The MCU-Link-MR is a CMSIS-DAP debug probe for ARM Cortex-M devices with extra features for mobile robot and drone debugging. The project is open source and available on GitHub with KiCAD files and BOM.
The MCU-Link-MR from NXP is a CMSIS-DAP debug probe. It includes dedicated connection headers found on mobile robotic systems. These systems include the Pixhawk/PX4 drone and robotics hardware.
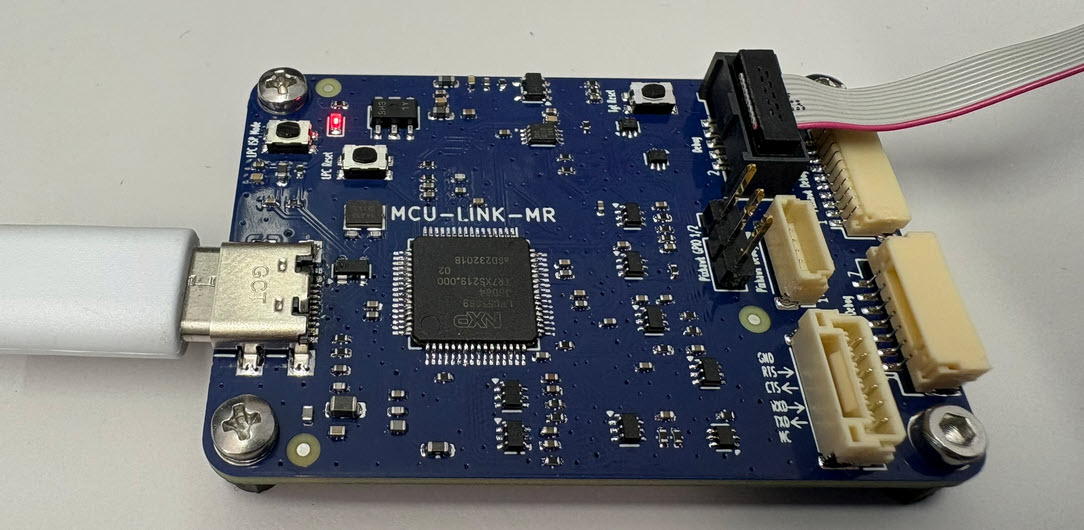
This week I have received the new PCBs for the MCU-Link MR for drones and robots and have populated the parts on the PCB, and it works fine as UART bridge and debug probe for the PixHawk i.MX RT:
I have lots of hardware and debug probes on my desk, and I discussed using nicknames for debug probes to better identify them.
‘Green’ and ‘Yellow’ Robots and J-Link Probes
So far so good. At that time of the previous article, it was possible to assign nicknames to J-Link debug probes, but not to use the nickname instead of the USB serial number. Well, SEGGER was fast again, and responded with a new J-Link software pack version 7.92d which implements that features: I can now use the nickname to connect to a debug probe :-).
In my previous article I showed how to import, build and debug MCUXpresso SDK projects in VS Code. In my lectures and labs we are using a robot based on the NXP Kinetis K22FX512 ARM Cortex-M4F microcontroller, and there is only the v2.13.0 SDK available.
Sumo Robot with K22FX512
The software on the robot uses the latest NXP MCUXpresso SDK v2.3.1. The he Eclipse based MCUXpresso IDE 11.8.0 works fine with all the 2.x SDKs, up to the latest 2.13.0 one.
Tool chains like the GNU compiler collection (gcc) have a plethora of options. The probably most important ones are the ones which tell the compiler how to optimize the code. Running out of code space, or the application is not performing well? Then have a look at the compiler optimization levels!
However, which one to select can be a difficult choice. And the result might very well depend on the application and coding style too. So I’ll give you some hints and guidance with an autonomous robot application we use at the Lucerne University for research and education.
The new semester is approaching in a very fast way, and so is the new lecture and lab module ‘Advanced Distributed Systems’ at the Lucerne University. For that module we are going to build a new ‘Sumo’ style robot with WLAN capabilities using the ESP32 chip. It will be a new robot PCB, and below is the current robot (based on NXP K22FX512) with the WLAN module connected to it:
The last challenge of the robotics course of this Fall semester had to be something special: This time it was about a ‘beauty contest’ followed by a line following challenge. Motto: Merry Christmas Time!
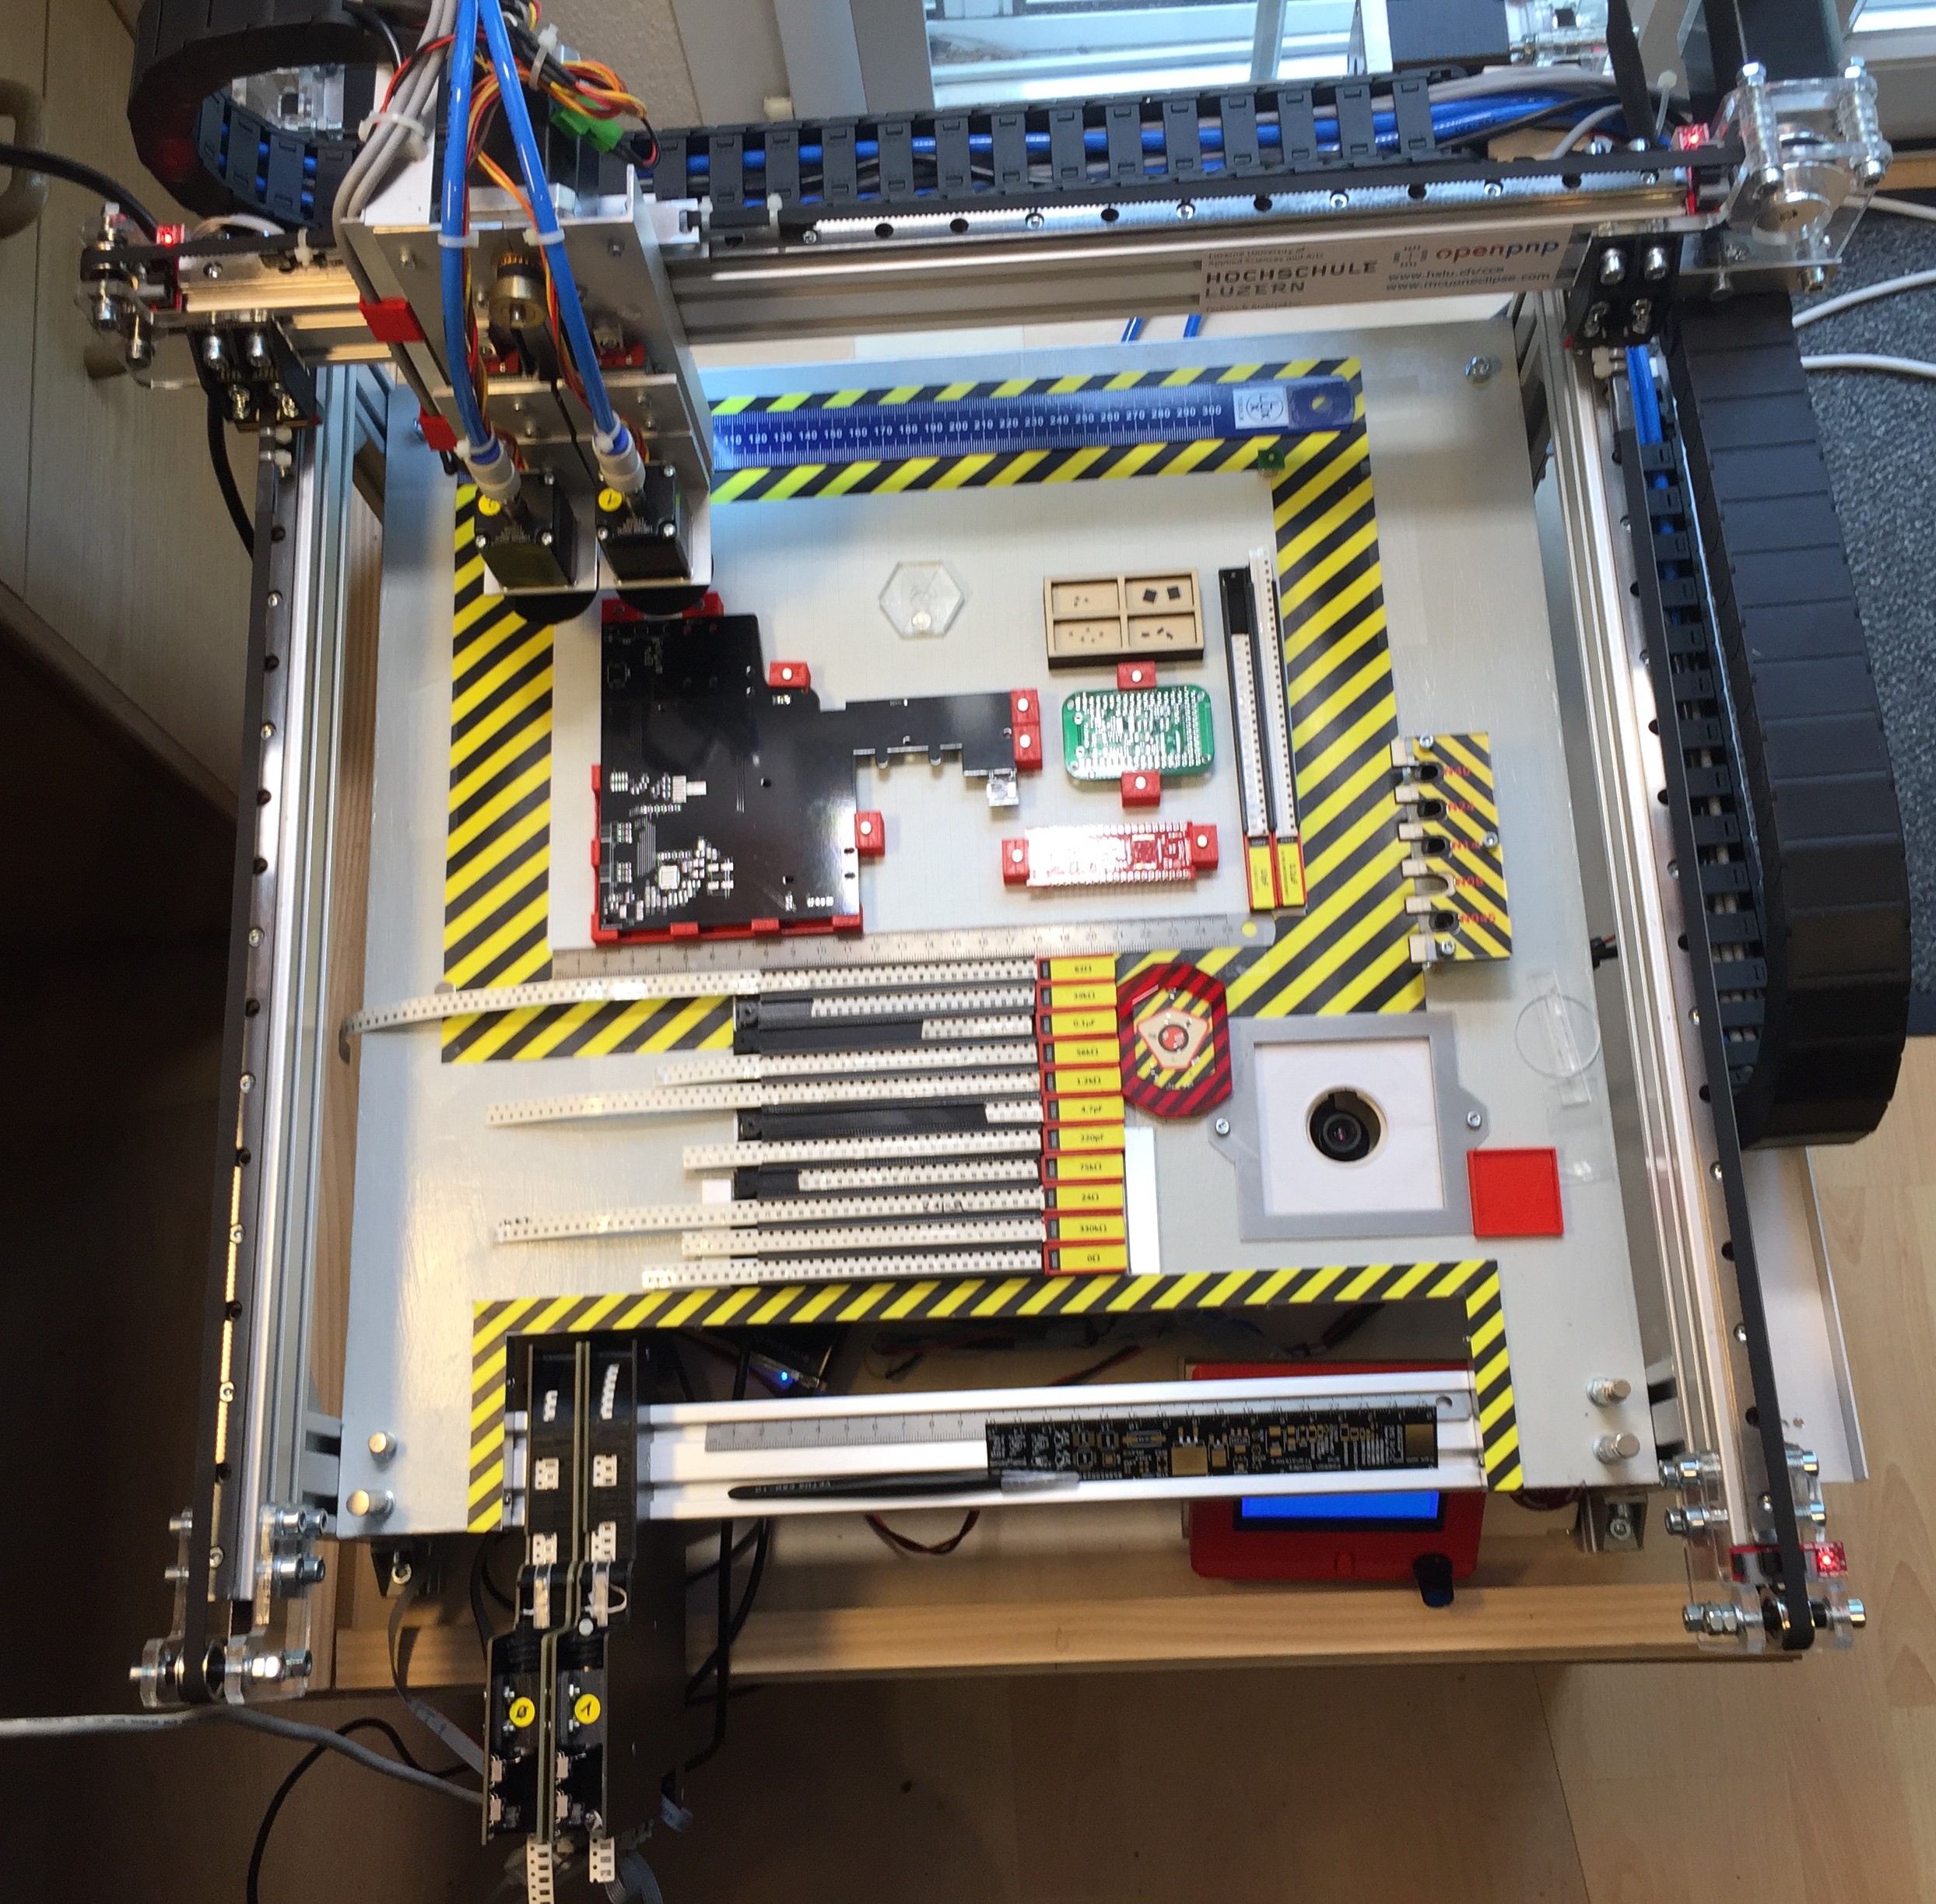
This article is about a project I have started back in January 2018. As for many of my projects, it took longer than anticipated.But now it is working, and the result is looking very good: a DIY automated pick and place machine to place parts on circuit boards. In the age of cheap PCBs, that machine closes the gap for small series of boards which have to be populated in a time consuming way otherwise.
To support my talk next week at the Embedded Computing Conference 2018, I have put together a video with the hardware features of that Pick&Place based on OpenPnP machine based on NXP LPC1769 and NXP Kinetis K22. Below is a picture of the current machine: