Laser cutter and engraver are the kind of cool thing after 3D printers which get more and more common. One interesting thing to use a laser engraver (or cutter) is to use it with tesa Laser Labels.

Tesa Laser Label (Source: http://www.tesa.com)
Laser cutter and engraver are the kind of cool thing after 3D printers which get more and more common. One interesting thing to use a laser engraver (or cutter) is to use it with tesa Laser Labels.
Tesa Laser Label (Source: http://www.tesa.com)
I’m dealing a lot with bootloaders recently (see “Flash-Resident USB-HID Bootloader with the NXP Kinetis K22 Microcontroller“), and bootloaders are sometimes very picky about what file format they are able to consume. So what if I have a binary (see “S-Record, Intel Hex and Binary Files“) file and I need to convert it into the Intel Hex format?
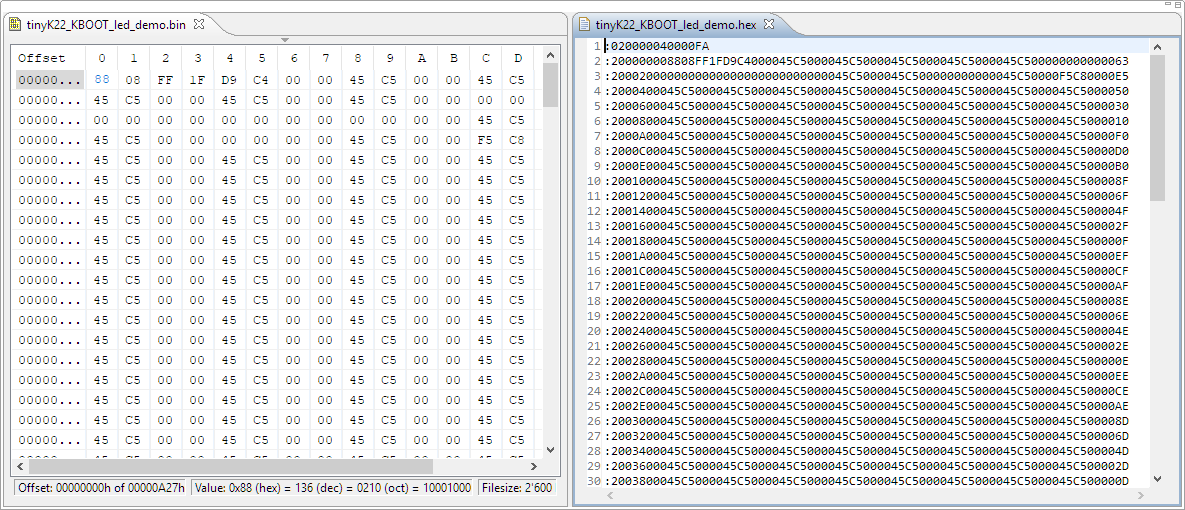
converted binary to intel hex
In “Flash-Resident USB-HID Bootloader with the NXP Kinetis K22 Microcontroller” I presented how I’m using the tinyK22 (or FRDM-K22F) with a flash resident USB HID bootloader. To make sure that the loaded application is not corrupted somehow, it is important to verify it with a Cyclic redundancy Checksum (CRC). The NXP KBOOT Bootloader can verify such a CRC, but how to generate one and how to use it is not really obvious (at least to me), so this article explains how to generate that CRC.

CRC Values for KBOOT
I’m mostly using my 50W laser cutter machine with plywood, simply because that material is available and very inexpensive. I have used it cutting or engraving PMMA (Polymethyl methacrylate or ‘Plexiglas’), simply because that material is more expensive.
From a reader of this blog I received something to experiment with: Cellulose Acetate sheets. Time to experiment with something new 🙂
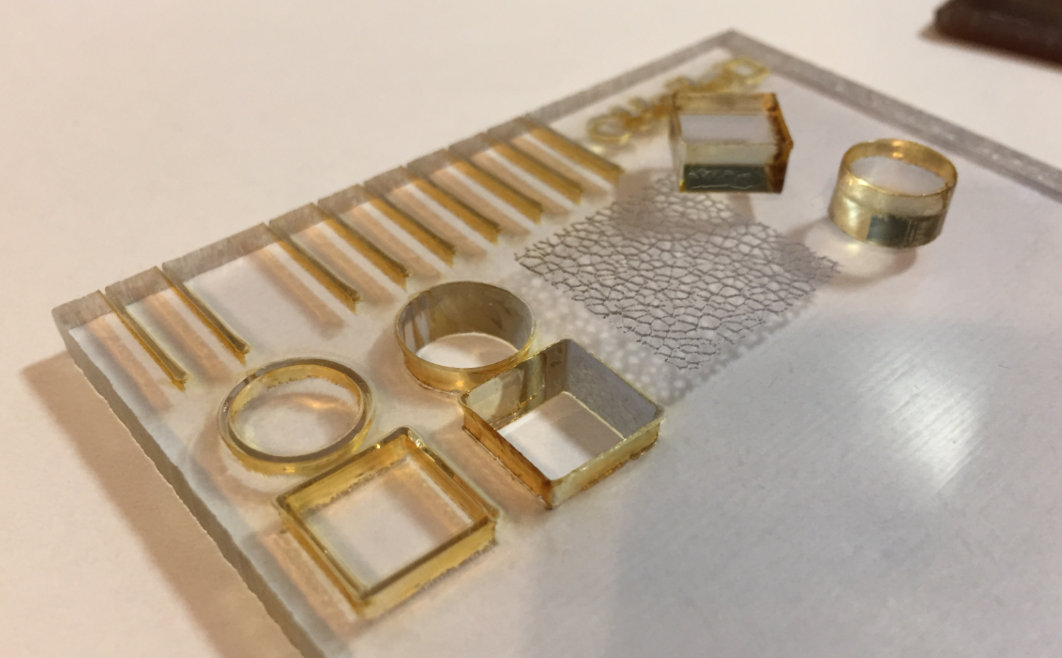
Washed off
One of the great things with the FreeRTOS operating system is that it comes with free performance analysis: It shows me how much time is spent in each task. Best of all: it shows it in a graphical way inside Eclipse too:

FreeRTOS Runtime Information in Eclipse
To solve the real hard problem of Embedded Systems development, I usually need all the data I can get from the target. The Percepio Tracealizer is such a tool which can stream application and FreeRTOS trace from the target over a Segger J-Link connection using the Segger RTT protocol. I’m using that combination a lot.
Streaming trace data that way does not need a dedicated hardware like ETM Trace. Using RTT is usually not much intrusive and affects the performance of the target in the 1-2% range (of course depending on the amount of data).
But what worried me for several weeks is that after moving to FreeRTOS V10.0.0 and the same time updating the Segger libraries, the target performance was heavily affected:
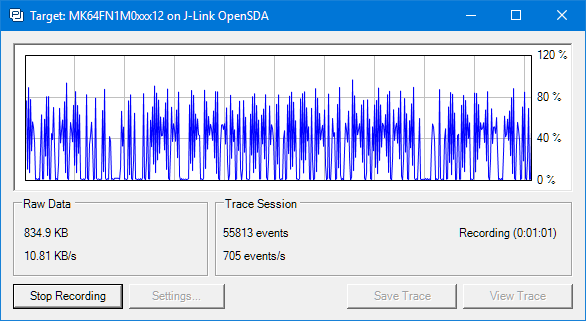
RTT streaming affects target performance?
Right before the start of the new semester, the new tinyK22 boards (see “First tinyK22 Board with NXP K22FN512 ARM Cortex-M4F“) arrived, and they are looking great 🙂
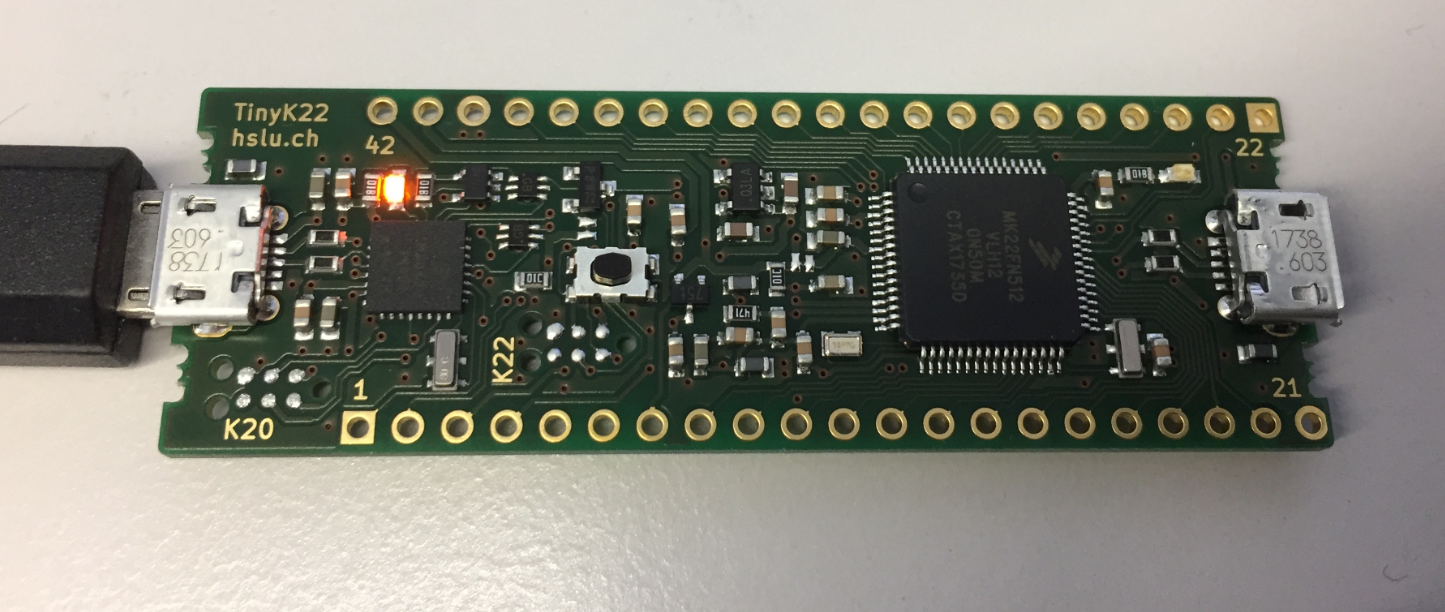
tinyK22 Board
Binary files are just a binary blob without debug information. Most debug tools and flashers are able to deal (raw) binary (see “S-Record, Intel Hex and Binary Files“). But GDB or the P&E GDB server really needs a ELF/Dwarf file which usually has all the debug information in it. This is a problem if all what I have is a binary file.
This post is about transforming a raw binary (.bin) file into an ELF/Dwarf file with adding a header to it:

Added Elf Header to Raw Binary File
I’m making great progress with the firmware for the new Mini Sumo Robot (see “New Concept for 2018 Mini Sumo Roboter“). The goal is a versatile and low-cost Mini Sumo robot, and the robot comes with the feature of magnetic position encoders. In a previous article I have explained how to mold custom tires for robots (see “Making Perfect Sticky DIY Sumo Robot Tires“), this article is about how to make DIY Magnetic disk encoders.

3D Printed Magnetic Encoders Disks
Sumo robot challenges are fun. One important aspect of every Sumo robot are the tires: if they are sticky enough, the robot can push out the opponent. In this article I compare different available robot hubs and tires, and how to make DIY hubs and tires.
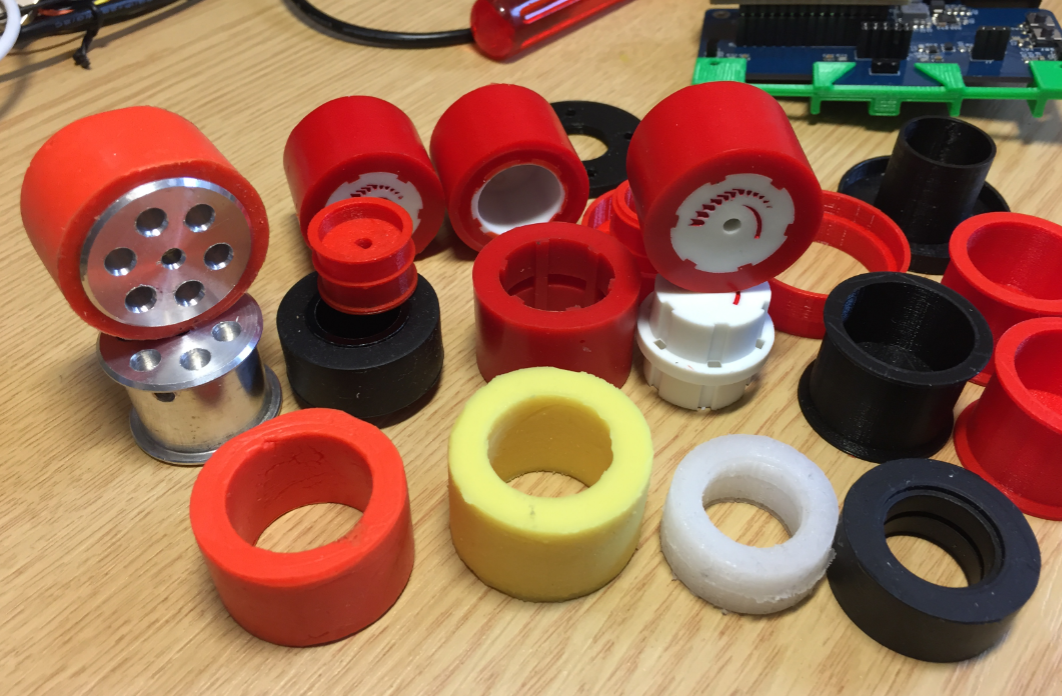
Selection of Sumo Robot Wheels and Tires
