I’m using the NXP Pins tool (see “Tutorial: Muxing with the New NXP Pins Tool“) now in several projects, and I think it is time to share a few tips and tricks.

Pins Tool
So join me on a journey through the internals of the NXP Pins tool :-).
I’m using the NXP Pins tool (see “Tutorial: Muxing with the New NXP Pins Tool“) now in several projects, and I think it is time to share a few tips and tricks.
Pins Tool
So join me on a journey through the internals of the NXP Pins tool :-).
With the NXP Pins Tool (see “Tutorial: Muxing with the New NXP Pins Tool“) I can configure and mux (multiplex) the microcontroller pins. What is really powerful and what might not be so obvious at the first sight is that it gives me deep control over every register bit and setting. For example I have below the PTB1 (Port B, pin 1) muxed as GPIO (General Purpose I/O):

PTB1 Muxed with Pins Tool
But it only generates this:
void BOARD_InitPins(void) {
  CLOCK_EnableClock(kCLOCK_PortB);                           /* Port B Clock Gate Control: Clock enabled */

  PORT_SetPinMux(PORTB, PIN1_IDX, kPORT_MuxAsGpio);          /* PORTB1 (pin 54) is configured as PTB1 */
}
So what about all the other bits and pieces? Continue reading
Smartwatches are around for a while now. To me it is still questionable how useful the ‘big’ ones for iOS and Android are. But there are definitely the crowd funded smartwatch projects which caught my attention. Maybe it is about the ‘do-anything’ with connectivity? One of these gadgets is Hexiwear: a hackable open source device

Hexiwear Device
While it *could* be a kind of smartwatch, the value of this thing is more that it includes a plethora of sensors with two microcontroller, and I can use Eclipse with GNU tools to build my firmware :-).
Alert: Hackster.io is giving away 100 Hexiwears, but you need to hurry up (submission until July 15th 2016)!
Breakout boards are great: they allow me to explore functions quickly, without to build my custom board: all what I need is some wires and ideally a bread board.

Adadfruit MicroSD Card Breakout Board
More and more of my students are using Microsoft Windows 10 machines, and my computer has been upgraded to Windows 10 a couple of week ago too. From my work and experience, a new operating system causes always some challenges, and Windows 10 is no difference. And no, this is not about Microsoft vs. Apple vs. Linux, this post is about addressing a potential and painful problem which I have observed with Windows 10 machines, and to my understanding it could happen with any other operating system too. The problem is that somehow on several student machines the bootloader and OpenSDA application on their FRDM boards did not work any more.
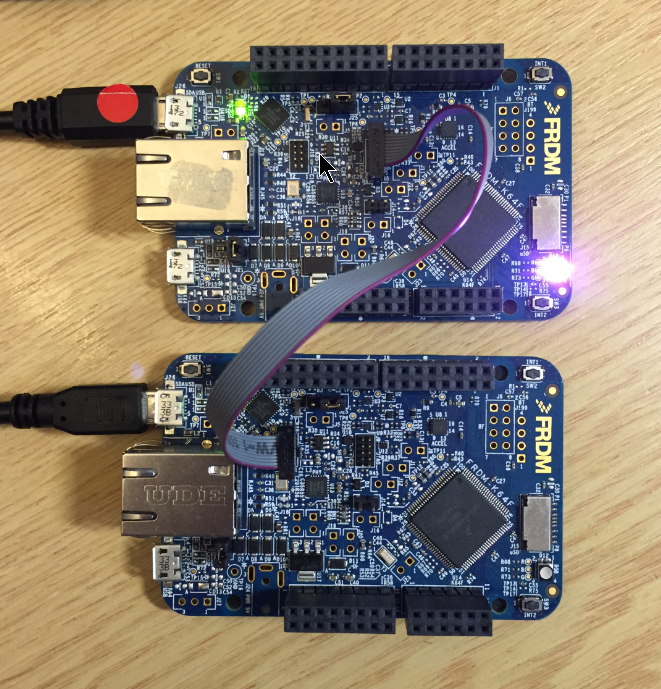
FRDM-K64F (top) programming the OpenSDA Bootloader (bottom)
One of the major benefits of Processor Expert is that I can easily switch the device or processor used in a project. For example I can do my concept with a larger device with more FLASH and RAM, and then at the end easily switch to a smaller or even completely different device very quickly. For example I have a project working with the 64KByte FLASH version of the KE02Z (KE02Z68VLH2):
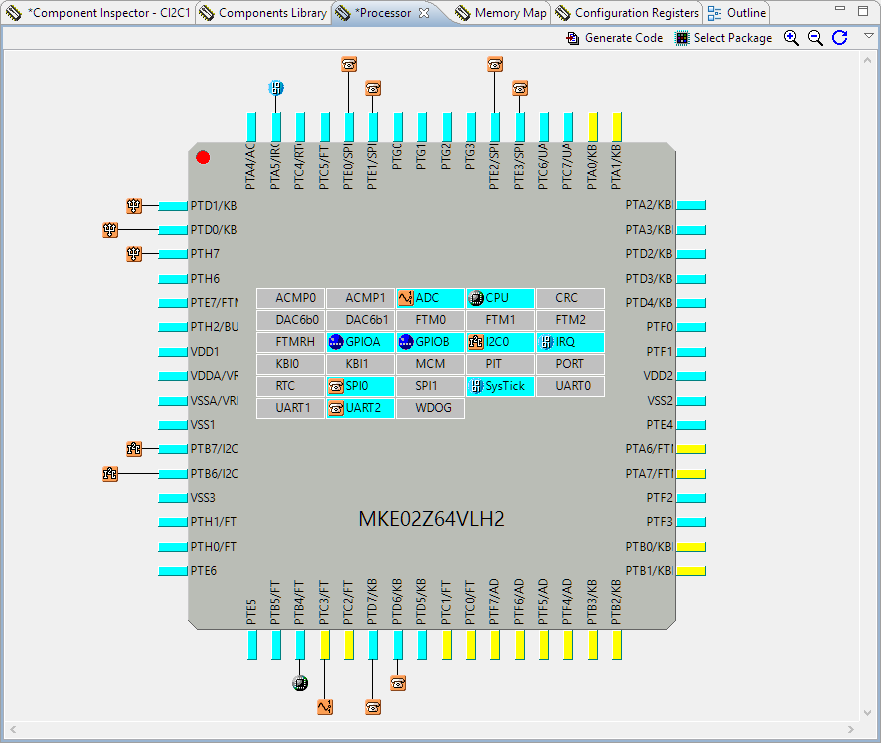
MKE02Z64VLH2
A bootloader shall be small and concise. I very much like bootloaders which do not need a ‘special’ program on the host, so I prefer a simple terminal for this. While porting my serial bootloader to the NXP FRDM-K64F board, I have found RealTerm which offers a lot of cool features:
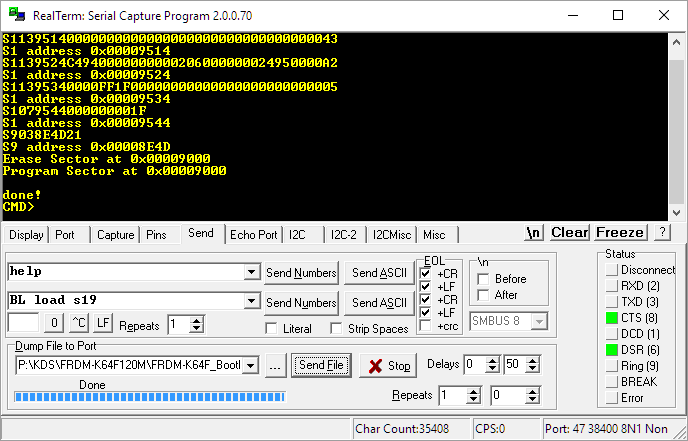
RealTerm
Sometimes it is very convenient to load a new firmware to a board without the need for a hardware debugger. This is usually done with a bootloader. The NXP Freedom and Tower evaluation boards have on-board debug device/microcontroller (OpenSDA) which can load different firmware implementations like CMSIS-DAP/mbed, P&E Multilink or a Segger J-Link OpenSDA applications. Both mbed and P&E implemenations support to program the board with drag&drop: simply send a file to a virtual MSD (Mass Storage Device) to get it programmed. The latest Segger OpenSDA firmware has this ability added now too: Programming the board with a virtual MSD device:
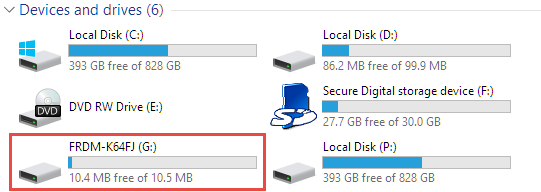
Virtual MSD Device
So this is my current week-end BBQ project: Pulled Pork out of the BBQ smoker :-). As a teaser, this is how the result looks like: tender, juicy slow-cooking smoked pork meat out of the smoker:
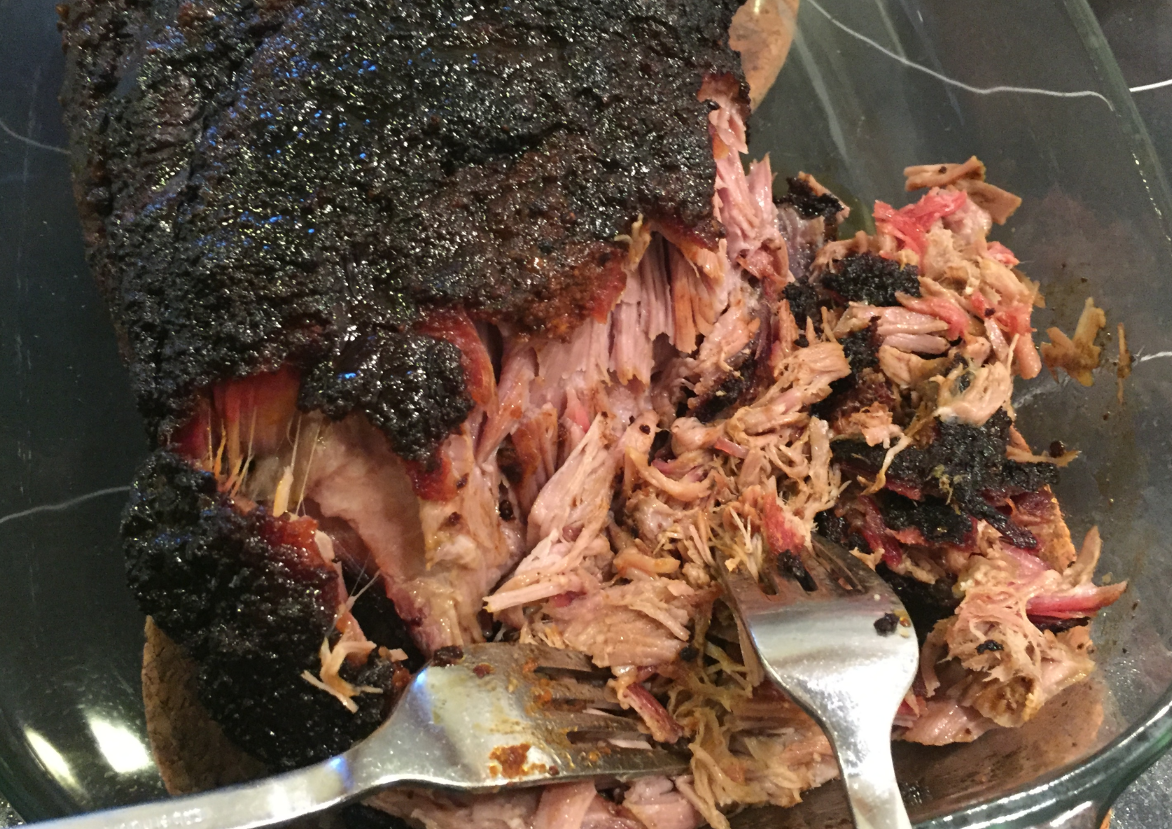
Pulling the pork

Pulled Pork Sandwich

