
Smartwatches are around for a while now. To me it is still questionable how useful the ‘big’ ones for iOS and Android are. But there are definitely the crowd funded smartwatch projects which caught my attention. Maybe it is about the ‘do-anything’ with connectivity? One of these gadgets is Hexiwear: a hackable open source device

Hexiwear Device
While it *could* be a kind of smartwatch, the value of this thing is more that it includes a plethora of sensors with two microcontroller, and I can use Eclipse with GNU tools to build my firmware :-).
Alert: Hackster.io is giving away 100 Hexiwears, but you need to hurry up (submission until July 15th 2016)!
The company behind the crowd funded project is MikroEletronika (http://www.mikroe.com/). This company is doing development tools and hardware boards, and in their Hexiwear Kickstarter campaign was aiming for $20’000 and reached $46’150. They showed solid prototypes and the concept of a true hackable small device with lots of sensors was attractive for me, so I pledged the project. Later this year, I saw the hardware and software in action at FTF 2016 in Austin/TX, and finally two weeks ago my package arrived:
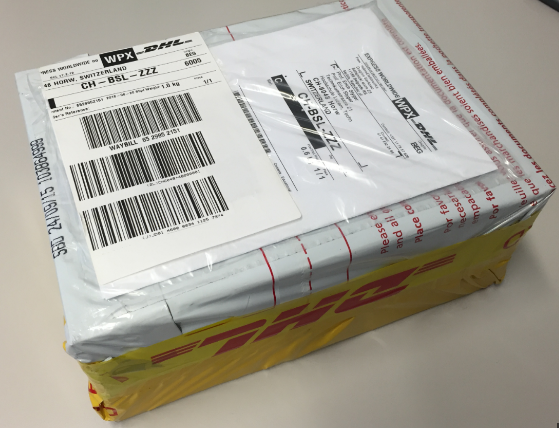
Hexiwear Package
I pledged the project for a ‘Power user Pack’ with a ‘Color Pack’, and this was what I have received:
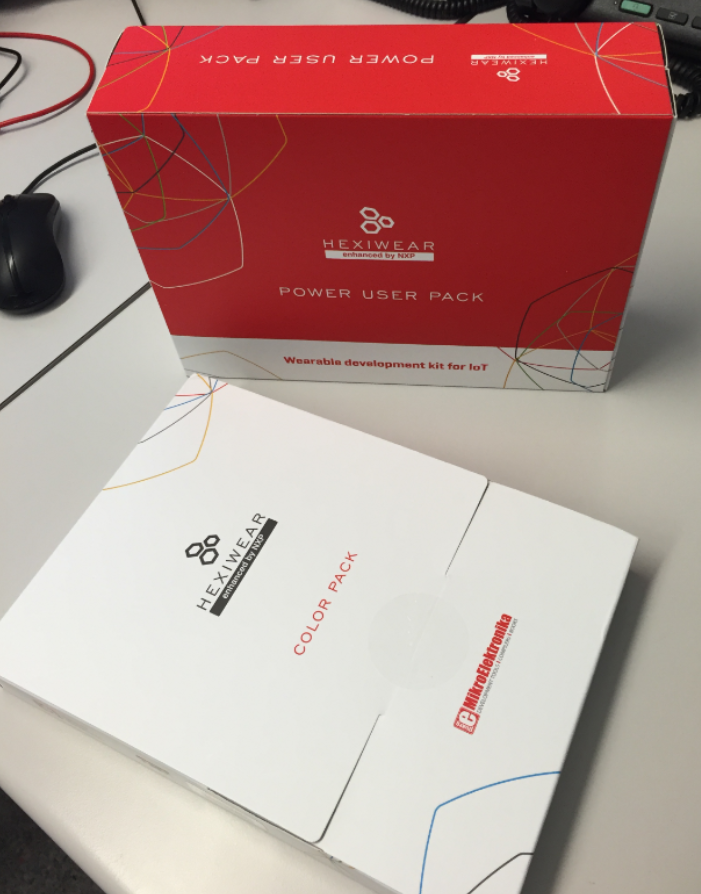
Hexiwear Power User Pack and Color Pack
The ‘Color Pack’ includes a bracelet and a soft cover:
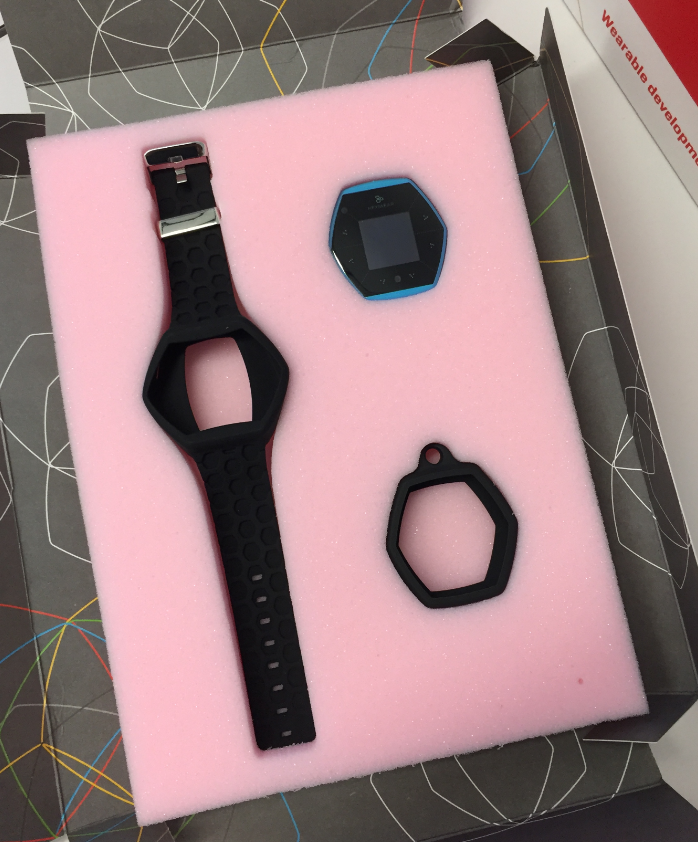
Hexiwear Color Pack
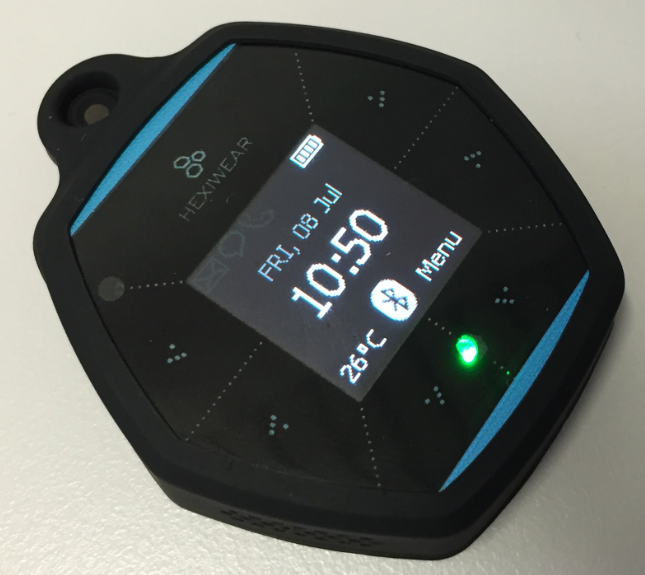
Hexiwear Device
For a ‘real’ smartwatch the Hexiwear is bit too large, and the color OLED display is not a touch display. What MikroElektronika has put into the device is an impressive number of components:
- Main CPU: NXP MK64FN1M0VDC12, ARM Cortex-M4F, 120 MHz, 1 MByte Flash, 256 KByte SRAM
- BLE CPU: NXP MKW40Z160VHT4, ARM Cortex-M0+, 48 MHz, 160 KByte Flash, 20KByte SRAM
- 8MB Serial Flash: Winbond W25Q64FVSSIG
- OLED 96×96 pixels SSD1351: PSP27801 (I did not find a datasheet)
- 1 RGB LED
- Battery charger: NXP MC34671
- 190 mAh LiPo battery
- 6 capacitive touch pads
- Vibration motor
- Accelerometer/Magnetometer: NXP FXOS8700CQ
- Gyroscope: NXP FXAS21002
- Barometric pressure and temperature sensor: NXP MPL3115A2
- Humidity and temperature: Masurement Specialities HTU21D
- Ambient Light Sensor: TAOS TSL2561
- Heart Rate Monitor: Maxim MAX30101
With all these sensors the Hexiwear can pretty much sense anything communicate with the internet over a gateway.
On the back there is a high density connector:
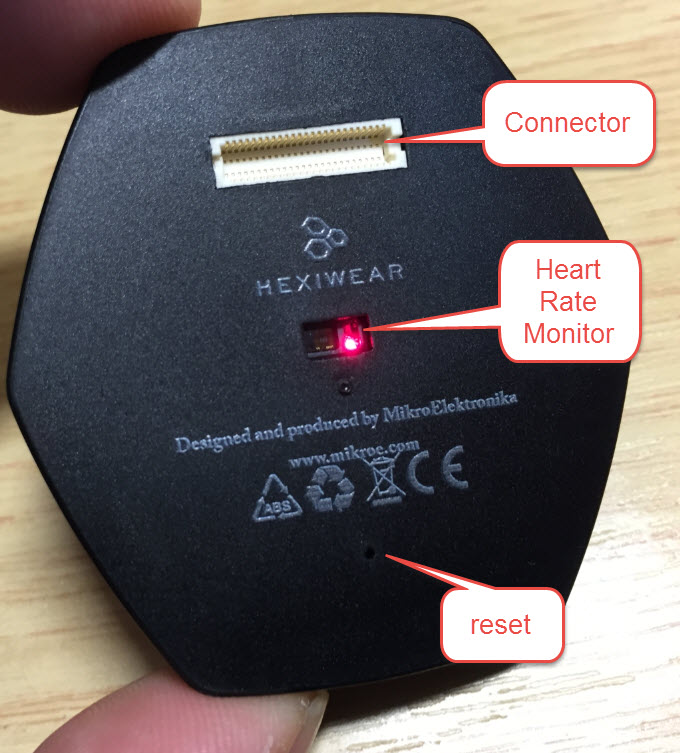
Hexiewar Back Side
Below shows how it compares to a 38mm Apple iWatch:
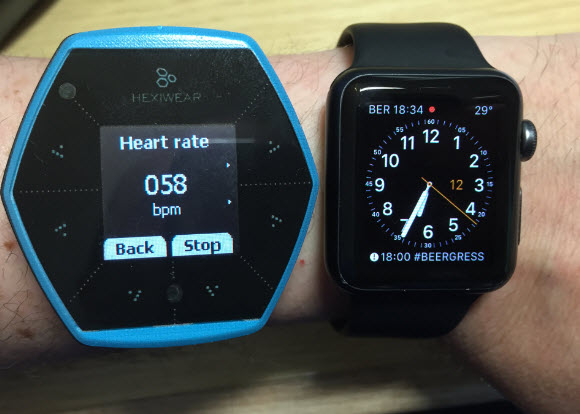
Hexiwear and iWatch Size Comparison
The Power User Pack has another color pack, plus the docking station with the micro-USB cable:
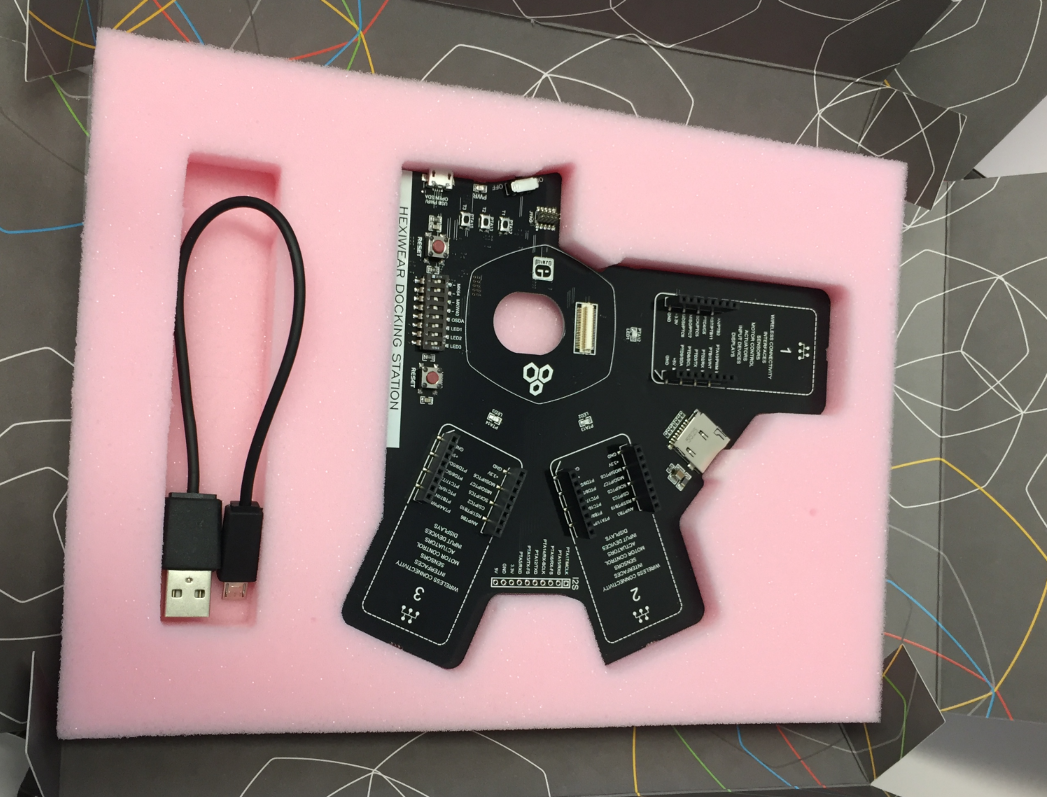
Hexiwear Docking Station
The docking station is provides the OpenSDA debug interface, a SWD debug connection, 3 Click Board sockets and acts as a charging and breakout PCB.
So with this I have two Hexiwear with bracelet and soft cover plus the docking station:
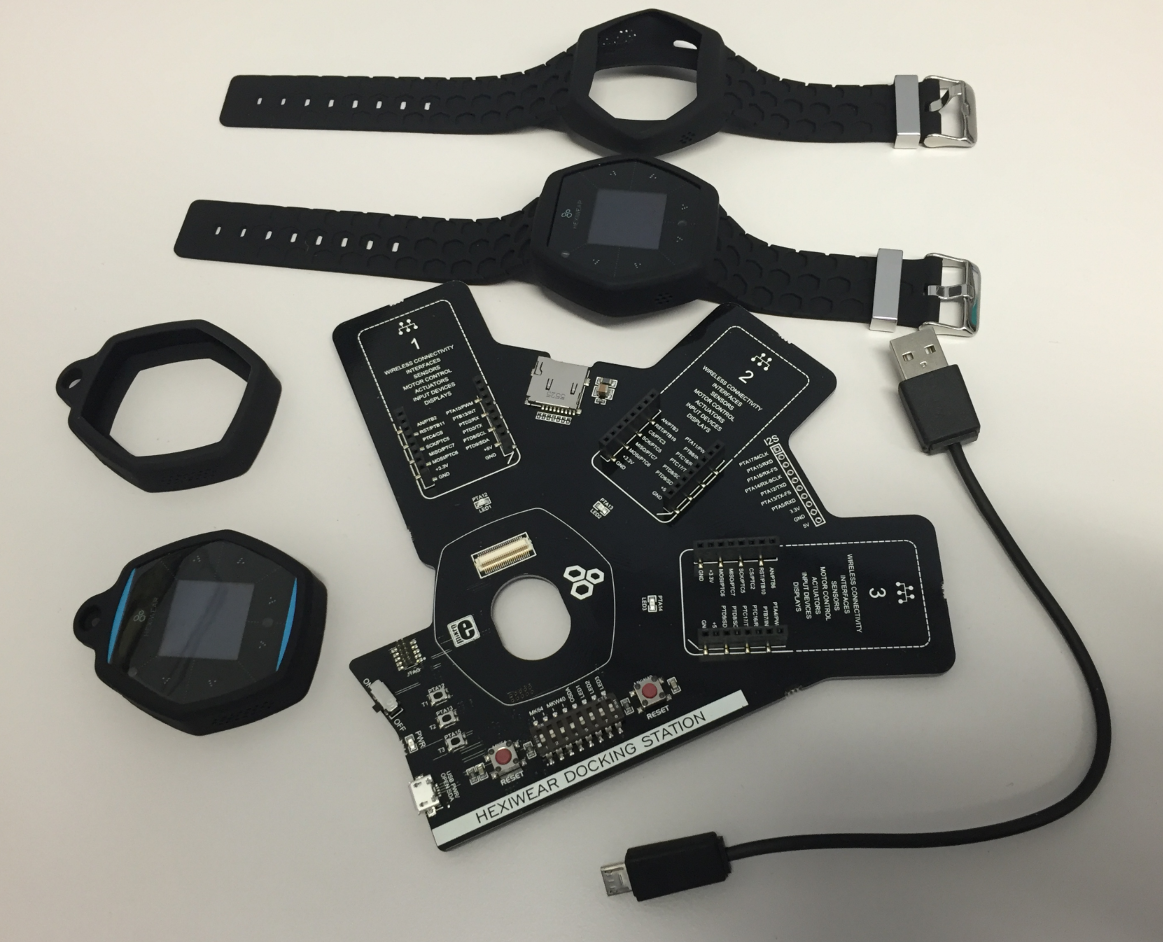
Color Pack and Power User Pack
The covers are of soft material to enclose the Hexiwear:
Soft Cover
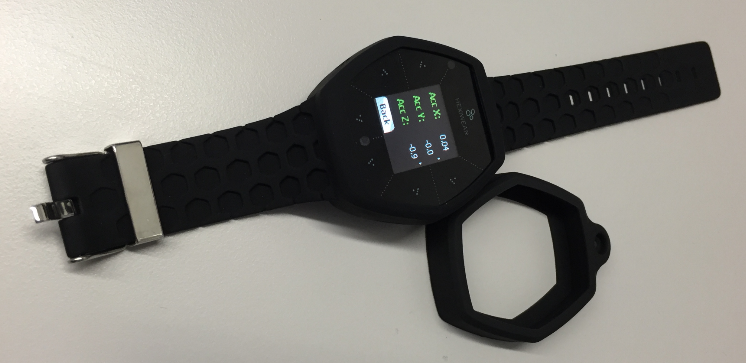
Hexiwear bracelet
The soft cover is nice and useful. But the Hexiwear holder of the bracelet is too soft and the Hexiwear can drop out easily.
Hexiwear Tear Down
So let’s see what’s inside. The plastic top cover is easily removed without any tool. It shows the LCD with the 6 capacitive touch pads.
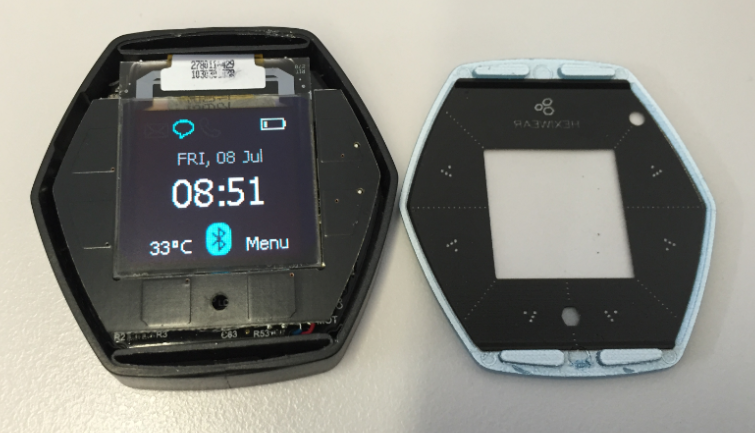
Hexiwear Cover Removed
The PCB(s) is easily pulled out of the base enclosure:
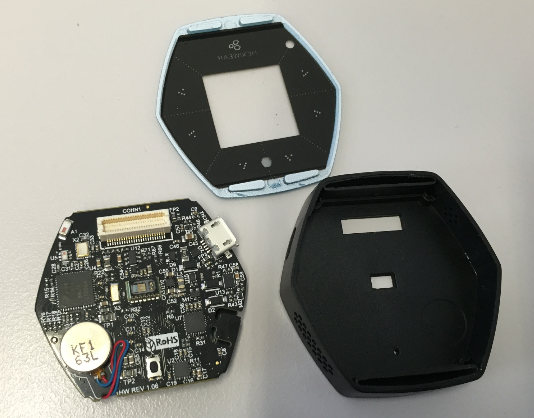
Hexiwear out of the case
The top PCB with the touch pads is connected with the base PCB with a connector:
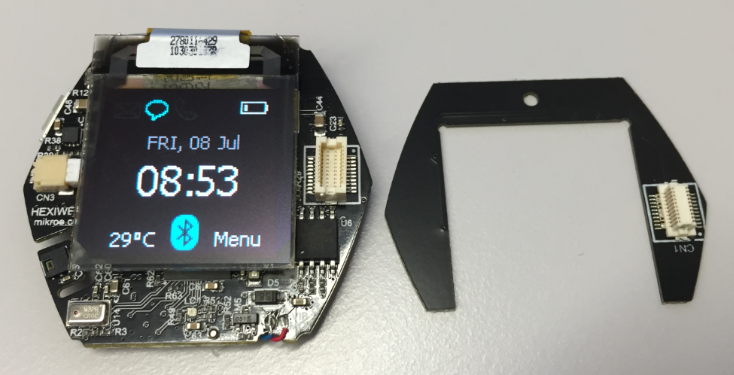
Hexiwear with Capacitive Touch PCB
The display (PSP27801, controller SSD1315) has 96×96 OLED pixels, and seems to costs around $6.5-7.5 (1000 piece minimum order, see this link).
There is no OFF switch, removing the capacitive pads while powered is not an issue. I pulled out the battery connector first:
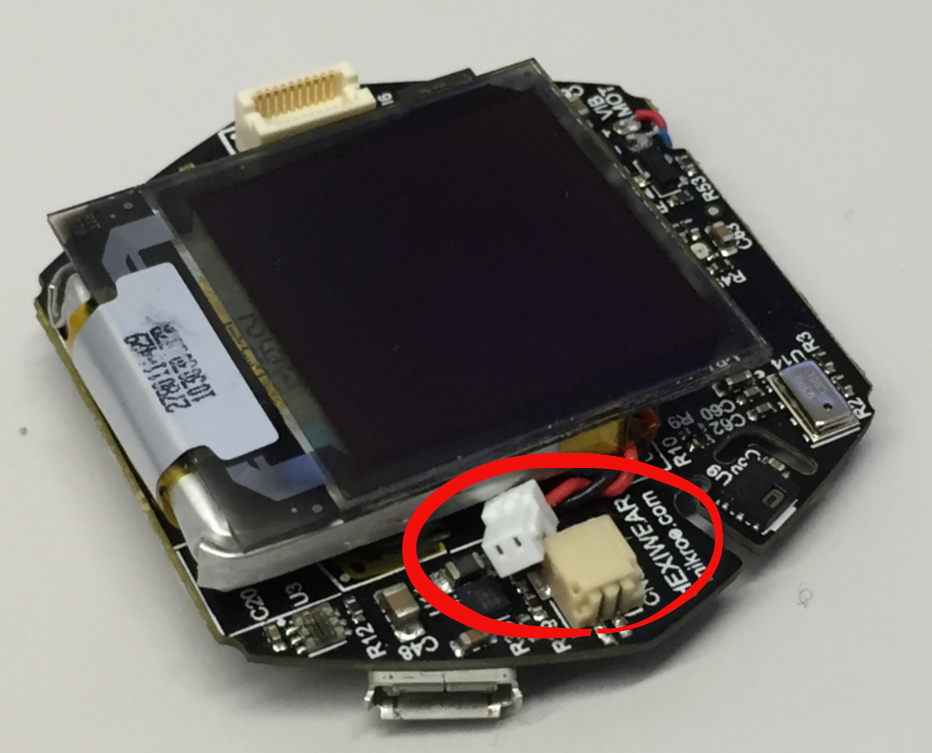
Pulled Battery Connector
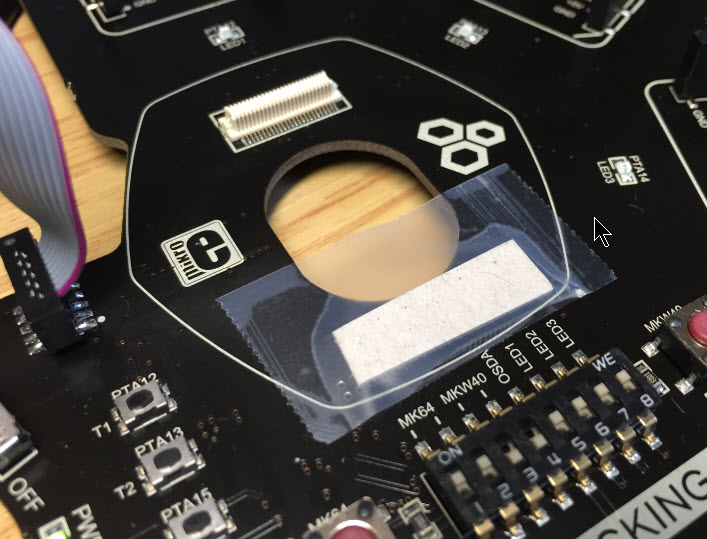
The battery is taped with a double-sided scotch tape to the PCB. Carefully separated the PCB from the battery. It is important not to put too much pressure not to break the glass of the LCD or to damage the LCD cable:
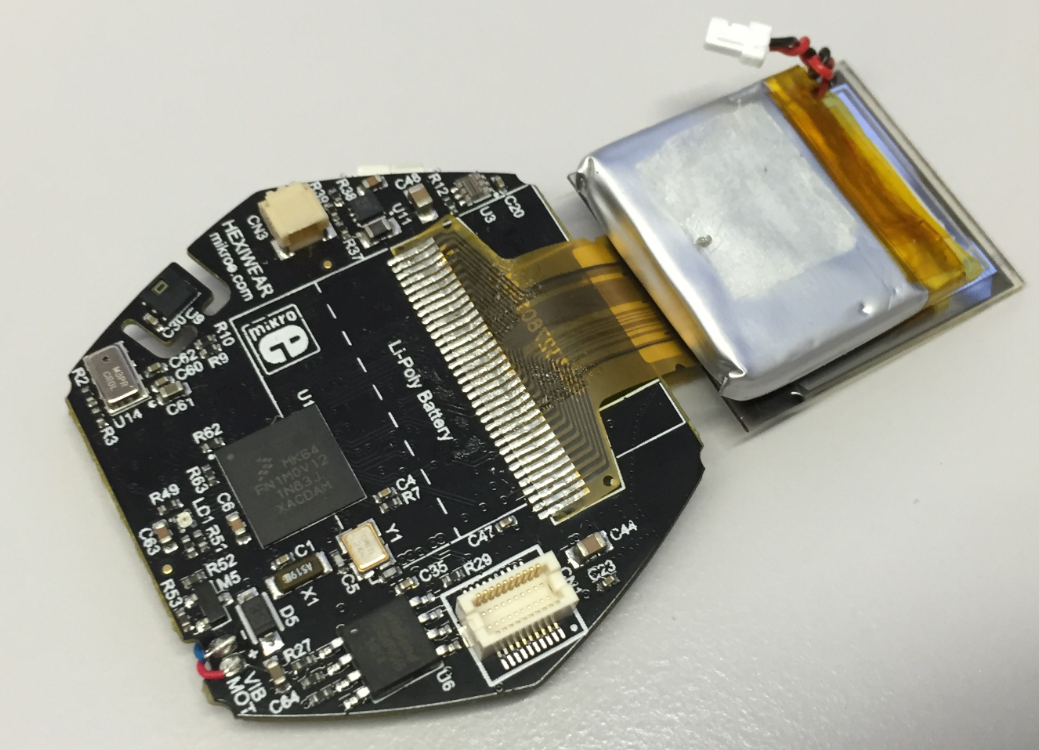
Removed Battery
There is a schematics available here.
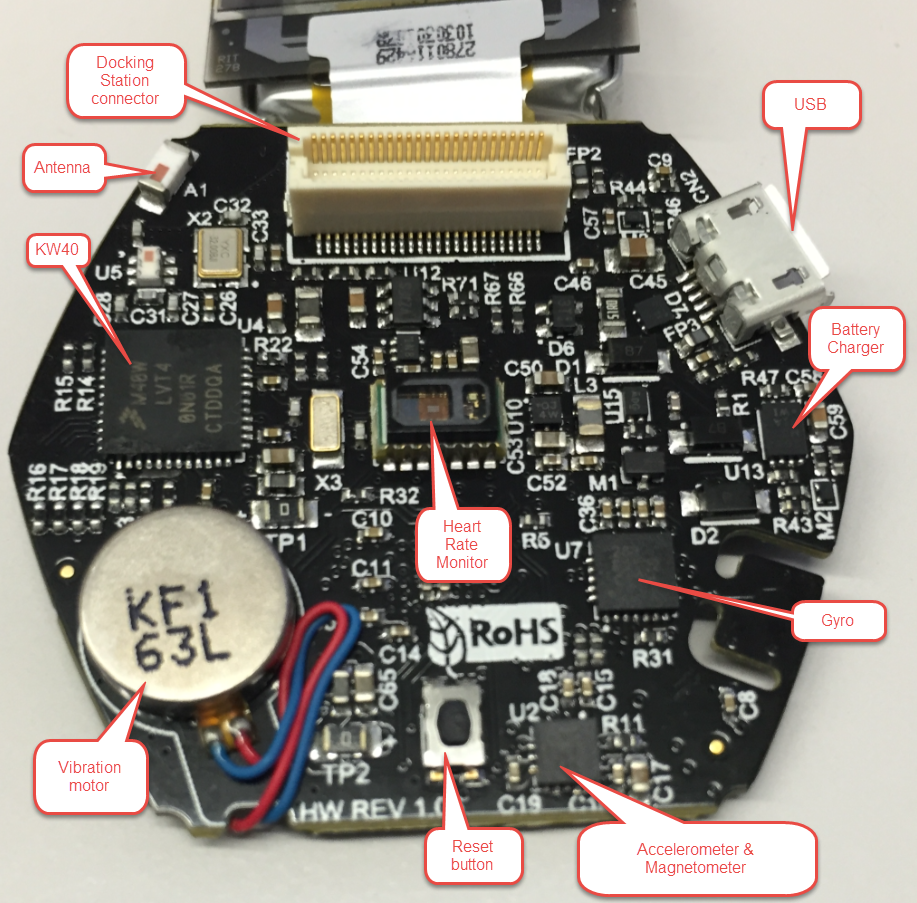
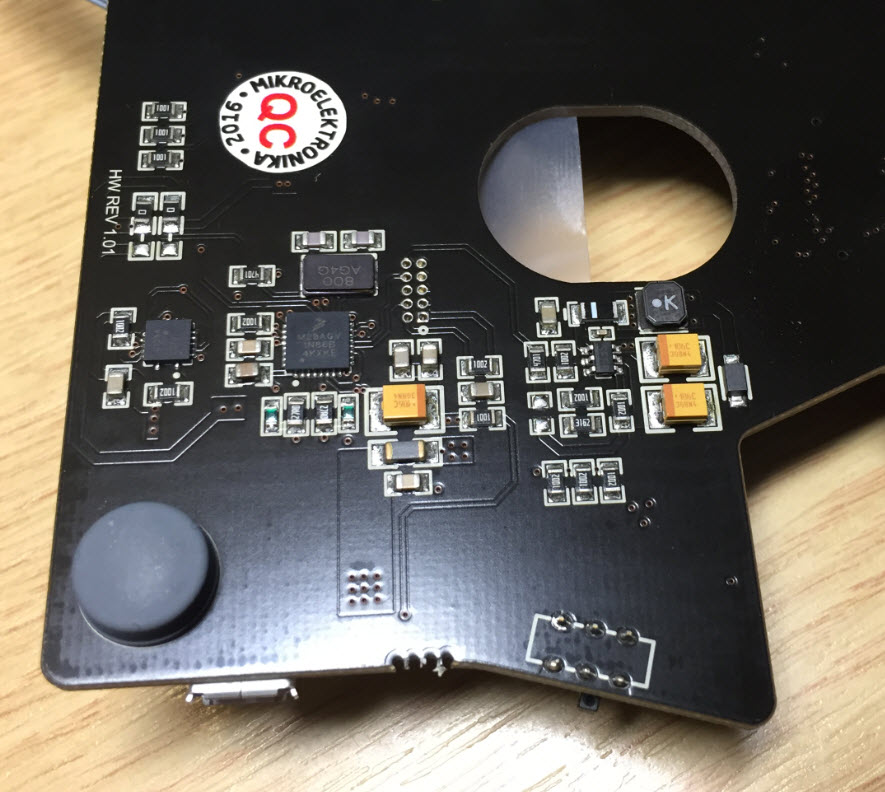
Hexiwear PCB Bottom
To me, it is much easier to press that reset button with the Hexiwear removed than using that tiny hole on the back.

Hexiwear PCB Top
Docking Station
The docking station is basically a breakout board for the Hexiwear, plus it includes a OpenSDA debug interface. It features several push buttons, LEDs, a micro-SD card socket plus three slots for MicroElectronica Click Modules:
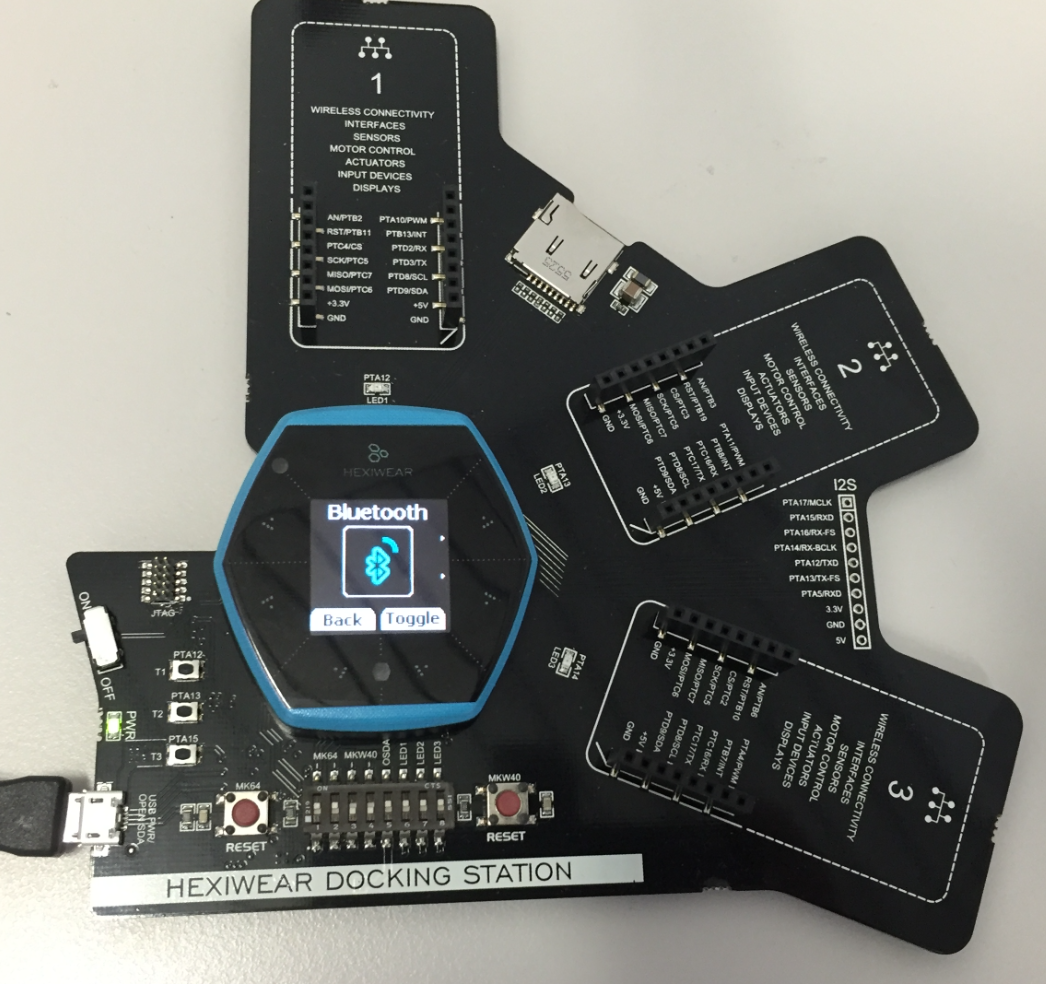
Hexiwear Docking Station
I have not used yet the OpenSDA circuit, as standard SWD debug connector is provided too, so I can use my standard debugging tools like Segger J-Link or P&E Multilink. Switches on the board allow me to select which device to debug: either the K64F or the KW40 microcontroller.
The used micro-connector between the docking station and the Hexiwear probably will not last long (not sure about the number of cycles, but probably not too many). I have put a small cardboard piece between the Hexiwear and the docking station to have more aligned connection: otherwise pressing any of the touch buttons might disconnect the two boards:
Cardboard on Docking Station PCB
💡 I faced several debugging issues, and it seems they were all related to bad connections between the docking station and the Hexiwear. So make sure that the connection is working properly.
OpenDAP
The backside of the docking station board includes a debug circuit based on the NXP Kinetis K20, similar to the OpenSDA:
DAPLink Circuit
The debug interface enumerates as DAPLink:
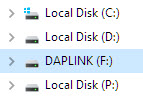
DAPLink
The ‘DETAILS.TXT’ on that virtual MSD device shows:
# DAPLink Firmware - see https://mbed.com/daplink
Unique ID: 0214000024404e45003d3017ffff0021ffffffff97969900
HIC ID: 97969900
Auto Reset: 0
Automation allowed: 0
Daplink Mode: Interface
Interface Version: 0241
Bootloader Version: 0241
Git SHA: d5a63b6e15d61714f164b823f7367f97620f3dad
Local Mods: 1
USB Interfaces: MSD, CDC, HID
Bootloader CRC: 0xe21e1718
Interface CRC: 0x886a40bf
Interestingly, pressing the RESET button while powering the circuit, it points to a web page dedicated to the KL26Z on the micro:bit. The drive shows up as MAINTENANCE:
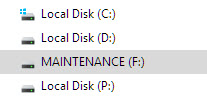
maintenance mode
I have not used the debug circuit as I was happy to use the P&E Multilink and Segger J-Link. The Hexiwear documentation suggests to use OpenOCD or pyOCD (recommended).
Smartphone Apps
Both an Android and a iOS smart phone application is available to connect through BLE (Bluetooth Low Energy) to the Hexiwear. The app is used to set the RTC of the Hexiwear and to read out multiple sensor values:
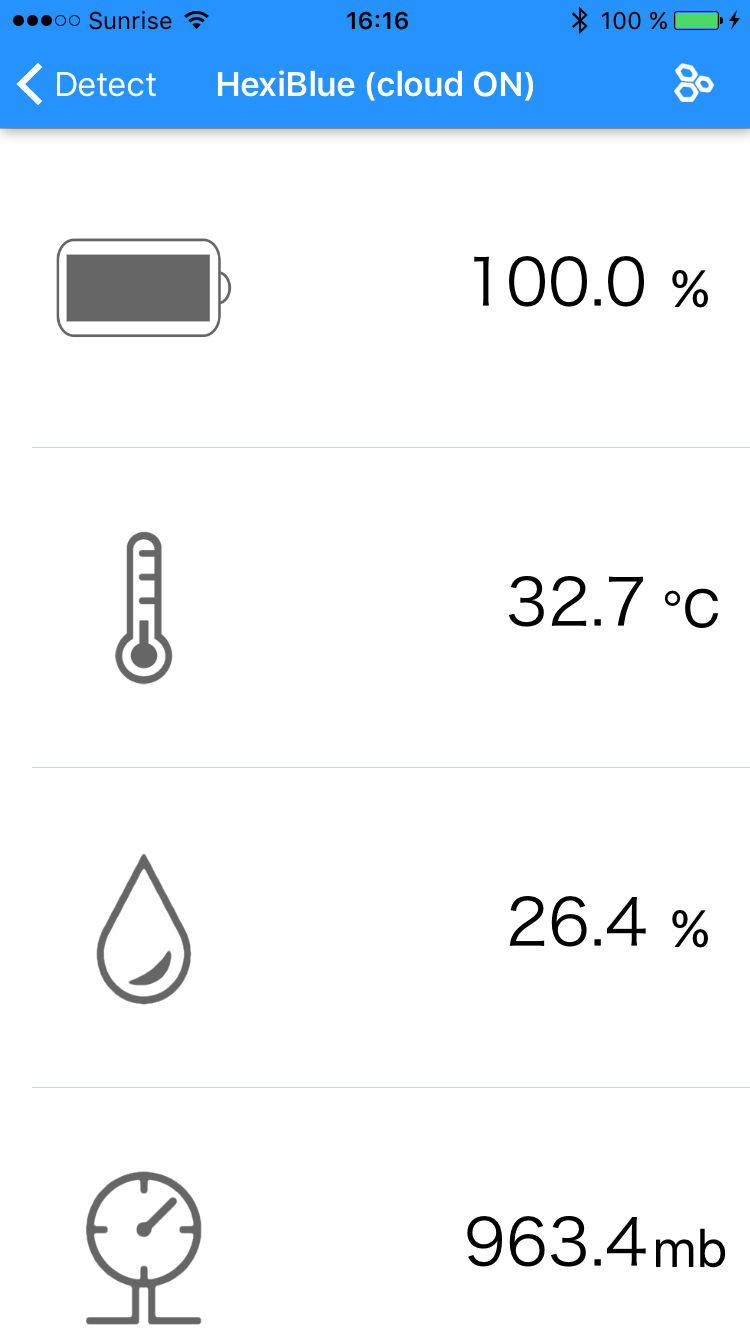
Sensor Data Reading
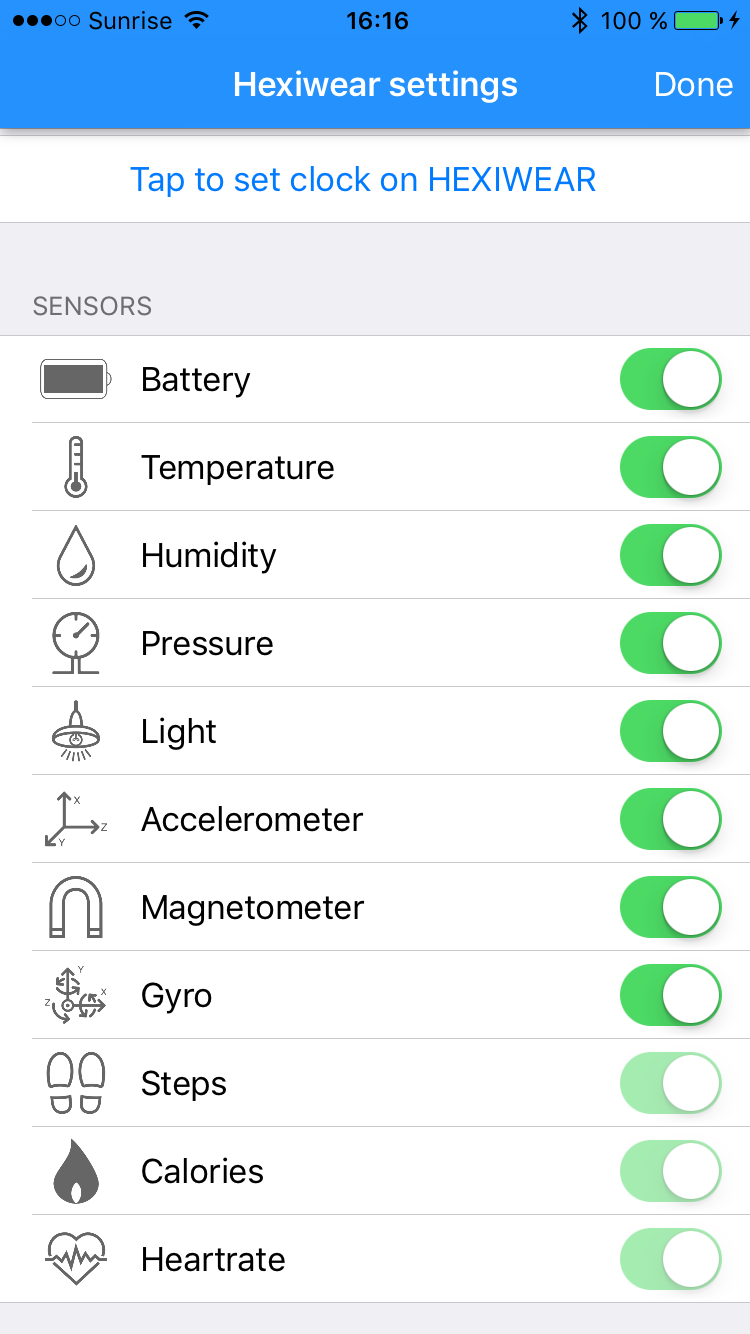
Configuration
The app has the feature to send the data periodically to the wolksense cloud:
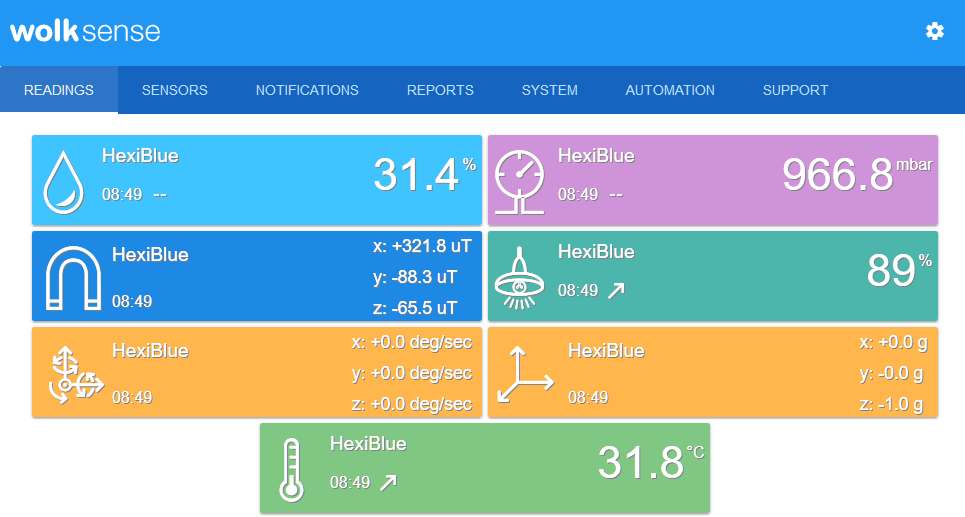
wolksense cloud web page
Using wolksense requires an account. The Hexiwear uses the smart phone as a gateway to publish the data to the cloud.
GitHub Project
The real advantage of the Hexiwear is that the firmware is open source and hackable. The Hexiwear firmware is available on a GitHub site: https://github.com/MikroElektronika/HEXIWEAR
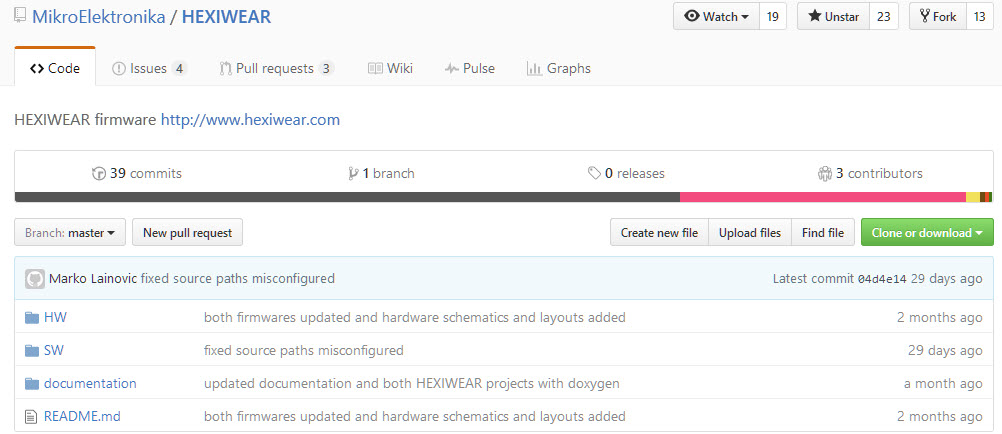
Hexiwear on GitHub
The Kinetis Design Studio V3.x project used at FTF is located here: https://github.com/MikroElektronika/HEXIWEAR/tree/master/SW/FTF/HEXIWEAR_OLED_sensors_RTOS and is an easy start into changing the firmware. There is a PPT with the instructions used at FTF here: https://github.com/MikroElektronika/HEXIWEAR/tree/master/documentation/FTF
Debugging worked fine for me both with Segger J-Link and P&E Multilink over the docking station SWD debug port:
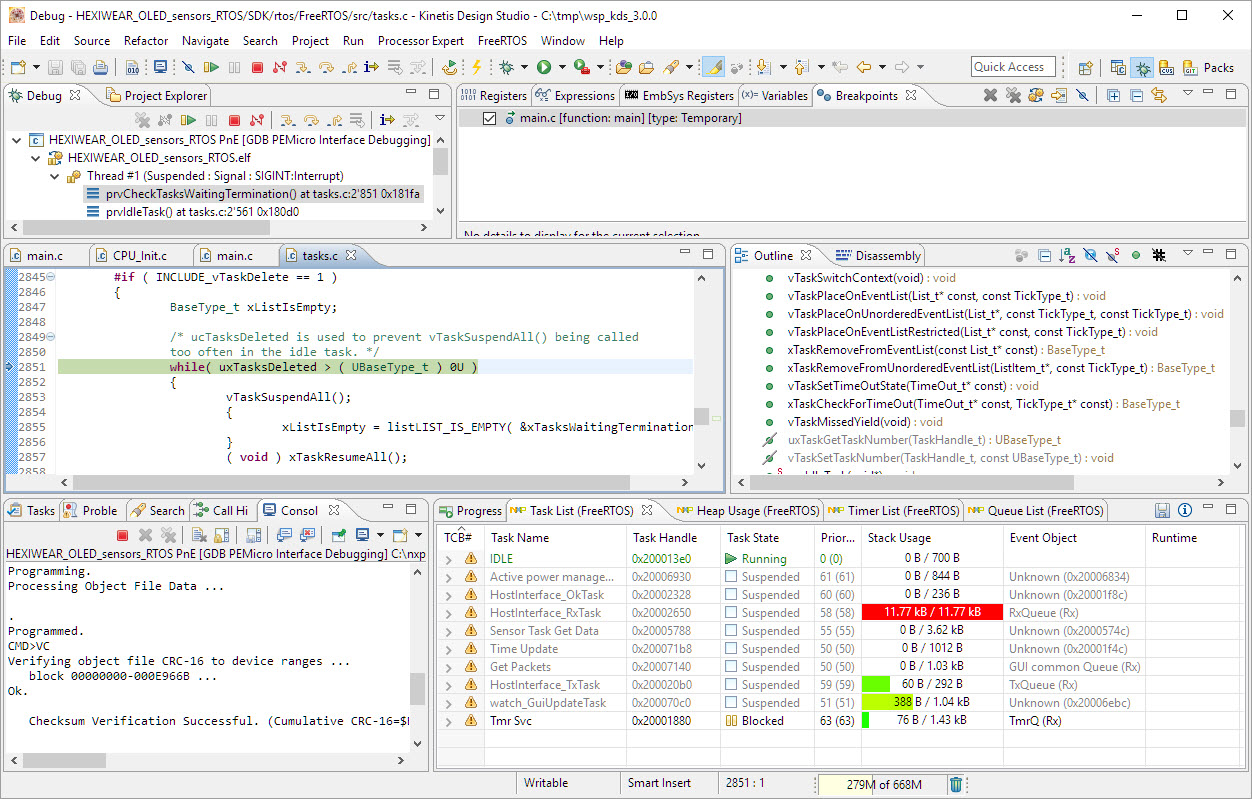
Debugging Hexiwear Firmware
I still need to make my way through the sources. The project is using the older Kinetis SDK v1.3 and not the latest v2.0. What is really cool is that it is using FreeRTOS 🙂 as operating system.
BLE for the KW40?
What makes this project really interesting is that it includes the NXP KW40 BLE enabled microcontroller.The GitHub repository only has binaries, object files and files to patch the NXP Connectivity Software with project files for IAR, but not for GNU and Eclipse. I have downloaded the Connectivity stack from the KW40 web page, but this only has IAR support and the BLE stack is provided with libraries only. It looks I would have to use a commercial IDE to use the BLE stack, and there is no full source code for it available.
Summary
Hexiwear is a cool gadget. While all the other parts of Hexiwear (Schematics, hardware, software on the K64) is open source, the BLE stack on the KW40 is not open:
“Complete software solution with open source embedded software, cell phone apps and cloud connectivity.” (Hexiwear overview, page 2)
I think the important word in the above statement is ‘with’: it comes with (most) open source embedded software. Would have been great to have the BLE stack open too.
Other than that, the Hexiwear is very versatile and useful: a battery operated device, lots of sensors, wireless connectivity, open source tools and software support for the K64F microcontroller, a lot of functionality and cool demos and applications at a very reasonable price: Mouser is selling it for around $50. And it comes with a lot of software and tools, and the tutorials and documentation is well written. With this, the Hexiwear is really a ‘Do-Anything’ device. And a great platform for NXP Kinetis and all the sensors on the Hexiwear. As for myself, I’m exploring ways how I can use it next semester in my university course.
Not to forget: If you have a great idea how to use that device: Until July 15th (!!!) you can apply for 100 free Hexiwear boards available with the contest running on hackster.io!

100 free Hexiwear Boards
Happy Hexiwearing 🙂
Links
- Hexiwear: http://www.hexiwear.com
- Hexiwear GitHub: https://github.com/MikroElektronika/HEXIWEAR
- Hexiwear KickStarter: https://www.kickstarter.com/projects/1351029401/hexiwear-a-wearable-development-kit-for-the-iot-er
- FTF Hexiwear presentation material: https://community.nxp.com/docs/DOC-331651
- FTF Hexiwear training material: https://github.com/MikroElektronika/HEXIWEAR/tree/master/documentation/FTF
- Hackster.io Hexiwear contest: https://www.hackster.io/challenges/Hexiwear
- NXP Design Files: http://www.nxp.com/products/software-and-tools/reference-designs-and-development-kits/nxp-designs/hexiwear-complete-iot-development-solution:HEXIWEAR?fpsp=1&tab=Design_Tools_Tab
- Hexiwear documentation: http://docs.mikroe.com/Hexiwear
- Hexiwear schematics: http://cdn-docs.mikroe.com/images/c/c0/Sch_Hexiwear_MainBoard_v106c.pdf
- NXP KW40 Connectivity Stack: http://www.nxp.com/products/microcontrollers-and-processors/arm-processors/kinetis-cortex-m-mcus/w-series-wireless-m0-plus-m4/kinetis-kw40z-2.4-ghz-dual-mode-ble-and-802.15.4-wireless-radio-microcontroller-mcu-based-on-arm-cortex-m0-plus-core:KW40Z

Great breakdown – really appreciate it. I sponsored the kickstarter as well and It is a very well crafted development board with what looks like the hardware interface drivers working and a data path to a web display. The BTLE software does fit with a Freescale (& also NXP) leveraging hot technology, usually through development partners. The Annaren Wiced and also STM parts seem to have the BTLE stacks available – though Wiced wasn’t that operational when I tried it this time last year.
LikeLike
Pingback: Hexiwear | MCU on Eclipse: Teardown of Hexiwear, the hackable ‘Do-Anything’ Device - Hexiwear
Pingback: Prototype of tiny Hexiwear Docking Station | MCU on Eclipse
Pingback: Tutorial: BLE Pairing the Raspberry Pi 3 Model B with Hexiwear | MCU on Eclipse
Pingback: Building the NXP BLE Stack with Open Source GNU and Eclipse Tools | MCU on Eclipse
Pingback: Reprogramming the Mikroelektronika Hexiwear Dockingstation | MCU on Eclipse
Pingback: McuOnEclipse Components: 12-Mar-2017 Release | MCU on Eclipse
Pingback: Embedded World Nürnberg 2017 Impressions: MCUXpresso, Hexiwear, NTAG, LPC800-DIP and Alan Hawse | MCU on Eclipse
Pingback: Using Python to Store Data from many BLE Devices | MCU on Eclipse