If a Cortex microcontroller is unresponsive to a debug connection for various reasons, then this trick might help to recover that device for you. All you need is a debug probe from PEMICRO and a utility.


If a Cortex microcontroller is unresponsive to a debug connection for various reasons, then this trick might help to recover that device for you. All you need is a debug probe from PEMICRO and a utility.
The NXP MCU-Link is a powerful $10 debug probe for ARM Cortex-M devices and works with the NXP LinkServer for debugging. The LinkServer does not an implement a gdb server, so it limits its usage e.g. for scripting or command line debugging. But as MCU-Link is also a CMSIS-DAP compatible debug probe, I can use it with OpenOCD which is open source and implements a GDB server. This article shows how I can use it with the MCU-Link.

Debugging FRDM-KL25Z with MCU-Link
The ‘Black Magic Probe’ (or in short: BMP) is a very small and open source JTAG/SWD debug probe with a build-in GDB Server. I saw that probe referenced in different places, so I thought I try it out with a few of my NXP LPC and Kinetis boards:

BMP with LPC and Kinetis Boards
For many projects it would be cool to build a custom USB Joystick device, either as custom game controller for Windows or any USB host which can be used with a USB Joystick. Instead buying one, why not build my version? All what I need is a USB capable board, some kind of input (potentiometer, push buttons) and some software, and I have my USB Joystick:

DIY USB HID Joystick Device
Getting a board from a distributor like Farnell/Element14/Mouser (add your own distributor) means that chances are high that the default firmware on it is written years from now because the inventory has not been updated, or because boards are still produced with that original firmware (because of testing?). So what happens if I use board with a firmware developed pre-Windows 8/10 area?

Freshly Unboxed NXP FRDM-KL25Z Board
It might work, but chances are high that the bootloader and firmware is not ready for the ‘modern age’, and as a result the board might be bricked. If you still have a Windows 7 machine around (I do!), you are lucky. If not, then you need to read this article….
Breakout boards are great: they allow me to explore functions quickly, without to build my custom board: all what I need is some wires and ideally a bread board.

Adadfruit MicroSD Card Breakout Board
I have been asked to provide a command line shell example for a bare-metal (no RTOS) application, so here we go!
Having a way to communicate to the firmware on a board is essential for most of my projects: it is simply, incredibly helpful and easy to do (see “A Shell for the Freedom KL25Z Board“). This tutorial shows how to add a simple command line shell to the NXP Freedom board which then can be extended as necessary.

Console Application
From my earlier work to use the NXP Kinetis with openHAB (see “Controlling NXP Freedom Board RGB LED with openHAB and Raspberry Pi“) it was only a small step to control a 20x20x20 cm light cube with 256 Adafruit WS2812 NeoPixels:
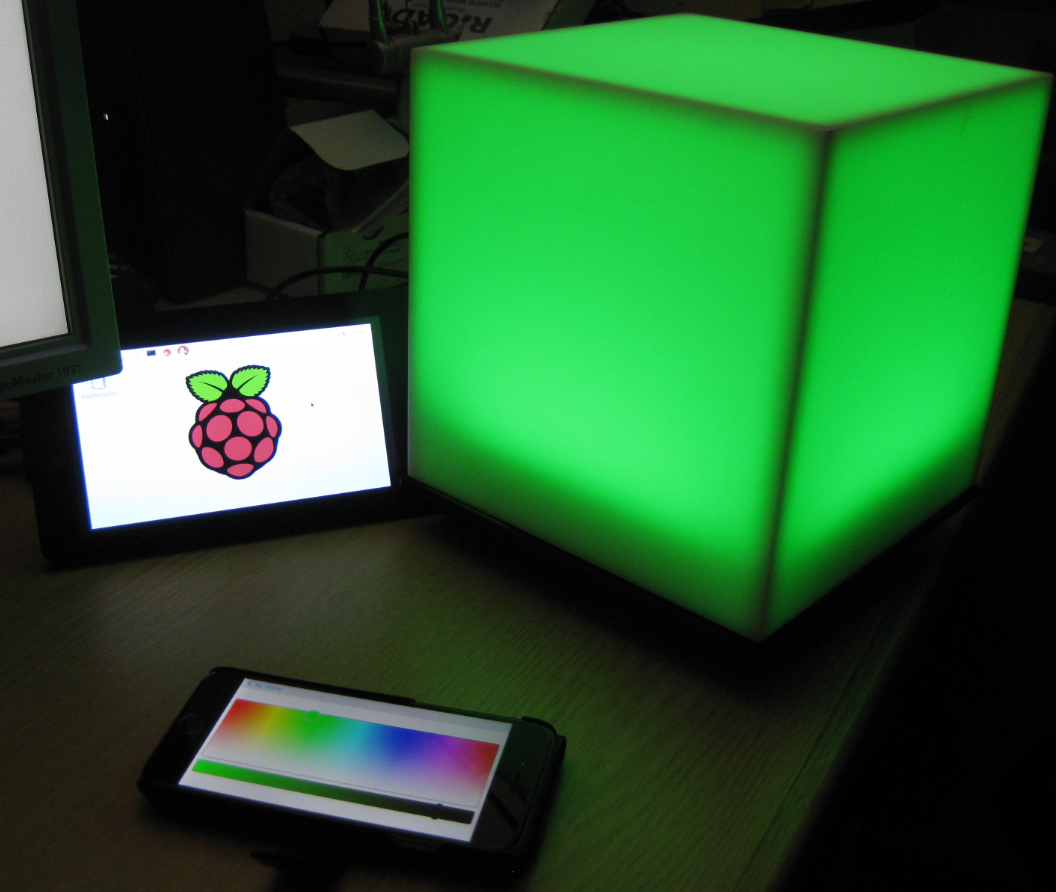
Kinetis RGB Cube with openHAB
There are plenty of different software packages available for microcontroller these days from all the silicon vendors. Finding a good software package is one challenge, getting what I really need is another one. Freescale is now part of NXP since December 2015, so this is probably the first release of the former Freescale part now as NXP: The NXP Kinetis SDK Version 2.0.
It comes with an interesting distribution way: instead of downloading huge packages with all-and-everything in it, I can build it ‘on demand’ online and get what I need, on demand from a web-based front end:

NXP Kinetis Expert with Kinetis SDK
In “Blinky LED with openHAB on Raspberry Pi” I have used openHAB on a Raspberry Pi to control an LED attached to the Pi, and in “Controlling NXP Freedom Board RGB LED with openHAB and Raspberry Pi” I have explored how to connect a NXP Freedom Board over USB CDC to the Raspberry Pi. In this article I’m going to combine both: to control the LED on a NXP Freedom board remotely with openHAB on the Raspberry Pi.

ColorPicker with openHAB and FRDM-KL25Z
