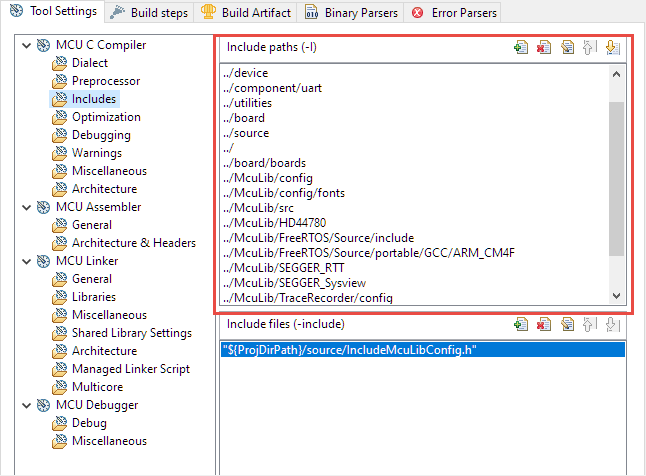
Eclipse with its CDT managed Make system makes it easy to build projects, because it can handle a lot of the background tasks and settings between the project and the build setting. It can get a bit difficult if I want to include a library or other sub-source project for which I have to add extra compiler #define or add extra includes path settings.
Eclipse project settings for include paths
This article show the different ways I have found to make such imports (and exports) easier.
The GNU size utility which is part of the GNU build tools shows code and data size for archive or object files. It is usually used as a post-build step in Eclipse CDT to show text, data and bss at the end of the build:
One great feature of Eclipse is its built-in spell checking engine. So no more excuses are possible for typos in the source code ;-). Eclipse scans the source code in the background and offers to correct it:
Right before Christmas 2019, NXP has released a new version of the MCUXpresso IDE, the version 11.1.0. This gave me time to explore it over the Christmas/New-Year break and evaluate it for the next university semester. There are several new features which will make my labs using it easier, so I plan to get the course material updated for it.
When using an RTOS like FreeRTOS, sooner or later you have to ask the question: how much time is spent in each task? The Eclipse based MCUXpresso IDE has a nice view showing exactly this kind of information:
FreeRTOS Runtime Information
For FreeRTOS (or that Task List view) to show that very useful information, the developer has to provide a helping hand so the RTOS can collect this information. This article shows how this can be done on an ARM Cortex-M.
For this last blog in the series Investigating ARM Cortex® M33 core I decided to explore the expansion features of the LPC55S69-EVK. This board has three expansion ports (PMOD, Arduino Duo, Mikroe click) and I picked the Mikroe expansion port. Why? Only because I had good experience with these boards with the Hexiwear project.
And because I have been doing some work this month with AWS IOT I wanted to get my LPC55S69-EVK onto my office WiFi network for the Christmas holidays. I know that the MCUXpresso SDK for lpcxpresso55s69 version 2.6.3 has a built-in WiFi example named qca_demo, and so that is what I am investigating today.
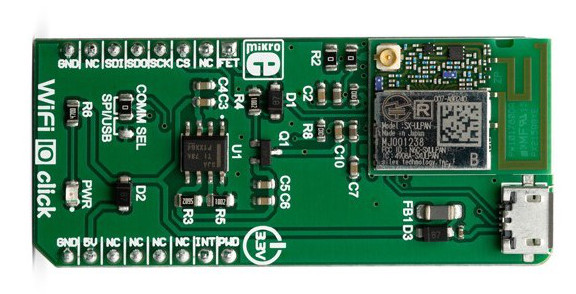
That WiFi example supports three WiFi shield boards, and I picked the Mikroe WiFi 10 click board. It’s part number MIKROE-3432 and available from all of the usual catalogue distributors.
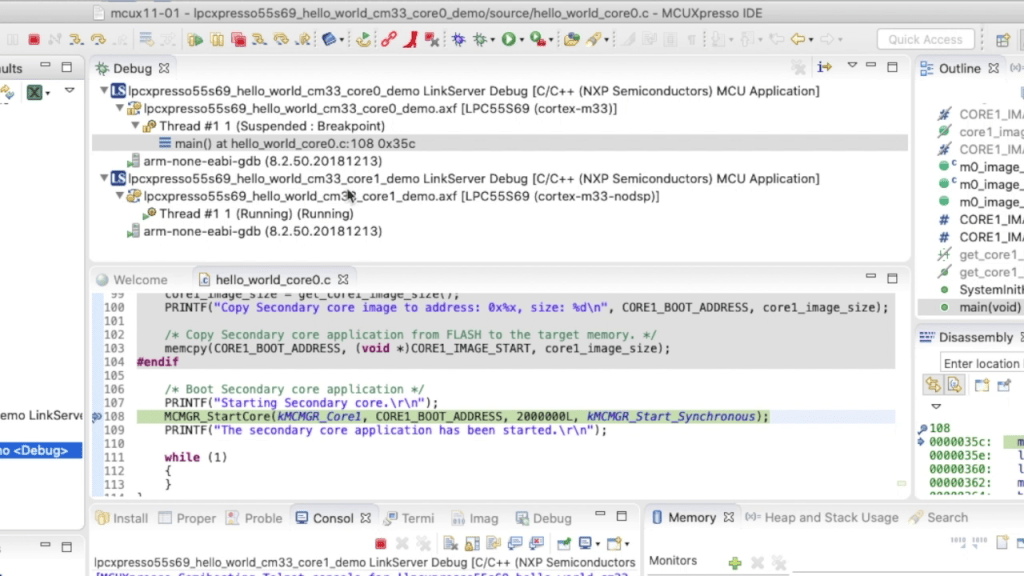
In last week’s blog I explained that the LPC55S69 microcontroller from NXP has two Cortex® M33 cores, named core0 and core1. There was a lot of theory, and so this week I put it all into practice and show you how to debug 2 cores with MCUXpresso IDE.
Multicore Debugging Interface in MCUXpresso IDE showing 2 different projectsContinue reading →
Throughout this series I’ve been using the LPC55S69 microcontroller from NXP as a platform to investigate the ARM Cortex® M33 core. NXP designed the LPC55S69 with two Cortex M33 cores and so this week I’m investigating these in more detail.
You’ll remember that when ARM launch a processor core it will have a number of optional features. This is shown very clearly on the LPC55S69. The 150 MHz primary core – cpu0 – is a full implementation of Cortex® M33 and includes the optional components FPU, MPU, DSP, ITM and the TrustZone® features.