From my previous MetaClockClock project, I still had some hardware available. So I decided to build my largest build so far: to clocks with 78 clocks each.

From my previous MetaClockClock project, I still had some hardware available. So I decided to build my largest build so far: to clocks with 78 clocks each.
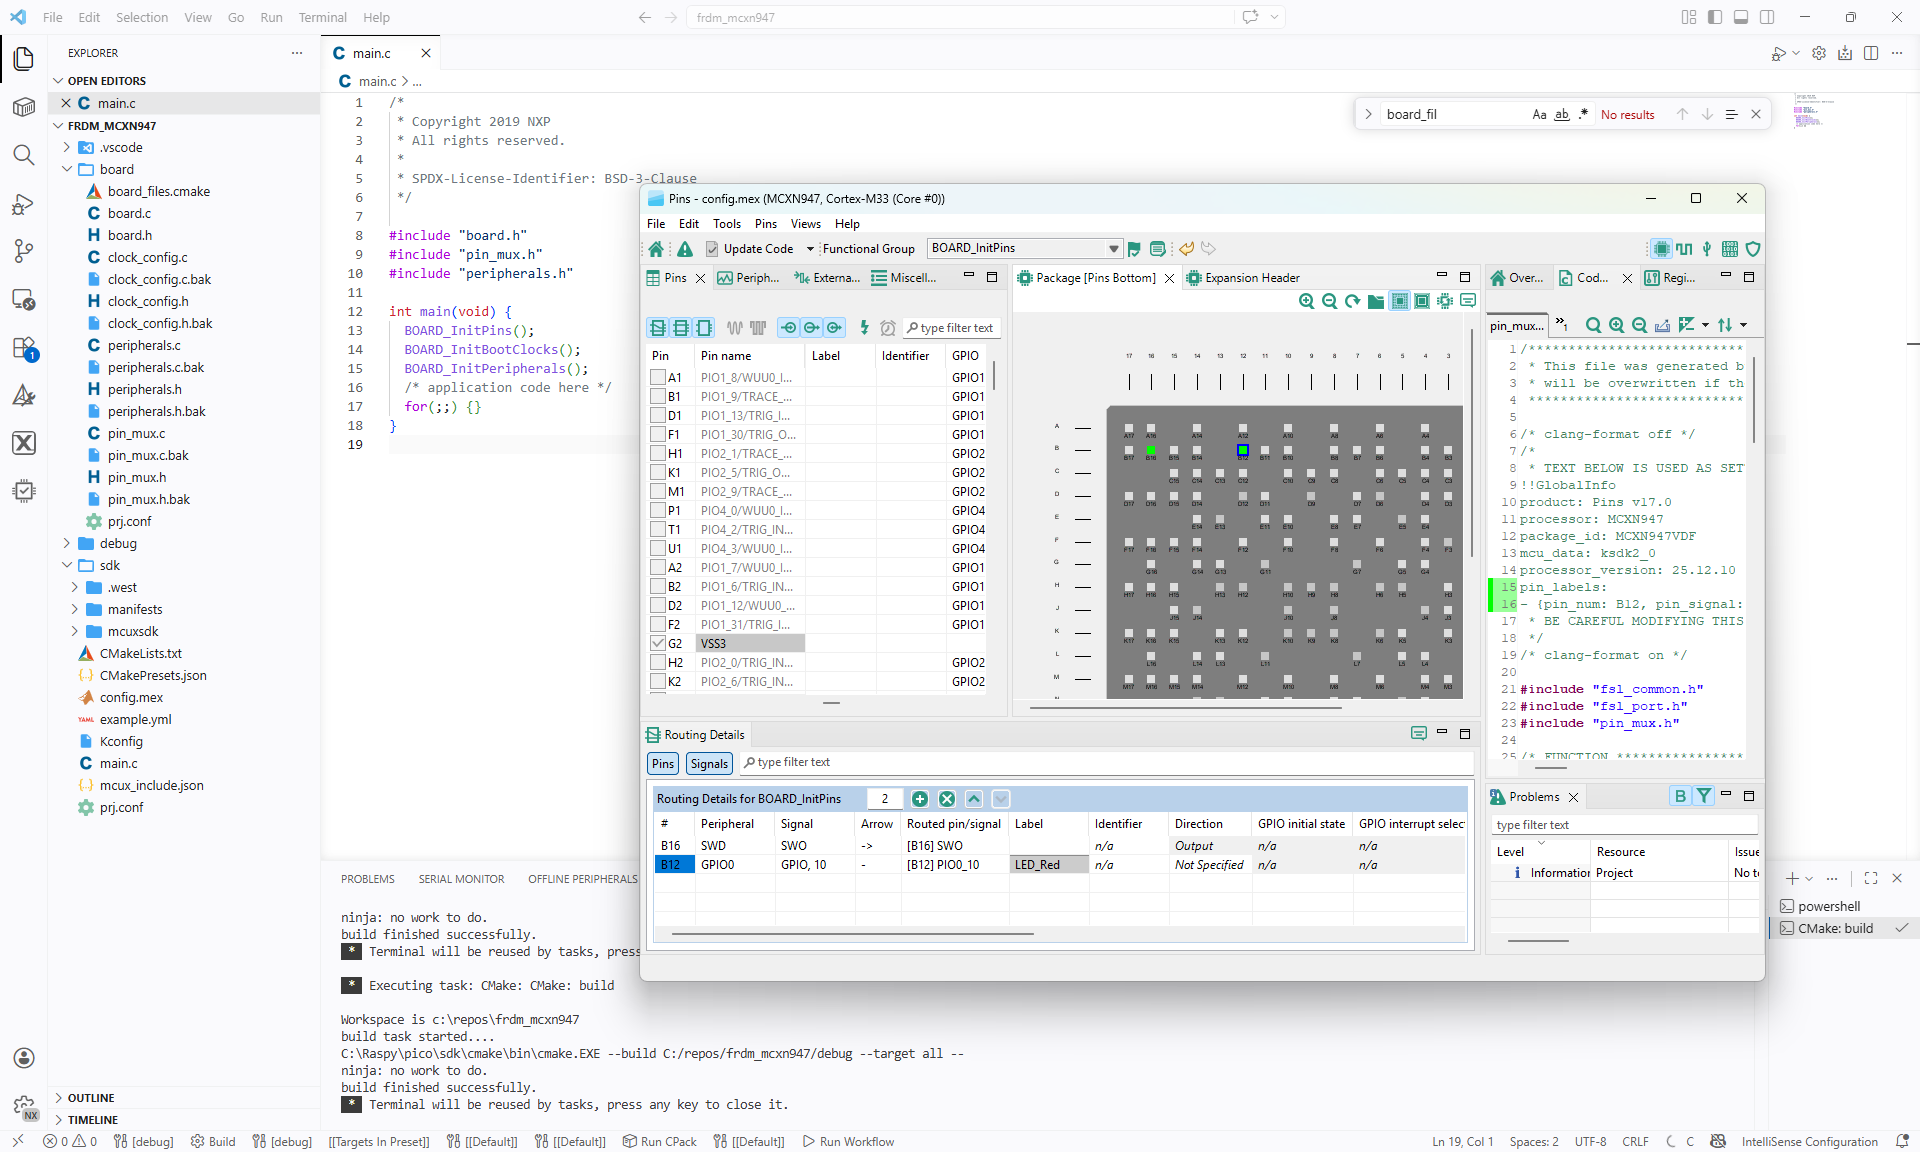
In Tutorial: Getting Started with MCUXpresso SDK – Repositories with VS Code and Tutorial: Getting Started with MCUXpresso SDK – west I showed how to get the MCUXpresso SDK. In this article it is about tweaking and streamlining the project.
The result is a clean, portable and self-contained MCUXpresso SDK project.
Recently I have been asked “How can I debug a Linux application with VS Code?”. I’m covering that topic in my ‘Embedded Application Development Course on Linux”.

I realized, that I have never covered that topic in any of my blog articles. So here we go: I show how easy it is to use VS Code to debug a Linux application. You can use this for example with an Raspberry Pi. Or for example the NXP i.MX93 which I’m using in this article.
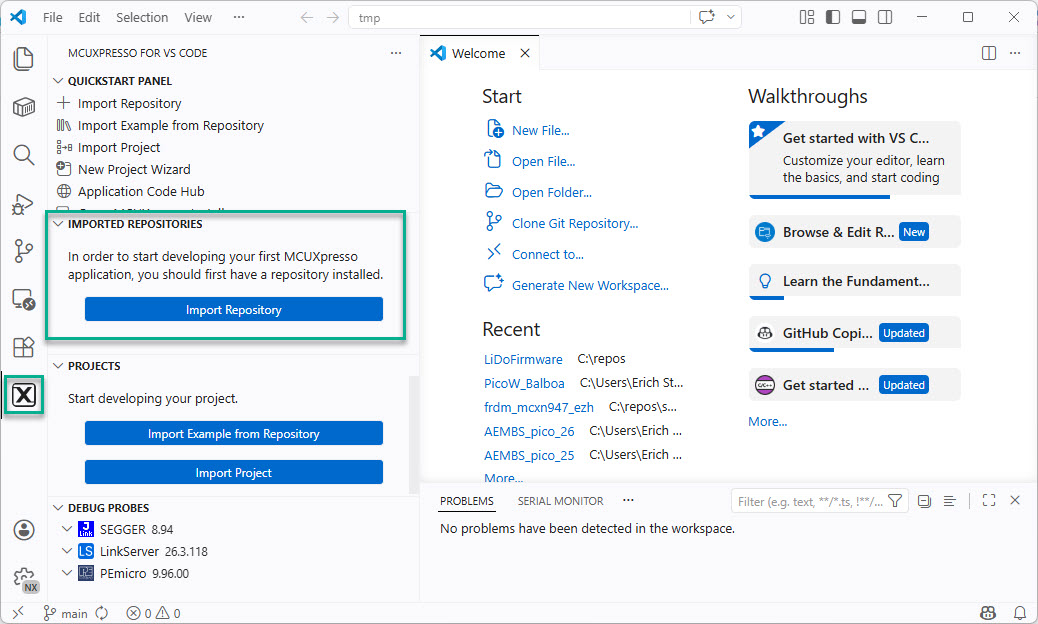
Continue readingIn “Tutorial: Getting Started with MCUXpresso SDK – west“, I demonstrated the ‘west’ tool’s usage. It helps in acquiring an SDK repository. Instead using the command line tool, I can use the NXP VS Code extension to do the same.
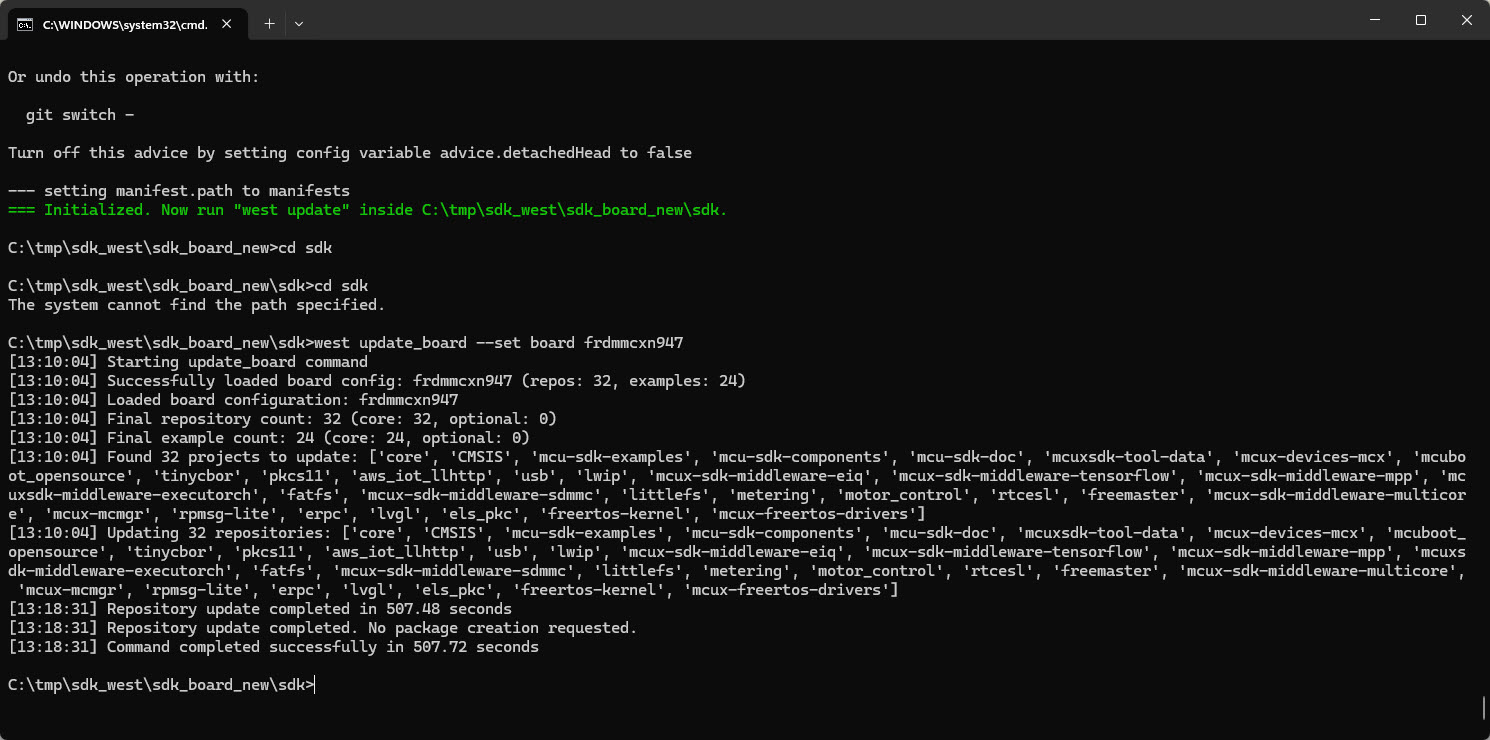
In my earlier tutorial I showed how to install the necessary SDK tools. In this article I’m going to install the SDK sources. For this I’m going to use west. This is a command-line ‘meta-repository’ tool.
The engineering and development landscape is constantly changing. This includes the embedded tooling and SDKs.
Back in the year 2017 I have used the version 2 (see Tutorial: Using Eclipse with NXP MCUXpresso SDK v2 and Processor Expert). Back then, it was Eclipse with make. Now we are in 2026 and things have changed to VS Code, cmake, ninja, python and west.
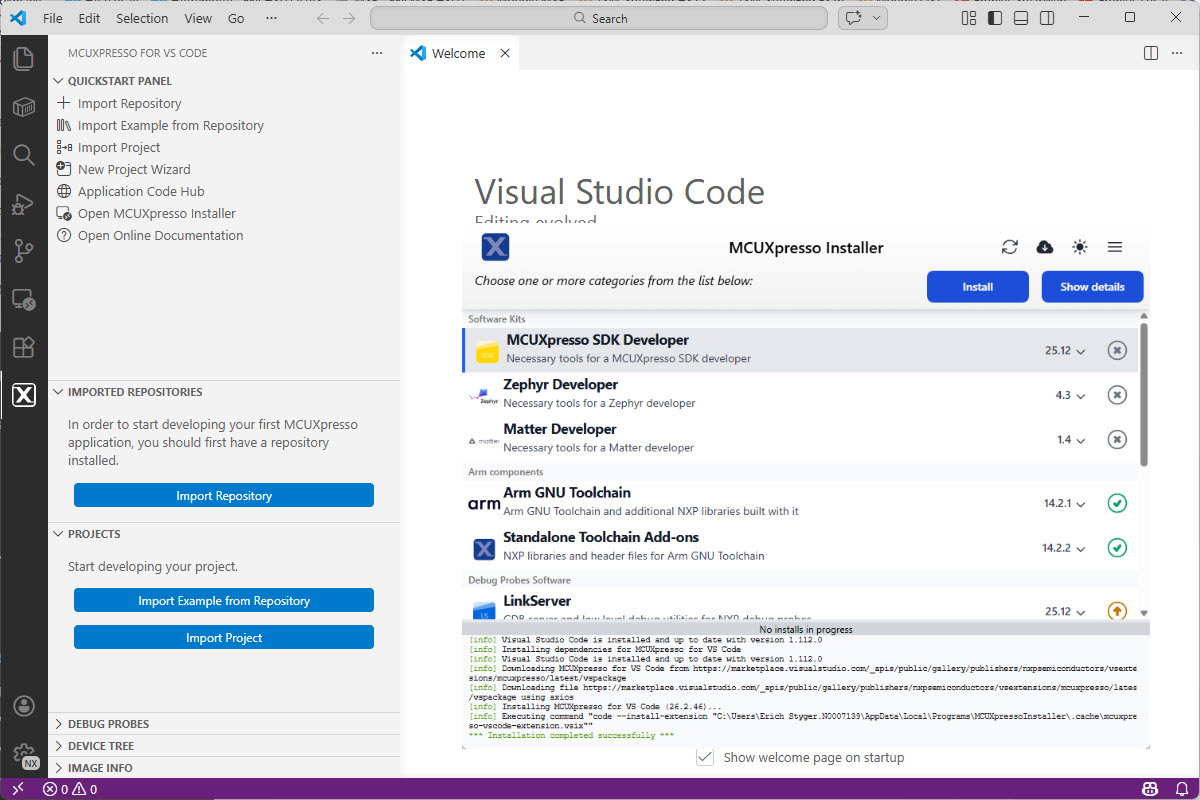
Luckily, although more and different tools are needed these days, the installation experience has improved significantly. It has shifted from installing multiple different tools to a streamlined installation process.
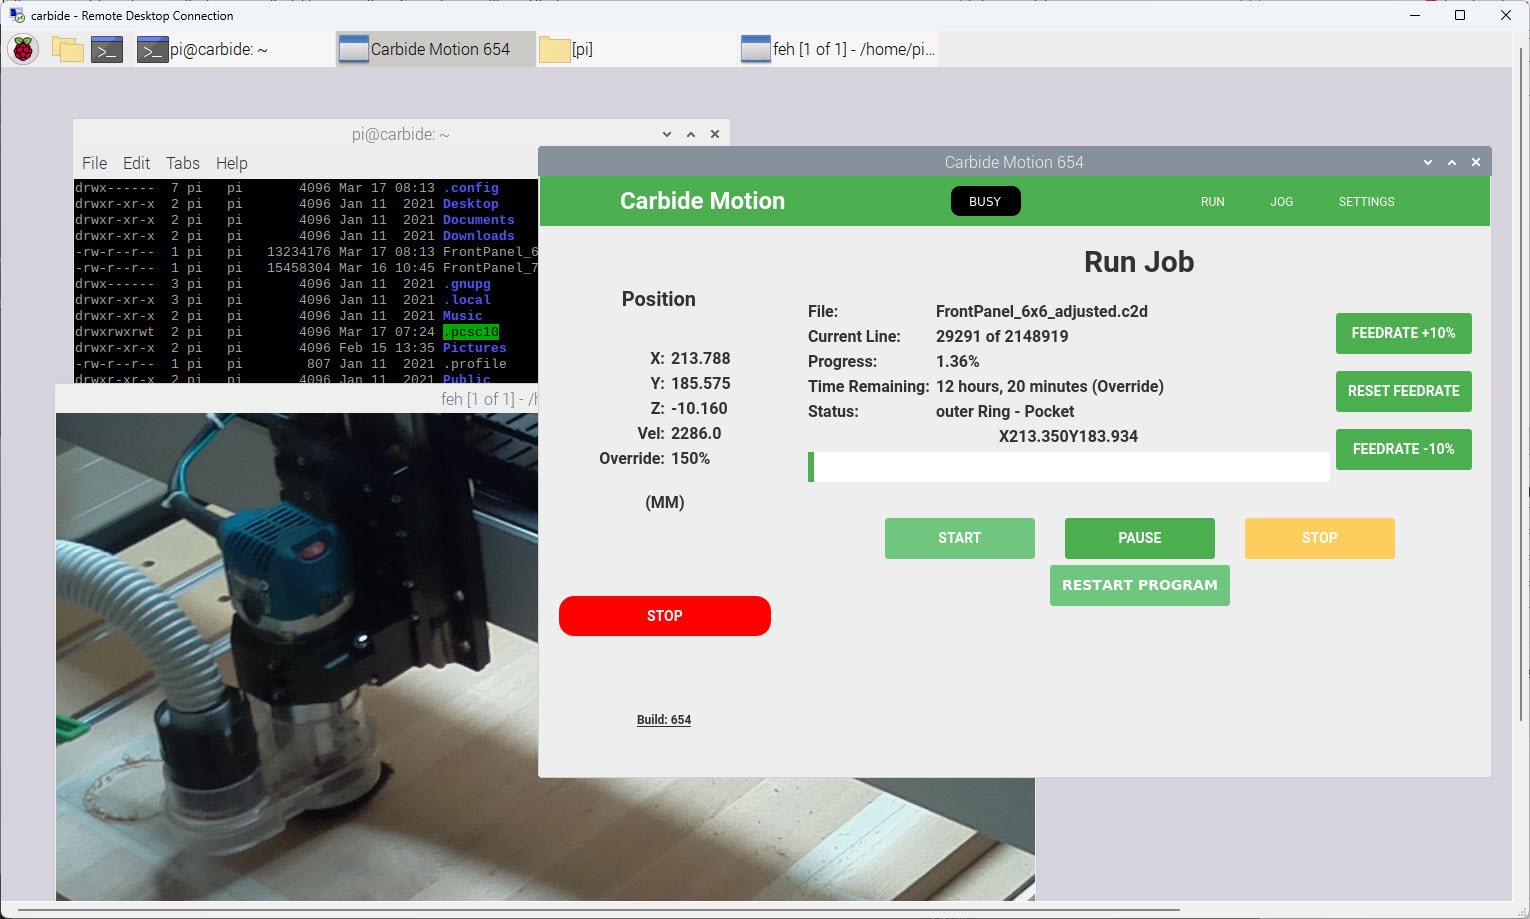
Continue readingI have to run multiple +10h CNC jobs. So, I decided to upgrade my Shapeoko 4 CNC machine. I equipped it with a Raspberry Pi and a new dust collection system.
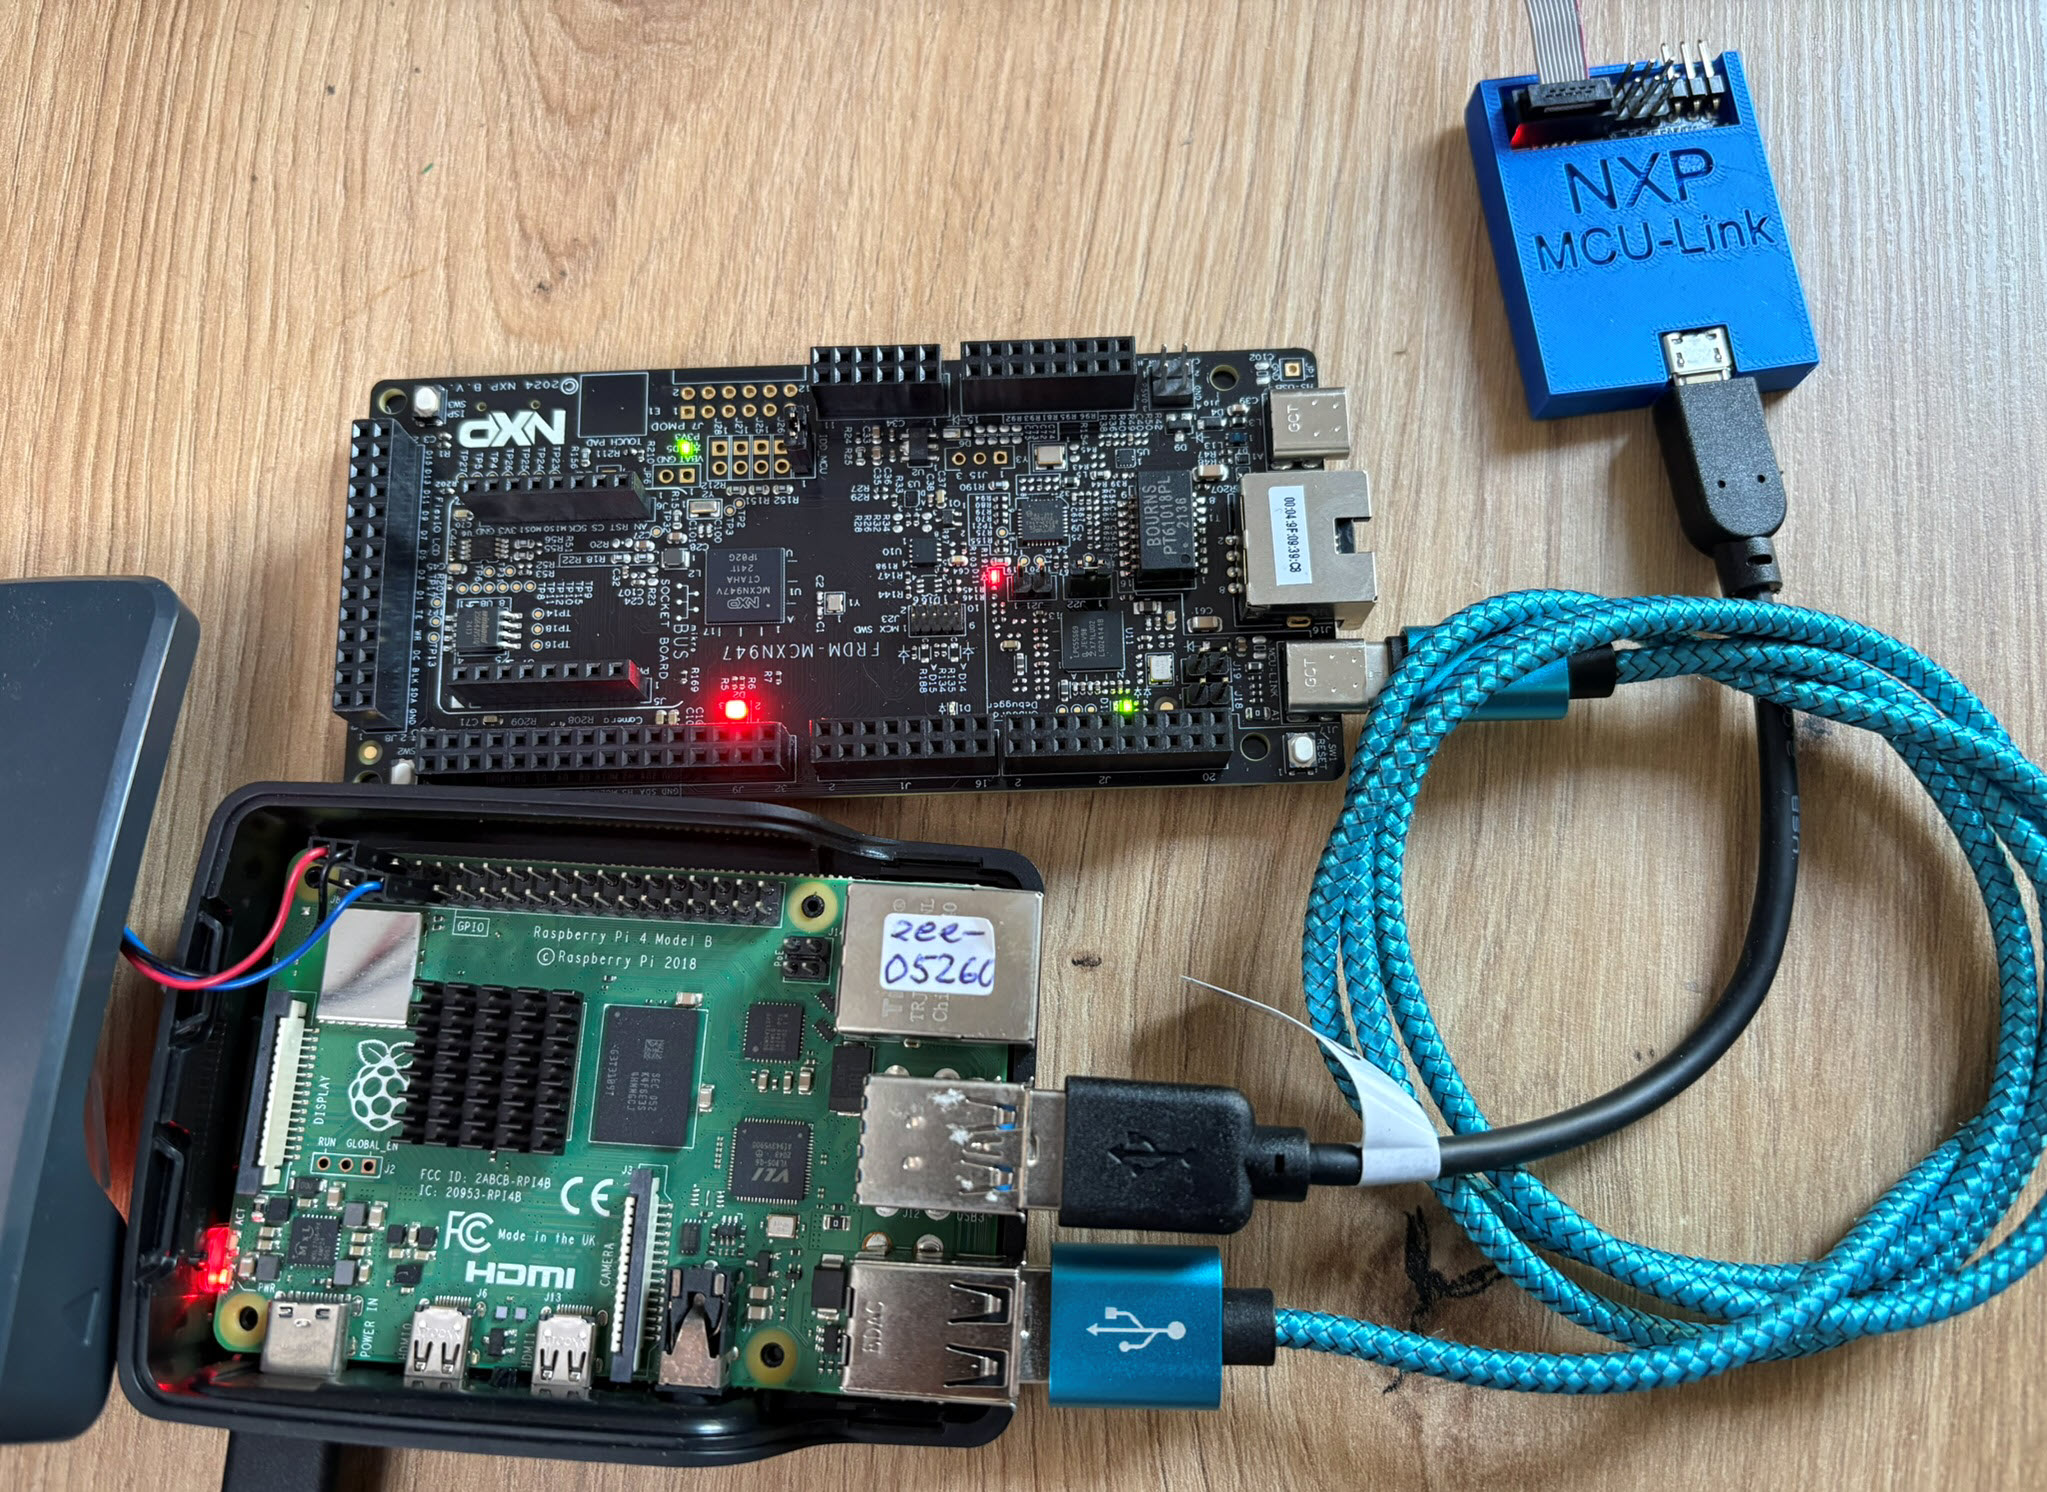
The latest release of the NXP LinkServer supports ARM 64bit (Debian) besides Windows, Linux and MacOS. With this, I can now develop on an NXP i.MX board. Plus, this enables an inexpensive way for automated on-target tests and CI/CD.
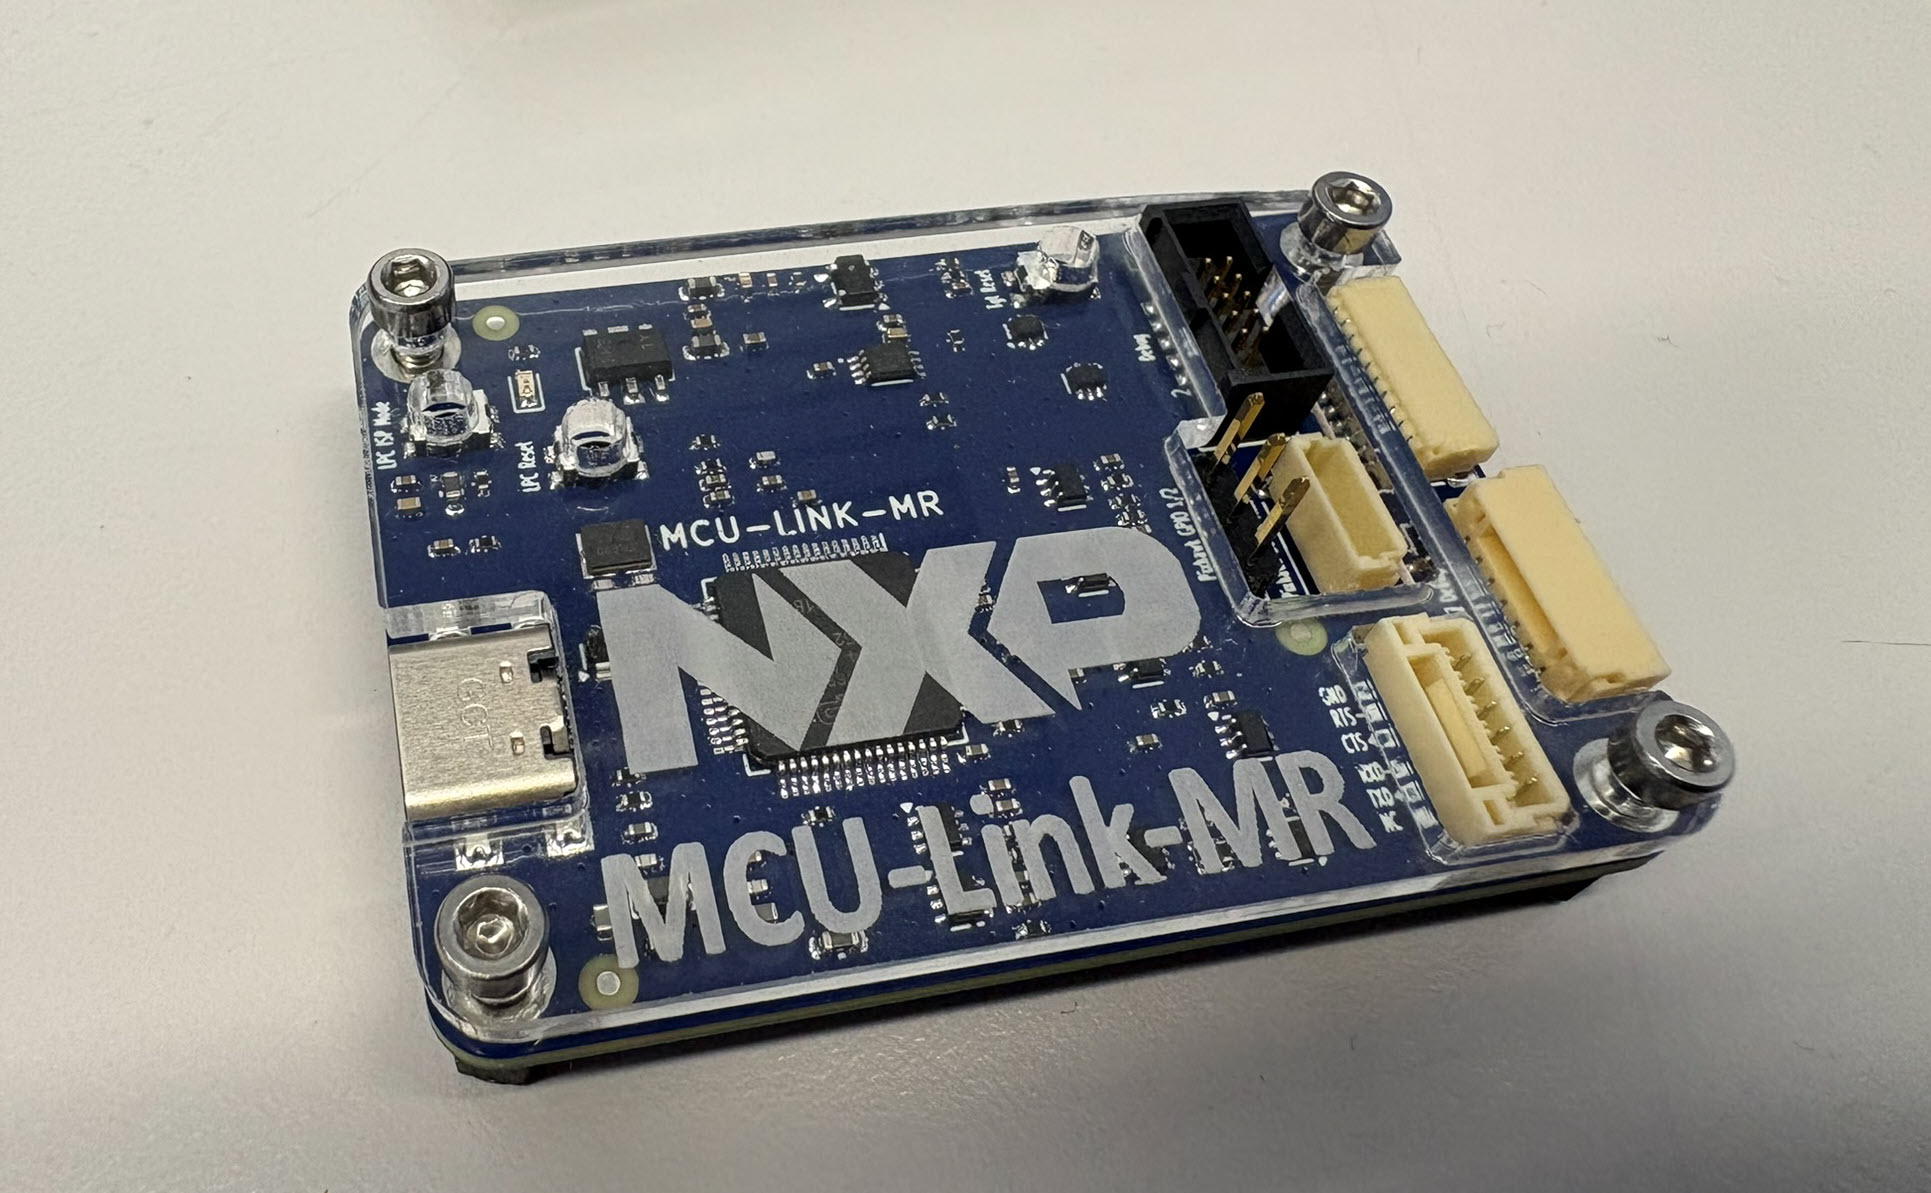
The new v0.5 MCU-Link-MR PCB (see MCU-Link-MR v0.5: Enhanced Debug Probe for ARM Cortex-M) comes with an extra pin header for logic analyzer signals. Because of this I have updated the enclosure for it:
The 3D Printed Rugged Enclosure for NXP MCU-Link Debug Probe has been very useful. I wanted to design something similar for the ‘MCU-Link Pro‘ version of that debug probe. There there is already a laser-cut enclosure for the probe itself. I used the same stack-able rugged box for the debug probe plus all the cables.

