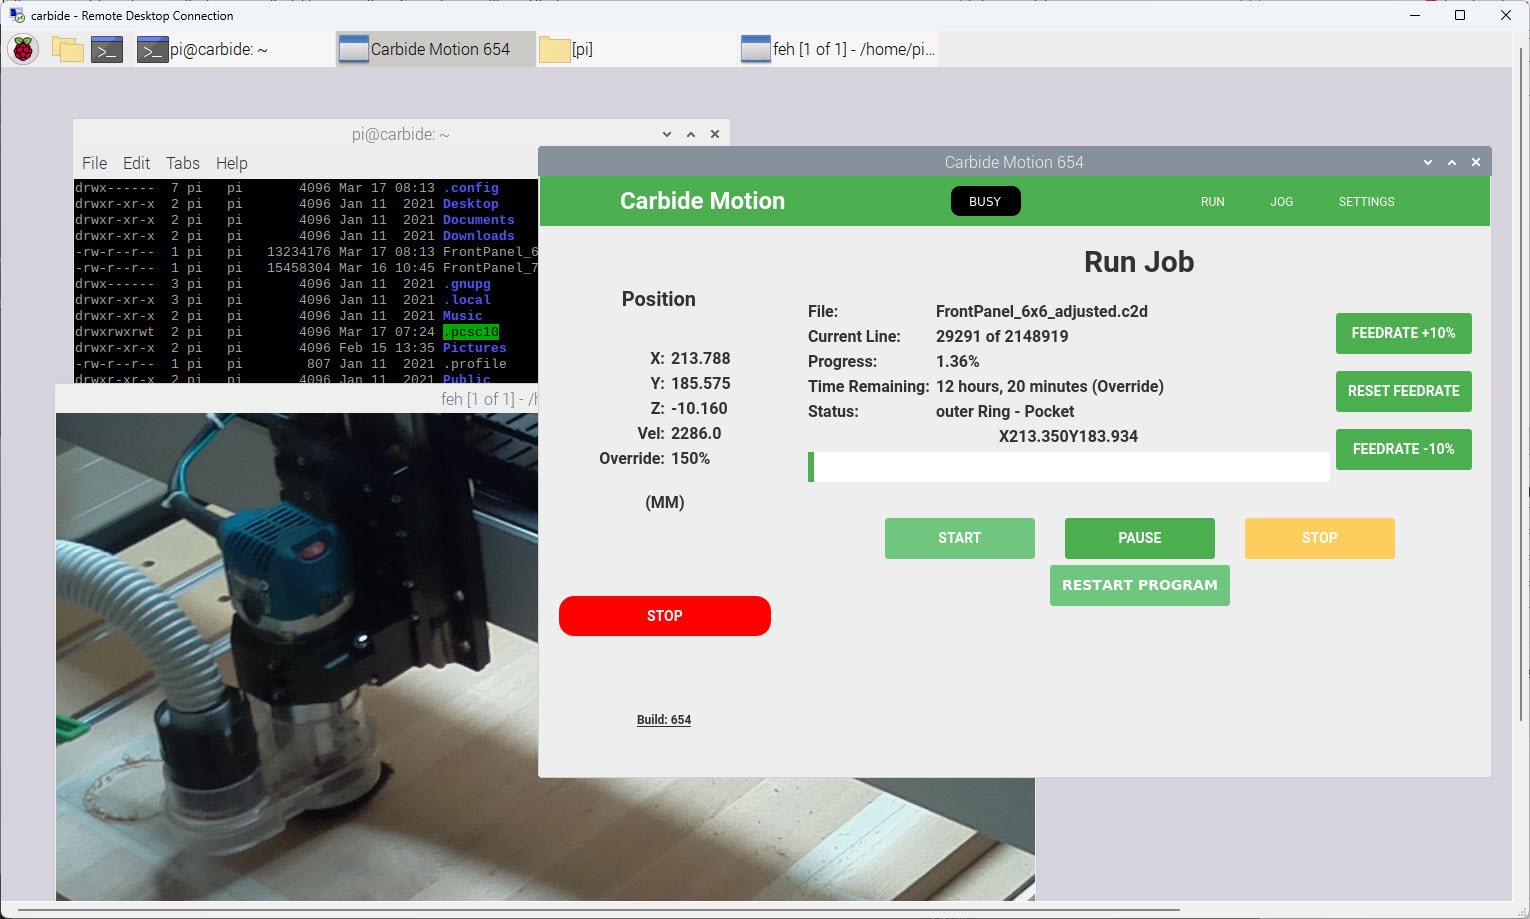
I have to run multiple +10h CNC jobs. So, I decided to upgrade my Shapeoko 4 CNC machine. I equipped it with a Raspberry Pi and a new dust collection system.

I have to run multiple +10h CNC jobs. So, I decided to upgrade my Shapeoko 4 CNC machine. I equipped it with a Raspberry Pi and a new dust collection system.
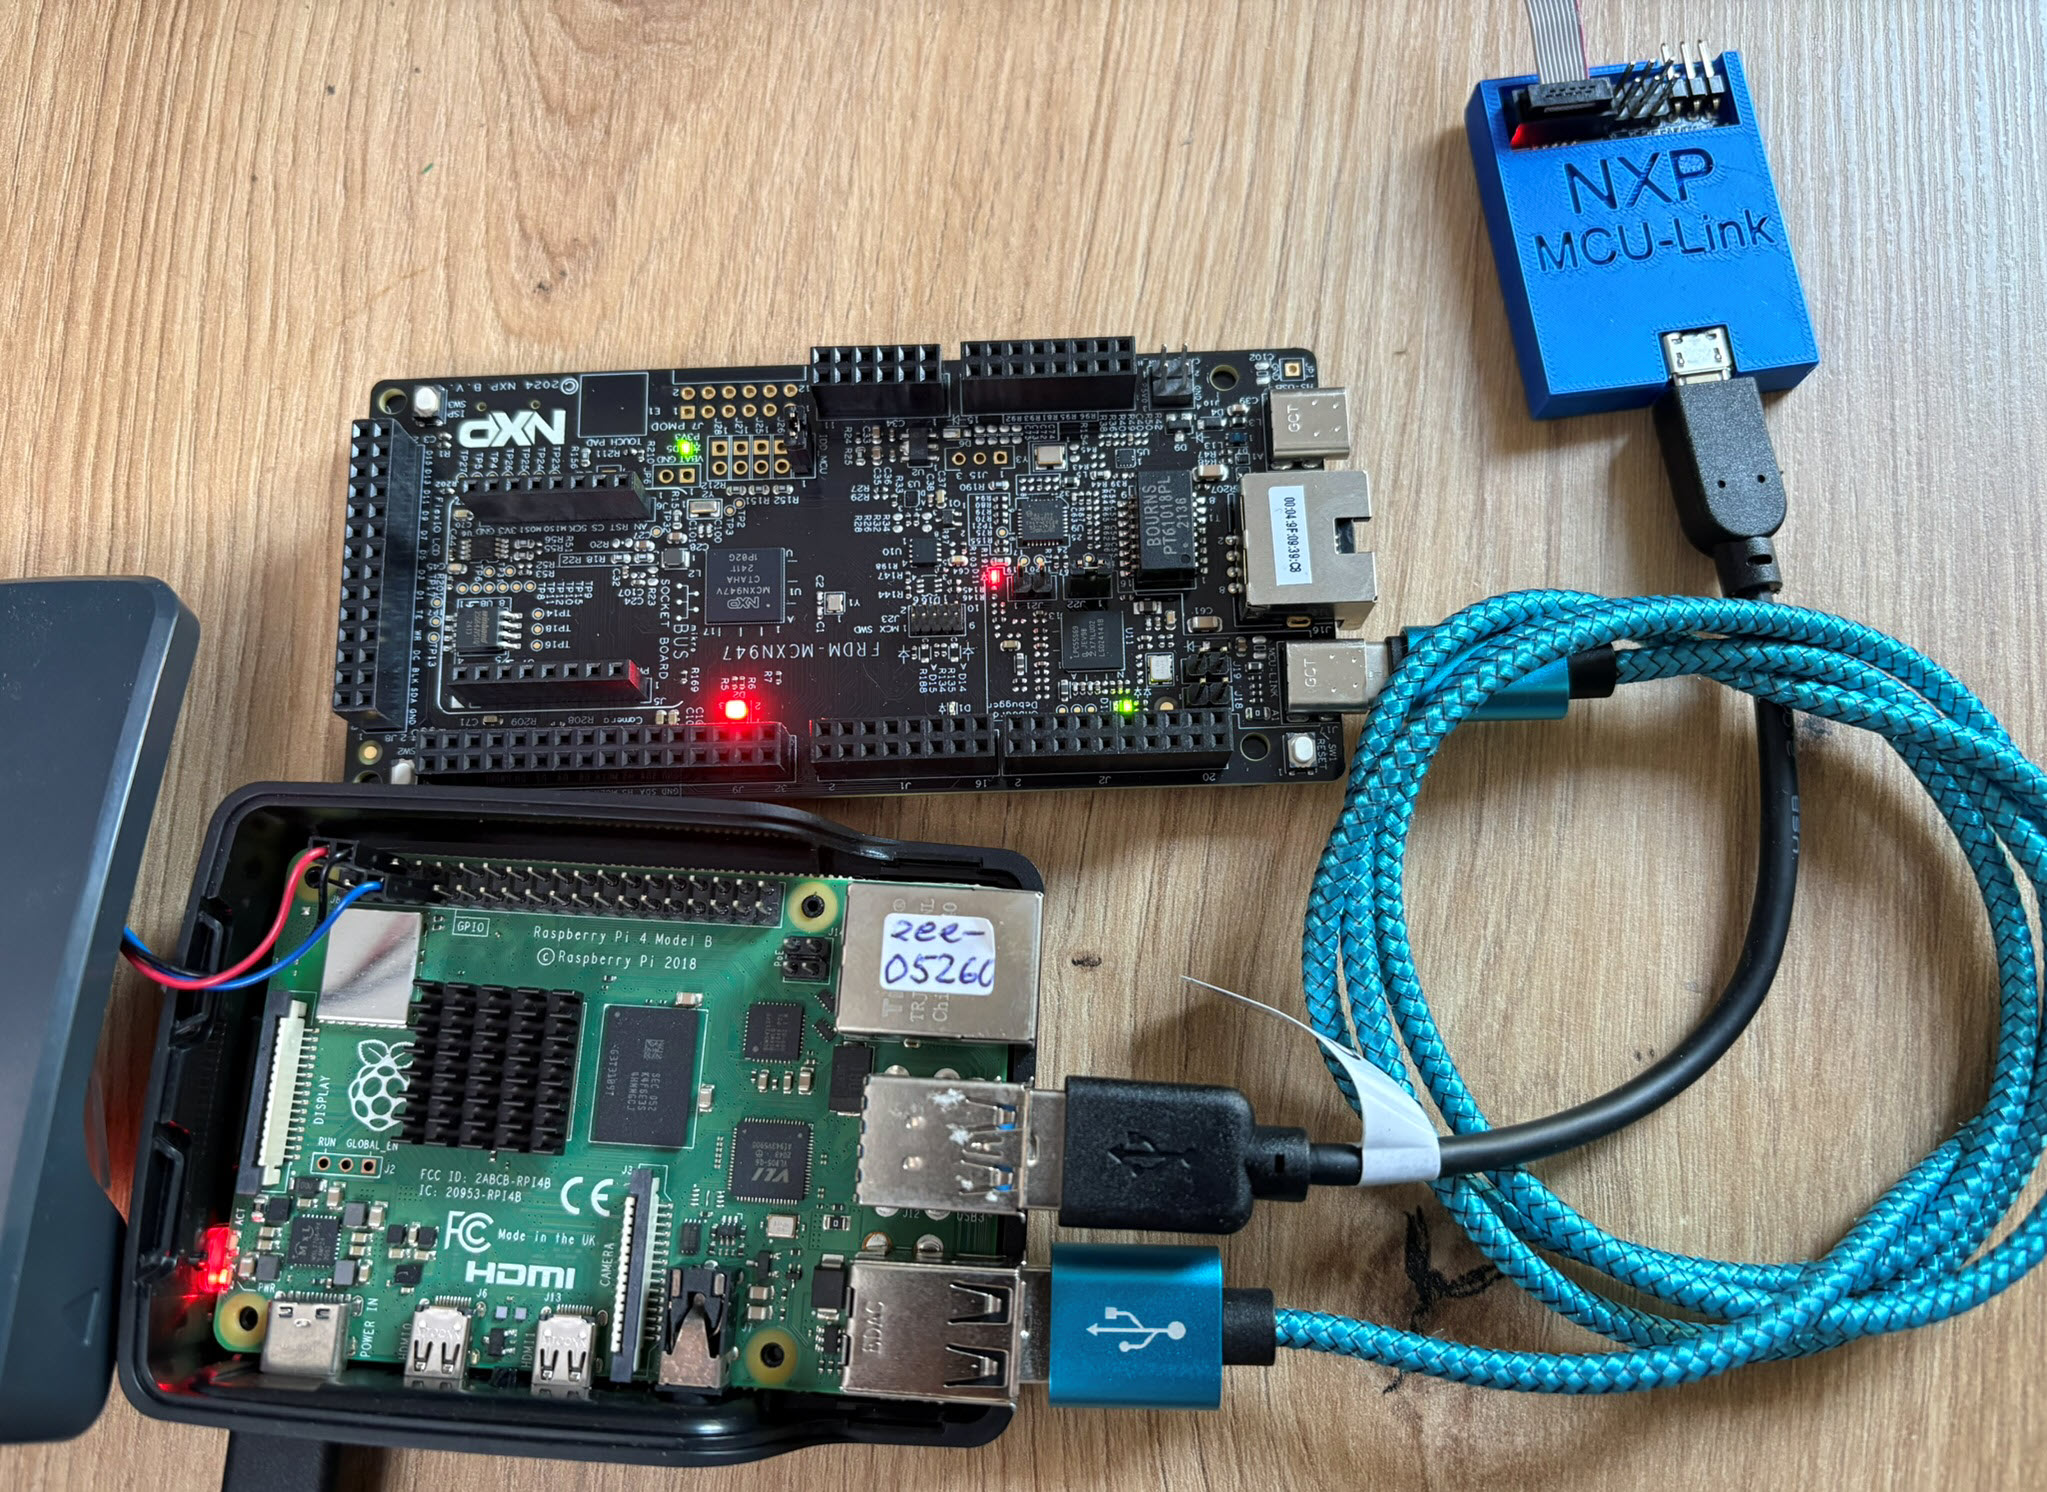
The latest release of the NXP LinkServer supports ARM 64bit (Debian) besides Windows, Linux and MacOS. With this, I can now develop on an NXP i.MX board. Plus, this enables an inexpensive way for automated on-target tests and CI/CD.
Having access to a laser cutter makes it possible to design custom enclosures. This one is for a Raspberry Pi in a Steampunk design:

Steampunk Enclosure
My LoRaWAN gateway (“Contributing an IoT LoRaWAN Raspberry Pi RAK831 Gateway to The Things Network” is running and working great now for more than a month and it already has transmitted more than 30k messages:
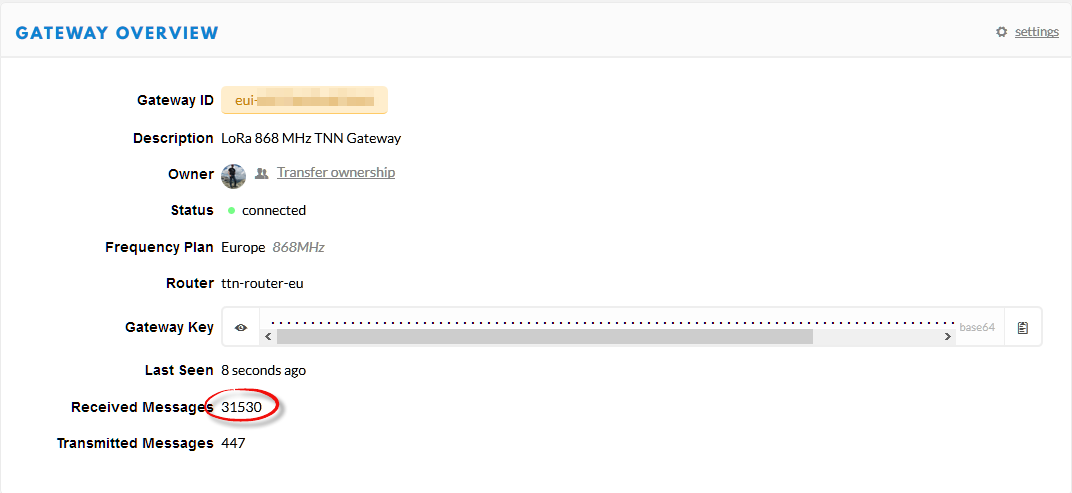
Gateway Overview
This creates a lot of log entries on the micro SD card of the Raspberry Pi. To avoid writing too many times log data, I have installed Log2Ram.
LoRa and LoRaWAN is getting the de-facto wireless IoT network in my area. No surprise that traditional telecom providers like Swisscom trying to monetize the ‘Internet of Things’ area. Luckily there is an open and free alternative: https://www.thethingsnetwork.org/. Volunteers, enthusiasts and members in the different TTN communities build gateways and offer free LoRaWAN network access. I wanted to contribute to that grassroots movement with building my gateway, providing LoRaWAN access to my neighborhood.

LoRaWAN TheThingsNetwork Gateway
Need a quick way how to attach a LED, a push button and two resistors to the Raspberry Pi header? One way is to use some ‘flying’ wires. Or to use three pieces of lasercut plywood for a nice looking Raspy extension board:

Wood Circuit Board on Raspberry Pi
BLE (Bluetooth Low Energy) sensor devices like the Hexiwear are great, but they cannot store a large amount of data. For a research project I have to collect data from many BLE devices for later processing. What I’m using is a Python script running on the Raspberry Pi which collects the data and stores it on a file:

Raspberry Pi with Python controlling a set of Hexiwear BLE Devices
Now I can use the data on the Hexiwear over BLE with the gatttool (see “Tutorial: Hexiwear Bluetooth Low Energy Packet Sniffing with Wireshark” and “Tutorial: BLE Pairing the Raspberry Pi 3 Model B with Hexiwear“). This article is taking things a step further and uses a Python script on Linux to access the sensor data on the BLE device:

Accessing Hexiwear Sensor Data with Python
The Raspberry Pi is a versatile mini computer: as such I can use it with USB keyboard, mouse and HDMI LCD monitor. But having multiple keyboards and mouse on my desktop is not my thing: somehow I always grab the wrong one. So what I prefer is to run the Raspberry with VNC (Virtual Network Computing). That way I have the Linux GUI as a window on my normal desktop, and no messing up with keyboards and mouse 🙂 :

Raspberry Pi on my Dekstop
The Hexiwear (see “Hexiwear: Teardown of the Hackable ‘Do-Anything’ Device“) is a small and portable sensor node with built-in BLE (Bluetooth Low Energy) transceiver. In a research project we try to use multiple Hexiwear in a classroom environment and to collect sensor data on a Raspberry Pi. The Raspberry Pi 3 Model B running Linux has an on-board BLE transceiver too, so why not binding them (wirelessly) together?

Raspberry Pi 3 connected with Hexiwear over BLE
Well, things seemed easy at the beginning, and as always, there are many things to learn on a journey like this…
