
I’m very happy with my 50W Laser Cutter (see “Getting Control over a 50 Watt CO2 Laser Cutter from China“). My main decision factors were (and still are): Software, software, tools and again software, and down in the list finally the hardware. Same thing for that laser cutter. After several upgrades (see “50W Laser Cutter Upgrades“), it was time replace the stock controller hardware with a new one including LCD display:

New Laser Cutter LCD Panel
The trigger point to buy a cheap chinese laser cutter was the K40 Whisperer software: that way I can use Inkscape with an easy-to-use program to get my design out of the laser cutting machine. After several months, it is now time to get that laser cutter a major upgrade. Yes, it is again about software (Smothieware), but as well about hardware (Cohesion3D Mini Board with the NXP LPC176):
Cohesion3D Mini Board with LCD
Original Hardware
Most cheap chinese laser cutters have the ‘M2 Nano’ board installed, same for my machine:

M2 Nano Laser Controller Board
The above M2-Nano board picture shows on the bottom the two stepper motor cables plus the connection to the laser power supply (blue: LO (Laser Out), 5V, GND and 24V input. The white connector on the right is for the end stops (GND, YL, XL, GND and NC).
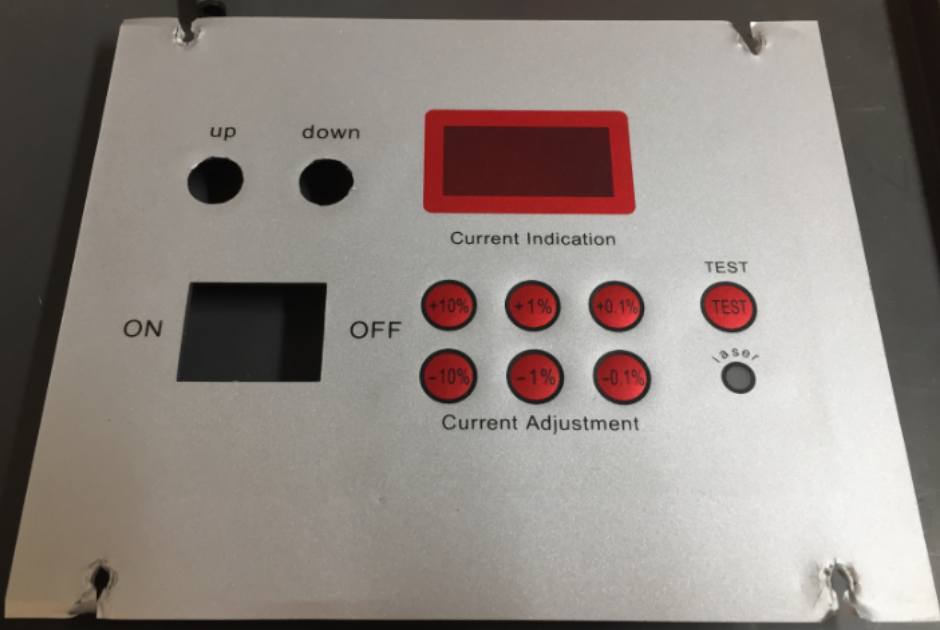
The board interfaces with a front panel which is used to set the laser power from 0% to 99.9%, plus a ‘Test’ button which fires the laser:
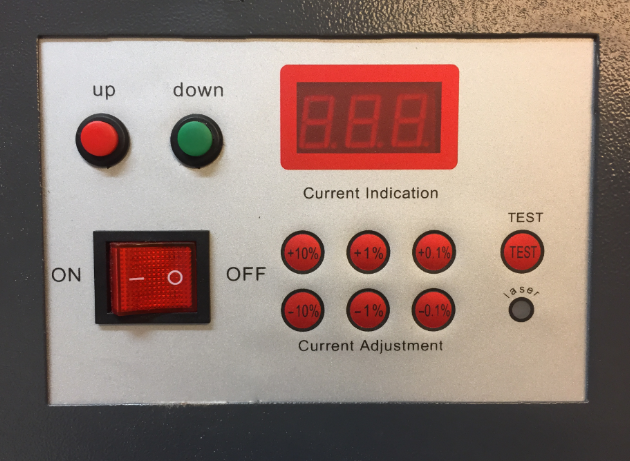
Laser Cutter Original Front Panel
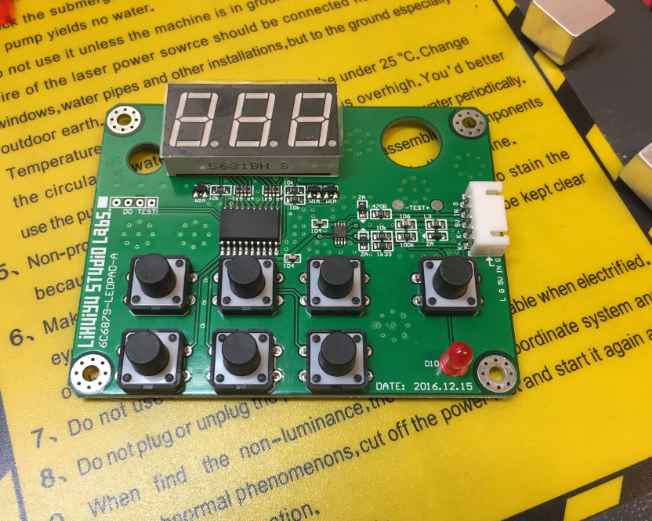
Below how it looks from inside the machine:
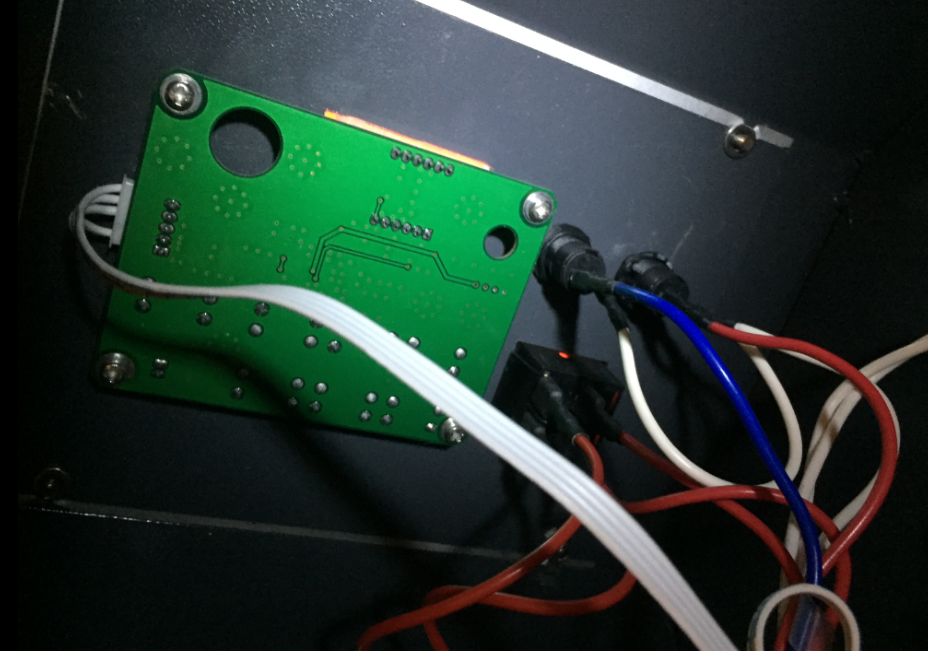
Laser Cutter Origional Front Panel back side
Software
While that controller board would be ok, using it with the supplied (cracked?) CorelDraw software was a horrible experience. That’s why using the K40 Whisperer Software was such a good thing: easy to use and works much better.

PRG-G Design in K40 Whisperer
The K40 Whisperer software is free of charge (thanks!) and evolving (see http://www.scorchworks.com/K40whisperer/k40whisperer_change_log.html), but when working on another side project I taped in the the world of CNC and 3D printing controllers. And there I really enjoyed the benefits of the Smoothieware: free, opensource and powerful G-code and CNC controller software, used for 3D printers, laser cutters and CNC milling.
That Smoothieware project really kicked me off to enhance my laser cutter with a more powerful solution.
Goals
While the above hardware and software is working fine, I was aiming for more:
- Controlling the laser power with software: I have to set the laser power on the panel, and lasering something with multiple speed and power requires multiple manual steps.
- More stepper motor drivers to control Z axis plus add a rotation axis for round objects: the M2-Nano only supports two steppers (X and Y axis)
- Ability to run G code on the machine with command line control
- Running jobs without PC attached (e.g. loading files from SD card)
- The last item requires an LCD attached (or graphic display)
Cohesion3D Mini
The heart of the Smoothieware boards is the NXP ARM Cortex-M3 LPC1769. Running the Smoothieware software, almost any aspect of the controller can be configured with a configuration file on the micro SD card.
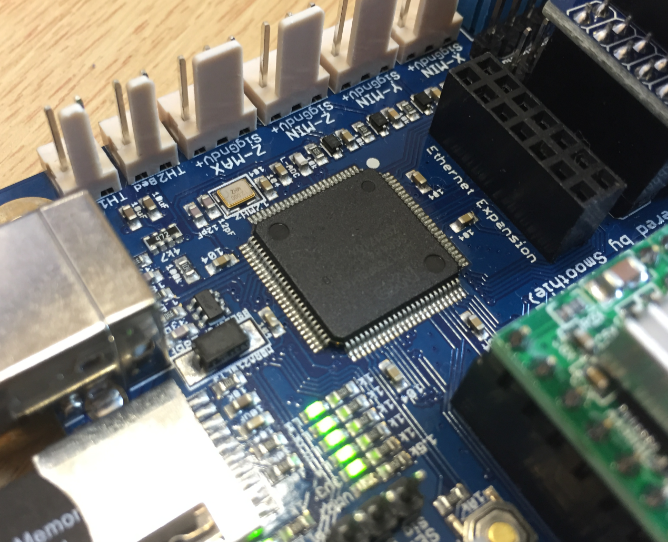
NXP LPC1769
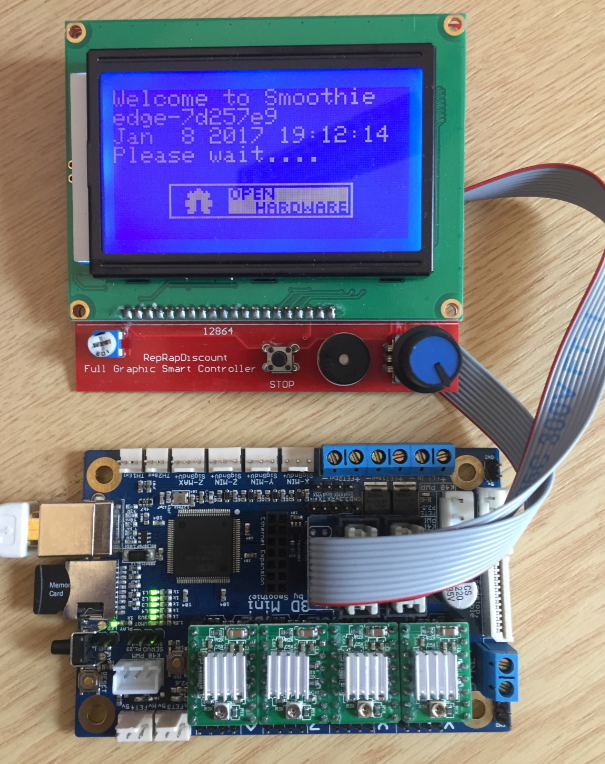
I have found that the company Cohesion3D sells a drop-in replacement board, the http://cohesion3d.com/cohesion3d-mini/. I ordered the board with 4 stepper motor drivers (2 extra to support future features like motorized bed leveling or rotation device) and the external graphical LCD board:
Cohesion3D Mini Board with LCD
With the stepper drivers and LCD the board costs around $150.
Installation
Using the guide from https://cohesion3d.freshdesk.com/support/solutions/articles/5000726542-k40-upgrade-with-cohesion3d-mini-instructions- the installation was easy.
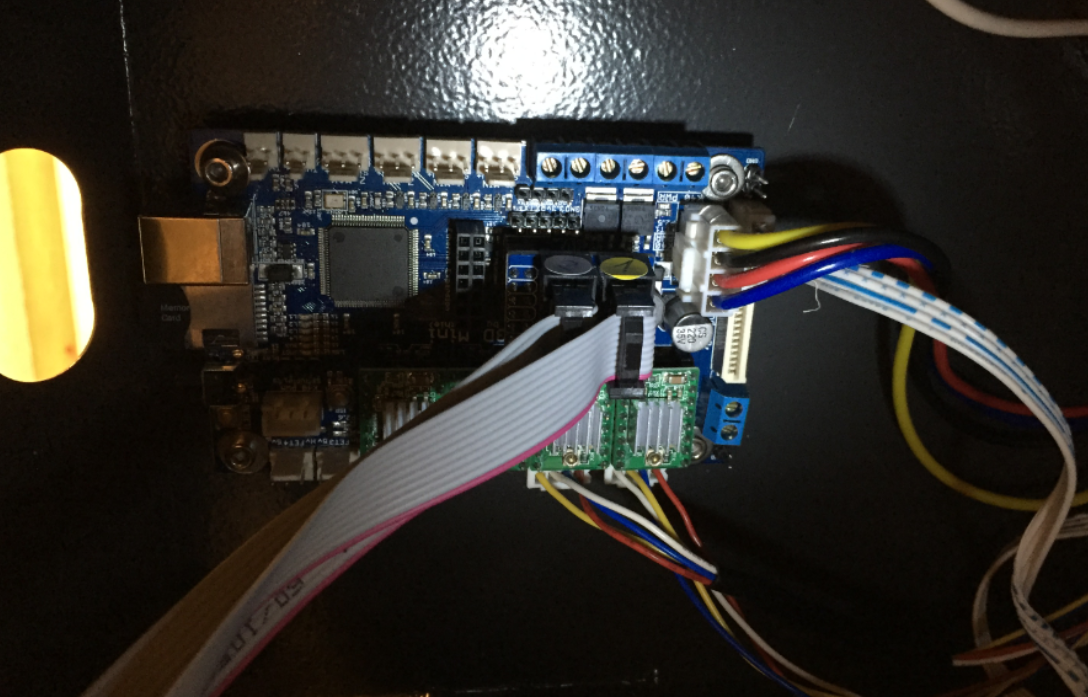
Installed Cohesion3D Board
Knowing the Smoothieware already pretty well, adopting the SD card config file was not difficult neither to match my machine which a bit different from the usual K40 laser cutter machine.
The only problem was with the end stops which took me a while to find: The K40 Endstop connector on the board only had one GND pin routed:
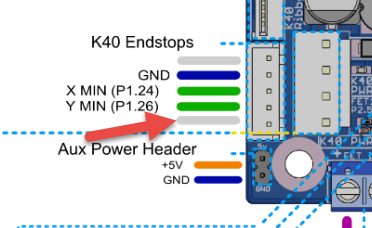
Cohesion3D K40 Endstops
My machine did not connect the GND for the two end stops, so one pin was floating. I fixed this with an extra black wire connecting the GND on the end stops:
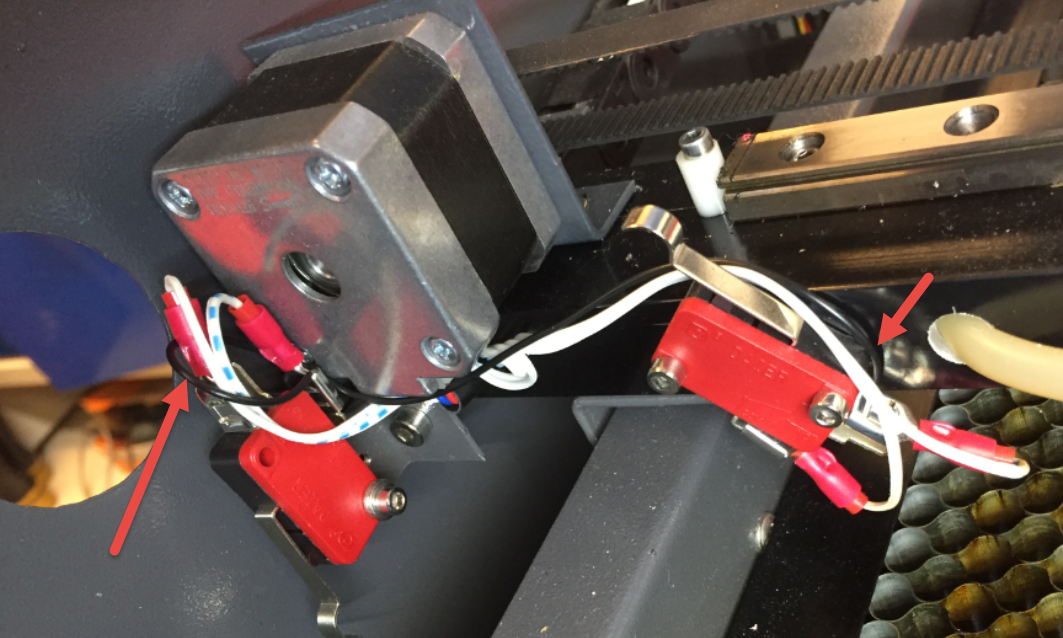
Extra Endstop GND Wire
Front Panel
Removed the old panel:
Old Panel Front Plate
Old Front Panel
Old Panel PCB
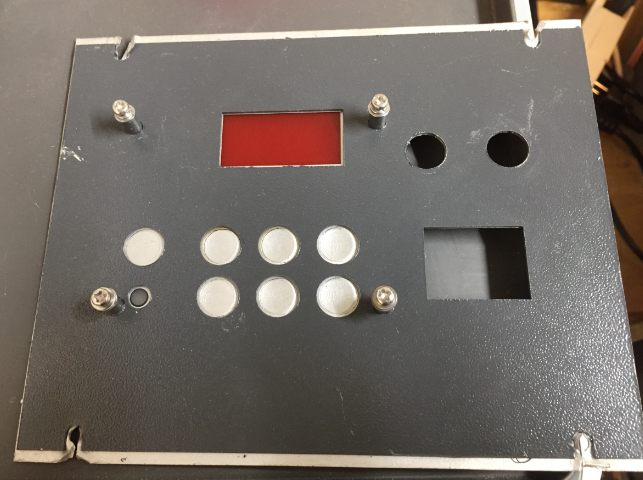
I created a new design in Inkscape and cut it out on 4 mm plywood:
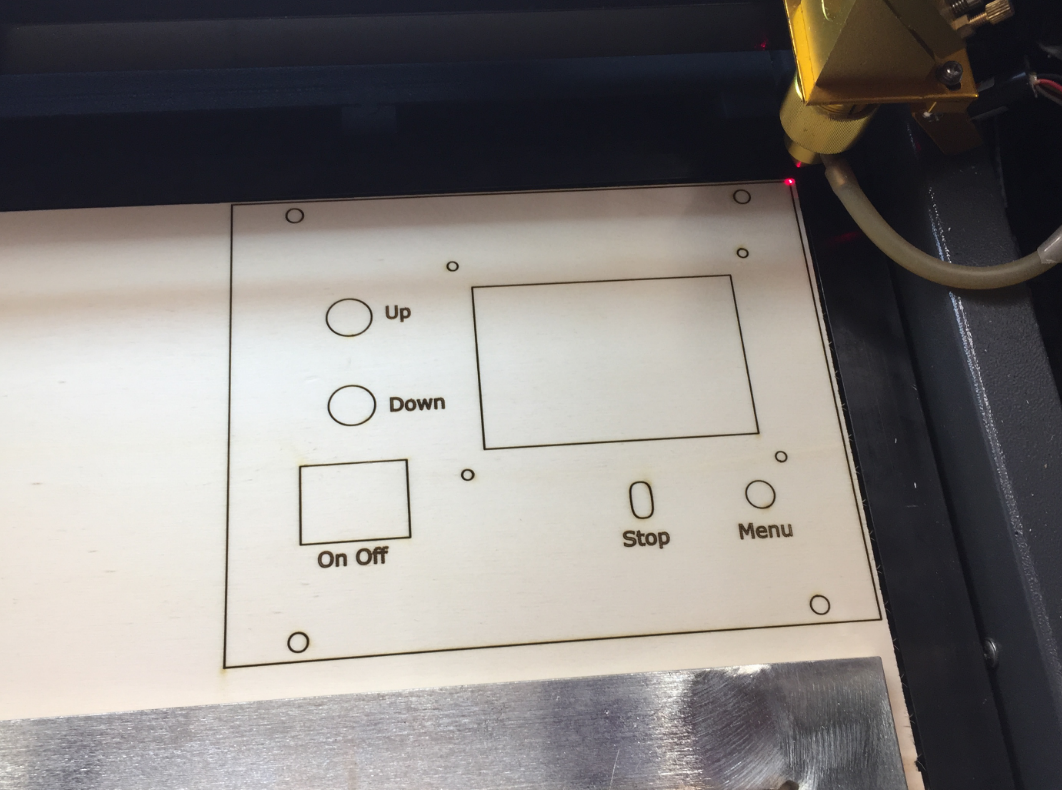
New Front Panel in laser cutter
Below the result (with the stop button 3D printed):

Backside of new panel
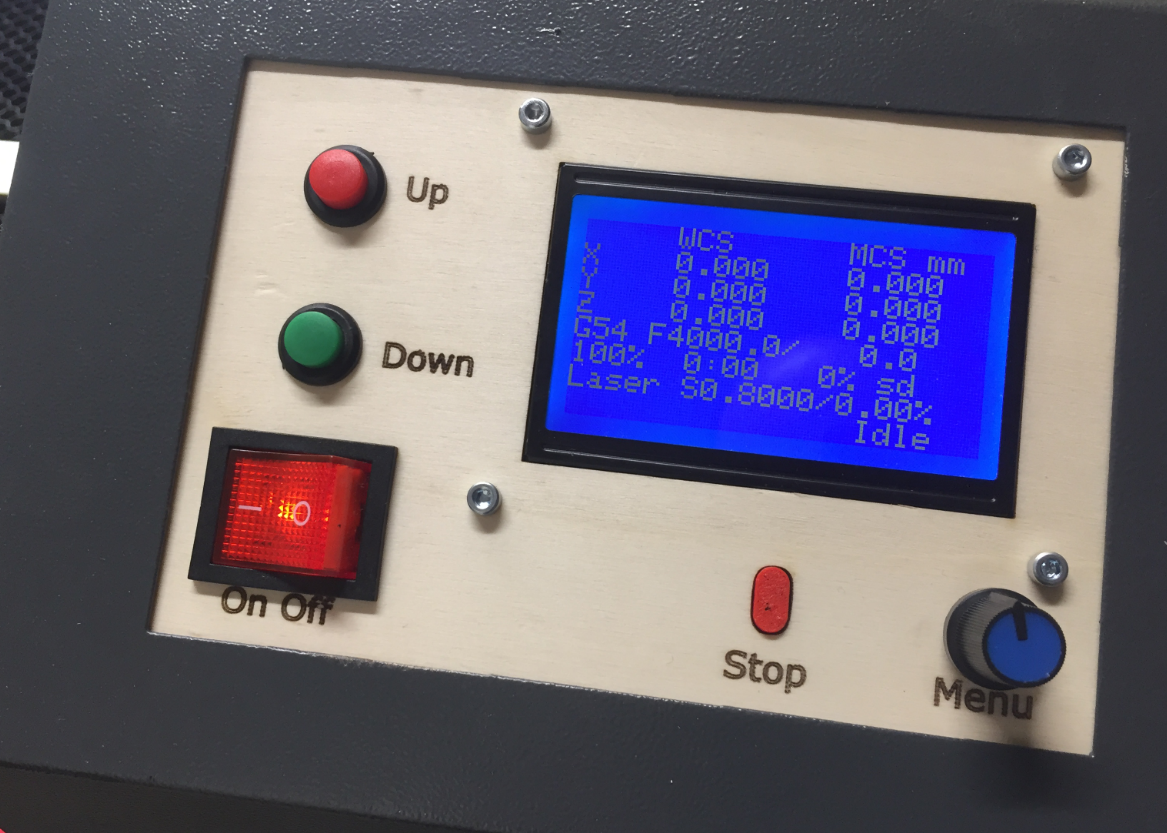
Laser Cut Front Panel
LightBurn
The Cohesion3D-Mini board runs the Smoothieware firmware which accepts G-Code. While looking for a good software, I have found LightBurn. The LightBurn software is still beta, but worked very well for me (there was only a homing issue which is now fixed in the latest version). It is possible to try it out for 30 days, with a very reasonable price point of $30 for the G-Code version which I use.
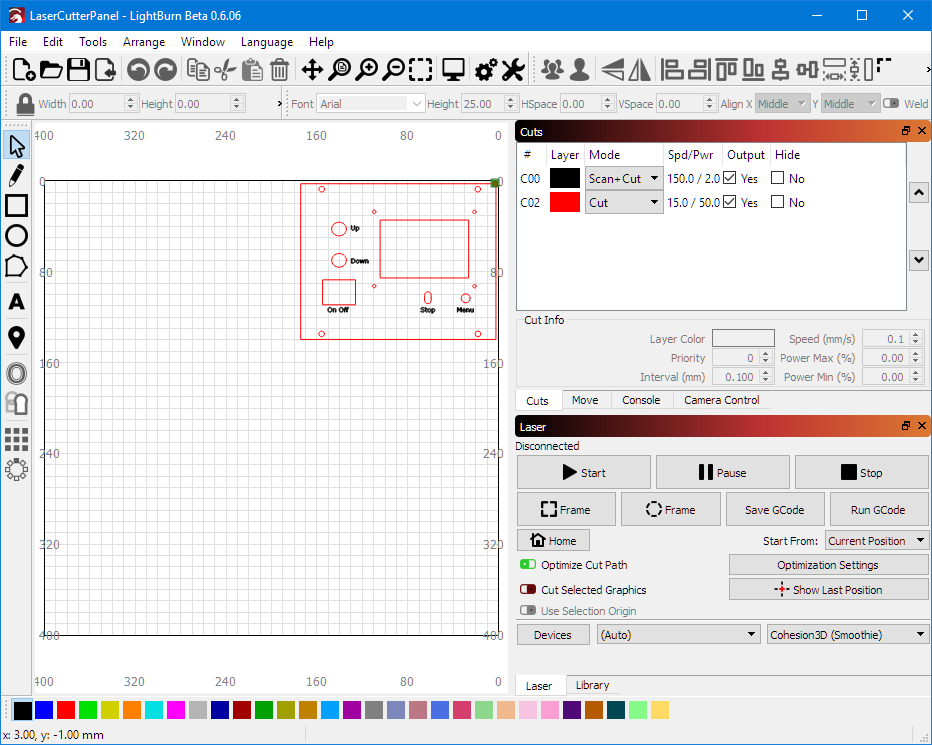
LightBurn Beta 0.6.06
With Lightburn I can jog the laser head and assign different layers/colors with speed and power modes.
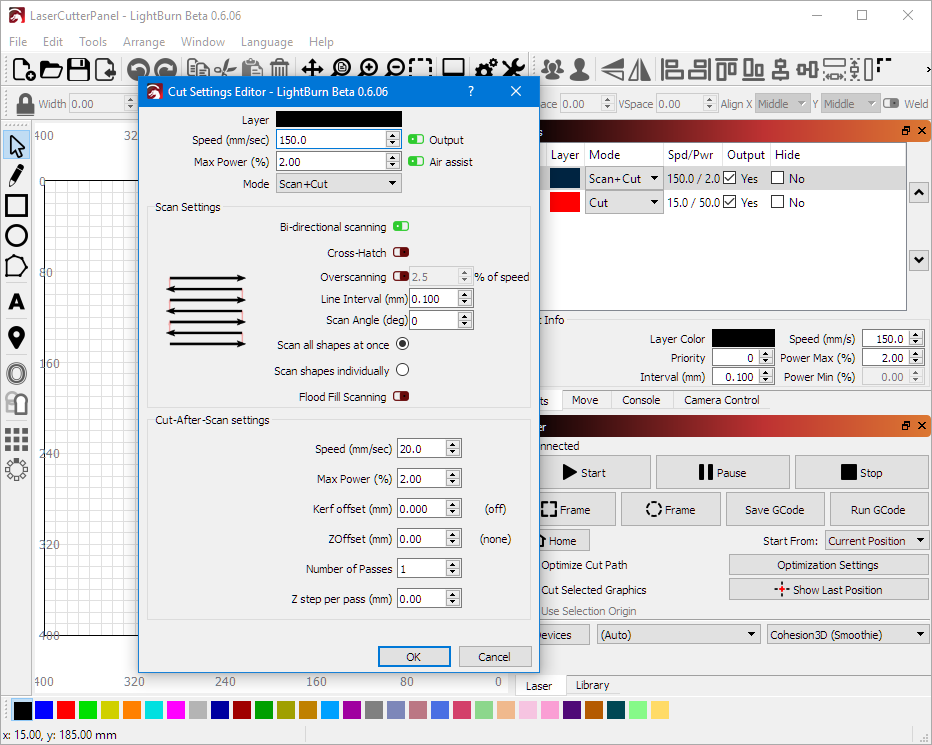
Scan and Cut Settings in LightBurn
Exactly what I was looking for :-), and it has camera and rotary device support too:
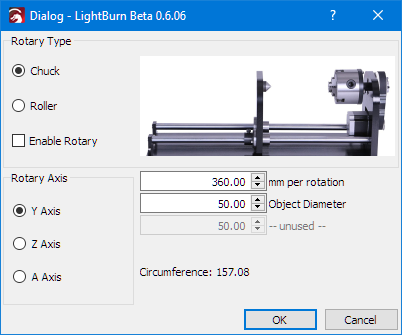
Rotary Device Support
I was able to import my Inkscape laser cut designs into LightBurn. Lightburn includes editing functionality, but for now I prefer to use Inkscape for editing. Then I import the design into Lightburn to send it to the laser machine.
Summary
This has been a major update to the laser cutter: a new controller board with graphical display, plus new laser controller software running G-Code with the Smoothieware firmware on the Cohesion 3D Mini. The previous software and hardware was working, but now I have a very fine tuned and powerful controller for my laser cutting and engraving work. I can run jobs with variable speed and laser power. The Smoothiware configuration still needs some tweaking as I want to run the laser with even higher speed. Compared to the original board/software I can run jobs faster with properly moved laser head around corners, so this alone was worth the time to make that upgrade.
Happy Upgrading 🙂
Links
- Design on Configuration Files used: https://github.com/ErichStyger/mcuoneclipse/tree/master/LaserCutter/Cohesion3D
- Cohesion3D K40 Laser Replacement board: http://cohesion3d.com/cohesion3d-mini-laser-upgrade-bundle/
- Getting Control over a 50 Watt CO2 Laser Cutter from China
- Cohesion3D Mini Pinout: https://cohesion3d.freshdesk.com/support/solutions/articles/5000721601-cohesion3d-mini-pinout-diagram
- K40 Laser Upgrade Guide with Cohesion3D Mini: https://cohesion3d.freshdesk.com/support/solutions/articles/5000726542-k40-upgrade-with-cohesion3d-mini-instructions-
- LightBurn Trial Software: https://lightburnsoftware.com/pages/trial-version-try-before-you-buy
- K40 Whisperer: http://www.scorchworks.com/K40whisperer/k40whisperer.html
- Inkscape: https://inkscape.org
- Smoothieware: http://smoothieware.org/

This is nicely written.
I knew there were “larger than k40 but still desktop (not on wheels)” 50w machines with the M2Nano but I thought they were all blue and white. Some even have a 36v PSU which has prompted me to consider a board that supports 36v instead of just 24v that the current C3D boards support (technically 30v is the currently stated max and caps start exploding at/ above 35v).
I might suggest swapping out the links for the “Cohesion3D Mini Laser Upgrade Bundle” so that anyone learning from this knows exactly which thing is the drop in upgrade (and not just the bare board): http://cohesion3d.com/cohesion3d-mini-laser-upgrade-bundle/
Cheers!
Ray | Cohesion3D
LikeLike
Hi Ray,
thanks! 🙂
And I have updated the links (thanks for that suggestion).
About the color: The picture of the machine I ordered was ‘white and blue’ too, but what I have received was ‘red and grey’ which I have found nicer.
About the voltage: the M2Nano has ’24V, max 28V’ written on the board (see https://mcuoneclipse.files.wordpress.com/2017/08/m2-nano-laser-controller-board.png). I don’t have any other M2Nano board, so I cannot tell that this is the normal case or not.
Cheers,
Erich
LikeLike
Cool!
I feel this could be something for a Summer project! 🙂
Thanks for sharing, Erich!
LikeLike
Actually it should be a weekend project only. If you need any of the configuration or design files, let me know.
LikeLike
Erich, you are a good man, as usual!
Thanks!
I shall contact you in case such a week-end project should come ’round. 🙂
LikeLike
I bought the same machine based on your earlier post. I got it a few weeks ago and I’m really enjoying it (although importing it into the US costs almost as much as the tool).
Is there any chance you can add your .dxf or .svg for the panel to the links? I want to cut the panel before I try doing the upgrade.
Also, FYI – My lighted power switch died within 1 week of plugging in the tool. It is stuck in the ‘on’ position, so I just use the e-stop to energize the tool. I’ll let you know a part number if I buy a replacement. Seems like they cut some corners on switches.
~Ed
LikeLike
Hi Ed,
sure, I have posted the files on GitHub: https://github.com/ErichStyger/mcuoneclipse/tree/master/LaserCutter/Cohesion3D
My power switch is still fine, but I probably might replace the bed up/down buttons (or better: have the bed auto-leveled (but thats something bigger)).
LikeLike
That’s great! You are just a master! Now is it worth waiting for the review on the turning device? 🙂
LikeLike
Thanks :-). As for the turning device: I have not decided if I should buy one or build one. Buying one from China seems to have shipping costs too high for me.
LikeLike
Hi Eric,
Thanks for this great post. I have a similar sized machine that also used a M2 board. Your post and instructions convinced me to also swap out my M2 board. I got my board a few days ago and swapped it out successfully. I have been wondering though, what did you do with the old display that manually controlled the power? Did you just disconnect it, or is it simply mounted on the inside and set to 100% power?
thanks,
James
LikeLike
Hi James,
initially I had the display inside the machine with 100% power set (as you said), but then I realized that this is not necessary and potentially conflicts with the PWM from the Cohesion3D mini board. So I removed the display completely and I’m driving now the power with the LightBurn software and Coehsion board alone. Works great.
LikeLike
Very well put together blog. I am about to upgrade my 4060 80W Chinese machine with the Cohesion3D as well. You made it easy for me just to follow and take advantage of your experience. I’d like to get more details if you’re willing to share anything you think I can help me to upgrade my unit. I.e configuration and design files
Also did you or are you planning n adding the rotation device? This’s is one thing I’m definitely interested to add to the unit!
Thank you for your time and hard work!
LikeLike
Hi John,
I have put my configuration files on GitHub already: https://github.com/ErichStyger/mcuoneclipse/tree/master/LaserCutter. So have a look.
I did not make much progress about the rotation device. I first wanted to order one from China, but they are rather expensive and shipping costs seem to be very high.
So I ended up looking at a DIY version, but I have not decided on it yet.
LikeLike
Pingback: Replacing a cheap Chinese CO2 Laser Tube | MCU on Eclipse
Pingback: Lasercut Angel Sweets Box | MCU on Eclipse
Pingback: Steampunk Lasercut Enclosure for Raspberry Pi | MCU on Eclipse
Pingback: DIY Wireless Magnetic Levitating Moon Lamp | MCU on Eclipse
Pingback: World Stepper Clock with NXP LPC845 | MCU on Eclipse
Pingback: DIY ‘Meta Clock’ with 24 Analog Clocks | MCU on Eclipse
Pingback: DIY Portable Video Conference, Sharing and Teaching Device | MCU on Eclipse
Pingback: Laser Cut Advent Calendar 2020 | MCU on Eclipse
Pingback: MetaClockClock Build Instructions | MCU on Eclipse
Pingback: Advent Calendar for 2021 | MCU on Eclipse
Pingback: DIY Split-Flap Display | MCU on Eclipse