
What is the life span of a cheap Chinese CO2 laser tube? I mean: how long can I use one these (aka K40) laser engraver/cutter tubes as used in that 50W machine I have? I have used my machine for over a year for now, and I don’t have hour meter, but I estimate it have used it for about 500 hours. I don’t have a data sheet of the tube used inside my machine. Discussions on the internet estimate the live span from DOA (Dead On Arrival) to ‘a few months with moderate usage’ up to 3000-5000h’. Well, whatever it would be: my laser cutter stopped working two weeks ago. Here is how I got it back operating again….

New Laser Tube on the Bench
I never run the laser cutter unattended. The machine stopped working while cutting a 4 mm plywood sheet: I saw it cutting fine, and in the middle of the job the beam did not ct any more with the head still moving. While I was wondering about this for a few seconds (problem with the job? Wrong settings? Did I reduce the laser power to much at this sequence?), the machine started to produce a strange screeching noise. I have hit immediately the emergency stop button to shut down the machine. Actually it was the first time I had to use that button.
It was hard to locate the source of that screeching sound. It happened when I fired the laser, so I concluded it must be either the laser power supply or the CO2 tube itself.
A reader of this blog had mentioned to me that in his laser machine (from the same vendor), the power supply stopped working after a few months. So I thought that could be my problem too.
Here are pictures from the 50W Laser power supply I have:
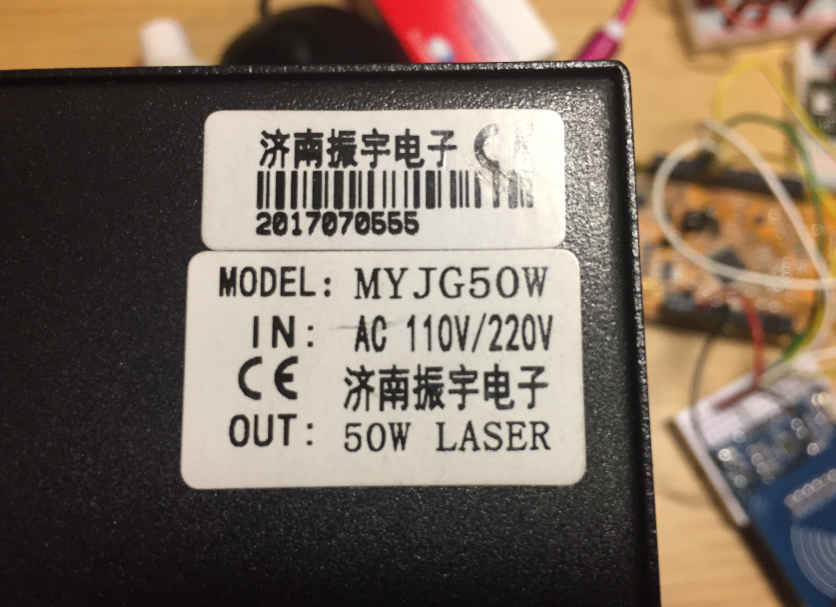
Laser Cutter 50W Power Supply
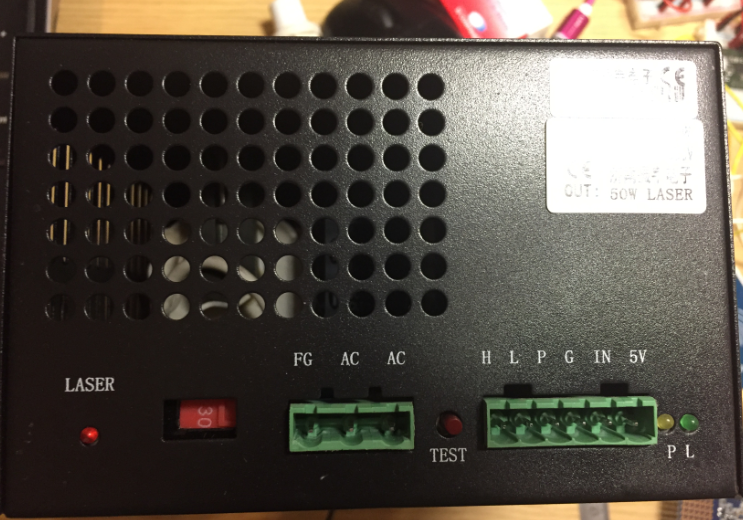
Laser Cutter Power Supply
External and internal visual inspection of the power supply did not show any obvious failure point. I ordered a new power supply: maybe it is good to have a second one at hand, right?
Over the course of the following days, while the power supply was on its way to me, I researched possible failure points and tests. A simple arcing test (be careful!) showed that the power supply seems to operate as it should. But that arcing sound was exactly what I was hearing from the machine.
I verified all the cables and connectors. Closer investigation revealed that the arcing came from the Anode connection of the laser tube.

Laser Tube Anode
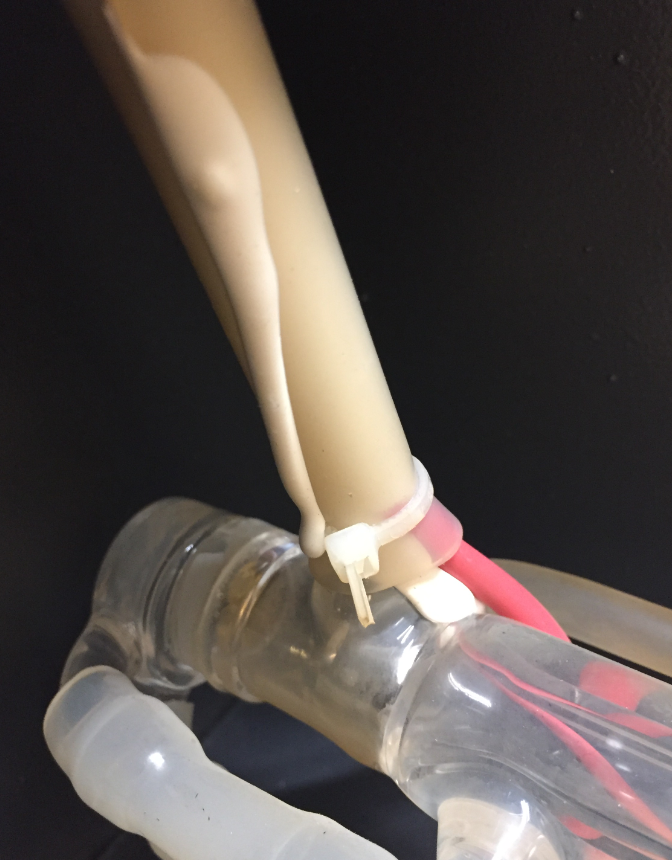
Laser Tube Anode Connection
There was no obvious sign what could be wrong with the connection on the outside. I decided to inspect the connection and removed the cable and isolation material.
Laser Tube Anode Cable Removed
I expected that the high voltage wire would be soldered to the anode as shown in the video below:
But it turned out that the wires were just wrapped around the anode. The anode is kind of graphite (?) material, so in general really hard to solder it in a way the cable would be really connected, or I might destroy the tube with to much heat. So maybe there was connection problem and the arcing is inside the connection?
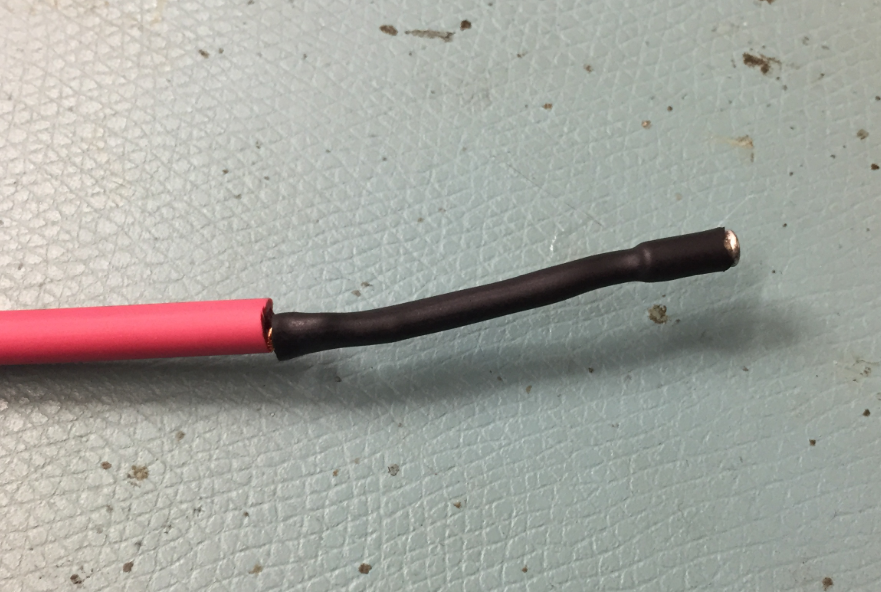
Cleaned the anode and soldered a thin wire to it (actually the solder connects with the wires but not to the graphite itself).
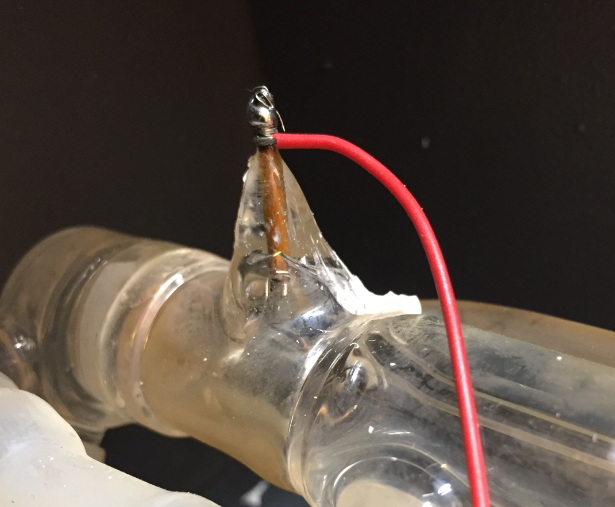
Thin Wire Soldered
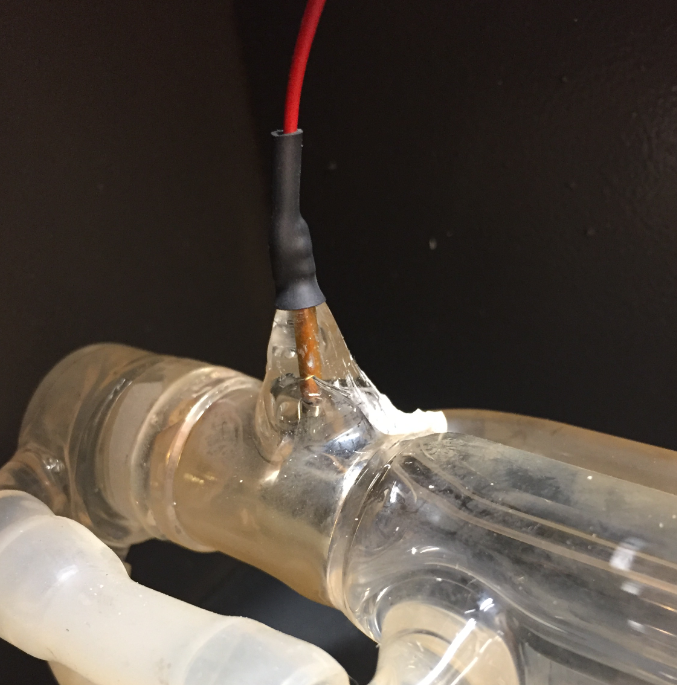
Heat Shrink Tube
The thin red wire gets soldered to the high voltage cable. Multiple layers of heat shrink tubing and electrical isolation tape, including an outside silicon tube was used to properly isolate it with a test run. Fired the laser, and still the same problem.
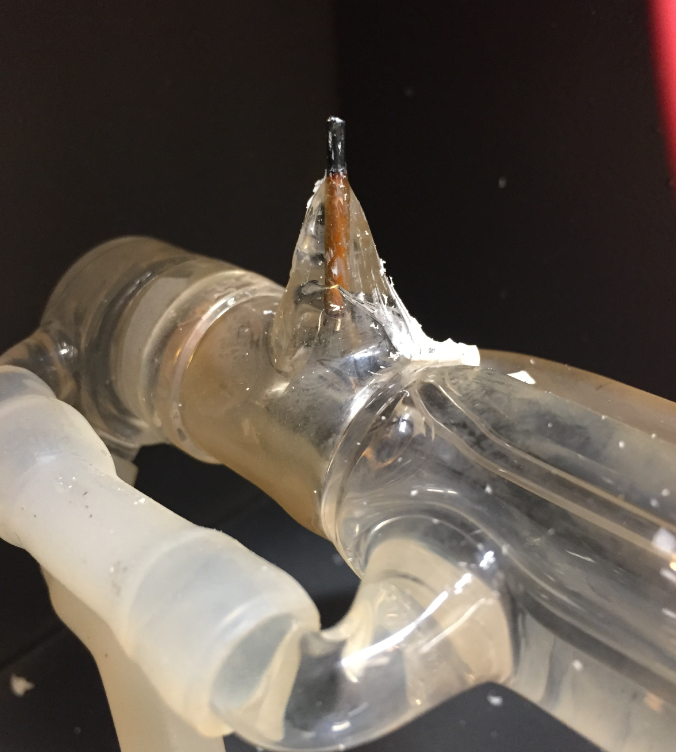
So what could be the problem? I noticed an orange film (bio film?) inside the tube. I’m changing the de-ionized water (with a bit anti-algea in it) every 2-3 months, maybe this was not frequent enough? Changing the cooling water did not help, and I was not able to observe any arcing in this area.
A closer inspection of the anode connection inside the tube to the anode ring in the tube showed that the solder joint might be the problem and not making contact any more?
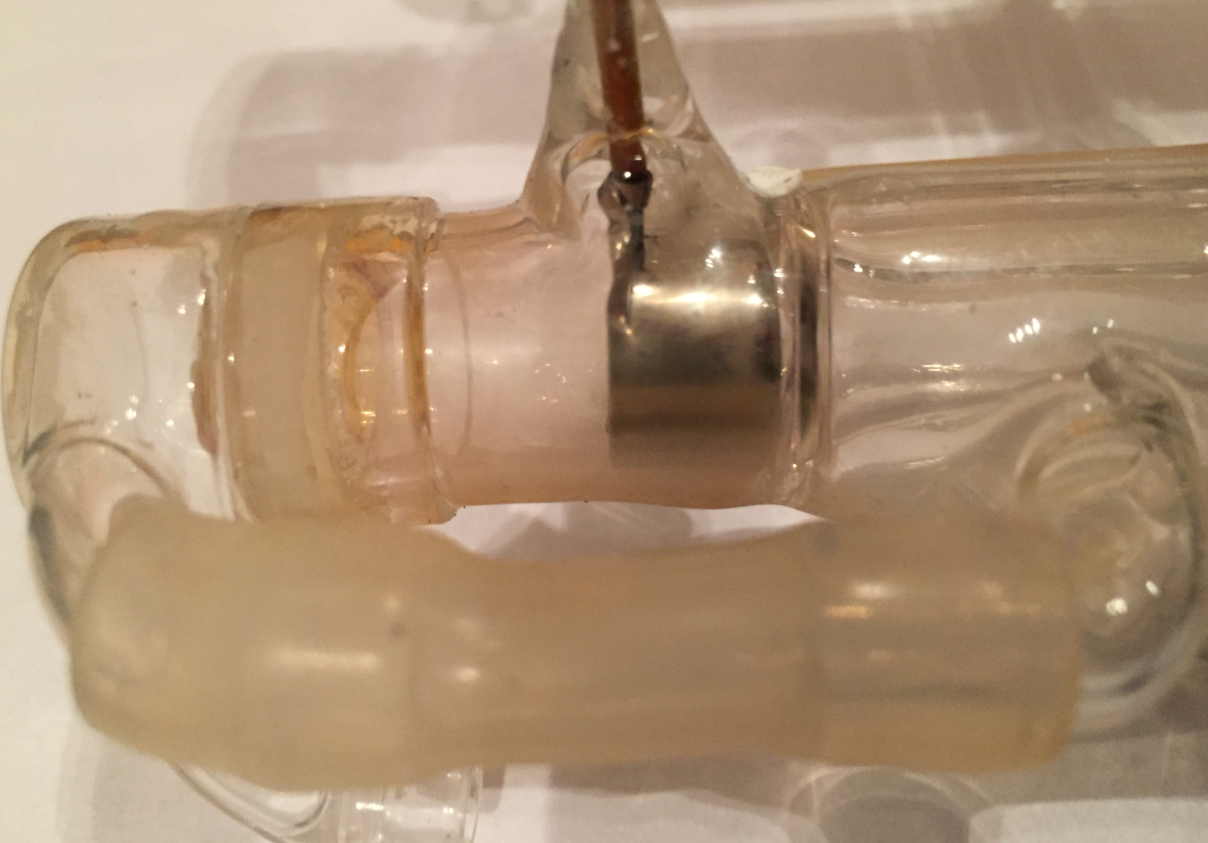
Anode connection
Anyway, I reached the point to order a replacement tube.
Within three days (wow, that was FAST from China) the new tube arrived from Cloudray, very well packaged and unbroken (that was my biggest fear). The picture below just shows the tube inside a package which was inside a larger box.
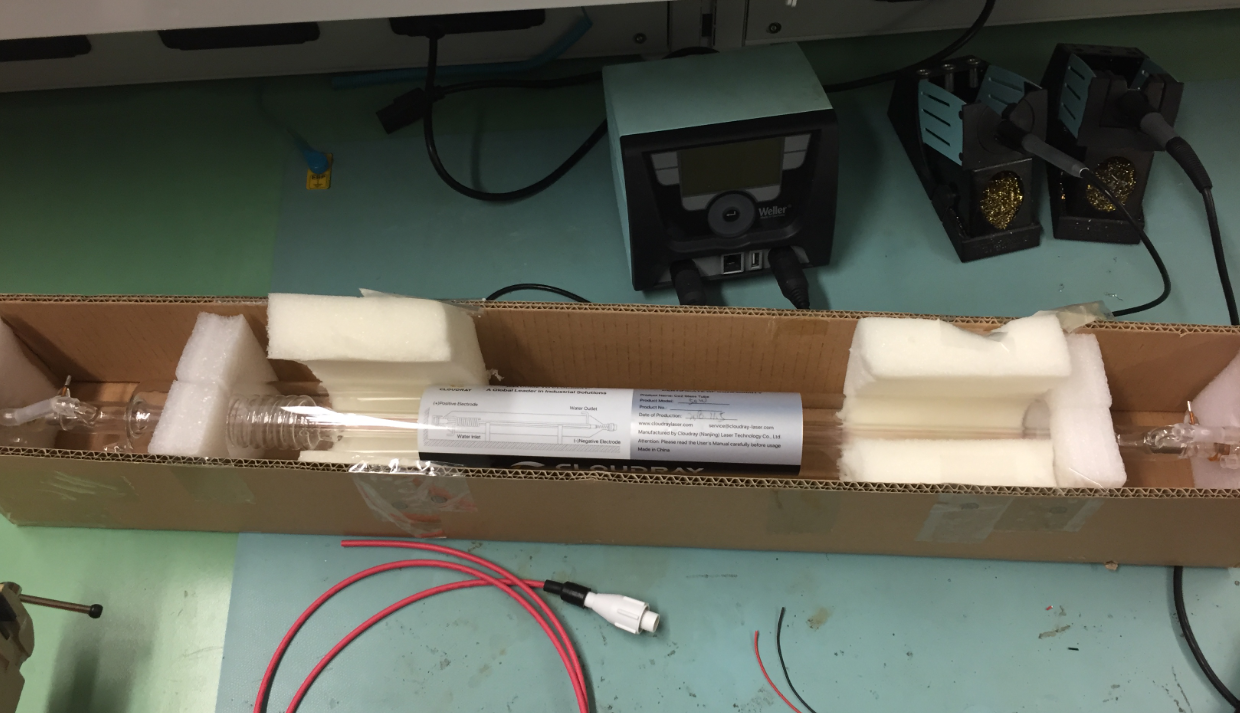
New Laser Tube
But how to make the connections? The new tube had this graphite style connection point too:

New Tube Anode
I was worried about breaking the tube with too much heat. The solution (thanks to a hint from Christoph Z.) was to use a special precision connector socket (Mouser part number 571-1-5050871-9), exactly what I needed:

AMP Connector (Source: https://www.mouser.ch/datasheet/2/418/NG_CD_5050871_A2-1251367.pdf)
The connector perfectly fits to the anode and cathode connection points of the new tube:

Connector
That way I have a good contact and still can remove the cables if needed.
Soldering thin wires to the outside of the connectors:

Thin Wires connected to Connectors
First layer of shrink tubing added and connected to the high voltage wire:
Connection to High Voltage Wire
Below how plugs to the tube, more layers of tubing to be added:
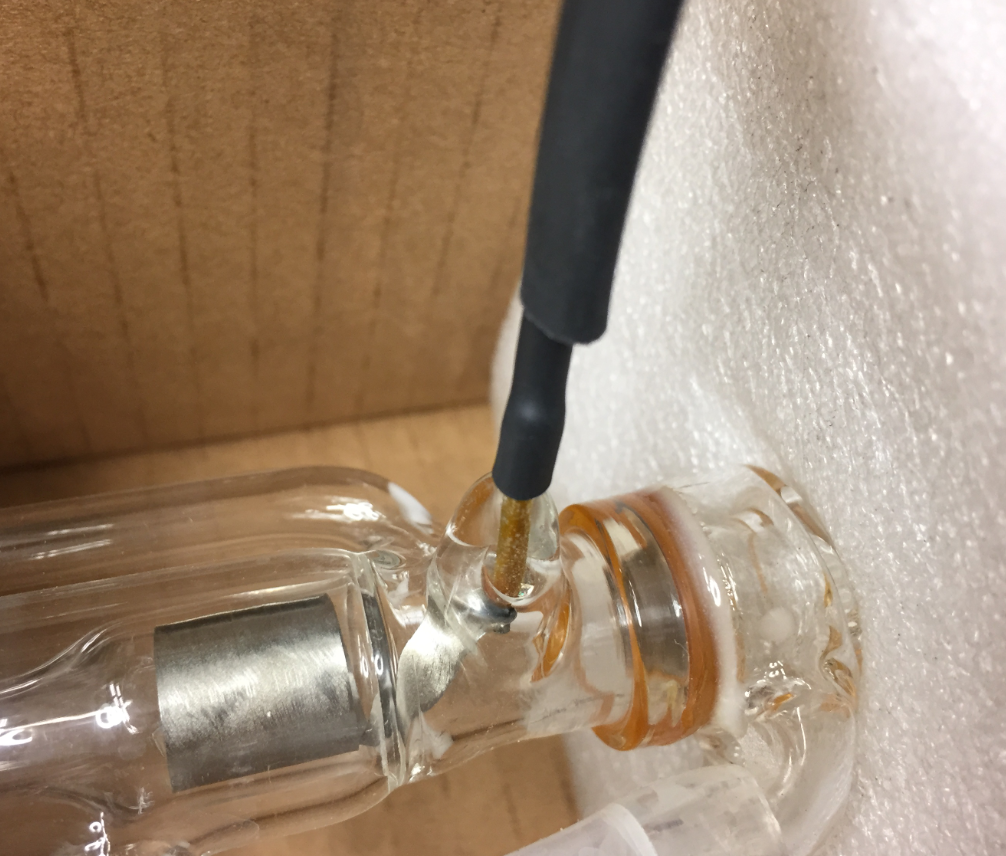
New Tube Anode Connection
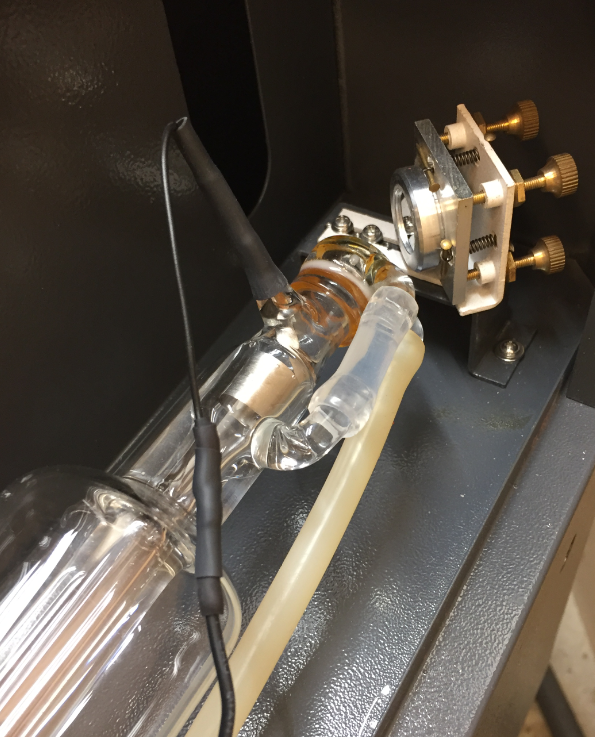
Final connection with more shrink tubing and an extra silicon isolation tube:

Tubing around high voltage anode
Laser Cathode connection:
New Tube Cathode Connection
The good news: the new tube works like a charm :-). I had to spend another 30 minutes to re-calibrate the mirrors, and the laser cutter was working again :-).
Conclusion and lessons learned:
- I have used the laser cutter probably around 600 hours. I kind of expected a life span of around 1000 hours, but without a data sheet this is a hard to verify.
- I do not run the tube a 100% power and have limited to 80%, so I don’t believe I have overpowered it which usually degrades it faster.
- I’m using an industrial chiller (see 50W Laser Cutter Upgrades), so over-temperature should not have been a problem.
- The tube immediately stopped working. I did not see any degradation over time. That coating inside the tube around the anode side is worrying me. Maybe I should exchange the cooling water more often?
- Having a spare/replacement tube at hand would be a good thing. And maybe a spare power supply too :-).
- I know now how to replace a CO2 laser cutter tube 🙂
Happy Replacing 🙂

As usual, another great article to keep in mind for future reference.
Thanks Erich for sharing your experiences with us! 🙂
LikeLike
Excellent article, sometimes simple idea (the way to fix the wire) are not where we think !
LikeLike
Thanks, and yes, indeed: I learned a lot of new things the past days that way.
LikeLike
I just reread your original post on getting the laser. Maybe if I have a good holiday season I’ll finally order one of those.
I’ll have to do a write up on my laser marking system. I picked it up at an asset liquidation auction for under $200 and managed to find the parts I needed to get it working on eBay – after building some new cables and replacing some failed components. It’s only 5 watts average, but it marks aluminum and steel very well. It’s an Nd:YAG laser and if the meter on the front can be believed it has over 19,000 hours on it, but it’s still going strong.
LikeLike
$200 for a Nd:YAG laser sounds like a really, really good deal, even with 5W. I have not used my laser for metal engraving: I want to be careful about possible reflections. But I have read that engraving anodized aluminium should be possible, so maybe I’ll give that a careful try.
LikeLike
It’s a Q-switched laser so it has really high peak power for short pulses. It’s also surprisingly fast and high resolution – last night I was experimenting with etching rocks, and it’d produce a whole line of readable text in a fraction of a second, with a height of about 0.25mm.
And the price was really good, because the auction house is bad at this stuff. They threw out the PC with the special DSP card that drives the laser, so I had to scrounge one on eBay, that didn’t have the same connector and had some dead PTC thermistors. I got my CNC milling machine from the same auction house for about 1/2 or 1/3 what it should have sold for and I made $3,000 profit on the rest of this latest batch, selling off other stuff on eBay that I don’t need. Also picked up a $250,000 space station component for $75. I’m not sure they were even supposed to be selling that.
Anyway, invest in some good laser goggles suitable for whatever wavelength you’re using. I’ve got a used laser dealer friend who sent me two pairs.
On anodized aluminum, this laser makes nice sharp white marks – good enough that for some enclosures I’m thinking about switching from the UV flatbed printer. (Which I still need to finish my write up on – I think anyone doing small scale electronics manufacturing should be looking at these printers.)
LikeLike
I have invested money in a pair of good CO2 laser wavelength goggles and I always wear them when using the laser. I looked at the UV flatbed printers (you gave me that hint) but they are rather expensive, so while intersting, it is out of reach for me right now.
LikeLike
If you can build a DIY pick and place machine, a DIY flatbed printer made from an Epson R330 ought to be within your capabilities – it’d definitely take some time, though.
My marking laser has a nice enclosure with a laser-safe window, but I wear my goggles anyway out of an abundance of caution. I’d rather not trust the safety interlocks of an unknown surplus laser.
The enclosure didn’t have any kind of adjustable Z-axis, just a pedestal for mounting fixtures, so I spent the afternoon disassembling a scrapped 3D printer and partially rebuilding it inside the laser enclosure. It’s coincidentally almost a perfect fit, and now I can adjust the platform height. Looking forward to adding a rotary axis to it when the parts come in from China. I took a hint from your laser post and added some white LED lights inside, too, so I can see what I’m doing.
LikeLike
Pingback: Fail of the Week: Did My Laser Cutter Tube Really Burn Out? | Hackaday
Excellent article, and very instructive about how to handle the laser tube.
LikeLike
Thanks, I’m still trying to find out what broke my previous tube.
LikeLike
Co2 power supply cant be connected with my laser so what do you think i can do?thankyou
LikeLike
You need to read the data sheet of your power supply and your laser system/tube if and how you can connect them. Be warned that you have to understand 100% what you are doing, otherwise the consequences will be very bad.
Best if you ask the company who sold you the laser for advice.
LikeLike
My laser machine power slow ..whats problem now??
LikeLike
not sure what you mean with ‘power slow’? If your laser is not at maximum power, that can have different reasons. Try adjusting/verifying the offsets, check the mirrors, verify the settings in your controller.
LikeLike