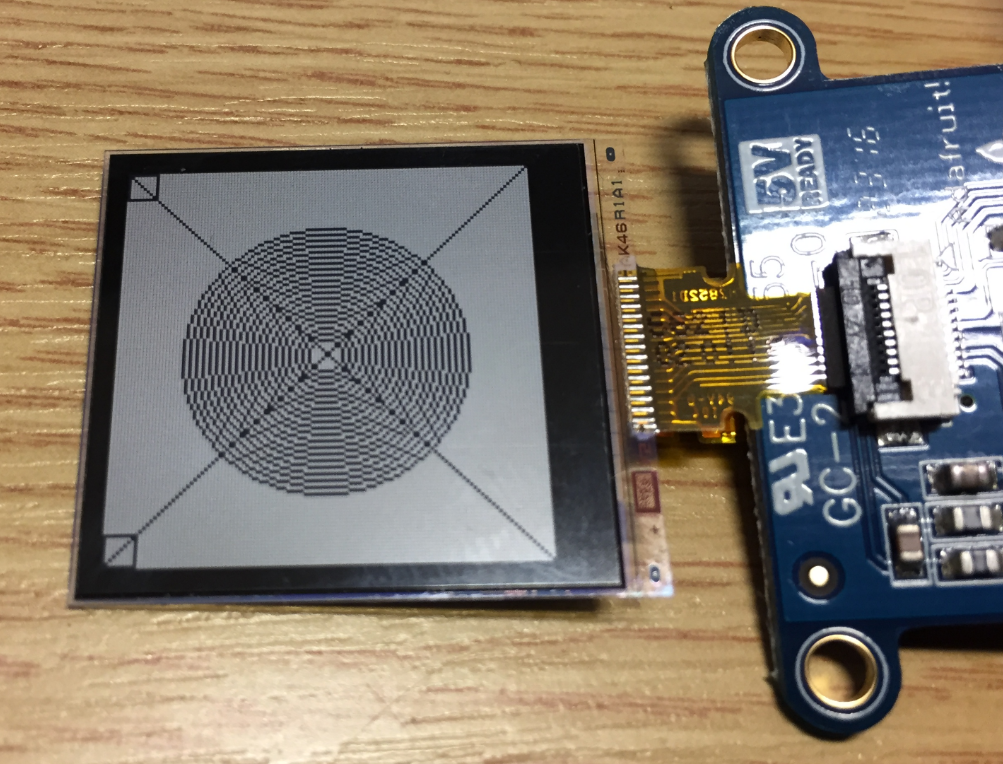
I have used E-Ink displays in projects three years ago, but from that time the technology has greatly evolved. That time displays were hard to get, expensive and difficult to use. Now things seem to change with e-ink displays available to the maker market :-). I’m able to get a 128×296 pixel e-paper display for $10! And for little more money I can have displays with black/white/red colors!
Tag Archives: tinyK20
Modifying the Teensy 3.5 and 3.6 for ARM SWD Debugging
Looking for a small, inexpensive ($25-30) ARM development board (say 120-180 MHz ARM Cortex-M4 with FPU, 512kB-1MB of FLASH and 256 KByte of RAM? Then have a look at the Teensy 3.5 and Teensy 3.6 by PJRC/Paul Stoffregen:
The only problem? it is not possible to debug it :-(. At least not in the traditional sense. This article is about how to change the board to use it with any normal SWD debugging tool e.g. Eclipse and the Segger J-Link :-).
Upgrading to Sharp 128×128 Pixel Memory Display
In “Low Power LCD: Adafruit Breakout Board with Sharp Memory Display” I used a 96×96 Sharp Display (LS013B4DN04) with the Adafruit breakout board, but because that one seems to be EOL (End Of Life), I searched for a replacement. I have found the 128×128 pixel version (Sharp LS013B7DH03), and best of all, it is pin compatible :-). With a small tweak of the driver, it works :-):
Low Power LCD: Adafruit Breakout Board with Sharp Memory Display
Many projects benefit from a small display as a user interface. For very low power applications this is usually a no-go as the display needs too much energy. I have used e-paper displays from Kent: while these e-paper displays do not need any power to keep the image, changing the display content is not for free, plus is very slow (around 1 second needed to update the display). So I was looking for something low power and fast for a long time, until Christian (thanks!) pointed me to a display from Sharp: both very low power and fast:
MINTomat: World’s Most Complicated Bubble Gum Automata?
How to fascinate kids for technology? Show them that engineering is fun :-). At the Lucerne University of Applied Sciences and Arts we have created the ‘MINTomat’: a robotics system for STEM activities rewarding interaction with bubble gums:
Yes, pretty over engineered compared to a normal bubble gum automata, but that’s part of the fun :-).
Enclosure for the Remote Robot Controller with LCD Display
The first enclosure for the INTRO robot remote controller board (see “INTRO Robot Remote – First Production PCB“) is ready, and it is looking good:
INTRO Robot Remote – First Production PCB
After the first prototype (see “Prototype of Wireless Remote Controller with NXP Kinetis K20“), we have received the boards and populated a first PCB to verify everything is working properly.
3D Printed Gameboy and Remote Controller with tinyK20 Board
As a remote controller for the Sumo robot (see “Zumo Robot with Magnetic Encoders“) we have used so far a combination of NXP FRDM-KL25Z board and a Joystick Shield (see “Joystick Shield with nRF24L01 driving a Zumo Robot“). That solution was not ideal, so this weekend I created a 3D printed prototype:
nRF24L01+ 2.4 GHz Wireless Connectivity with the tinyK20 Board
I’m using the tiny and inexpensive Nordic Semiconductor nRF24L01+ transceiver (see “Tutorial: Nordic Semiconductor nRF24L01+ with the Freescale FRDM-K64F Board“) in many projects: it costs less than $3 and allows me to communicate with a proprietary 2.4GHz protocol in a low power way (see “IoT: FreeRTOS Down to the Micro Amps“). I have that transceiver now running with the tinyK20 board too: