In my previous articles I have used the command line on Linux to build and debug NXP MCUXpresso SDK applications. In this article I’m running code on NXP i.MX RT1064 in RAM or FLASH.

i.MXRT1064 board with LPC845-BRK as debug probe

In my previous articles I have used the command line on Linux to build and debug NXP MCUXpresso SDK applications. In this article I’m running code on NXP i.MX RT1064 in RAM or FLASH.
i.MXRT1064 board with LPC845-BRK as debug probe
There are different ways to ruin a Linux system. For the Raspberry Pi which uses a micro SD card as the storage device by default, it comes with two challenges:
For problem one I do I have a mitigation strategy (see “Log2Ram: Extending SD Card Lifetime for Raspberry Pi LoRaWAN Gateway“). Problem two can occur by user error (“you shall not turn it off without a sudo poweroff!”) or with the event of a power outage or black out. So for that problem I wanted to build a UPS for the Raspberry Pi.

Raspberry Pi with UPS System and tinyK22
The ARM TrustZone is an optional security feature for Cortex-M33 which shall improve the security for embedded applications running on microcontroller as the NXP LPC55S69 (dual-core M33) on the LPC55S69-EVK.

NXP LPC55S69-EVK Board
For the long Easter weekend I have organized a new toy: the NXP LPC55S69-EVK board: a dual ARM Cortex-M33 running at 100 MHz with ARM TrustZone:

LPC55S69 Microcontroller
In “Tutorial: MCUXpresso SDK with Linux, Part 1: Installation and Build with Maked” I used cmake and make to build the SDK application. In this part I’m going to use the command line gdb to debug the application on the board.

Cross-Debugging with GDB
I admit: my work laptop machine is running a Windows 10 OS by default. But this does not prevent me running Linux in a Virtual Machine (VM). Each host platform has its benefits, and I don’t feel biased to one or the other, but I have started using Ubuntu more and more, simply because I have worked more on Embedded Linux projects. While I have used mostly Windows with Eclipse for NXP LPC, Kinetis and i.MX platforms in the past, I started using Ubuntu too from last year with the NXP MCUXpresso SDK. I did not find much documentation about this on the web, so I thought it might be a good idea to write a tutorial about it. So here we go…

Building NXP MCUXpresso SDK on Linux Ubuntu
In the IoT world, it is all about security, connectivity and low power. LoRaWAN with the Things Network is able to connect devices over several kilometers, and I’m running my gateway for it already (see “Contributing an IoT LoRaWAN Raspberry Pi RAK831 Gateway to The Things Network“). This tutorial is about building a BLE+LoRaWAN+GPS sensor node with GNU tools and Eclipse:
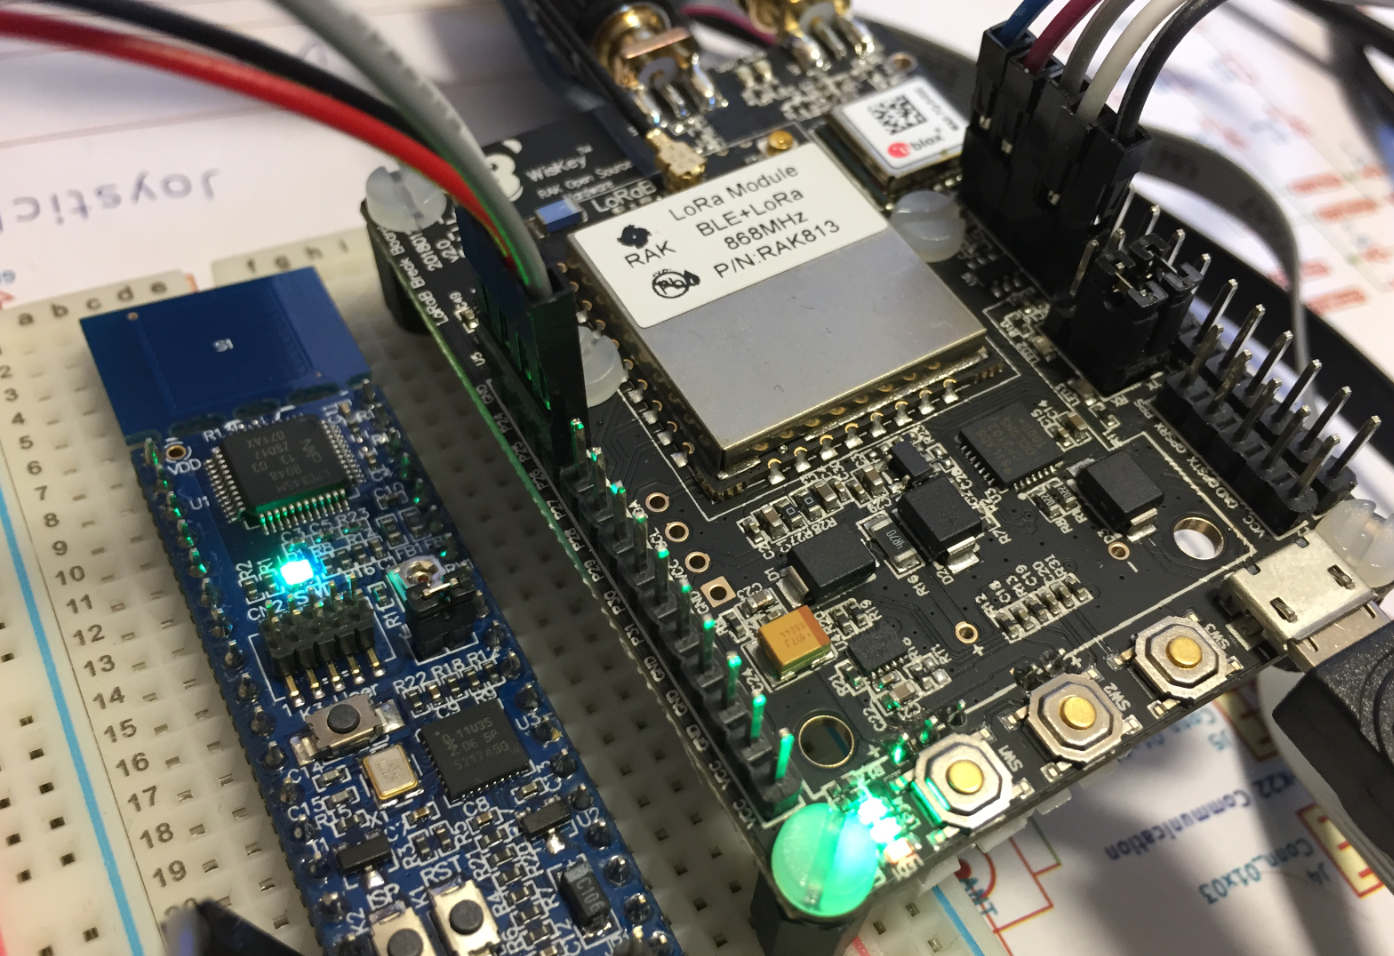
LoRa+BLE with RAK813 and LPC845
In “Debugging the RV32M1-VEGA RISC-V with Eclipse and MCUXpresso IDE” I described how to build and debug applications for the VEGA RISC-V board. In this article I describe how to enable FreeRTOS for RISC-V, based on the latest FreeRTOS V10.2.0 release.
Blinky with FreeRTOS on the VEGA RISC-V Board
For some projects it is not possible to have the device under debug available on my desk: the board might be in another room, on another site or in a place where physical access is not possible or even dangerous. In that case an IP-based debug probe (see Debugging ARM Cores with IP based Debug Probes and Eclipse) is very useful: as long as I can access its IP address, that works fine. It is an excellent solution even if the board is moving or rotating: hook it up to a WLAN access point and I still can use it as it would be on my desk.
But what if I have a debug probe only connected to USB? This article shows how to turn a USB debug probe into a IP-based debug solution: that way I can easily debug a board from remote, connected to the network:

IP Based Debugging with USB Debug Probe
On Friday a new release of the Eclipse Oxygen based NXP MCUXpresso IDE V10.3.1 has been made available. The IDE supports MacOS, Linux and Windows 32/64-bit and will be 64-bit only going forward.

MCUXpresso 10.3.1 About Information
