
The ARM Cortex cores are everywhere. I like (and use) them a lot. Don’t take me wrong: maybe ARM needs some competition? It is very refreshing to see that something new is getting a lot of attention: RISC-V!

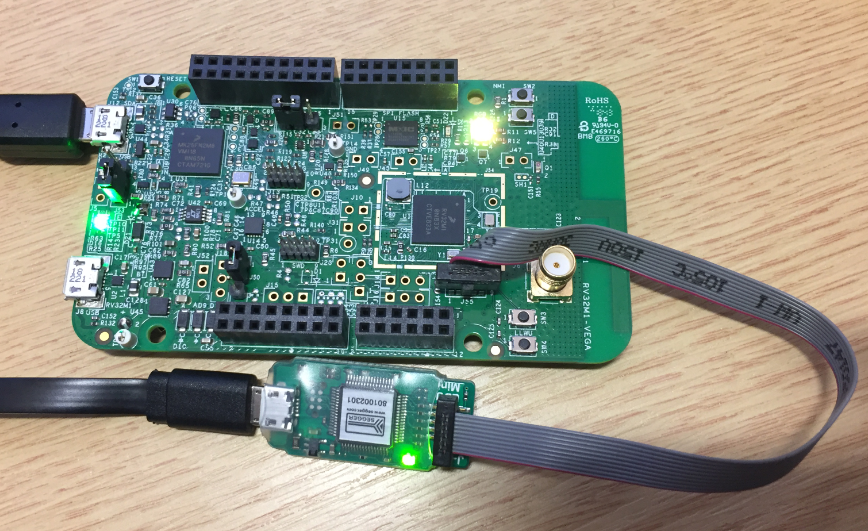
RV32M1 (VEGA)
RISC-V is an open instruction set architecture, and so far SiFive was *the* vendor offering real chips. I’m already using a RISC-V from SiFive (see Open Source RISC – Eclipse with RISC-V on the SiFive HiFive1 Board).
A new RISC-V player showed at https://open-isa.org/. On that site, there was an offer for a free board for which I applied. I nearly have forgotten about this, but after several weeks afterwards I received two boards :-). The website and discussions in the communities indicated it, and the logo on the device confirmed it: it is Freescale (well, now NXP) which produced that device, see https://hackaday.com/2019/02/04/openisa-launches-free-risc-v-vegaboard/. What they have done is creating a community page on https://open-isa.org and this where the board ‘getting started’ points too, and what I have used to set up my environment. It seems that NXP has started a kind of test run ‘under the radar’, which is interesting on its own.
VEGA RV32M1 Board
The board is interesting too. It looks like one of the normal ‘Freedom’ boards on steroids. The board comes with a USB cable, five jumpers and a short ‘getting started’ leaflet.
Compared to the SiFive board, I’m happy to report that this board can be debugged properly with a 10-pin SWD/JTAG connector 🙂
VEGA Board
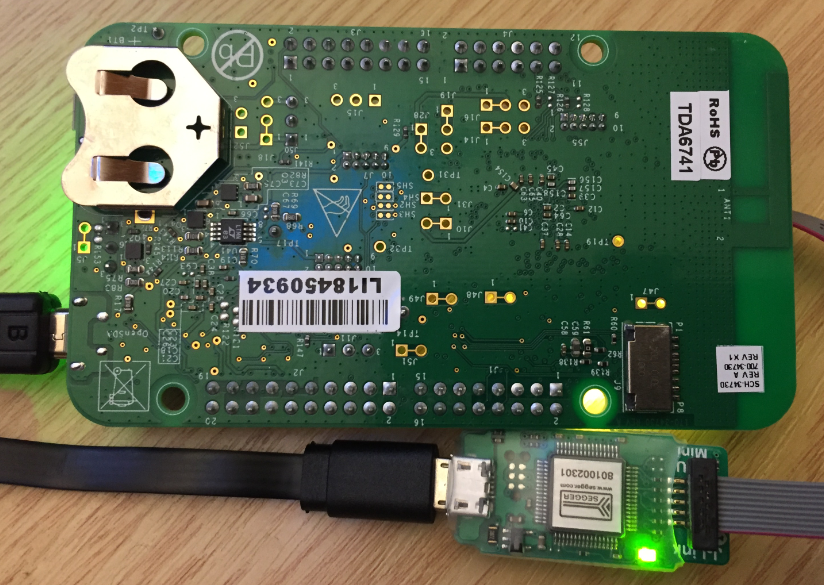
Vega Board Bottom Side
The board is very similar to other ‘FRDM’ (or Freedom) boards from Freescale/NXP. The board features a NXP Kinetis K26 as UART (and possibly Debug? I did not find a firmware) bridge.
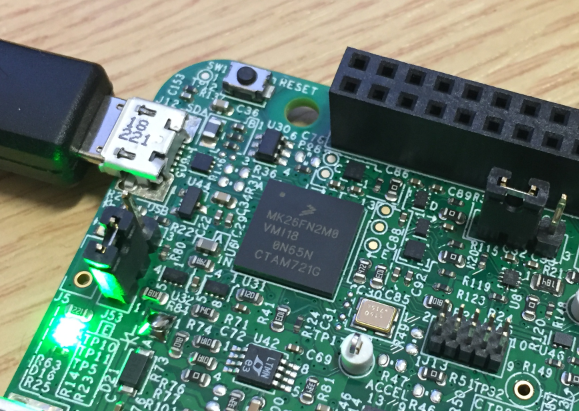
MK26
So I used a SEGGER J-Link Mini to debug the board.
There are a of 4 cores (plus the Kinetis K26) on the board. Which core to boot is selectable, but I have not explored that yet.
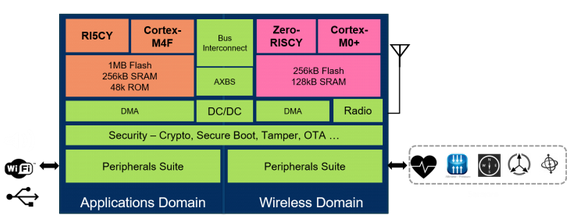
Vega Board Block Diagram (Source: https://www.eejournal.com/article/priming-the-risc-v-pump/)
Because each half (RI5CY/M4F and Zero-RISCY/M0+) share the same bus, it is more like a dual-heterogeneous-core setup. Interestingly, the two RISC-V cores are from the PULP project at the ETH Zurich.
Installation
The ‘Getting Started’ on https://open-isa.org/get-started/ provides videos and basic steps to setup an environment, explaining it for using make files or with a DIY Eclipse IDE. I decided to use the NXP MCUXpresso IDE instead, and that worked very well. I used the MCUXpresso IDE V10.3.1 in this article, and it needs only the GNU MCU Eclipse plugins and a toolchain to develop for RISC-V.
- I assume that the MCUXpresso IDE is already installed, otherwise it is available from http://www.nxp.com/mcuxpresso/ide
- Go to https://github.com/open-isa-org/open-isa.org/releases and download the toolchain and SDK (marked below for Windows).The ARM SDK is optional and only needed to develop for the ARM cores.

rv32m1 SDK and Toolchain
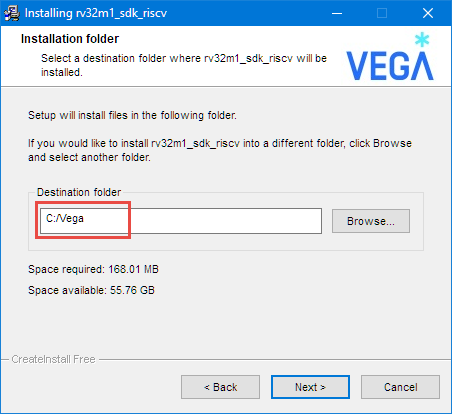
- Run the installer for the RISC-V SDK and install it into c:\vega (which is the default)

Installing RISC-V SDK
- Optionally: Install the ARM SDK into the same folder as above.
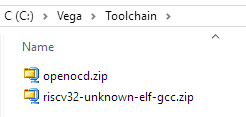
- Create a folder ‘Toolchain’ in C:\Vega and extract the two zip files from the Toolchain zip/archive into it

Toolchain Zip Files
- Extract the content of openocd.zip into a folder named openocd
- Extract the content of the riscv32-unknown-elf-gcc.zip into a folder named riscv32-unknown-elf-gcc
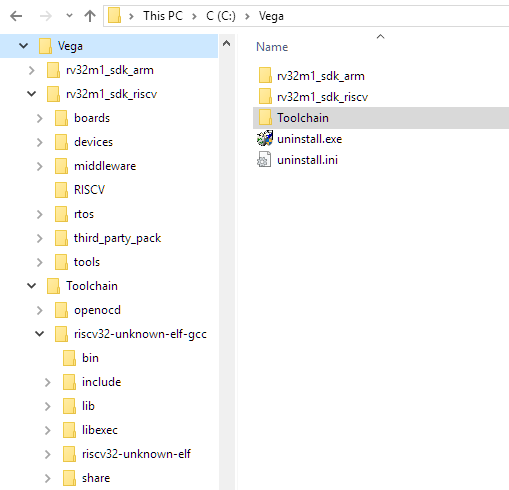
- The installation structure should now look like this:

VEGA Installation Folder
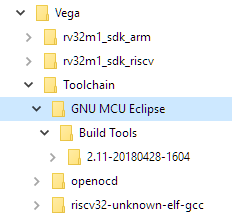
- Windows Build tools (Make, rm): If not already installed: Go to https://gnu-mcu-eclipse.github.io/windows-build-tools/install/ and download the archive from https://github.com/gnu-mcu-eclipse/windows-build-tools/releases, extract it into the Toolchain folder:

GNU MCU Eclipse Build Tools
- In MCUXpresso IDE, use the following URL as update site in Eclipse (Help > Install New software):
http://gnu-mcu-eclipse.netlify.com/v4-neon-updates
and install the plugin(s):
GNU MCU Eclipse Plugins


With this, all the plugins and tools are installed.
Debug Probe
I’m using a J-Link EDU Mini. There are three SWD/JTAG headers on the board: use the one near the RV32M1 microcontroller.
The toolchain comes with a pre-built OpenOCD package which works with a SEGGER J-Link (see https://wiki.segger.com/OpenOCD). To use it, launch the UsbDriverTool:
UsbDriverTool
Then install WinUSB on the J-Link driver. For this, the J-Link has to be plugged into the host:
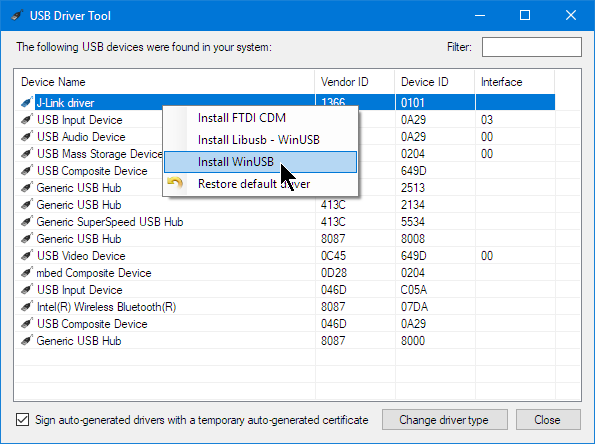
Install WinUSB
NOTE: with doing this, I cannot use the J-Link probes with the SEGGER J-Link software anymore. To use the J-Link again the ‘normal’ way, I have to restore the default driver again:
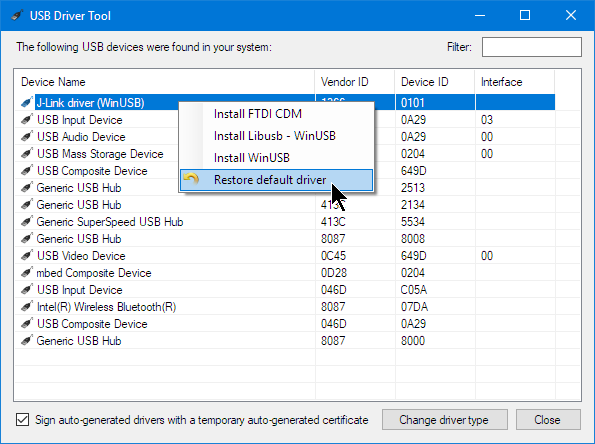
Restore Default Driver
Eclipse Tool Chain Setup
In the MCUXpresso IDE, verify that the Toolchain settings in the workspace settings (menu Window > Preferences):
Global Build Tools Path:
C:\Vega\GNU MCU Eclipse\Build Tools\2.11-20180428-1604\bin

Global Build Tools Path
RISC-V Toolchain:
C:\Vega\Toolchain\riscv32-unknown-elf-gcc\bin
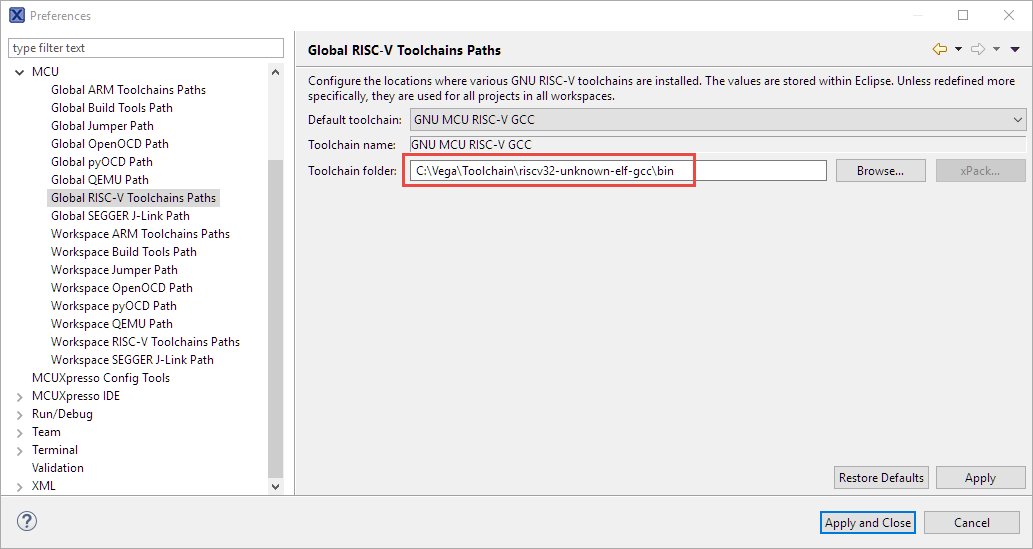
RISC-V Toolchain
OpenOCD:
C:\Vega\Toolchain\openocd\bin
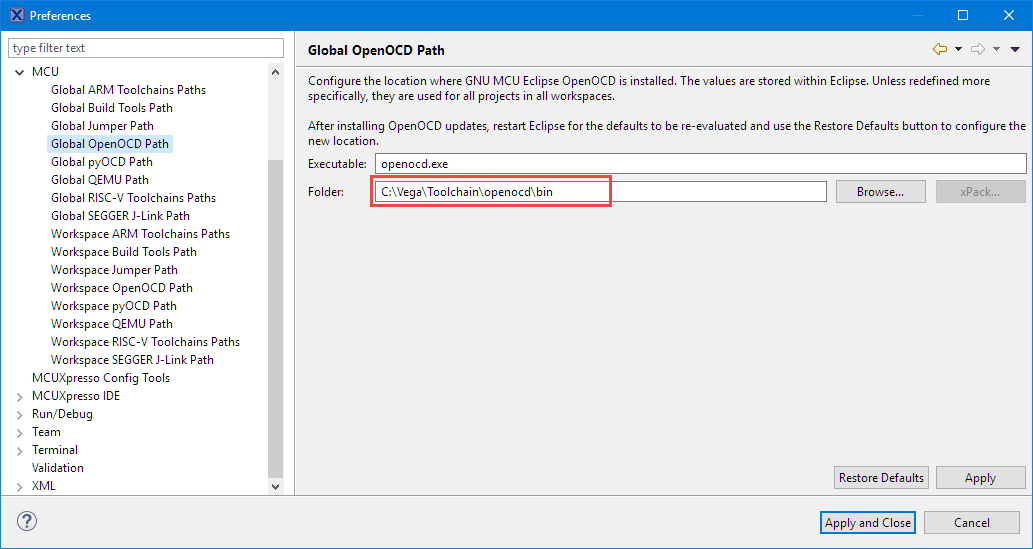
Global OpenOCD Path
Importing Project
Import a project from the SDK, e.g.
C:\Vega\rv32m1_sdk_riscv\boards\rv32m1_vega\demo_apps\bubble\ri5cy\riscveclipse
drag&drop the .project file into the IDE. Because the projects in the SDK are using project relative links, I have to ‘Link’ to it:
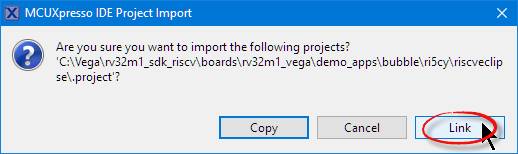
Importing project
With the toolchain setup correctly, this should build fine:

Building project
Debugging
The projects inlcude launch configurations for OpenOCD (Menu Run > Debug Configurations). Verify that the correct openOCD binary is used with its configuration file:

OpenOCD Settings
Power the board with the J8 USB connector:
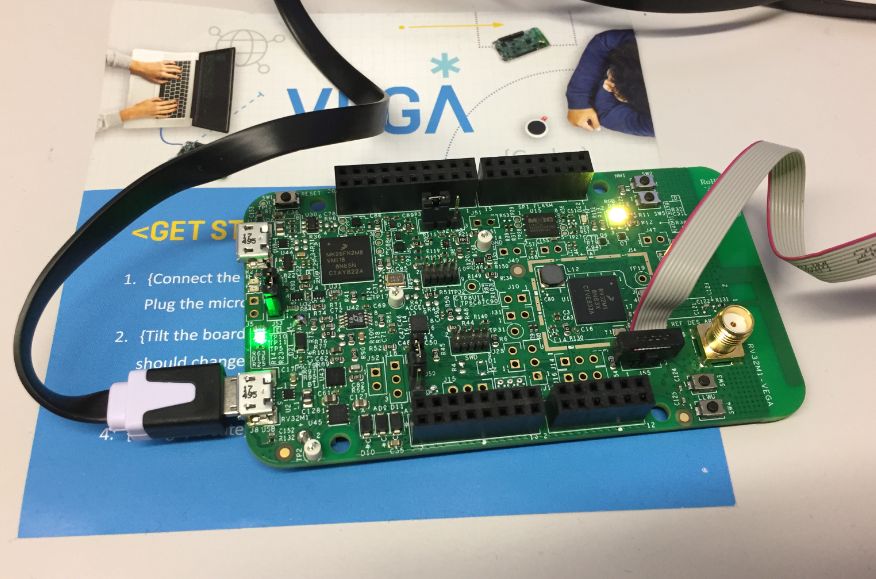
Debugging VEGA Board
With this, hit ‘Debug’ and I am debugging 🙂
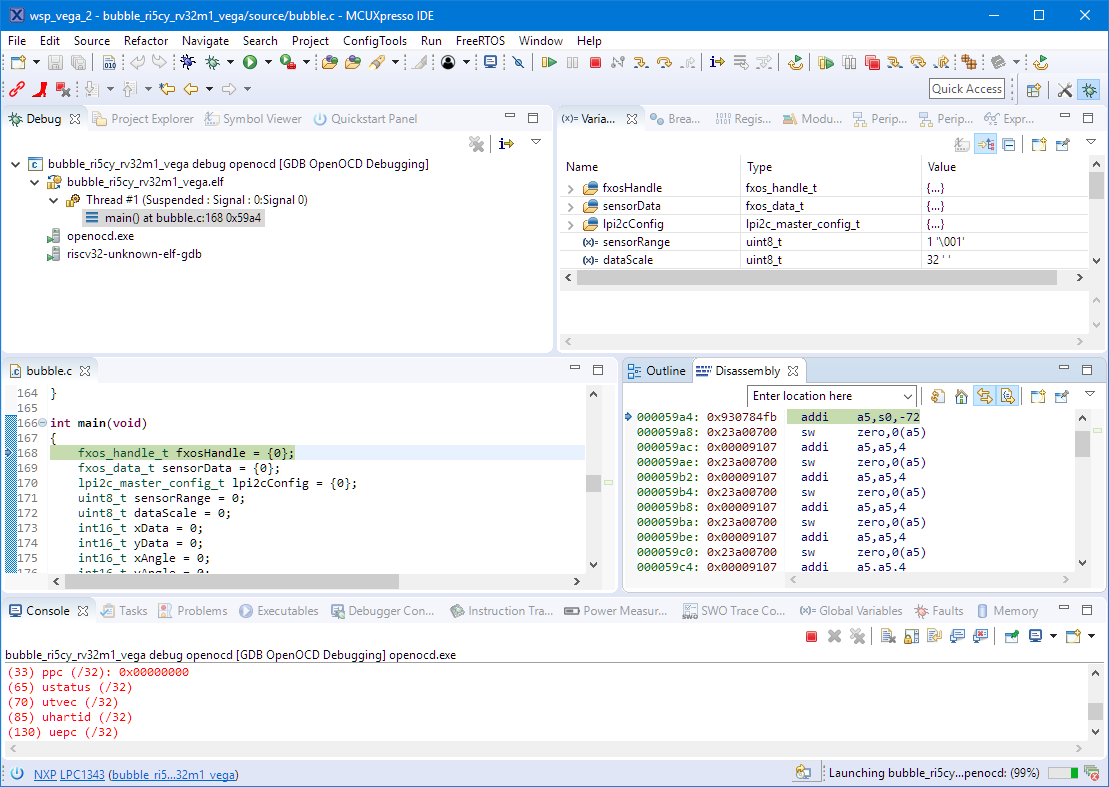
Debugging VEGA Board with OpenOCD
Summary
Using a RISC-V core or as in this case using multiple ones is fun, and I’m glad to see that software and tools are evolving. RISC-V could be the next big thing, but for sure it might take a while to be widely available. According to https://www.eejournal.com/article/priming-the-risc-v-pump/ more boards might be available in the future.
What’s next? There is a new FreeRTOS release available for RISC-V, so I’m going to try that one ….
Happy RISCing 🙂
Links
- https://www.eejournal.com/article/priming-the-risc-v-pump/
- https://open-isa.org/
- RISC-V: https://riscv.org/
- MCUXpresso IDE: http://www.nxp.com/mcuxpresso/ide
- MCUXpresso IDE V10.3.1 available
- Open Source RISC – Eclipse with RISC-V on the SiFive HiFive1 Board
- Hackaday: https://hackaday.com/2019/02/14/new-part-day-a-risc-v-cpu-for-eight-dollars/
- Hackaday: https://hackaday.com/2019/02/04/openisa-launches-free-risc-v-vegaboard/
- PULP: https://www.pulp-platform.org/
- Open-ISA GitHub: https://github.com/open-isa-org/open-isa.org

Hello,
Where is possibte to buy this board?
BR
LikeLike
It would be https://open-isa.org/order/, but they are currently out of stock.
LikeLiked by 1 person
Pingback: Running FreeRTOS on the VEGA RISC-V Board | MCU on Eclipse
Good news: the VEGA board is back on stock: https://vegaboards.com/product/vegaboard/ !
LikeLike
Is it possible to debug openOCD source code with thses projects instead of using binaries. I am want to modify some code in openOCD source code. Could you help with that, please.
Thanks
LikeLike
If you want to modify and build openOCD, there is http://openocd.org/, have you checked this?
LikeLike