Sometimes it makes sense to write everything in assembly, even these days. For example if using a tiny microcontroller. Or just if one just don’t need all the productivity of the C/C++ tools. And it is a good educational experience: getting hands-on on the lower levels.
The Project Explorer view in Eclipse shows the projects and their files. By default, some files are hidden. But I can change that, and I can hide and unhide files based on rules:
GDB is the de-facto debugging engine and debug connection for micro-controllers these days: it is versatile and with its client-server architecture very flexible and powerful, and pretty much every debug probe and vendor (PEMICRO, SEGGER, OpenOCD, pyOCD, …) offers it. But a GDB server or command line implementation was not available for the NXP LinkServer family of debug probes (LPC-Link, MCU-Link, MCU-Link Pro). This has changed now: LinkServer is available as command line tool and can be used as GDB Server:
LinkServer as GDB Server with Eclipse
With the new LinkServer package I do not only get a gdb server implementation: I have now a command line tool I can use for automation and all kind of different things: programming boards, erasing flash, and so on.
A Triumvirate is or Triarchy is built by three individuals which lead or rule something. In this article I want to rule a project with Eclipse CDT, Visual Studio Code and with building it from the command line for automated builds.
So what if I have an Eclipse project (say MCUXpresso IDE and SDK), and want to build it on a build server, and and I want to use the same time the project with Eclipse IDE and Visual Studio code?
Key to this is CMake: I’m keeping the Eclipse CDT features, adding CMake with Make and Ninja to the fix, and have it ‘ruled’ by three different ’emperor’: Eclipse, Visual Studio Code and from a shell console:
MCUXpresso SDK CDT project with CMake for Eclipse, Visual Studio Code and Command Line BuildingContinue reading →
We all should know it: dynamic memory usage can be dangerous. There can be memory fragmentation, use-after-free, out-of-memory and memory leaks. While I do prefer static memory allocation for embedded systems, using a dynamic memory allocation in some applications is not avoidable or just makes sense.
In one of my lecture modules we develop a ‘Boulder’ game, where the player has to collect underground diamonds and avoid moving monsters:
LPC845-BRK with OLED using dynamic memory allocation
I’ll show you have FreeRTOS memory usage can be tracked and monitored.
The MCU-Link debug probe comes without an enclosure. To protect the hardware against ESD issues, I had created a 3D printed enclosure for it. That one worked fine, but takes some time to print it. If you have to build many enclosures for a full classroom setup, then a laser cutter is much faster. And to create some variations, I have decided to cut it with different materials and colors. To be environment friendly, extra glue is needed, and with recycled PMMA, different colors are possible too.
Different laser-cut enclosure: wood, and red, transparent, blue and green PMMAContinue reading →
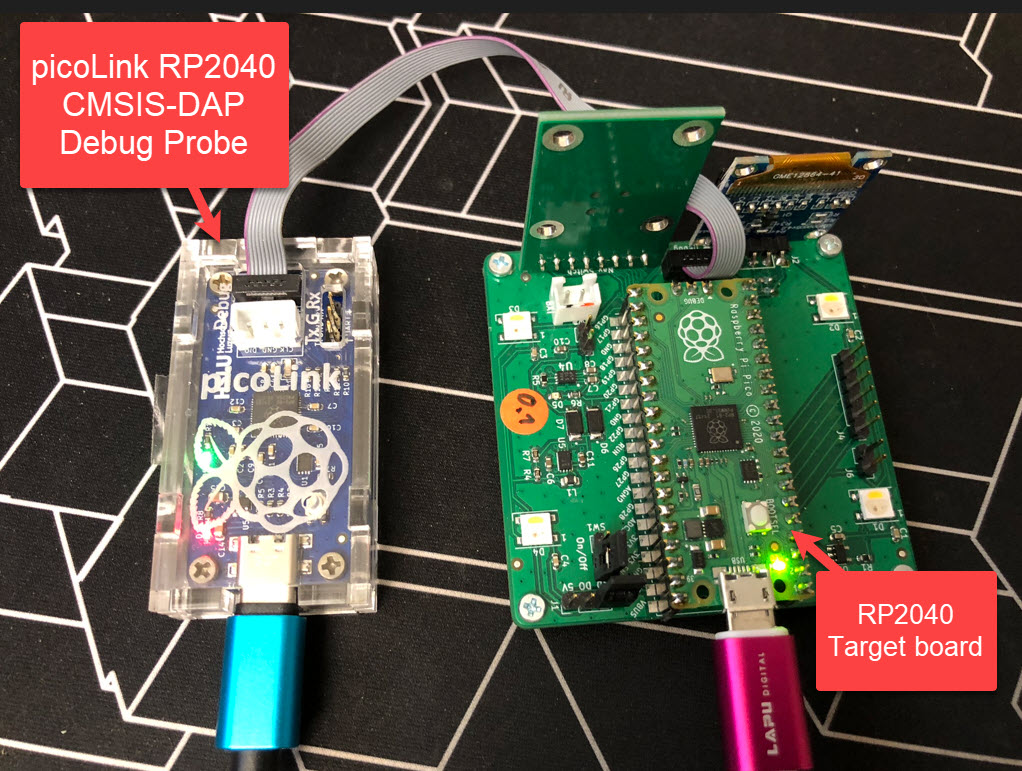
One essential part of embedded development is the ability to debug the target application. The good thing with the Raspberry Pi Pico RP2040 Eco-system is: One can use another RP2040 Pico board as a debug probe to debug other ARM Cortex-M devices.
But instead using a Raspberry Pi Pico board with some wires, why not building a dedicated board? The result is a small, versatile and open source debugging probe which virtually can debug any ARM Cortex-M device as a standard ARM CMSIS-DAP probe:
picoLink Debug Probe debugging a Raspberry Pi Pico BoardContinue reading →
By default, the debugger cares about the initial register settings after connecting to the target. But for special cases like using a bootloader combined with a loaded application, this requires a bit more than the usually ‘standard procedure’. For example I need to set both a custom program counter (PC) and stack pointer (SP).
How to set custom PC and SP for startup of the applicationContinue reading →
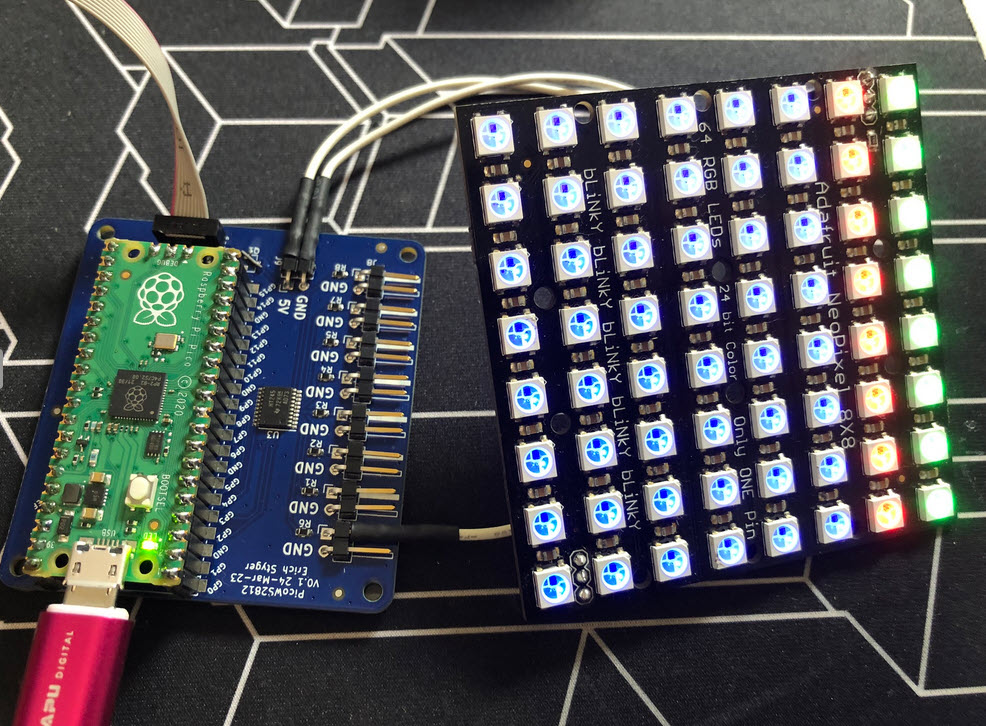
I love the WS2812B (aka SK6812) addressable LEDs: they are inexpensive and available in different packages. I have used them in different projects, including the MetaClockClock one. I used the NXP Kinetis for these projects, but because they are not available any more, for a new project we had to choose a new microcontroller, with the Raspberry Pi Pico RP2040 as the winner.
Raspberry Pi Pico RP2040 driving WS2812B with PIO and DMAContinue reading →