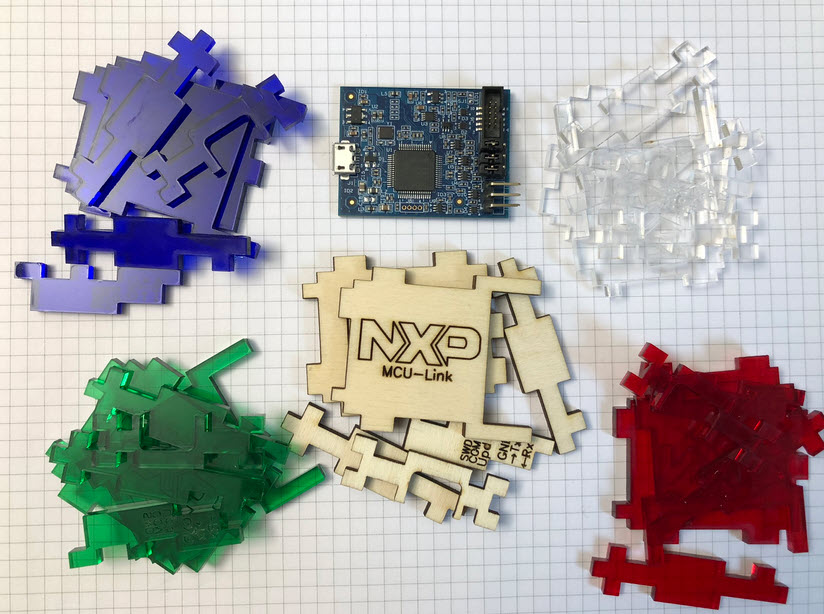
The MCU-Link debug probe comes without an enclosure. To protect the hardware against ESD issues, I had created a 3D printed enclosure for it. That one worked fine, but takes some time to print it. If you have to build many enclosures for a full classroom setup, then a laser cutter is much faster. And to create some variations, I have decided to cut it with different materials and colors. To be environment friendly, extra glue is needed, and with recycled PMMA, different colors are possible too.

You can find the files on GitHub (see links at the end of this article), together with the LightBurn files. The design has been created with Inkscape, and there are two files: one for 3 mm PMMA and one for 3 mm plywood.
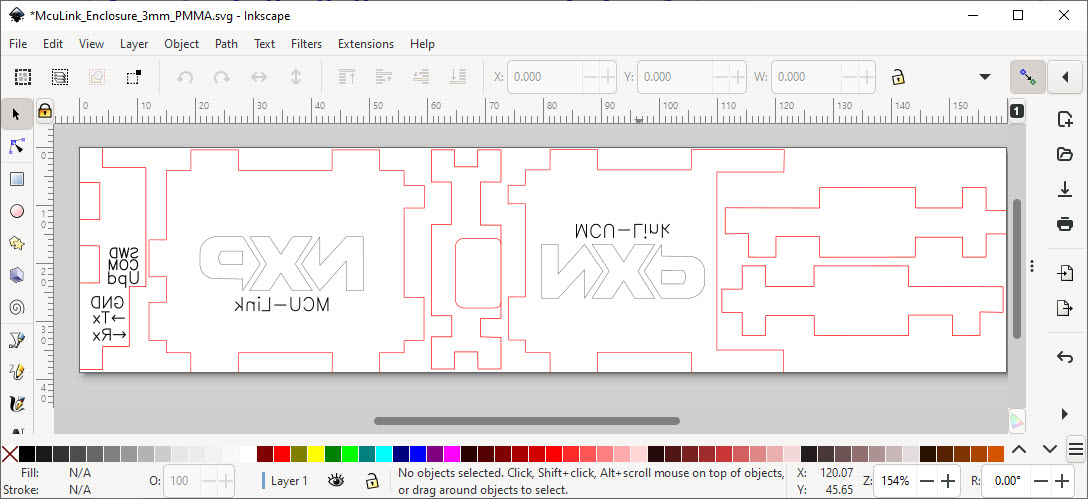
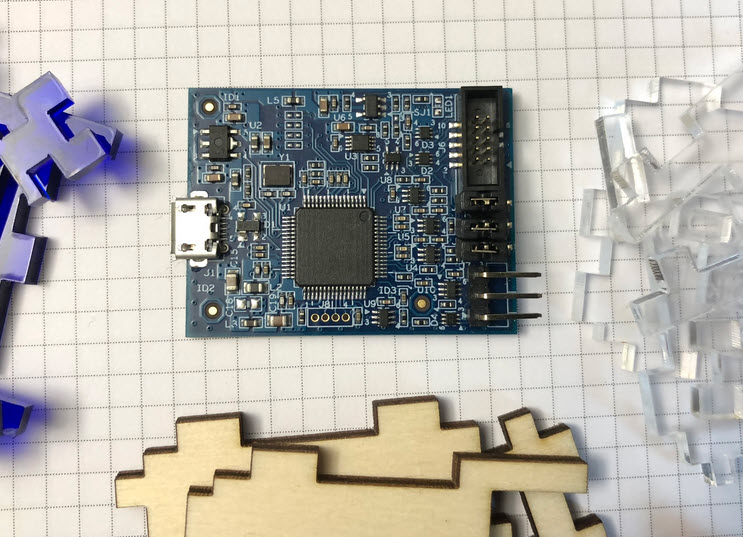
Because the PCB has no mounting points or holes, the PCB is ‘pressed’ into the enclosure, to keep it in place.
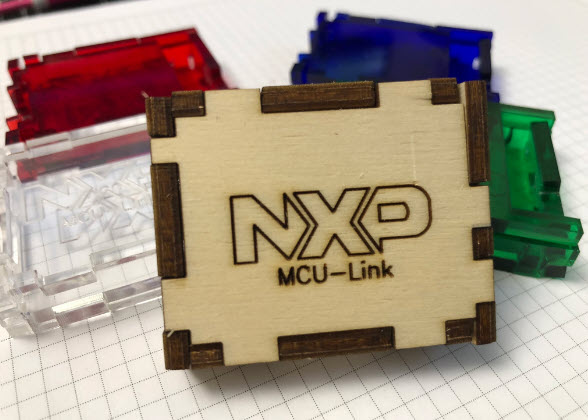
I’m using 3 mm material: birch plywood, clear PMMA and three recycled PMMA material (red, green and blue):
The design is using a ‘press-fit’ approach: this means that the parts don’t need any glue: simply press the pieces together.
Both the top and bottom side is engraved: the PMMA uses engraving on the inside, and the wood has the engraving on the outside.
An additional engraving is on the back side to indicate jumper functionality and the pins of the UART connection:

You can find all the files on GitHub.
And if you are looking for an enclosure for the Pro version: Adding RGBW Wings and Enclosure to a Debug Probe.
Happy cutting 🙂
Links
- Laser cutter files on GitHub: https://github.com/ErichStyger/mcuoneclipse/tree/master/MCU-Link/McuLink%20Enclosure
- MCU-Link 3D printed enclosure: New MCU-Link Debug Probe from NXP
- MCU-Link Pro Enclosure: Adding RGBW Wings and Enclosure to a Debug Probe

I’ve got a couple of them that I’ll have to try that out with. I’m still using the laser cut enclosure you shared for the LPC-Link2.
I’ve been working on a palletized project idea. I usually have several things going at once and only so much workbench space. I’ve started putting projects on cafeteria trays (you can get anti-static ones) and each can have an MCU-Link, small USB hub, and standardized power connectors. 40 trays will fit in a common bakery rack that takes up about a square meter of floor space. This is especially useful for working on janky prototype setups where multiple boards or modules are connected together – the whole thing gets put on the rack when not in use and then I only have to reconnect a couple of things when I get it out again. It’s still a work in progress but it has promise. Connecting the debug interface usually isn’t a big deal but MCU-Links are so cheap it’s not a big deal to leave one attached to each project. My Cyclone is faster but I can buy 40 MCU-Links for the same price.
LikeLike
Hi Scott,
I’m migrating my LPC-Link2 infrastructure to the MCU-Link one currently, as the LPC-Link2 is not available any more.
Interesting approach with using the cafeteria trays. I assume the rack is on rollers, so you can move them around as needed?
LikeLike
Yeah, it’s the style a bakery would probably call a proofing rack. We’ve got 3 of them in the shop now. One has been cut down a little narrower so it’ll fit cheap parts trays with removable bins. They go on sale for around $7 at Harbor Freight. They’re not as nice as the $50 Bosch/Sortimo ones but I can afford a lot more of them. 40 of them fit in one rack. https://imgur.com/nTYjO0V
LikeLike
Hi Scott,
thanks for sharing, this looks like a really cool and useful approach.
LikeLike
Hi,
I like those 3D laser-cut enclosures. Nice work.
Where did you buy the 3mm recycled PMMA materials? And the Plywood?
I am based in Switzerland and I would like to find such material in a size that could fit in my laser cutter.
Thanks.
LikeLike
The plywood you can get both from Jumbo and Migros. PMMA you get from Jumbo or Hornbach. But you need to be a bit careful and check for the material, because they sell ‘Fensterglas’ or similar things which is not PMMA based.
LikeLiked by 1 person