Last week I received the email notification, that NXP has released an update of the MCUXpresso IDE: the version 11.6.1. So I quickly checked it out:

Last week I received the email notification, that NXP has released an update of the MCUXpresso IDE: the version 11.6.1. So I quickly checked it out:
In Getting Started: Raspberry Pi Pico RP2040 with Eclipse and J-Link I used a SEGGER J-Link EDU for debugging: unfortunately, probably because of silicon shortage, these EDU probes are out of stock everywhere. Luckily, there is a solution: just use another Raspberry Pi Pico!

This turns a $5 Raspberry Pi Pico board in to a very usable and versatile debug probe.
Continue readingMCU vendors offer SDKs and configuration tools: that’s a good thing, because that way I can get started quickly and get something up and running ideally in a few minutes. But this gets you into a dependency on tools, SDK and configuration tools too: changing later from one MCU to another can be difficult and time consuming. So why not get started with a ‘bare’ project, using general available tools, just with a basic initialization (clocking, startup code, CMSIS), even with the silicon vendor provided IDE and basic support files?
In this case, I show how you easily can do this with CMake, make and Eclipse, without the (direct) need of an SDK.

With a steady release train, NXP has released last week a new and updated version of their flagship IDE: the version 11.6.0 of the MCUXpresso IDE.

And there are several new and cool features with that release, including a power & energy profiler and CMake support.
Continue readingIn this time where many micro-controllers have 100+ weeks estimated delivery time, it makes sense to look at alternatives. So it is not a surprise that the Raspberry Pi RP2040 gets used more and more in projects. It is not only inexpensive, it is (at least for now) available which makes all the difference. The RP2040 is the first microcontroller from Raspberry Pi: a dual-core ARM Cortex-M0+ running up to 133 MHz, 264 KByte on-Chip RAM and up to 16 MByte external FLASH.

It is a very versatile microcontroller, with a rich eco-system and set of tools. It can be easily used with C/C++ or MicroPython, and the Raspberry Pi Pico board only costs around $5. There are plenty of tutorials out there, for example how to use the Pico board as debug probe to debug another Pico board. While this is great, there is an easy way to use any existing J-Link and Eclipse IDE too, so this is what this article is about.
Continue readingIf you are in the electronics or microcontroller business: you very well know the problems with chip and silicon availability. What was supposed to last maybe for a few months starting with COVID-19 is still a problem in 2022: chips are not available or the price has skyrocket.

We at the Lucerne University are using NXP Kinetis micro controllers which seem to be affected by the silicon shortage somewhat more than any other devices? When looking that the usual sources, it was clear some are still available, but in a rather exotic WLCSP package. So the question is: can it be useful?
Continue readingThe Eclipse Editor has a very cool feature named ‘Code Templates’: With such templates files are created with specific pre-filled content. For the templates, variables like ${user} for the user name can be used, see Custom C/C++ Headers with Eclipse:

Tool chains like the GNU compiler collection (gcc) have a plethora of options. The probably most important ones are the ones which tell the compiler how to optimize the code. Running out of code space, or the application is not performing well? Then have a look at the compiler optimization levels!
However, which one to select can be a difficult choice. And the result might very well depend on the application and coding style too. So I’ll give you some hints and guidance with an autonomous robot application we use at the Lucerne University for research and education.

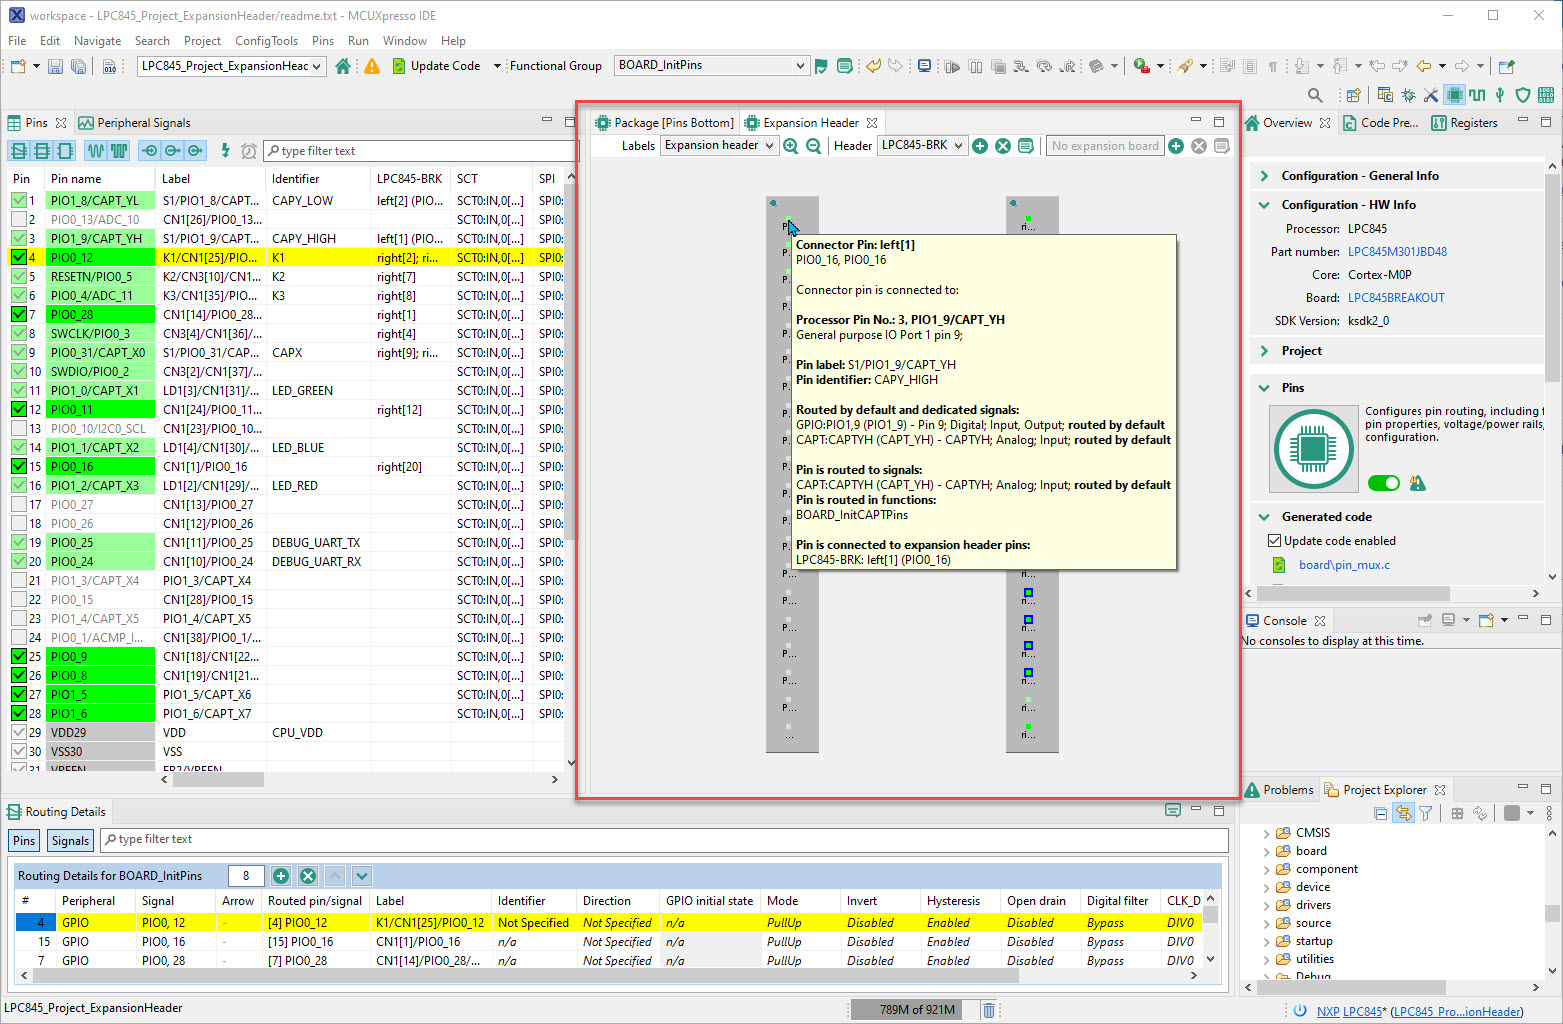
The MCUXpresso Pins Tool is part of the NXP configuration suite which makes pin assignments, configuration and muxing easy. What I have somehow missed from one of the latest updates and releases is that it allows me now to add my own custom headers definition. Not only the tool is now aware of the ‘standard’ Arduino headers, but I can add my own headers too. This can be useful for providers of breakout boards or any kind of board which can be added to a MCU board. In my case it is very useful for projects where we design our own (breadboard-friendly) board or a custom board with an expansion board: we can design a board header and use it in other projects.
In many cases I prefer wood as material: it has a warm feeling and with its texture it makes things unique and special. For some time I was thinking about creating a wooden case for eyeglasses as a gift. And here is a first version of it:

