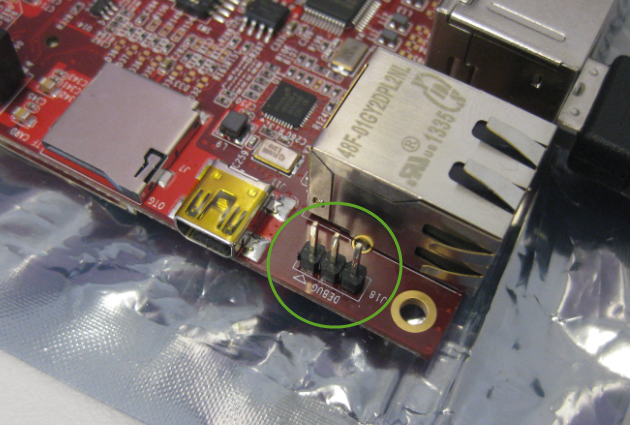
The wired Ethernet connectivity works out of the box with the Freescale RIoT board :-). But to make it more ‘IoT’ capable, a WiFi connection would be a big plus. The element14 site did not tell which WiFi dongles are supported, and a thread in the element14 forum on that topic has not really provided much information. With some risks I decided to order the Wi-Pi WiFi dongle which seems to be popular in the Raspberry Pi community (thus that Wi-Pi name?). And as I anyway have a Raspy, my thinking was that if it does not work with the RIoT board, I still can use it with the Raspy 🙂
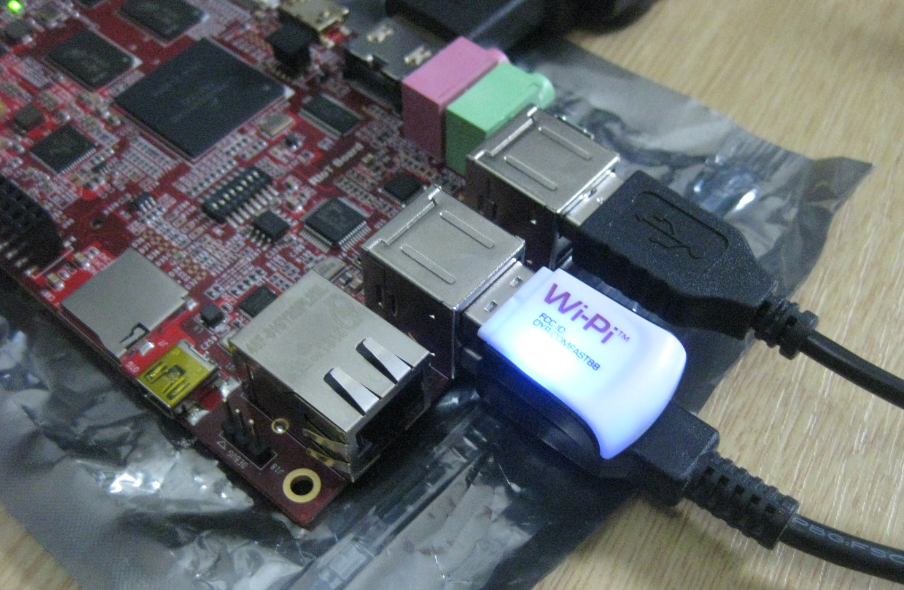
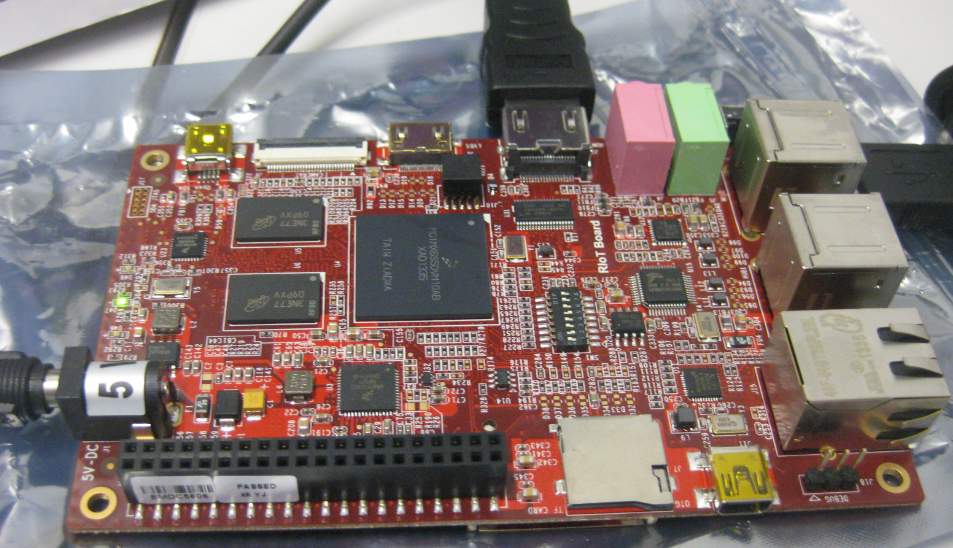
Flashing a new Android Image to the RIoT Board
I understand the challenges of board vendors: they produce many boards, and typically they have an early/first firmware version on it. And when that board gets shipped to customers, that firmware typically is old and outdated :-(. Same for the RIoT board I have received: I was desperately trying some advanced features, only to realize that the firmware on the board is an older one from this year. So time to update the Android on that board.
Exclude Source Files from Build in Eclipse
Sometimes I have source files in my project which I do not want to get compiled (or excluded from build). Because as I’m using the ‘managed make’, all source files matching certain extensions (like *.c) are automatically included into the build.
To exclude a file from build, I right-click on it to get to the properties. There I can select a check box to have it excluded from the build:
Terminal Connection to the RIoT Board
I admit: I love command line interfaces. Because that gives me usually much more control than any GUI (Graphical User Interface). I like the fact that they have put a UART interface on the RIoT board:
Tour to Italy
Gallery
This gallery contains 9 photos.
This week-end tour with the motor bike was down to Italy and back through the alps. And it started with nice weather conditions:
First Steps with the RIoT Board and Android
At the university we have several projects with internet connectivity running. Yes, there is a hype around IoT, and in my view many false perceptions around this what it could or should be. Anyway, for these projects in many cases the Raspberry Pi boards are used, and I use a model B board of the Raspy too. I’m very happy with the Raspy, but I wanted to explore different options, so I ordered a RIoT board two weeks ago. When I looked at it the first time, I was thinking that this board could be a better (although larger) board than the Raspberry Pi one: more USB, more GPIO, micro-SD card, more processing power:
Well, then this week the new Raspberry Pi B+ came out: more USB, more GPIO, but same processing power as the standard B model.
Adafruit NeoPixel Clock with 60 LEDs
After the problems with level shifters (see “First Adafruit NeoPixel Blinks with the FRDM Board“) I received the ordered 74HCT245N. Put it on a bread board, wired it up, … only to find out that the device gets very hot… turned off power, and realized that had the device put in with a wrong orientation 😦 oh darn! That’s why I always order things like that in quantities of 3 or more :-). Corrected the mistake, and things are running (or blinking) again 🙂
Campus Horw and Mount Pilatus
Image
Preserving Memory Ranges with Eclipse and P&E GDB Server
For my boot loaders I need the functionality that I can keep memory ranges from being erased while downloading the rest of the application. P&E provides a GDB server which interfaces with their probes (P&E Universal Multilinks, Tracelinks, …) and as well with the OpenSDA present on many of the Freescale evaluation boards. In CodeWarrior there is an option for ‘Advanced Programming Options’ which allows to preserve memory of the microcontroller FLASH (see “Programming part of flash“). However, that option or button is not present in the Eclipse version of the P&E GDB server (e.g. in Kinetis Design Studio). So how can I preserve some areas of FLASH in Eclipse with GDB?
First Adafruit NeoPixel Blinks with the FRDM Board
LEDs are getting smarter these days. An amazing example are the WS2812(B) or ‘NeoPixels’ from Adafruit: RGB LEDs with a built-in constant current controller and shift register! With a single wire data wire hundreds of RGB LEDs can be controlled. Exactly what I need for a project I had in mind for a very long time. So I ordered a bunch of different LEDs from Adafruit to experiment. Exactly the right thing on dark and rainy week-end. And the result is, well: bright and colorful 🙂


