At the university we have several projects with internet connectivity running. Yes, there is a hype around IoT, and in my view many false perceptions around this what it could or should be. Anyway, for these projects in many cases the Raspberry Pi boards are used, and I use a model B board of the Raspy too. I’m very happy with the Raspy, but I wanted to explore different options, so I ordered a RIoT board two weeks ago. When I looked at it the first time, I was thinking that this board could be a better (although larger) board than the Raspberry Pi one: more USB, more GPIO, micro-SD card, more processing power:
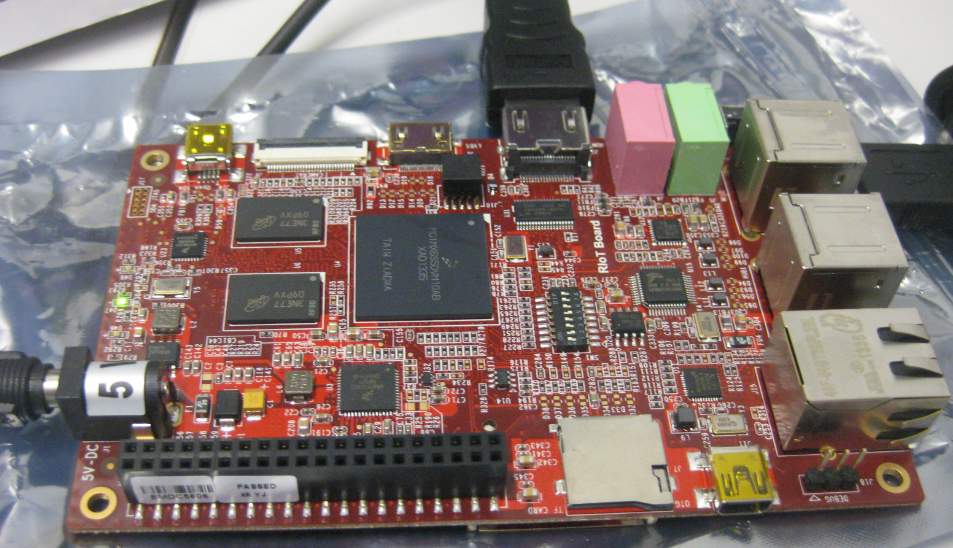
RIoT Board
Well, then this week the new Raspberry Pi B+ came out: more USB, more GPIO, but same processing power as the standard B model.
RIoT Board
So what is that RIoT board? It is a board capable running Linux or Android, with a Freescale i.MX 6Solo processor (ARM A9 with 1 GHz clock frequency), with 1 GB DDR3 RAM and 4 GB on-board FLASH. So compared to a Raspberry Pi (model B), this is a lot more horsepower. The board comes with 4 USB connectors, Ethernet and USB, while one USB is for debugging (interestingly with OpenSDA, but I was not able to make it work, and I saw other posts that it is not supported yet). While there is a lot of stuff on that board, the price (~CHF 85) is higher than the price for Raspberry (~CHF 30) or BeagleBone Black (~CHF 65). As well the board size is much larger (see this post).
Getting Started
I don’t write a detailed tutorial in this post, as there are several good sources already available. Instead, I point to these other tutorials, and add my experience and comments.
Unboxing
The board came in a small card box, with a small note card pointing to www.riotboard.org. This site is supposed to host manuals, data sheets, and so on. However, that page more looked like an entry portal to element14 pages which was confusing. I expected that the .org site would host all the information, but indeed it is all element14? Beside of the board there is a mini-USB cable included. But no power supply and no HDMI cable to connect to a monitor. Reading the quick start guide mentions a 5V power supply needed with 4 Amps (yikes!). Well, it turned out that a 1.5 Amps does it to. I guess that 4 Amps is with lots of stuff attached to the board (USB, Ethernet, camera, …). Anyway, I collected a power supply, a HDMI cable plus a HDMI screen, a mouse to get things started.
Tutorials
The element14 site hosts several posts and tutorials. I recommend to start with this one: http://www.element14.com/community/community/designcenter/single-board-computers/riotboard//blog/2014/01/24/publishing-my-first-android-app-on-riotboard
This goes through connecting the board and getting Android to show up on the monitor. Here I had the first problem: my monitor did not show anything! There is only a tiny LED on the board, nothing blinking, so I thought first my board does not work or I did something wrong. In despair I tried another (smaller) monitor, and voilà, this worked, and the Android startup screen showed up:
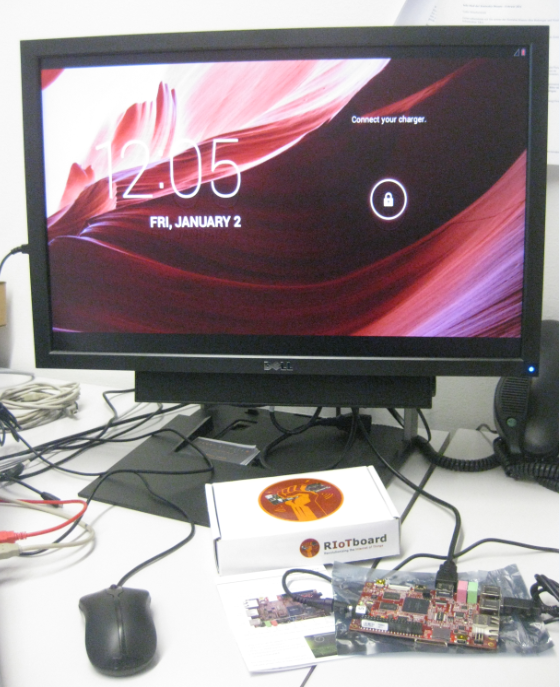
Running Android (hurray!)
Ok, the date/time was wrong, and the board asked to “Connect your charger” (????). Anyway, it was doing something :-).
In that tutorial I followed to download and install the Android SDK. I did *not* downgrade my Java version (I have 1.7.0_60 on my Windows 7 64-bit machine). Best of the Android SDK: it is all Eclipse, and I love that :-).
Android SDK
The next part is about making the first steps with the Android SDK and installing the needed packages: http://www.element14.com/community/community/designcenter/single-board-computers/riotboard//blog/2014/02/08/part-2-writing-an-android-app
💡 To use the board for application writing and debugging over USB, it needs to be in ‘developer mode’. How to get there is not described in above tutorial: You have to tap seven times on the build number (see http://www.androidcentral.com/how-enable-developer-settings-android-42).
After fixing the developer mode, the board still did not show up properly in my Eclipse and Windows 7 64-bit. The Windows device manager showed the board, but has not installed the drivers:
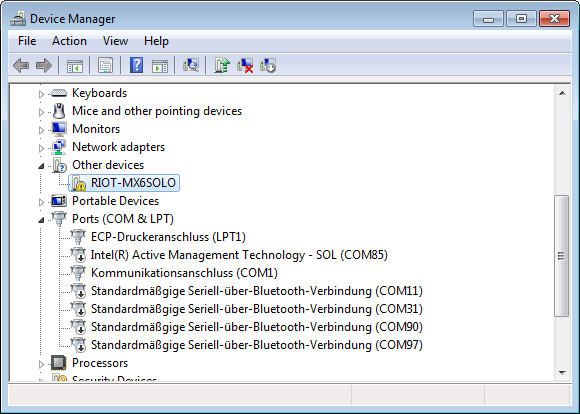
RIOT driver in device manager
Some clues are discussed in http://www.element14.com/community/thread/31859/l/riotboard-usb-driver-for-windows-eclipse. The point is that the Google ATD drivers need to be downloaded with the package manager:
But it still might be (at least for my machine) that they are not installed. So I needed to manually install them. Make sure you have in the Android Package manager the Google USB Drivers downloaded:
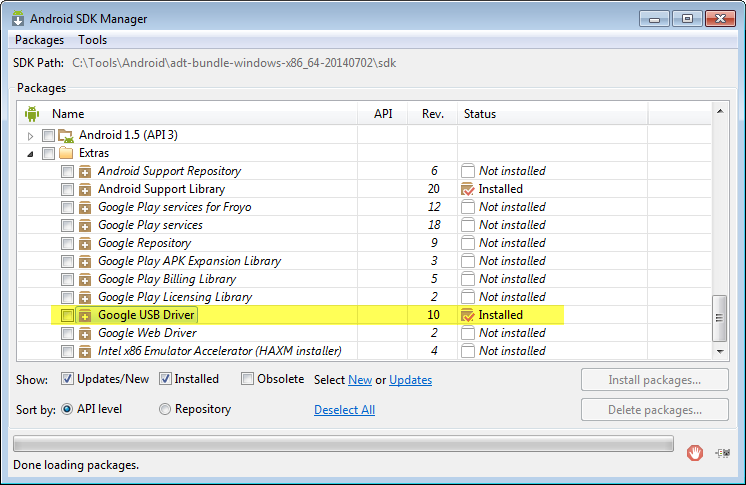
Google USB Drivers
Then go to the Windows device manager, and update the drivers for the RIoT board:
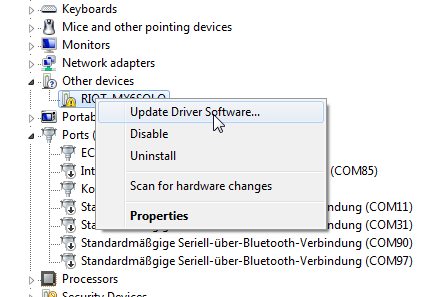
Right Click to update drivers
Then (important!) use the ‘Browse my computer for driver software:
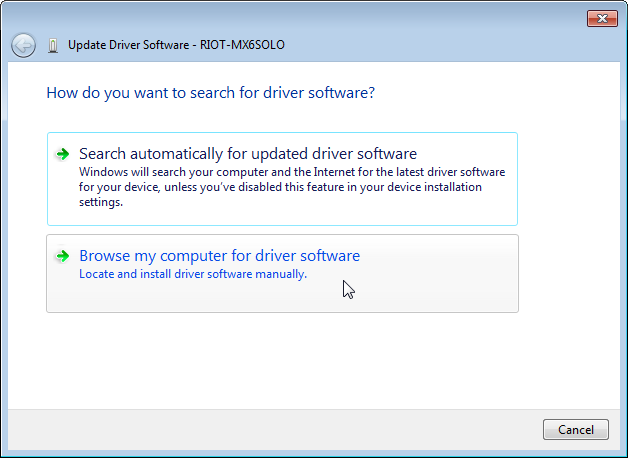
Browse computer for driver software
Browse to the installation files downloaded before with the package manager. For me this is
C:\Tools\Android\adt-bundle-windows-x86_64-20140702\sdk\extras\google\usb_driver
Your path might be similar, check where you have the Android SDK downloaded.
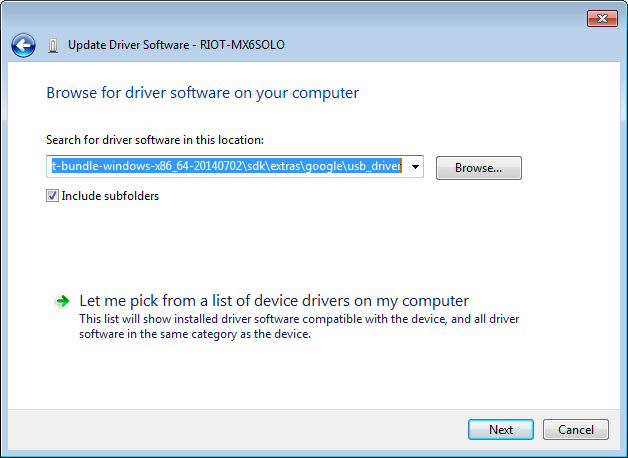
Browse to the installation files
Then confirm to install drivers:
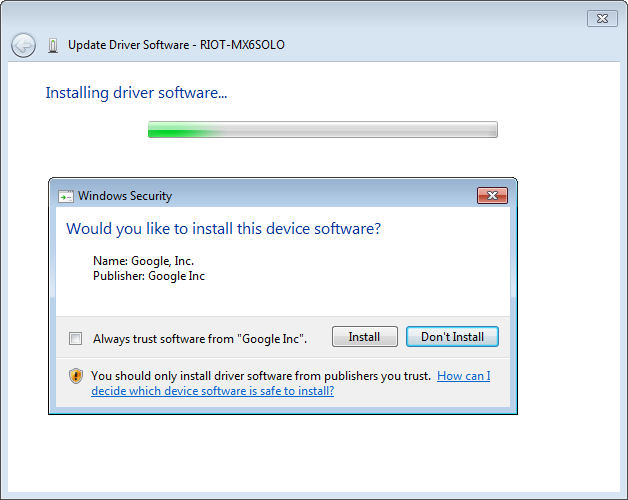
Confirmation to install drivers
Finally, the drivers are installed:
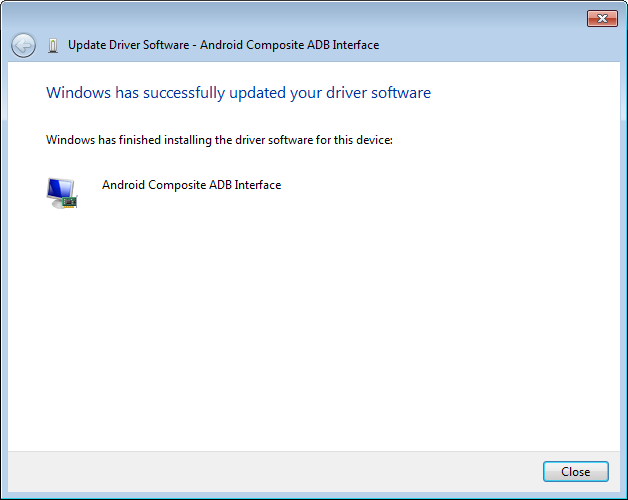
Drivers installed
Now, the drivers are installed and it looks good in the Windows Device Manager:
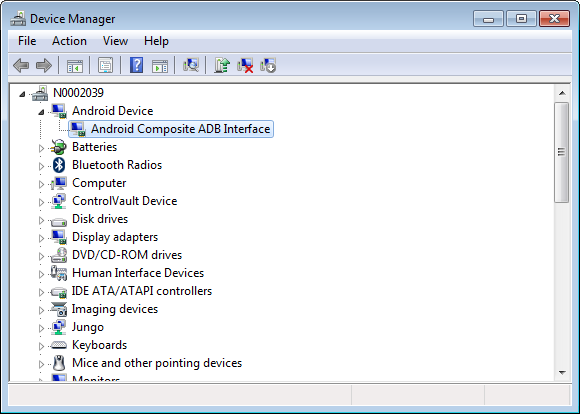
Android Composite ADB Interface
In the Android settings, make sure USB debugging is enabled:
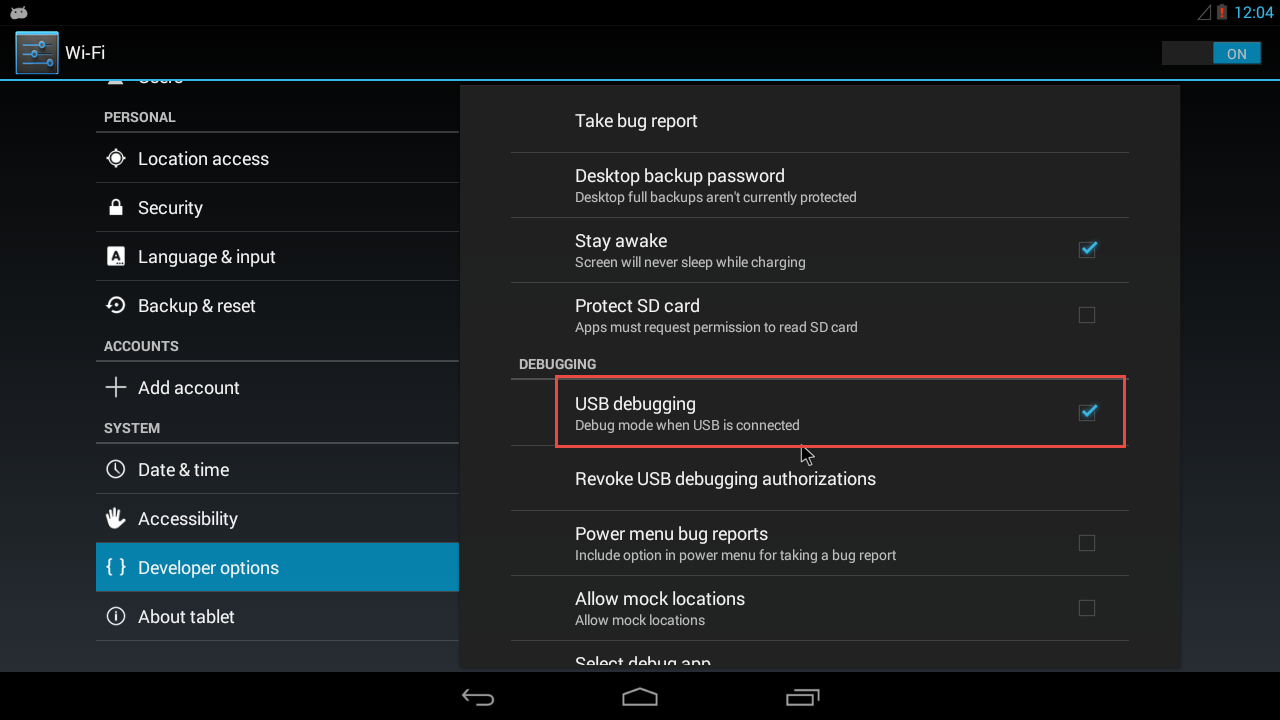
Developer Option enabled
Restarting Eclipse, and with this the device shows up:
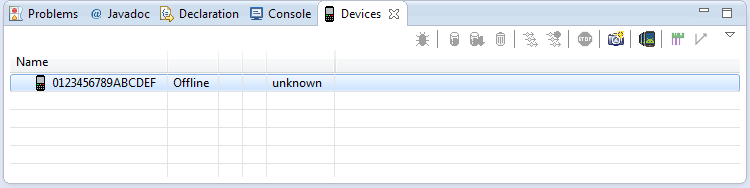
Device shows up
With this, I’m ready to develop an Android application for that board :-).
Summary
While the RIoT Board is advertised as ‘IoT’ (Internet of Things) board (Slogan: “Revolutionizing the Internet of Things”), it is not more ‘IoT’ than any other board with Ethernet connectivity. While it has a lot of CPU power, it does not come anything I would expect for a real IoT board: there is no WiFi, no Bluetooth, no BLE or any other transceiver. No interface (apart of the pin header) which would let it interface to the real time (RTOS) world. And the board should be much smaller so I could it put into a small enclosure, at least the size of the new Raspy B+. Apart of that, it is a very solid (although rather expensive) board. I like the easy way of getting Android running on it. And as I wanted to learn more about using Android, this let me feel that with this board I can explore more of that world.
Next…
So what’s next? I want to write an application for Android and the board, and there is already a tutorial I want to follow here. I want to add serial connection, a camera, I want to add WiFi, and I want to interface with any of the FRDM boards. Might take a while, but I feel that could be an interesting journey 🙂
Happy RIoTing 🙂

Este RioT esta parecendo mais um CUBIEBOARD….ou estou enganado?
LikeLike
Yes, it is kind of similar, but more like a Raspberry Pi with more CPU power.
LikeLike
Yes, these boards are an attractive option for the applications requiring rich UI and connectivity. It would be helpful to have more info on accessing the hardware (gpio, spi, etc.) under Android.
LikeLike
Yes, agreed, making slowly my path through the whole thing 🙂
LikeLike
Hi Erich,
ADB is quite useful for testing. Works nicely on Beaglebone
Click to access BeagleBoneBlack_tutorials_Rev_2.pdf
LikeLike
Pingback: First Steps with the RIoT Board and Android | MCU on Eclipse - BayLibre