To switch between perspectives I can use the toolbar in Eclipse:

Eclipse Perspective Toolbar
But there must be another or better way to do this?

To switch between perspectives I can use the toolbar in Eclipse:
Eclipse Perspective Toolbar
But there must be another or better way to do this?
The tinyK22 board (see “tinyK22 Boards arrived“) gets rolled out at the Lucerne University of Applied Sciences and Arts, so I thought I write-up an article this weekend how to use that board with a Flash Resident Bootloader.
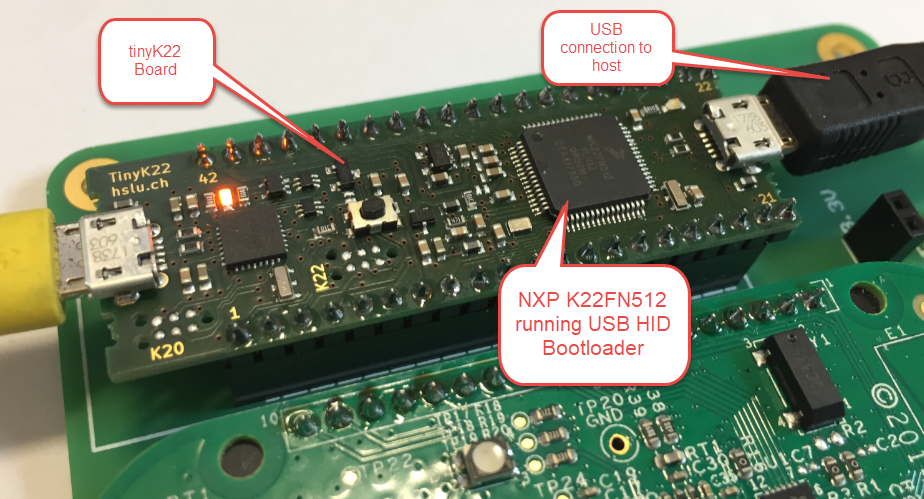
tinyK22 with USB HID Bootloader
One of the great things with the FreeRTOS operating system is that it comes with free performance analysis: It shows me how much time is spent in each task. Best of all: it shows it in a graphical way inside Eclipse too:

FreeRTOS Runtime Information in Eclipse
The Teensy boards are great, but as they are they are not really useful for real development, as they lack proper SWD debugging. In “Modifying the Teensy 3.5 and 3.6 for ARM SWD Debugging” I have found a way to get SWD debugging working, at that time with Kinetis Design Studio and the Segger J-Link. This article is about how debug the Teensy with free MCUXpresso IDE and the $20 NXP LPC-Link2 debug probe:
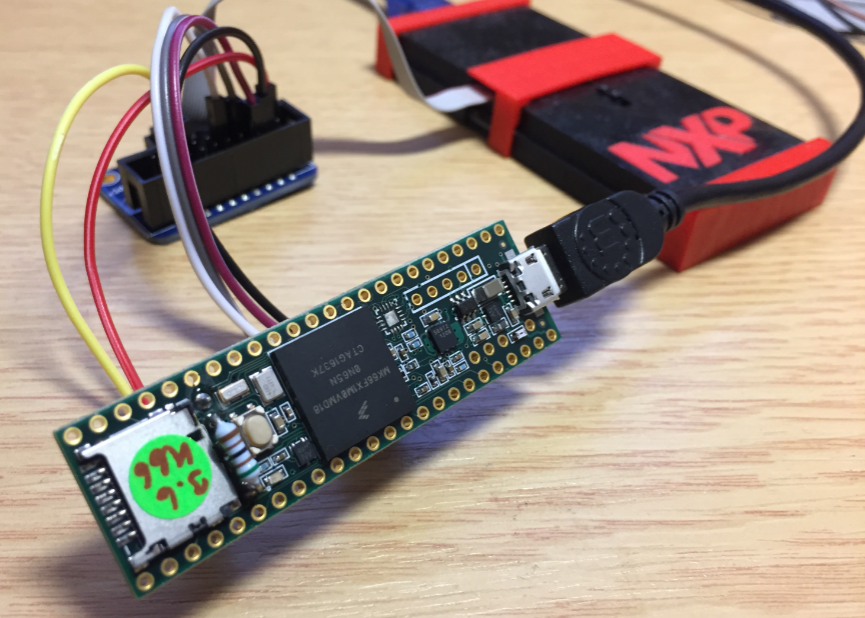
Teensy 3.6 with NXP LPC-Link2
In “Eclipse MCUXpresso IDE 10.1 with integrated MCUXpresso Configuration Tools” I mentioned that I wanted to try the i.MX RT1050 processor. Well, finally my ordered board from Mouser arrived, right on time for the week-end, so I had a chance to use that ARM Cortex-M7 running at 600 MHz :-).

i.MX RT1050 EVK
“Amazon FreeRTOS – IoT operating system for microcontrollers”: The announcement of FreeRTOS V10.0.0 was one of the biggest news last week for me. Not only is there now a Version 10, the bigger news is that FreeRTOS is now part of Amazon. Wow! Now this explains why Richard Barry (the founder behind FreeRTOS) was kind of hiding away for about a year: he joined Amazon as a principal engineer about a year ago. I think we all have to wait and see what it means for FreeRTOS.

Amazon FreeRTOS (Source: Amazon Web Site)
Back in March 2017, NXP had rolled the MCUXpresso IDE starting with Version 10.0.0. With the intent to unify the SDK, LPCXpresso, CodeWarrior, Kinetis Design Studio and Processor Expert into one unified and integrated set of tools. V10.0.0 was a good start. The MCUXpresso IDE V10.0.2 in July was more of a smaller update, and the Pin and Clock configuration tools were not integrated, no added tool for peripheral configuration.
A week ago the MCUXpresso V10.1.0 has been released which shows where the journey is going: an free-of-charge and code size unlimited Eclipse based integrated set of tools to configure, build and debug Cortex-M (Kinetis, LPC and i.MX RT) microcontroller/processor based applications.
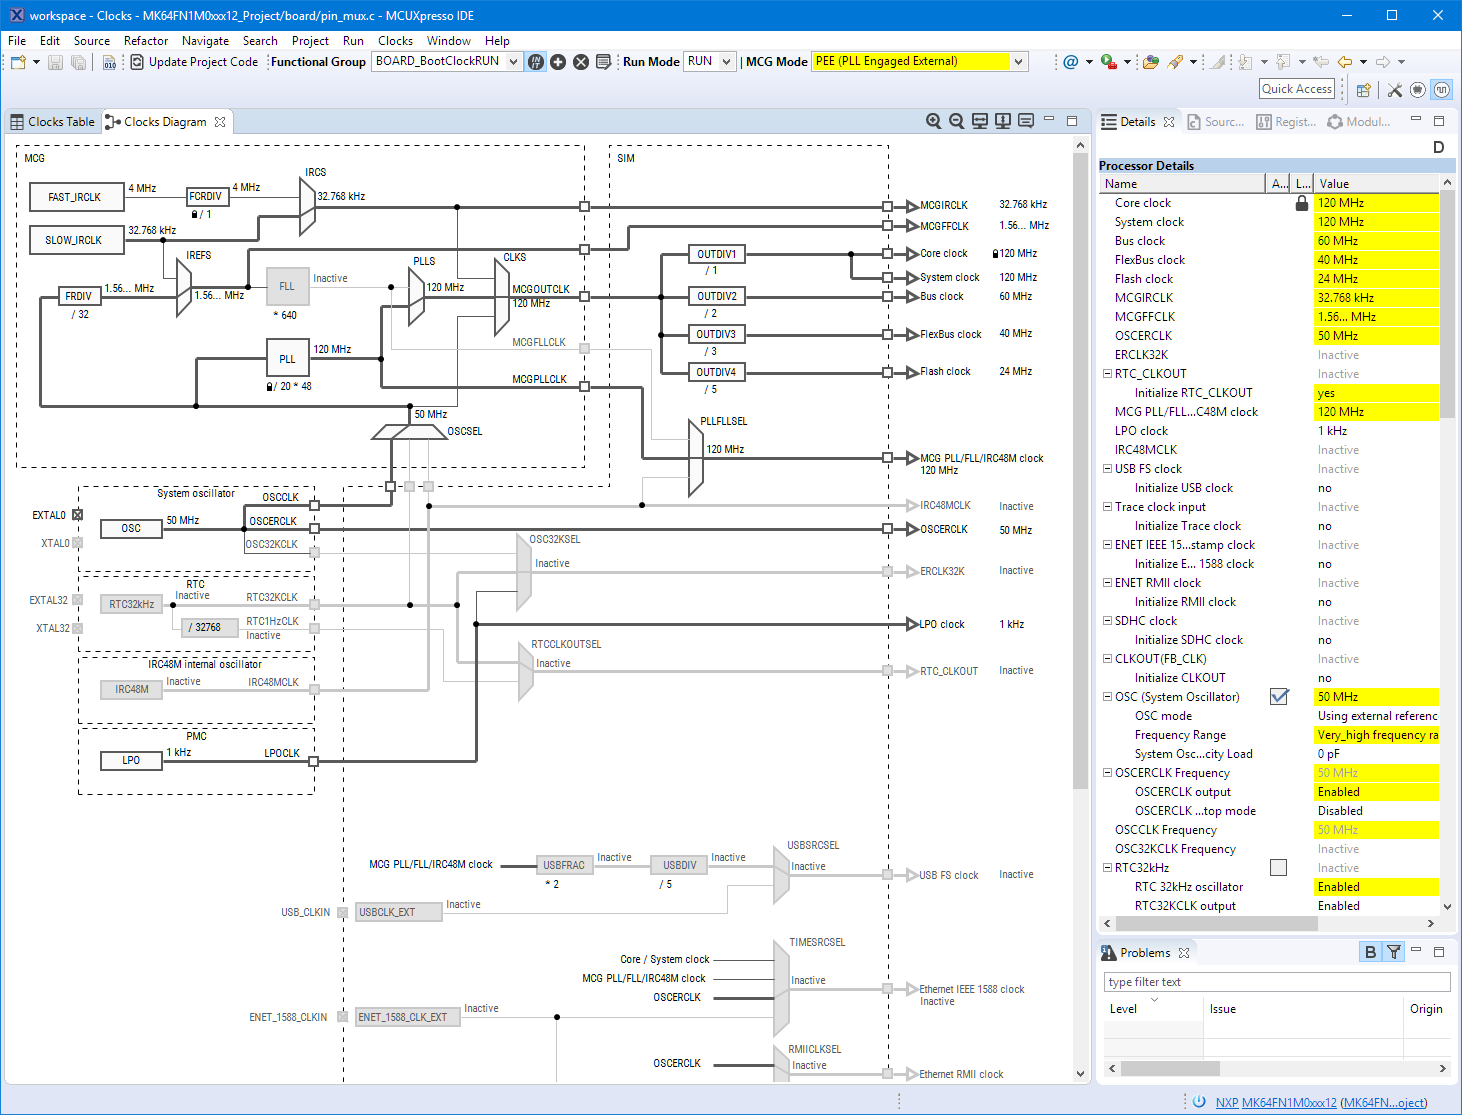
Clock Tool inside MCUXpresso IDE
I have used it for a week, and although many things are still new, I thought I’m able to give an overview about what is new.
I’m using many microcontroller in my projects. And a lot more are available out there in the ecosystem. Like many others, I tend to select what I am familiar with. But is this the correct approach to select the hardware and tools for a next project?

Microcontroller Boards
The MCUXpresso IDE comes with a ‘Develop’ perspective which combines the usual C/C++ and the Debug perspective in one:

MCUXpresso Develop Perspective
More and more these very-very-high-resolution (UHD, Ultra-High-Density) notebook displays show up in my class rooms.These displays have 3100×1800 or even more pixels, making it great for watching high-resolution videos or for playing games (maybe?). But such a high-resolution makes many tools including Eclipse very hard to use, because the toolbar icons get so tiny that they are really hard to hit with a mouse cursor on Windows:
Eclipse Icons with UHD Display
