I’m experimenting with different 3D printed LED frames printed with ABS (see “Avoid Warping ABS on Ultimaker 2“). I frame multiple Adadfruit 8×8 NeoPixel WS2812B LED modules with 3D printed diffuser and frames to create color effects:
Tag Archives: NeoMatrix
Thanks to Erich and FRDM-K64F!! :)
It has been a long time since I wrote my last blog. I really want to apologize to you all for the delay, but I was busy with another project about the competitive analysis of Freescale with our competitors. I hope I can provide you guys later with some important findings from my research.
Well as far as my project for neopixels using FRDM-K64F is concerned, Erich wrote the wonderful tutorial for all of us to turn on the NeoMatrix. I tried my hands on that and I was indeed able to turn on the board but not in the way I wanted it to. 😦 So, it turns out that I got few LEDs turning blue or some turning green. I asked Erich about it and I got to know that it is because I screwed up with the timing signals. I was using an oscilloscope and not a logic analyzer but Erich’s recommendation was to use the Logic Analyzer. This was the result of my experiment following Erich’s tutorials.
To write a program using KDS with Kinetis SDK!!
Starting from the baby steps for our project seems like a good idea but not very helpful though. Learning and understanding Kinetis SDK seems like a lot of work. Meanwhile, I would like to share an important piece of information that I found on my path of working on this project. Many of you might already know, but being a first time user of Kinetis SDK 1.2.0, I found that there are few differences between Kinetis SDK 1.1.0 and Kinetis SDK 1.2.0. I was trying my hands on to use the KDS with KSDK.
So, In order to create a KDS project with Kinetis SDK, I need to create new folders, add different files and the libraries to my project. I didn’t look into all this with much detail before. I would recommend all to go through this link in order to understand using KDS with Kinetis SDK1.1.0 and Kinetis SDK 1.2.0.
This is how it looks after you have added everything:
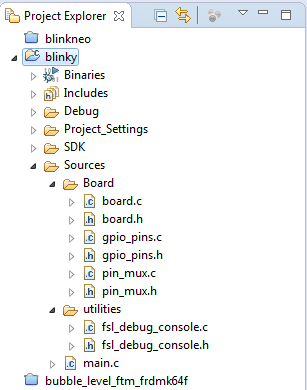