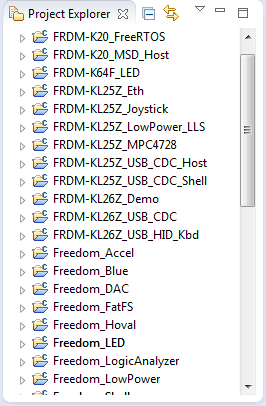
When I create a new Processor Expert project for a board I already have the components configured, then an easy way to transfer components from one project to another is to copy-paste the components. In the ‘source’ project I select the components I want to use, choose Copy (or CTRL+C shortcut on Windows):
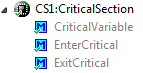
Tag Archives: codewarrior project
Eclipse Performance Improvement Tip: Close Unused Projects
Eclipse is not the fastest and snappiest IDE of the world, but in my view the most versatile and open one. And as with any tool: using it the wrong way does not make it better. Sometimes I have students in my classes which complain that Eclipse is slow, even on a decent machine. Looking at their notebook screens and Eclipse workspace usually tells me right away what they are doing ‘wrong’: there are many, many projects open in the workspace, the most I have seen was more than 50 projects (yikes!!!)!
Printing Code Size Information in Eclipse
For the GNU ARM tools it is easy to print out the code and date size information, see
- GNU Additional Tools: Create Flash Image, Print Size and Extended Listing Options
- Code Size Information with gcc for ARM/Kinetis
- text, data and bss: Code and Data Size Explained
But this is all for ARM cores. What if I use other architectures like S08 or ColdFire in Eclipse?
Using the FRDM-K64F with CodeWarrior
The new flagship of FRDM boards is the FRDM-K64F board. After FTF I have explored different ways debugging the board, and received many comments and questions about it (thanks!). Freescale announced the supports with the new Eclipse based Kinetis Design Studio (KDS). But until KDS is out, how can I use the FRDM-K64F board with CodeWarrior?
Tutorial: Thermal Printer, Part 1: Hardware Setup with FRDM Board
One of my embedded projects is to measure the running time in a sports event (see “Sports Timing System in a Lunch Box“). The recorded time is stored in an EEPROM plus sent over USB or wireless connection to the host. It would be great if I could print out the time and ranking directly, so if there is no PC, the system can be small and tiny. So here is my next project and tutorial: Printing with the Freedom board!
Generating Static FreeRTOS Source Code
Using Processor Expert is an awesome tool: it generates source code for me, and I can can ‘dynamically’ tune my projects to my needs. Still, sometimes it is better or desirable to have a ‘normal’ or ‘static’ project. This is very well possible with Processor Expert (see “Sneaking from Processor Expert” or “Disable my Code Generation“): I can generate the code one time, and then use it without Processor Expert.
To make this even easier, I have added an option to the FreeRTOS Processor Expert component to generate ‘static’ code I can copy-paste to projects and tool chains which are either not supported by Processor Expert, or just for ‘static’ projects.
First Steps with the Freescale TWR-K64F120M
Naturally, I have several project ideas lingering around. No time to make them all (for now). One of it is interfacing the Raspberry Pi camera with a microcontroller. To store the images, I need plenty of RAM on the device, and so far the Kinetis microcontroller did not have that. Finally, Freescale announced the K64F120 a few months back, and my ordered TWR-K64F120M board arrived on my desk, waiting to be used: Finally I get an ARM Cortex-M4F with 1 MByte of FLASH and 256 KByte of RAM :-).
CriticalSection Component
I have created and published on GitHub a new component ‘CriticalSection’:
This component is a wrapper between my components and the problematic current implementation in Processor Expert (see EnterCritical()
and ExitCritical()
: Why Things are Failing Badly). It uses a flexible approach and uses macros to either use my modified version of EnterCritical()
and ExitCritical()
, or simply defaults to the original implementation.
FRDM with Arduino Ethernet Shield R3, Part 3: Embedded Web Server
This is Part 3 of an ongoing tutorial to use the Arduino Ethernet Shield R3 with a Freescale FRDM-KL25Z board (or any other board you like).
In Part 1 I worked on the SD card, in Part 2 I have added basic network connection. Now time to run a web server with my FRDM-KL25Z :-). With this, I can get access to my board through the network, and the board will host a web page where I can do pretty much everything: showing status, or adding functions to turn on things like an LED 🙂
RNet: optional ACK, Dynamic Payload and Extended nRF24L01+ Driver
Time to write an update about the RNet Wireless Stack. The stack has been successfully used for the Sumo Robots as wireless controller. In the last week, there has been a lot smaller and larger extensions for it. And because the nRF24L01+ modules are so inexpensive, I bunkered more than 50, with 20 still left to be deployed: