P&E has just released a new version of their Eclipse plugins for the set of GNU ARM Eclipse debug plugins. The GNU ARM Eclipse plugins from Liviu support OpenOCD and Segger J-link, so with this update or extension it adds P&E support to it. With this, I can use the P&E debug devices (P&E Multilink, Tracelink) or as well the Freescale OpenSDA with it.
Tag Archives: Freescale
Automatic Documentation Generation: Doxygen with Processor Expert
One really cool thing with Processor Expert is: it does not only generate the source code for me, it generates as well documentation :-). I’m a believer of the ‘single source’ approach: if I have to document a software project, then the software itself shall be the source of the documentation. And for this I love Doxygen: see “5 Best Eclipse Plugins: #1 (Eclox with Doxygen, Graphviz and Mscgen)“. Doxygen is a compiler which compiles my source files, and instead of object files it creates documentation files for me :-).
Review of the CAM8100-U USB Camera with the RIoT Android Board
In my earlier post (“Adding the CAM8000-D Camera Module to the RIoT Board“) I was running into the ‘single camera’ trap of the current RIoT Android OS image: with only one camera attached, and switching between front/back camera, Android is stuck and needs to be flashed again to the board. Because this is so painful and can happen easily, I ordered a USB camera for the RIoT board: with this that problem should go away, and I would have a front and a back camera.
Hacking the Teensy V3.1 for SWD Debugging
I *love* the Freescale Freedom boards, and you probably recognized that with all my projects using them. The Freedom boards are small, inexpensive and can be easily extended with Arduino shields which makes them a great platform for prototyping. But sometimes I just need an ARM microcontroller with some headers, and then the 85mm x 55mm size of the Freedom board is not ideal. That’s nothing new, but I realized that yet again when I did my Adafruit NeoPixel clock: the FRDM board was rather bulky, even if hidden behind that clock. I need something much smaller: the Teensy board!
USB with the TWR-KL25Z48M Board: Check Jumper J18!
When I ordered my first Freedom FRDM-KL25Z board, I placed an order the Tower TWR-KL25Z48M shortly afterwards. But I was so happy with the FRDM-KL25Z, and because the FRDM board is much less expensive and easier to handle, that Tower board was sitting in my board shelf, waiting for a maybe a student project or to get any other use of it. Well, I can tell that my students wanted the FRDM board, not the Tower board ;-). But when I saw this week in the Freescale forum a user asking for a USB example for that Tower board, I thought that now I could at least use that board to help someone out.
Zumo Robot with WiFi and GPS
It always takes longer than expected: actually 4 weeks from the first board out of the reflow oven (“First New Zumo Board out of the Reflow Oven“), until I have it working on the Pololu chassis. But now I have a mobile Robot with WiFi, GPS, Bluetooth, nRF24L01+ and all the stuff I have dreamed off 🙂
Adding the Wi-Pi WiFi Dongle to the RIoT Android Board
The wired Ethernet connectivity works out of the box with the Freescale RIoT board :-). But to make it more ‘IoT’ capable, a WiFi connection would be a big plus. The element14 site did not tell which WiFi dongles are supported, and a thread in the element14 forum on that topic has not really provided much information. With some risks I decided to order the Wi-Pi WiFi dongle which seems to be popular in the Raspberry Pi community (thus that Wi-Pi name?). And as I anyway have a Raspy, my thinking was that if it does not work with the RIoT board, I still can use it with the Raspy 🙂
Flashing a new Android Image to the RIoT Board
I understand the challenges of board vendors: they produce many boards, and typically they have an early/first firmware version on it. And when that board gets shipped to customers, that firmware typically is old and outdated :-(. Same for the RIoT board I have received: I was desperately trying some advanced features, only to realize that the firmware on the board is an older one from this year. So time to update the Android on that board.
Terminal Connection to the RIoT Board
I admit: I love command line interfaces. Because that gives me usually much more control than any GUI (Graphical User Interface). I like the fact that they have put a UART interface on the RIoT board:
First Steps with the RIoT Board and Android
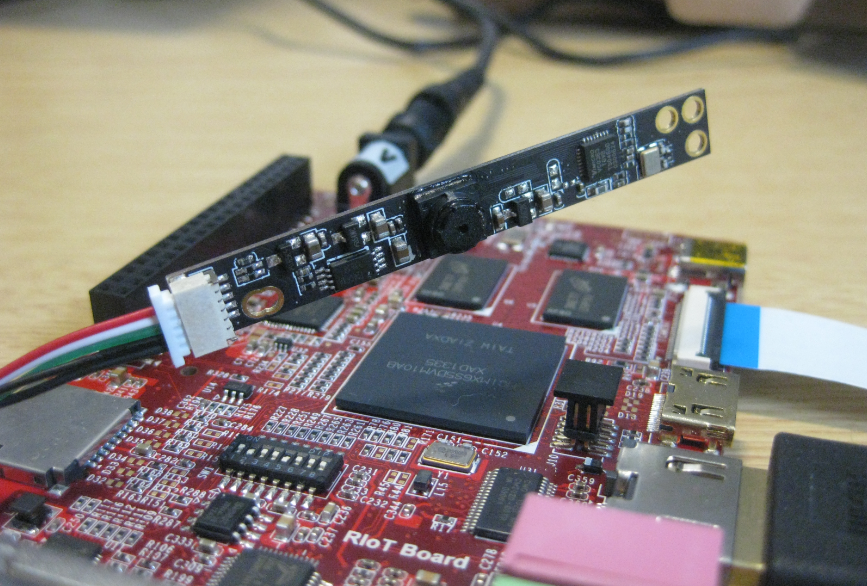
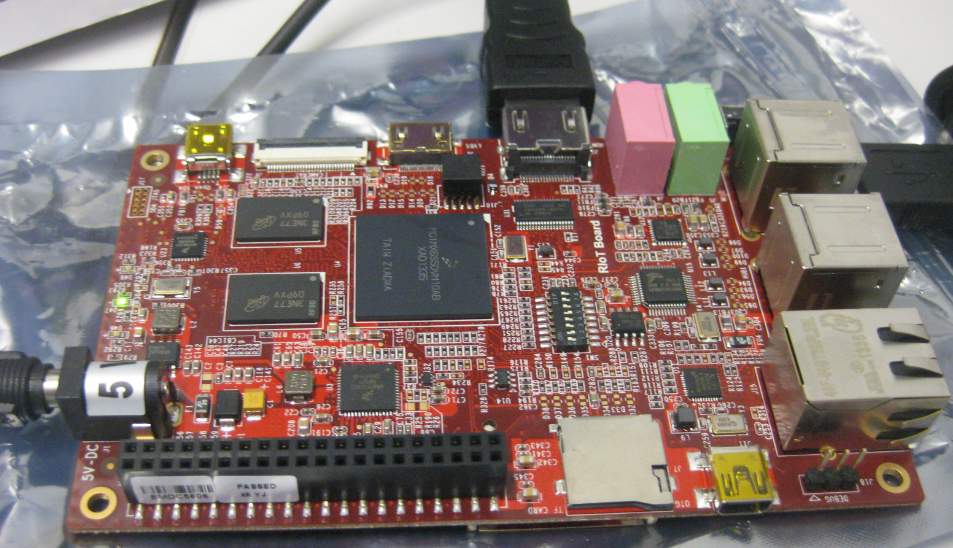
At the university we have several projects with internet connectivity running. Yes, there is a hype around IoT, and in my view many false perceptions around this what it could or should be. Anyway, for these projects in many cases the Raspberry Pi boards are used, and I use a model B board of the Raspy too. I’m very happy with the Raspy, but I wanted to explore different options, so I ordered a RIoT board two weeks ago. When I looked at it the first time, I was thinking that this board could be a better (although larger) board than the Raspberry Pi one: more USB, more GPIO, micro-SD card, more processing power:
Well, then this week the new Raspberry Pi B+ came out: more USB, more GPIO, but same processing power as the standard B model.


