
Sometimes I start a project with an ARM microcontroller, and in the middle of the project I find out that it was a wrong choice at the beginning and I need to switch the microcontroller derivative or even the used ARM core. With little knowledge of the project structure and the files needed, such a switch is not the easiest thing, but definitely possible.

switching cores
Outline
It is easier to switch a microcontroller derivative (say different pinout or different memory sizes, e.g. from a KL27Z64 to a KL27Z) than switching from a K64F to a KL27Z or even switching from one MCU/CPU vendor to another. But because Eclipse, the GNU toolchain and ARM Cortex-M is the industry standard, a change is pretty simply *if* you know what you have to change. The most difficult part is the application code and where it accesses the hardware (say the UART or SPI) which can be very different and depends on the MCU/CPU used. I’m *not* going to covert that. What I’m covering is the ARM Cortex part. I’m using Kinetis Design Studio 3.2.0 as this happens to be used in such a project, but the steps apply to any other Eclipse+GNU based IDE (for example MCUXpresso IDE).
I general I recommend to make such a porting with the “create a new project for the new device and then move things over”, as that way the original project remains ‘as is’. But it is possible to make the change ‘in-place’ too, and this is what this article shows.
In this article I show how to change a project for the FRDM-K64F (ARM Cortex-M4F from NXP) to a FRDM-KL27Z (ARM Cortex-M0+ from NXP). They have different ARM cores, different memory map and different system startup files.
switching cores
Projects
First, create a new project for the new board because we need to copy files from that project. This project can be removed at the end of the porting.

dummy project for new device
System Files
Remove the old system files and copy the new ones:

System Files
The system files are used to set the clock during startup or give access to the peripherals.
Startup Code
Do the same for the startup code files:

Startup Code
The startup code is used to initialize memory and setup the most important hardware, such as disabling/enabling watchdog or setup initial clock speed.
Linker Files
The linker files include the memory map. Replace the existing one with the new one:

Linker File
In the project settings, change the linker file name used:

Linker File Setting
Target Processor and Core
Make sure the ARM family and FPU settings are matching the new processor in the compiler settings:

Core Settings
Depending on the IDE and SDK used, change the device specifed in the project settings:
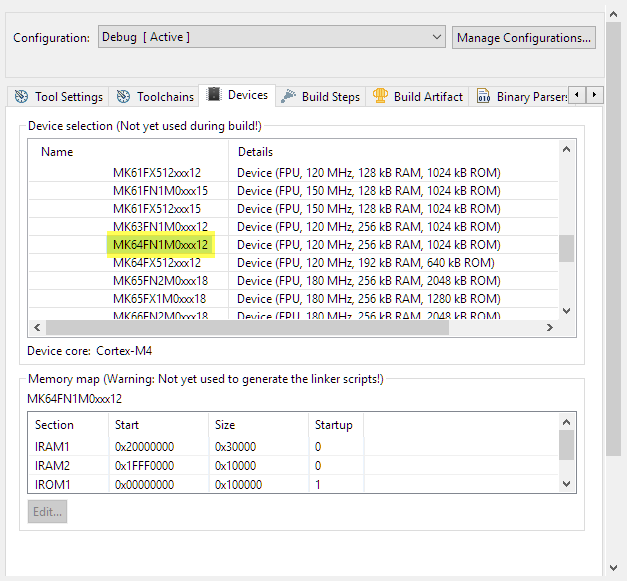
Device Setting
Build
Do a Project > Clean and then try to build the project. There are probably several includes in your application which need to be updated:

Changed include file
After that, the project should build fine.
Debugger
One last step: check your launch configuration/debugger settings: it should match the new device:
Setting if using PEMICRO Multilink:

Debugger Setting PEMicro
Setting if using SEGGER J-Link:

Debugger Device Setting SEGGER
That’s it. With this the project has all the new settings.
Summary
I recommend to switch a processor with the “create new project and move your application files over”. But sometimes it makes sense to make that change ‘inplace’. Switching the ARM Cortex ‘core’ stuff is rather easy. Migrating the microcontroller peripheral specific parts is much harder and specific to the family use, so this would be a complete different story.
Happy Switching 🙂

Good and Essential Explanation! Thanks
LikeLike
Thank you, appreciated 🙂
LikeLike