
Not ready for the complexity of a full blown Embedded Linux, but need that extra compute performance? Need an ARM Cortex-M7 running at 600 MHz module on a half-sized business card, ready to be integrated? Here we go: the Embedded Artists i.MX RT1052 OEM module:

Embedded Artists NXP i.MX RT1052 OEM Module
Compute modules are very common in the Embedded Linux space, for example see this Toradex module. The reason is simple: these high-performance boards simplify the design, as I don’t have to care about the BGA packages and the external SDRAM and FLASH devices: everything is on a module I can easily integrate into my base board.
With more and more powerful ARM Cortex-M7 entering that space (see the NXP i.MX RT1050), to me there is clearly a need to have such modules available for the non-Linux space. In my earlier review of the RT1050-EVK(B) I mentioned the need for such modules, and Embedded Artists was so kind to send me the i.MX RT1052 evaluation kit which arrived this Friday. So I had something to play with this weekend :-).
Embedded Artists i.MX RT1052 Evaluation Kit
The board from Embedded Artists (i.MX RT1052 OEM Module) is priced at 149 Euros. Not sure what the compute module alone price would be (I have asked), but I think if the price would be reasonable that module could get used in lots of places.
Update: I received pricing information for the OEM compute module (same as I have, with SRAM and PHY, but without WiFi module (http://embeddedartists.com/products/oem/imxrt1052_oem.php)):
“Our iMX RT1052 OEM board cost 49 EUR each in small volumes, but goes down to 19 EUR in high volume.”
The board came with a unique product (registration) serial number on a product registration card, a micro-USB card plus a small box of sweets :-).
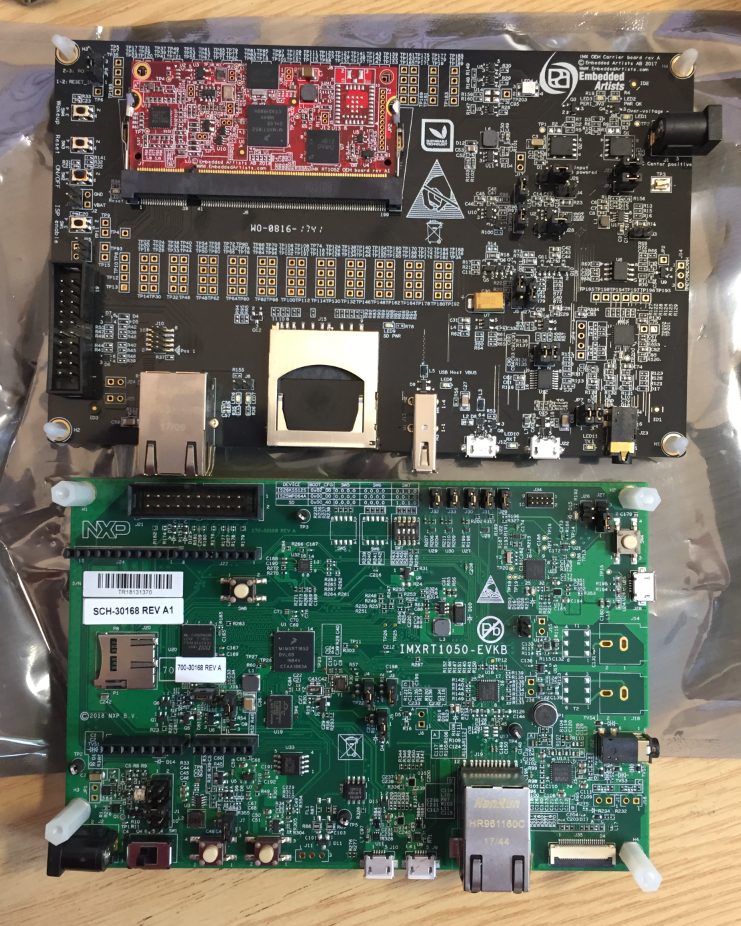
The base board size is 165×105 mm and has a LCD on the back. Compared to the NXP i.MX RT1050-EVK(B) this is much easier to use as it has all connectors on one side, has easily accessible test points and user elements (push buttons, debug connector are well placed.
I feel that the board has been designed as it could be used right away in a real product, it only could be a bit smaller. I like the fact that it does *not* have that OpenSDA on-board and that I can directly use standard debug tools using the 2×5 pin debug header (it does have that ‘bulky’ 2×20 pin adapter on it as well).
Size Comparison of the two boards
The board has the same display I have used in “Adding a Rocktech Capacitive Touch LCD to the NXP i.MX RT1052 EVK“.
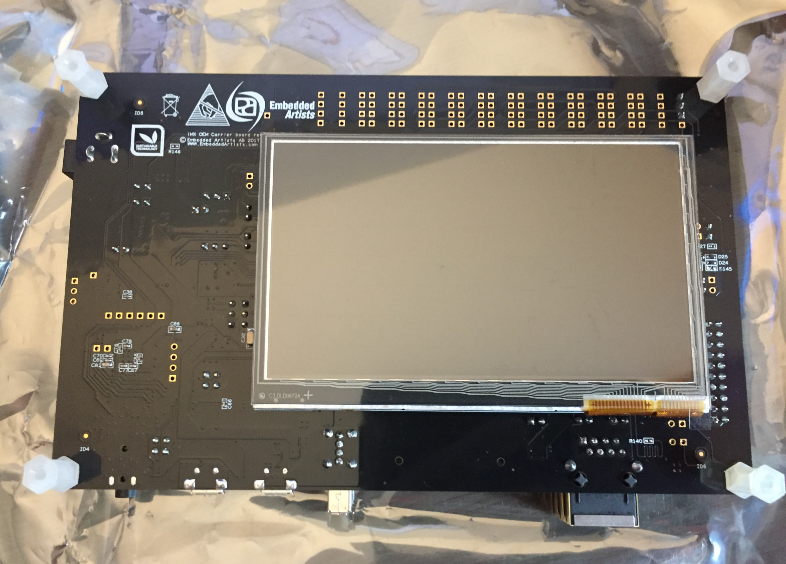
Embedded Artist NXP i.MX RT1052 Base Board Bottom Side with LCD
Compute Module
On the module there is the NXP i.MX RT1052 (ARM Cortex-M7, 600 MHz, 512 KByte TCM RAM) with 4 MByte external FLASH.

i.MX RT1052 OEM Board Block Diagram (Source: Embedded Artists)
Below the top side of the OEM board with the components:

Embedded Artist NXP i.MX RT1052 OEM Board Top Side
The compute module includes the dual QSPI adesto (EcoXiP) 4 MByte external FLASH memory. This video gives an overview about that solution. The NXP i.MX RT1050-EVK(B) has the device from Spansion on it. Unfortunately that memory device cannot be ordered by the usual distributors. So with building my board I would prefer normal QSPI external FLASH devices which are readily available.
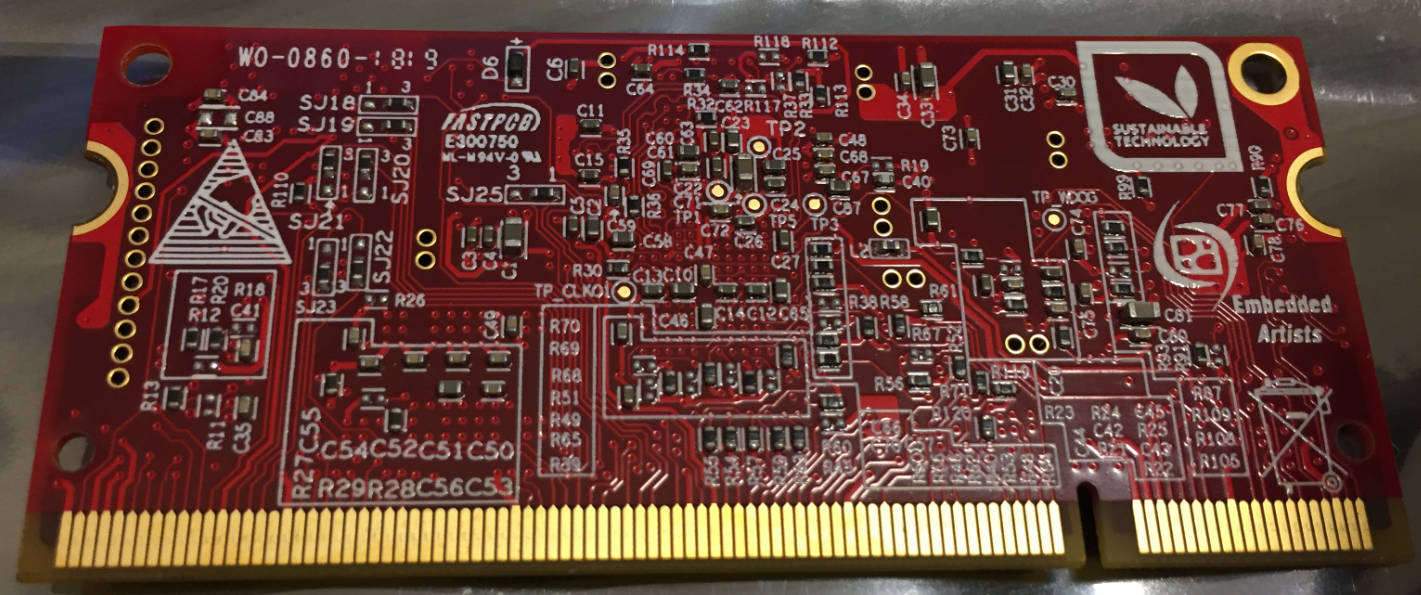
Embedded Artist NXP i.MX RT1052 OEM Board Bottom Side
The board has a footprint on it for the uBlox NINA-W13 WiFi chip.
💡 Both the compute module and the base board features several test points for power measrements, see the iMX_RT1052_Developers_Kit_Users_Guide.pdf from Embedded Artists.
MCUXpresso IDE
I have used the following software and tools with the board:
💡 because the i.MX RT family is still new, make sure you have the latest and greatest software and tools installed.
- IDE: MCUXpresso IDE v10.2.1 build 795 [2018-07-25]
- SDK: MCUXpresso SDK_2.x_EVKB-IMXRT1050 v2.4.2 Manifest 3.3.0
- Debug probe: LPC-Link2
Debug Probe
In this article I’m using the low-cost ($20) NXP LPC-Link2 as debug probe.
💡 Do not provide power to the target on the debug port! Have the jumper JP2 on the LPC-Link2 removed!

LPC-Link2 with JP2 (provide power to the target) REMOVED (not jumpered)
💡 At the time of this article, both Segger and P&E do not support the EcoXiP Flash from adesto. So my only option was to use the LPC-Link2. But I think this might change with getting that module more popular.
Hello World Project
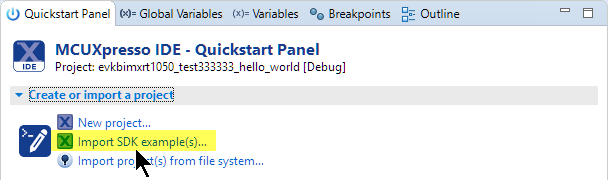
I recommend to start with a ‘hello world’ project. Use the ‘Import SDK example(s) button in the Quickstart panel:
💡 The finished example project is available on my GitHub site.
Import SDK Project
Because the SDK does not have the Embedded Artists board listed, select the i.MX RT1050 EVKB board:
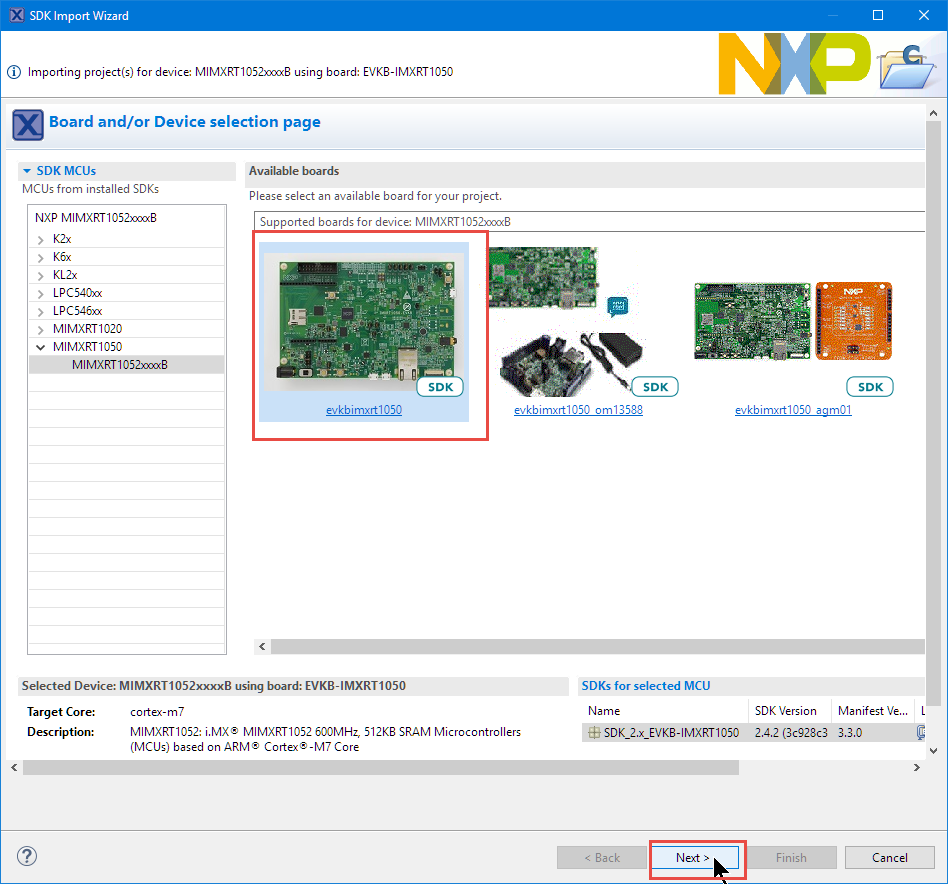
Board Selection
In the wizard, give the project a name and select the ‘hello world’ with UART selected:
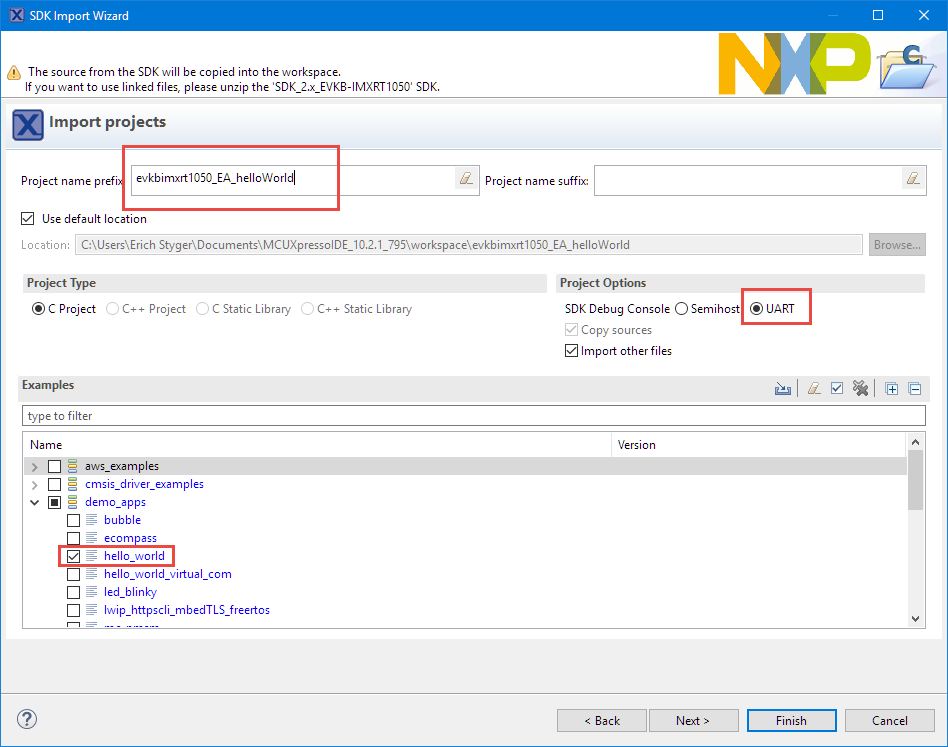
SDK Import Wizard
Because Embedded Artists board has a different external FLASH device, press ‘Edit…’ in the next dialog:
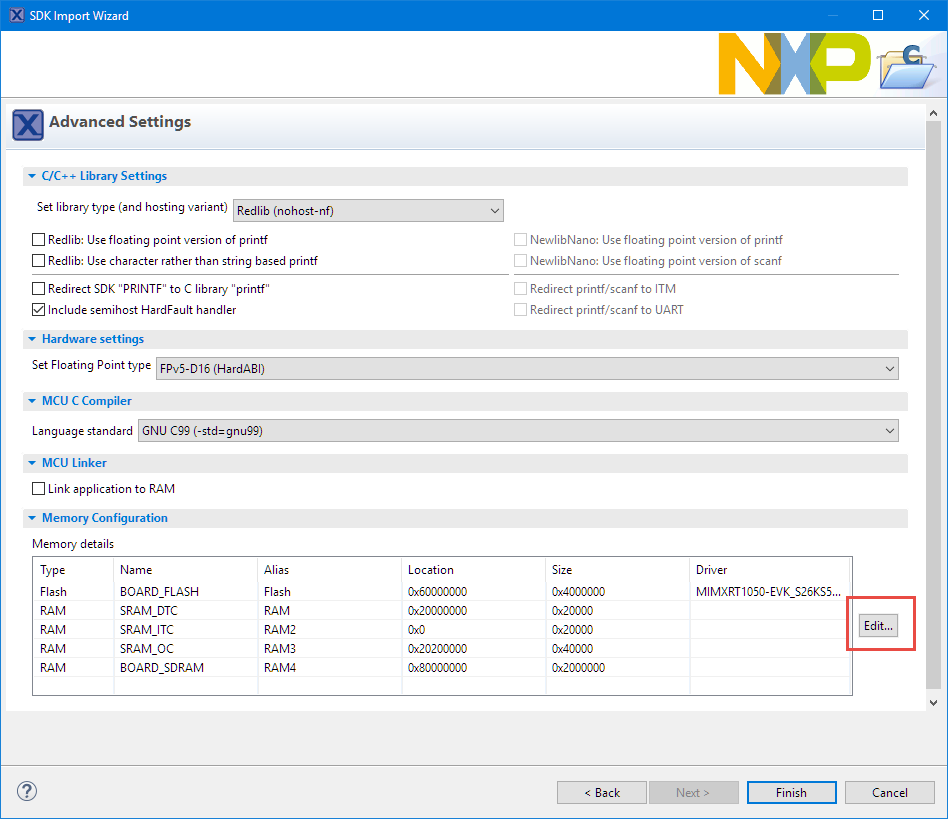
Advanced Settings
💡 If making the change in an existing project, see the ‘Porting’ section at the end of this article for a manual update of existing projects.
Press the ‘…’ button to change the flash driver:
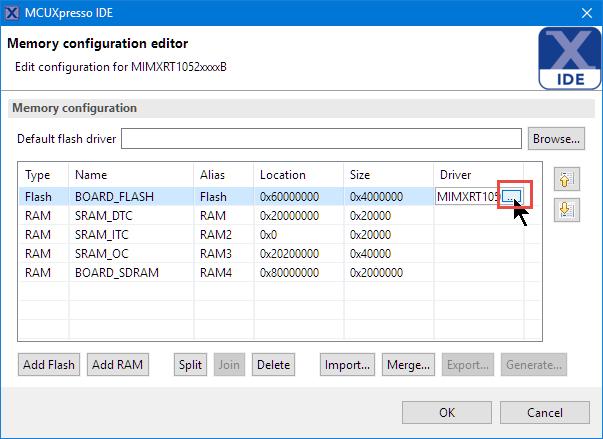
Flash Driver Settings
Select the ‘MIMXRT1050-EcoXiP_ATXP032.cfx’ driver:
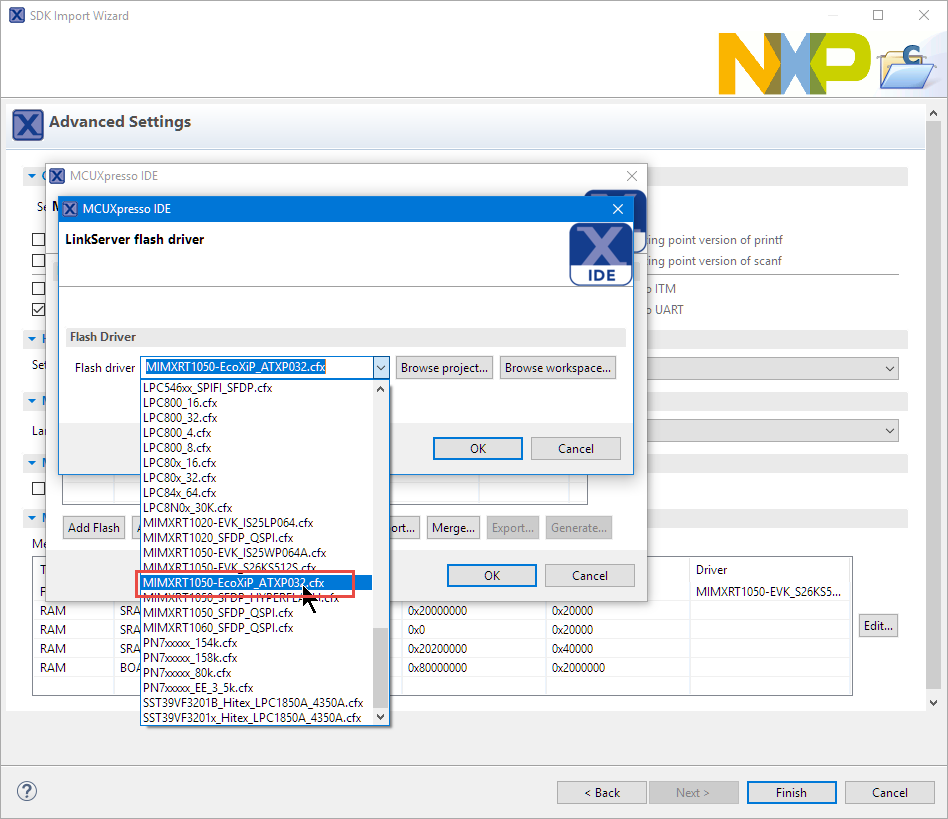
MIMXRT1050-EcoXiP_ATXP032.cfx
The EVK has a 64 MByte FLASH device, but our bord has 4 MByte: change the size to
0x400000
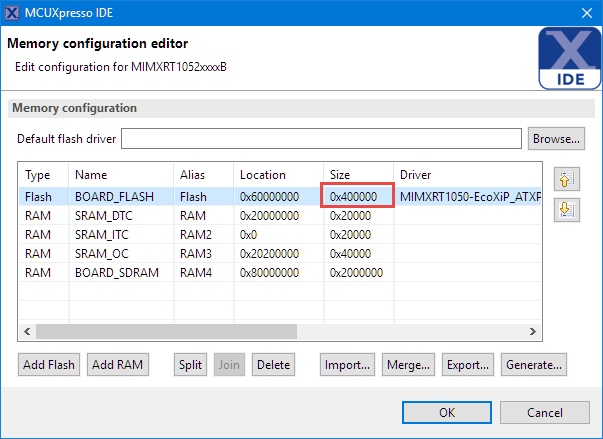
4 MByte FLASH Size
Use the OK buttons and then Finish to complete the project creation.
NOR FLASH Configuration File
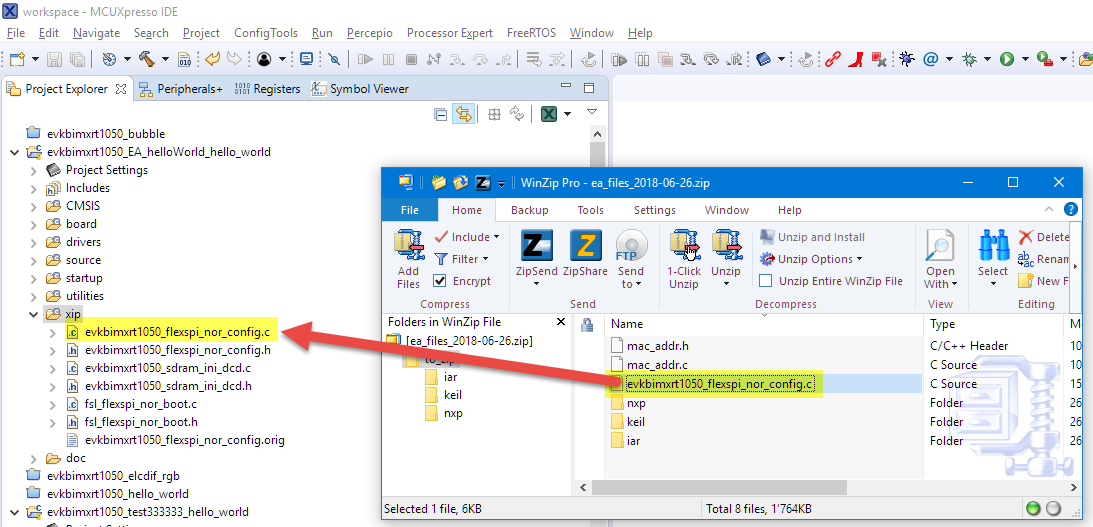
The i.MX RT is a flashless device and needs to be informed about the external flash attached to the CPU. So it is very important to have and use the correct boot header for the external FLASH. So we need to replace the one of the SDK with the correct one which is provided by Embedded Artists in a zip file from the Support area. Place that file into the XiP directory:
Flash Configuration
💡 The Embedded Artists documentation suggests to add this file to the SDK. But in that case the SDK will always use that file for all i.MX RT105x projects. I recommend to manually place the file into the XiP folder.
Board Setup
I prefer to power the board with an external 5V power supply. For this jumper J29 has to be set on position 1-2:
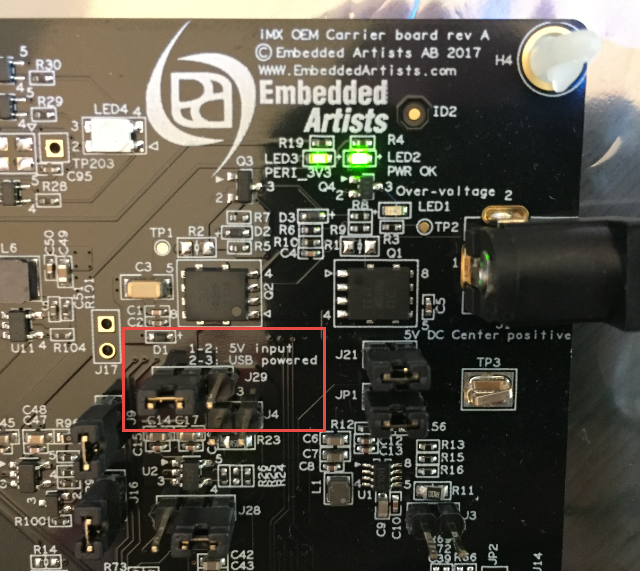
J29 5V Input Option
The ‘hello world’ uses the UART on the board, so I have connected the yellow USB cable to the UART-2-USB CDC bridge:
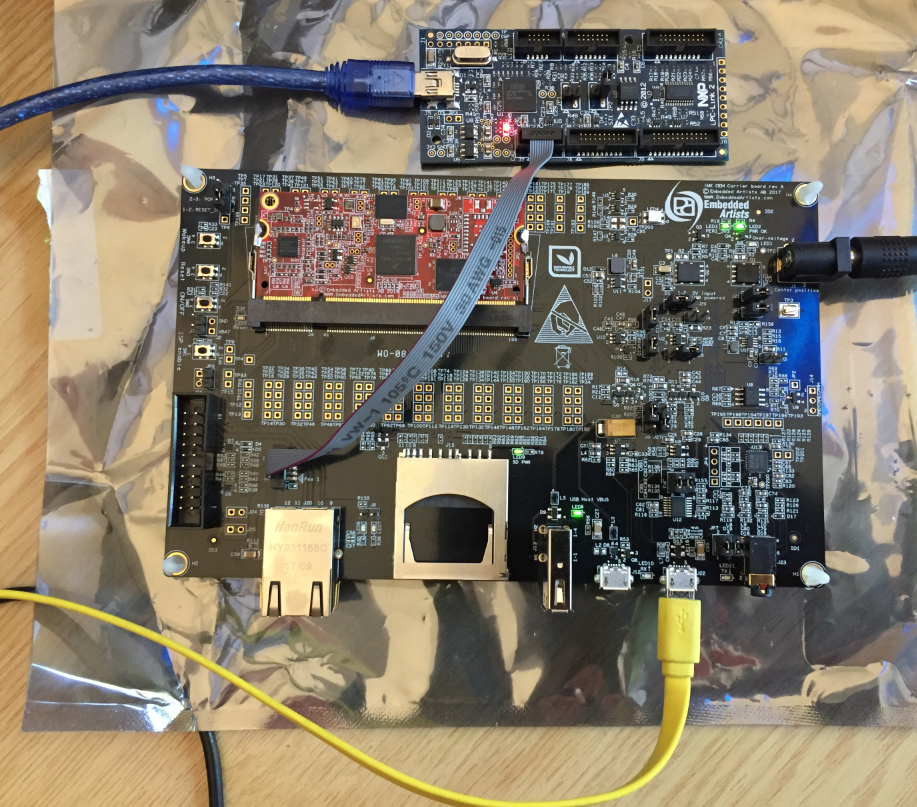
Debugging the Hardware
With this, I get the Hello World out of the UART to the terminal:
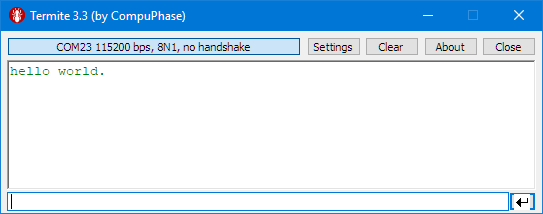
Hello World output
Build and Debug
Use the ‘Build’ followed by the ‘Debug’:
Then I’m able to debug the board with the MCUXpresso IDE :-):
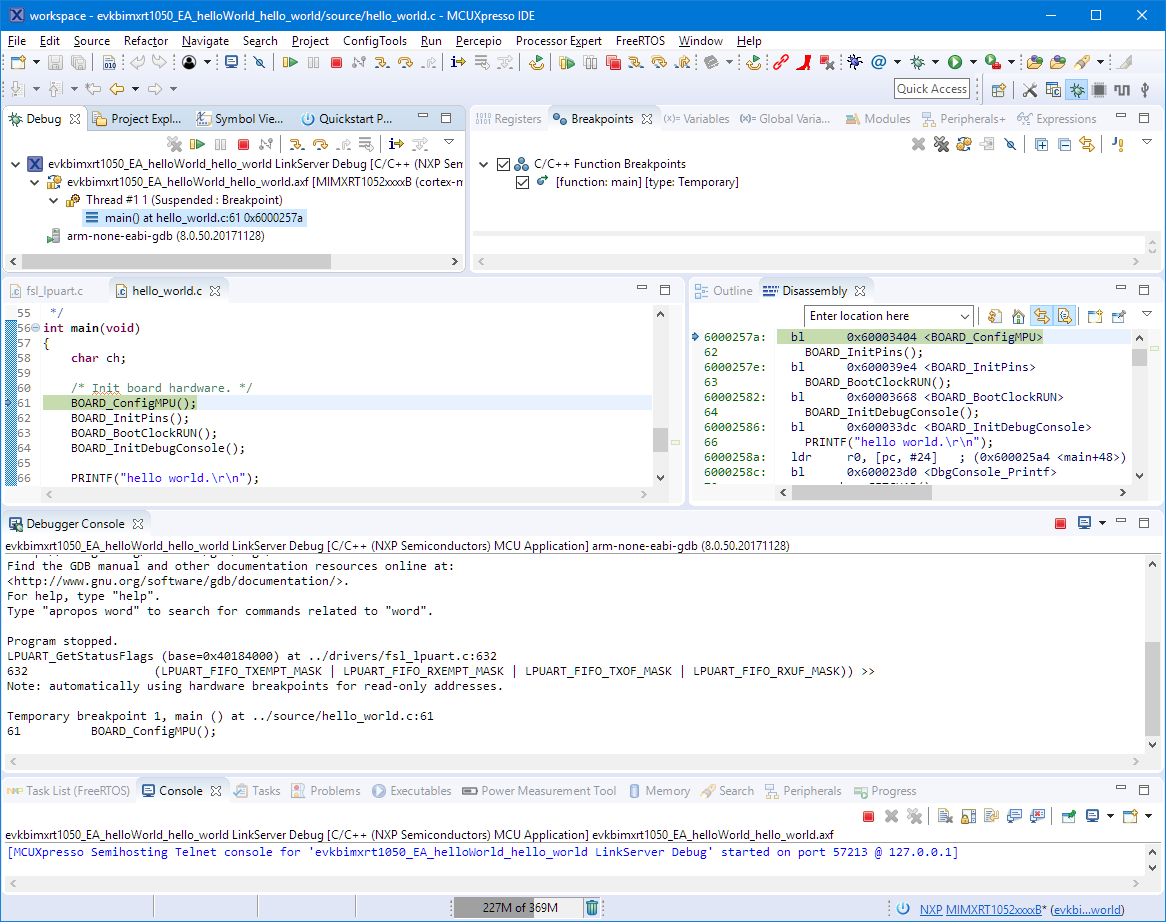
Debugging the Board
Porting Projects
The board is kind of similar to the NXP i.MX RT1050-EVK(B), but not the same, as the hardware is different. Consult the Embedded Artists iMX_RT1052_Developers_Kit_Program_Development_Guide.pdf for details.
For existing projects at least the flash type and size has to be changed (see steps from above during project creation) in addition to changing the flash header information in the XiP project folder.
- Replace <project>\xip\evkbimxrt1050_flexspi_nor_config.c
- Change flash device size and type
At least with MCUXpresso IDE 10.2.1 the second step cannot be done directly in the IDE, as changing the flash type seems to affect other SDK settings.What I have observed with using the GUI on the project it removes some SDK component settings in the .cproject file:
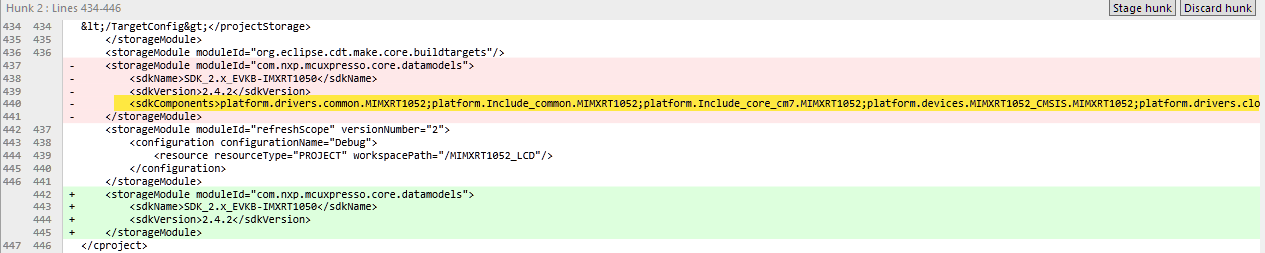
Possibly Lost Entries in .cproject
If this is the case for you too, then use the following workaround:
- Close the IDE or the project
- With a text editor, open the .project of the project
- Search for
driver="MIMXRT1050-EVK_S26KS512S.cfx" edited="true" id="BOARD_FLASH" location="0x60000000" size="0x4000000"
and change it to
driver="MIMXRT1050-EcoXiP_ATXP032.cfx" edited="true" id="BOARD_FLASH" location="0x60000000" size="0x400000"

Changed Flash Driver
With this, I only needed a few minutes to port a LittlevGL application to the Embedded Artists board:
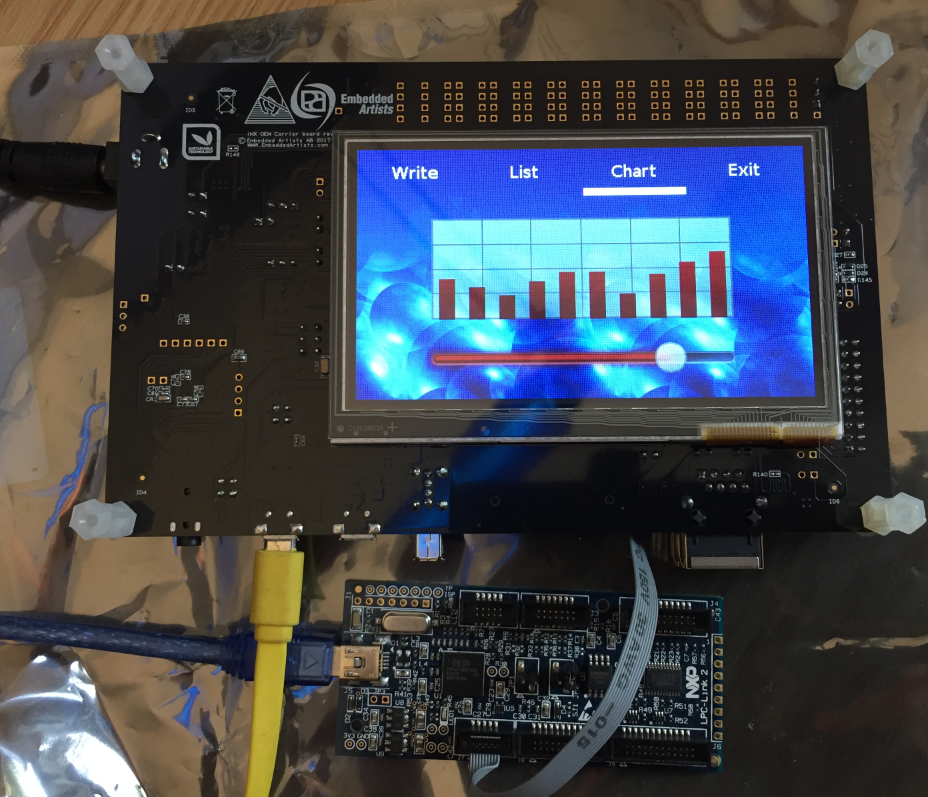
LittlevGL running on Embedded Artists i.MX RT Board
Summary
The Embedded Artists board and module has everything I need to get started developing with i.MX RT 1052. It is a better board than the NXP EVK(B), includes already the LCD, but costs about twice as much. I’m missing the camera connector which the EVK(B) has: I ordered a camera from AliExpress, but it did not arrive yet.
The goal of this high-performance ARM Cortex-M7 devices is to fill the gap between the microcontroller world and the Linux world. The challenge for vendors as NXP will be to bring the ease-of-use of the microcontroller world to this class of micro controllers: External flash device configuration is just one example of it.
Other than that: the Embedded Artists i.MXR1052 OEM compute module allows easy integration into custom products, and even if not intended for this, the base board already comes close to a real production board.
I hope this article gets you started with that compute module and board.
Happy Computing 🙂
Links
- Embedded Artists: http://embeddedartists.com/
- Embedded Artists i.MX RT1052 OEM Board: http://www.embeddedartists.com/products/oem/imxrt1052_oem.php
- MCUXpresso IDE: http://www.nxp.com/mcuxpresso/ide
- MCUXpresso SDK: https://mcuxpresso.nxp.com
- LPC-Link2 Debug Probe: https://www.nxp.com/products/processors-and-microcontrollers/arm-based-processors-and-mcus/lpc-cortex-m-mcus/lpc1100-cortex-m0-plus-m0/lpc-link2:OM13054
- NXP i.MX RT1050 EVK: i.MX RT1050 EVK vs. EVKB
- Projects on GitHub: https://github.com/ErichStyger/mcuoneclipse/tree/master/Examples/MCUXpresso/i.MX%20RT1052%20Embedded%20Artists

Hello Erich!
Really like your post! Great job! Are you going to make some tutorial how it works with Amazon FreeRTOS? It would be great to see how the OTA (firmware update over the air) works… We can find a lot of things on the net about embedded world but I am not sure why there is really not much easy to use OTA possibilities for embedded products…
LikeLike
Thanks! Yes, I have something like this in mind, just nneed to find a few spare hours to go through this….
LikeLike
Thanks for the info Erich!
LikeLike
Hello.
How many pins of Input/Output ports are available in connectors on the board to connect external devices ?, it seems that these are 6-pin connectors marked with TPxx, but the manual does not specify which ports, it even seems that some of those connectors are difficulties for access, by the Compute board itself.
On the NXP RT1020/RT1050 evaluation boards we only have a few ports available, on Arduino type connectors, for me it is insufficient for my tests.
As for the price of the Embedded Artists board, in Mouser it is 165 Euros + VAT (200 Euros), which is much more expensive than the NXP board. I see no reason, for now, to pay that extra money, the NXP board with the display is 134 Euros (VAT included) and the OpenSDA programmer / debugger is integrated.
The socket for memory cards, seems a large size, very impractical, when today the right thing is micro SD.
For the only thing that may interest me this kit is if it has enough more accessible I/O ports than the few Arduino format that gives the NXP evaluation board, but pay that extra of almost 70 euros, I do not know if it’s worth it.
I have already developed my own board with the RT1020 LQFP100, waiting for the LQFP144 to be available, because I can not connect an SDRAM with as few pins as the LQFP100 gives. That’s why I’m interested in getting an RT1020 or RT1050 evaluation board with access to a lot of ports.
Regards
LikeLike
Yes, the board is more expensive, but in my view well suited for evaluation. Anyway the idea of the compute module is to have it on your own custom board.
I did not make a 1-to-1 pin comparison, but the module has most pins available on the connector. I’m sure you will get the data sheet from Embedded Access (it is available with a link provided with the board, so not sure if I can send you the one I have). What is not available on the connector are the memory interface signals if the board comes with the SDRAM mounted. Same thing for the PHY signals: with a PHY on the board (as on my module), they are obviously not available. Other than that the LCD signals, I2C, Port B, SD card, etc for for all the components on the board are available.
LikeLike
Ok, thanks, I’m going to order the board, because I need many more I/O ports than those provided by the NXP evaluation boards. I suppose that I can use the Jlink or Multilink, by JTAG to Pprogram/Debug this board
What I’m looking for is an example source code, using DMA to transfer Memory data to several GPIO ports, and vice versa. In the SDK, all the examples that exist are from Memory to Memory or with peripherals of serial ports like SPI, I2C, UART, but none to copy from memory to several GPIO. Do you have any example source code of this type, so that I can use it as a reference to make my own program with DMA?
As I am starting with the RT1020 and it is also the first time I start using the DMA, I have many doubts, and seeing a sample source program helps a lot.
LikeLike
As of today, only the LPC-Link2 debug probe worked with that board (see the details in the article). Segger responded that they thought that the flash algos were part of the latest release of their software, but I did not see it. P&E very likely might support that flash device in the near future too. So I suggest that you get a LPC-Link2 in any case too (costs only $20).
DMA: I have done that on other Kinetis/ARM devices, but not on this one yet.
LikeLike
Hello, Erich.
Do you know if the Octal SPI memory is faster than the SDRAM? I want to make my own board with RT1020 LQFP144, my idea is to boot from QSPI or SD, and run from SDRAM.
I have read that it is possible to boot from QSPI (I suppose also from SD), and compile the software in a way that automatically copies and run from SDRAM. This is defined in the Linker Script, parameter Link Application to RAM.
Finally, the Embedded Artists Developer Kit is not useful for me, because most I/O pins are used by chips on the board. I asked them and they said that there are no 20 free I/O ports for my own application, so I decided to do my own custom board. On the other hand, they confirm that their board is compatible with Jlink from SEGGER, although not with Multilink.
I developed already my own board with RT1020 LQFP100, but I can not use SDRAM with LQFP100, I need the LQFP144. Because LQFP144 is not yet available, I will remove one chip of one of the NXP evaluation boards that I have to install it on my own custom board.
I need a very fast storage to run software and load huge tables of data in arrays, so I thought of SDRAM, but I’ve read that really the Octal SPI can be faster because the bus is 64 bits, while the SDRAM is 32 bits. In addition, the Octal SPI needs fewer I/O pins than SDRAM.
Sincerely
LikeLike
Hi Luis,
I have not done any benchmarking yet, but my understanding is that running code from SDRAM with caches enabled will give you the best performance.
LikeLike
Ok, thanks.
I read it in this NXP document, I do not understand why they suggest that OctoSPI is faster than SDRAM, just because the data bus is double, I thought that RAM would always be faster than any flash memory.
https://community.nxp.com/servlet/JiveServlet/download/340655-1-426559/boot_to_sdram.zip
” NOTE: While RT does support booting to SDRAM using these steps, we recommend using XIP from serial NOR on the FlexSPI interface when possible. The FlexSPI controller is connected to a 64-bit internal bus, but the SEMC which is the SDRAM controller on RT uses a 32-bit bus. So XIP from FlexSPI will usually provide better performance than booting code to SDRAM. “
LikeLike
Hi Erich,
Great article. Was looking for something like this. Do you have any recommendation about Embedded Linux dev boards (probably from NXP)? I have tried one from Karo Electronics but inadequate documentation and customer support have been a bottleneck. Any suggestion would be appreciated!
LikeLike
Hi Fahad,
I have used the Toradex modules (https://mcuoneclipse.com/2016/10/22/tutorial-first-steps-with-nxp-i-mx7-and-toradex-colibri-board/) and that worked well for me. You might have a look at other vendors too, e.g. https://mcuoneclipse.com/2017/06/25/first-steps-with-the-variscite-dart-6ul-i-mx6-ultralite-development-kit/
LikeLike
Thanks for the suggestions, Erich. I will check those. I always wanted to check out Yocto.
LikeLike
Pingback: First Steps with the NXP i.MX RT1064-EVK Board | MCU on Eclipse