
This tutorial goes through the steps how to create a blinking LED application, using Kinetis SDK and Processor Expert, using the TWR-KL43Z48M board from Freescale (now NXP):

twr-kl43z48m
Preconditions
I’m using the following in this tutorial:
- Eclipse based Kinetis Design Studio V3.2.0: http://www.nxp.com/kds. Or use your preferred IDE with Processor Expert.
- Kinetis SDK V1.3 for your target board: get it from http://kex.nxp.com/
- Make sure you install the SDK update into Eclipse (menu Help > Install New Software and then point to the .zip file in <SDK installation path>\tools\eclipse_update
- McuOnEclipse Processor Expert components from https://sourceforge.net/projects/mcuoneclipse/files/PEx%20Components/, see “McuOnEclipse Releases on SourceForge” how to install it.
I’m using the TWR-KL43Z48M board in this tutorial. You can use any other board, make sure you have the schematics and you should be ready to go :-).
Create New Project
Create new project with File > New > Processor Expert Project (Kinetis SDK 1.x works the same, btw):

create-new-project
Provide a project name, select your board/device, then point to the SDK folder and enable Processor Expert:

sdk-selection
Components
This creates a standard project with some default components:

project-created
Adding Components
Consult the schematics and board configuration where you have the LEDs. On my TWR-KL43Z the green LED is on PTA12.
To work with GPIO pins, I add the fsl_gpio component for the SDK V1.3 to the project:

added-fsl_gpio
Add the LED component:

added-led-component
SDK
This adds a few referenced components. Right now it shows an error, because the LED component it needs to be configured to use the SDK. Specify the SDK to be used (1.3 in our case):

sdk-to-be-used
Tell the LED component to use the SDK variant (SDK_BitIO):

sdk_bitio
As I’m using the LED on PTA12, I configure it as such (GPIOx, pin number) and give it a symbol name (LED_GREEN in my case):

configured-pin
Building and Debugging
That’s it! Generate code:
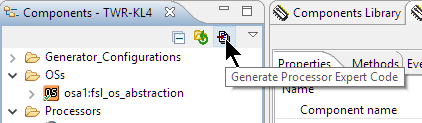
generate-code
Then add some blinky code like this:
  for(;;) {
    LED1_On();
    LED1_Off();
  }

blinky-code
And then build/compile the project:

building
Press debug:

start-debugging
Finally debug it on your board:

debugging
Stepping through the code now should blink the LED:

blinky, blinky!
Summary
The fastest way to bring up a board like the TWR-KL43Z used in this tutorial is still with Processor Expert: to have the blinky for that board took me less than 3 minutes from the project creation to debugging the blinking LED code on the target.
The project is available on GitHub: https://github.com/ErichStyger/mcuoneclipse/tree/master/Examples/KDS/TWR-KL43Z48M/TWR-KL43Z_Blinky_SDK_V1.3
Happy Blinking 🙂
Links
- https://mcuoneclipse.com/2015/10/18/overview-processor-expert/
- https://mcuoneclipse.com/2015/10/15/playing-tetris-with-a-frdm-kl43z-board/
- https://mcuoneclipse.com/2015/12/05/tutorial-freertos-projects-with-kinetis-sdk-v1-3-and-the-sdk-project-generator/
- https://mcuoneclipse.com/2016/01/29/first-nxp-kinetis-sdk-release-sdk-v2-0-with-on-demand-package-builder/
- https://mcuoneclipse.com/2014/11/08/tutorial-freertos-with-the-kinetis-sdk-and-processor-expert/
- https://mcuoneclipse.com/2015/07/08/tutorial-using-processor-expert-and-freertos-with-kinetis-sdk-v1-2/
