
Especially in a lab or classroom environment it is convenient to start with a template project, and then explore different ways to shape the project for different needs. As for any IDE of this world, this requires an understanding of the inner workings to get it right. So in this article I show how to copy, clone or rename properly an Eclipse ‘template’ project in the MCUXpresso IDE.
Template Project
In this article I’m using the NXP MCUXpresso version 11.11.1, but applies to earlier (and most likely later) versions too.
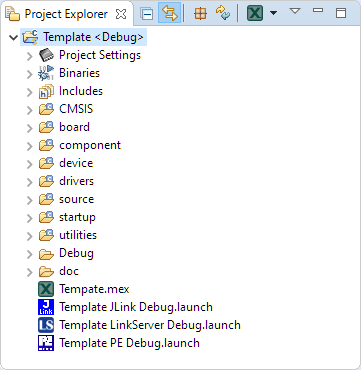
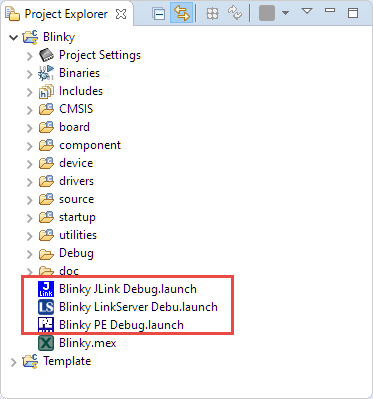
The template project has the usual things in it: folders, SDK source files, project settings, a .mex Configuration Tool file plus as an extra three different debug (.launch) configs for three different probe vendors (NXP LinkServer, P&E Multilink and Segger J-Link):
Template Project in MCUXpresso IDE
Basically the process is to copy-paste the template project. But to make everything really good looking and for the perfectionists among us, I have added some optional extra steps.
Step 1: Copy the project
The first and easy step is to copy the project:
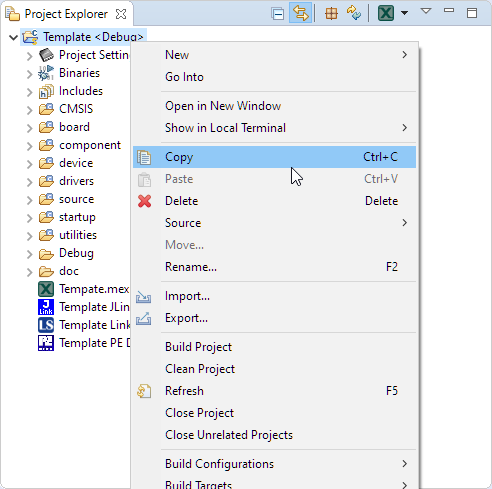
Copy project
and then paste it:

Paste Project
Give it a new name and optionally specify it where it should be stored:
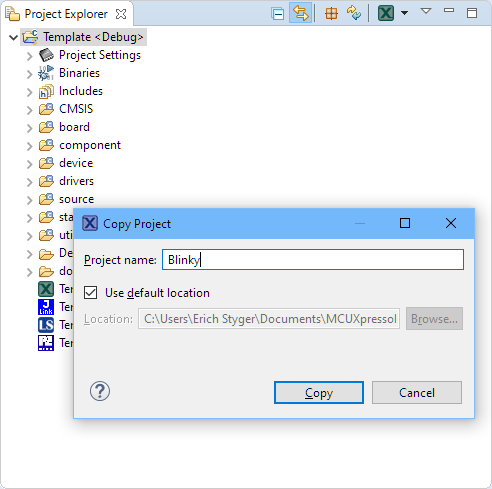
Name for copy
Now I have a second project in the workspace:
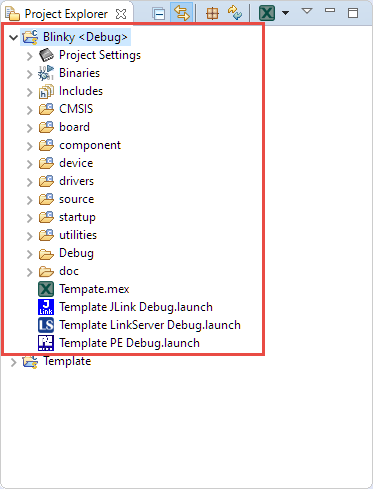
New copied project (Blinky)
Step 2: Refresh Policy
Go into the project properties > C/C++ Build > Refresh Policy and check that the correct project name is listed as Resource:
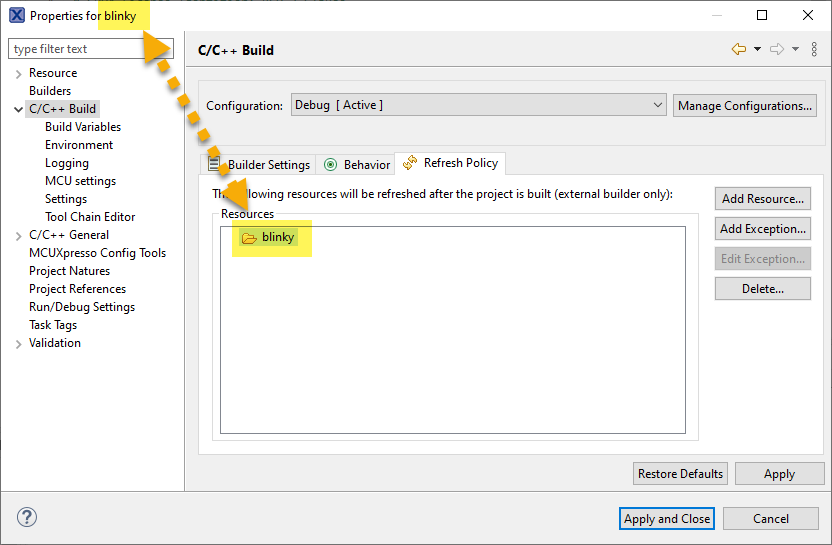
resource
Otherwise the build systems always will build all files, see “Eclipse Project ‘Refresh Policy’: Broken Incremental Build with External Make?“.
💡 The latest Eclipse release might automatically change that name with the rename action, but better to check anyway.
Step 3: Clean-Clean
Now we need to get rid of all the intermediate, build and object files of the previous project. The usual Project > Clean is not enough, as it still might leave things behind from the template project. To make sure that we have a clean-clean state, simply delete the output folder, typically named ‘Debug’:
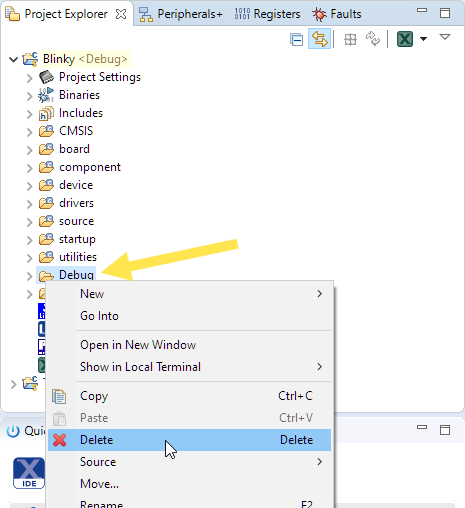
Deleting Debug Folder
Step 4: Build the Project
Build the project:
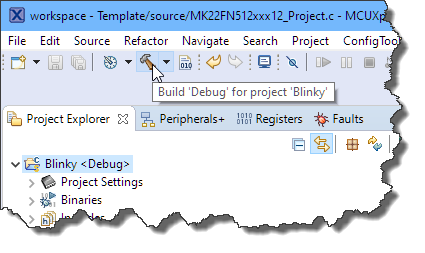
Build the project
Step 5: Rename the Linker Files (optional)
This is more of a cosmetic thing: looking at the files in the output folder, there are the linker files with using the ‘old’ project name:
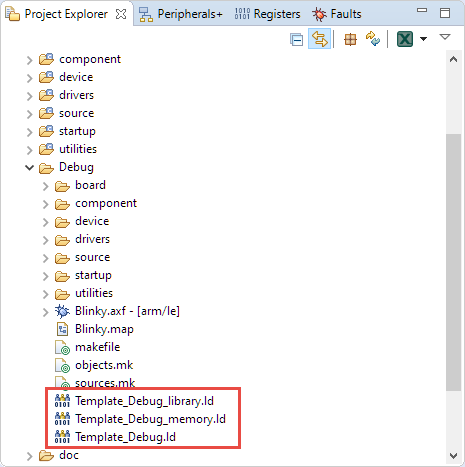
Selected again
It works because the name does not matter: for the perfectionists (I’m one of it) to have them matching the new project name, I have to use a trick:
First: delete the files:
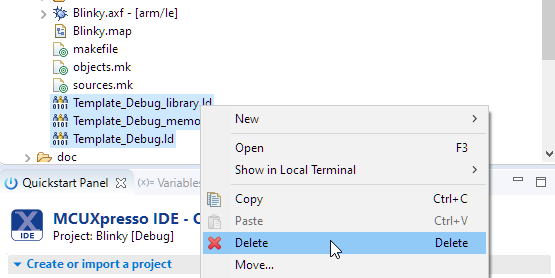
Deleting Linker Files
Then go into the project settings (Project > Properties) and de-select the ‘Manage Linker script’ option and press ‘Apply and Close’:
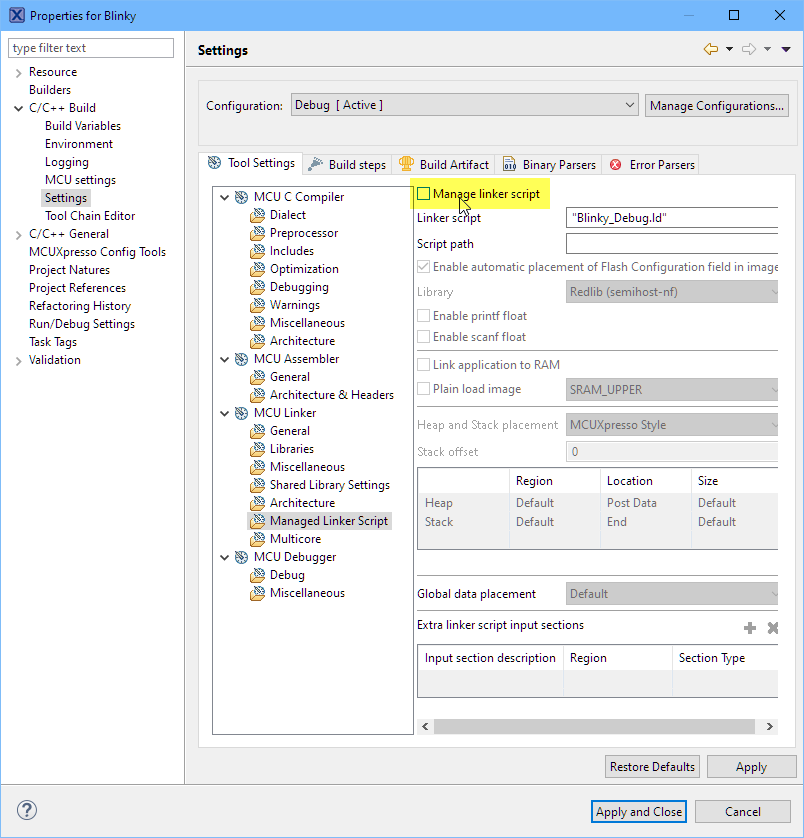
Deselect Managed Linker Script
Then open the same settings, and now re-enable that option again and press ‘Apply and Close’:
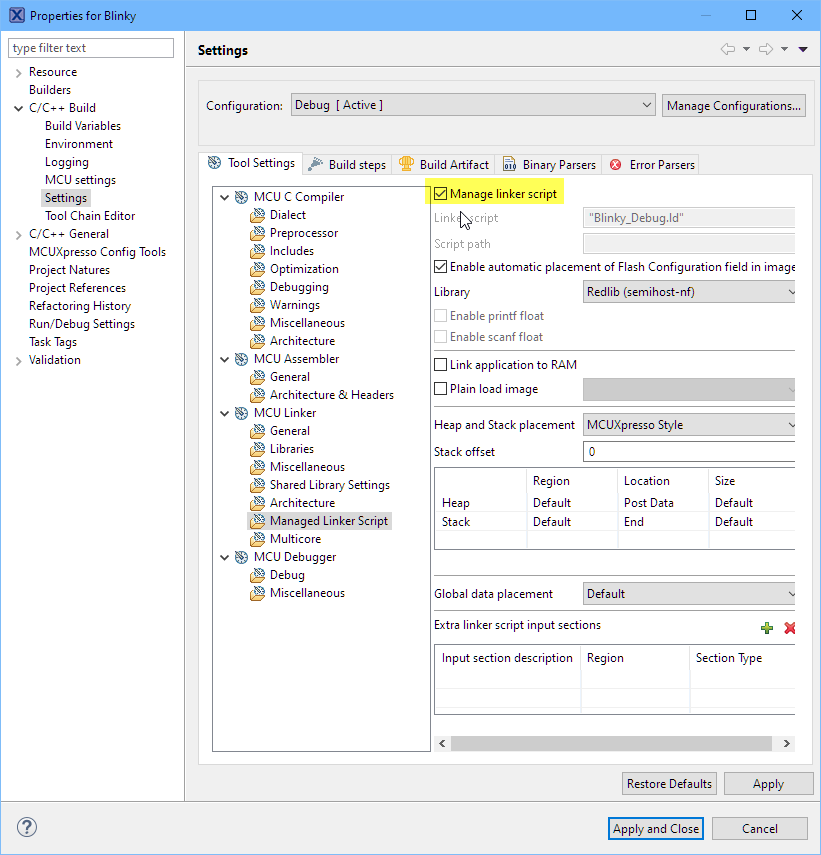
Selected again
Now do a build, and the files will use the new project name:
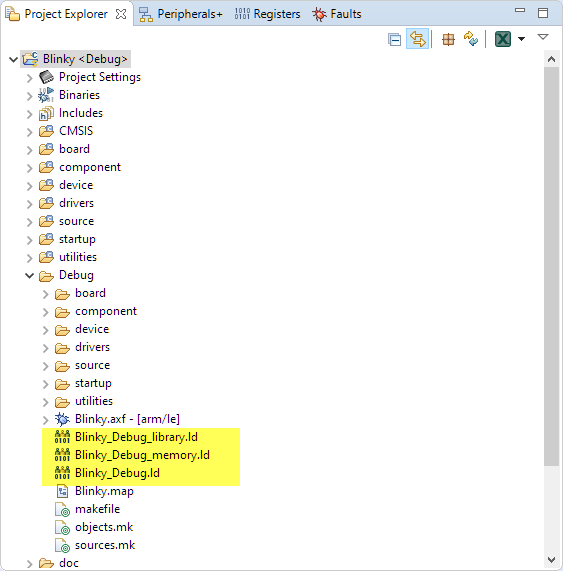
Linker Files with new names
Step 6: Rename the Config Tools .mex Files (optional)
As we can see: Eclipse copied the project files and settings and created a new folder for the project. But it did not change the file names for the .mex or .launch files. The files work with whatever name they have, but I prefer to have them named matching the project name. So I rename the .mex file (if it exists):
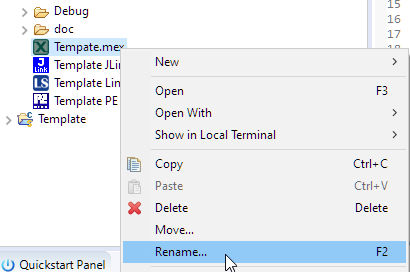
Rename .mex File
Step 7: Rename .launch files (optional)
Because the NXP MCUXpresso IDE is re-creating the .launch files with a probe discovery, I simply could delete the .launch files and they would be re-recreated from the defaults. But if I have carefully crafted the settings in it, then it is easier to have them renamed too:
Renamed Launch Files
With the .launch files renamed, they still point to the previous project and binaries. For each of the .launch files, open it (double-click on it):

Changed Debugger Main Configuration
Make the change, press ‘Apply’ and close the dialog.
Result
Now I have a perfectly cloned project which I can start using (or clone again):
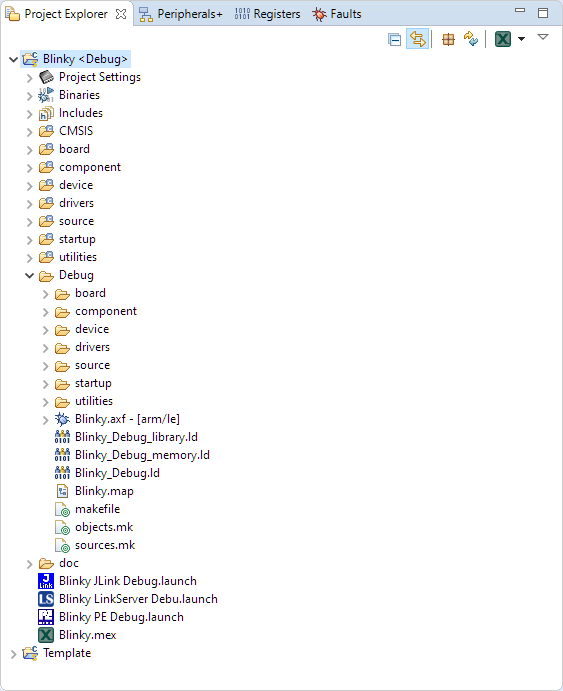
Cloned Project
Summary
Making a copy of an Eclipse project in MCUXpresso is basically a copy-paste operation. But to make it perfect and to match the file names the new project names, I can rename and update the settings (or simply delete the debugger .launch files and have them re-created by the debug probe auto-discovery).
Happy cloning 🙂

A good list that shows all the annoyances of doing what should be an easy copy/paste; that wrong linker filenames issue has bothered me since day 2 with the Kinetis tools – first time I’ve seen a way to resolve it (even if a bit of excessive trouble!)
Thanks!
LikeLike
I have found that way to deal with the linker script files only by experimenting with the options. The good thing is that the linker script file name is annoying, but not really changing functionality.
LikeLike
Thanx Erich,
I could have used that about five months ago. ;^)
I basically follow what you are doing but I don’t see the Preferences being copied through (MCU Settings, Build Includes and Build Preprocessor options specifically). Is there a way to copy them directly?
LikeLike
There is the Export > C/C++ > C/C++ project settings to export it. For the Includes/etc you can simply select things and copy-paste it too (see https://mcuoneclipse.com/2017/08/29/tutorial-porting-blenrf-kinetis-design-studio-project-to-mcuxpresso-ide/copied-include-paths-into-mcuxpresso-ide-project/)
LikeLike
Thanx – that’s what I’m doing. It’s just that doing the select/copy/paste process, it is manual and mistakes can be made.
I was hoping for something that was fully automated.
LikeLike
Sometime ago, debugging a project together with its copy using two JLink at the same time on the same pc, weird things happened and I had to change the value of all occurrences of id=”com.crt.advproject.config.exe.debug.1234567890″ in the .cproject file of the cloned project…
Is there some easier way to do it?
Thanks Erich!
LikeLike
Hi Michael,
I have not obeserved any problems with such a parallel debugging, as long I took care to connect to the correct USB (ID). That com.crt.advproject.config.exe is imho the container for the build configuration and its settings, and they are local to the project, I don’t see how this would affect debug operation? From where did you had the information to change that ID?
Thanks!
LikeLike
Hi Erich, I searched every where by myself and found only that… It seems to me that McuXpresso controls that id when debugging in the same time two identical projects (only the project name was different in my case).
LikeLike
Ok, I’ll keep an eye on it. Good to know if this is indeed a problem.
LikeLike
For my LPCXpresso55S16 I’m trying to rename the couple of connected sample projects: lpcxpresso55s16_hello_world_ns and lpcxpresso55s16_hello_world_s (SDK Import Wizard). I followed this article and succesfully changed name and built lpcxpresso55s16_hello_world_ns. Then, leaving lpcxpresso55s16_hello_world_s unchanged and debugging it, the debug gave error. Each project referes to the other (Project->Properties->Project Referencies).
LikeLike
Not sure how you managed to get the project reference? But you can easily uncheck that reference (you don’t need the reference, right?).
What kind of debug error have you received?
LikeLike
The crossed referencies from notSecure to Secure and back are
provided by the base samples. If I take away one or both the result is the same: I can compile the renamed notSecure, but when I debug the Secure one, which will call also notSecure, I get the same error. If I could paste an image it would be better. The error is: Error in final launch sequence:
Error executing step execute method: stepProgramNS
Error executing step execute method: stepProgramNS
java.lang.reflect.InvocationTargetException
LikeLike
I’m away from my board and desk, so cannot try. But I believe this is linked because the final application consists both of a secure and non-secure part?
LikeLike
Hey Eric,
Thank you for your posts. I keep coming back here for valuable help.
I’m maintaining firmware from the KDS days and I have previously used an article from you on cloning a project. This looks like the newest guide for MCUXpresso, but it likely assumes some Eclipse fixes since then. I’m writing this in case others hit this article and are having issues with KDS. Please see a previous article for renaming Eclipse CDT Projects: https://mcuoneclipse.com/2016/01/07/renaming-eclipse-cdt-projects/
The particular issue I dealt with was a build would always re-build everything in the project. Again, I found another article from Eric to address the refresh policy:
Now, I just need to take the time some day to upgrade to the latest IDE. When I do I’ll have to say goodbye to Processor Export.
Thanks again!
LikeLike
Hi Kevin,
Thanks for pointing that out. Yes, newer Eclipse versions do update that Refresh Policy, so I did not include that step. But I have found out that this is probably only in 90% of the cases, so thanks to your feedback I have now added that extra step. That way I have this covered too, thank you!
Erich
LikeLike