
I admit: my work laptop machine is running a Windows 10 OS by default. But this does not prevent me running Linux in a Virtual Machine (VM). Each host platform has its benefits, and I don’t feel biased to one or the other, but I have started using Ubuntu more and more, simply because I have worked more on Embedded Linux projects. While I have used mostly Windows with Eclipse for NXP LPC, Kinetis and i.MX platforms in the past, I started using Ubuntu too from last year with the NXP MCUXpresso SDK. I did not find much documentation about this on the web, so I thought it might be a good idea to write a tutorial about it. So here we go…
Building NXP MCUXpresso SDK on Linux Ubuntu
List of this multi-part tutorial:
- Tutorial: MCUXpresso SDK with Linux, Part 1: Installation and Build with Make
- Tutorial: MCUXpresso SDK with Linux, Part 2: Commandline Debugging with GDB
- Tutorial: MCUXpresso SDK with Linux, Part 3: RAM and XiP Code on i.MX RT1064
Outline
This tutorial shows how to install and develop on Linux with the NXP MCUXpresso SDK. It goes through the steps all the needed pieces and to build one of the SDK example projects.
💡 If you want to develop the easy way with MCUXpesso SDK using a GUI: The MCUXpresso IDE (Eclipse based) runs on Ubuntu (and Windows and Mac) too. This article uses make files and no GUI for a ‘headless’ or ‘GUI-less’ environment.
This is what I’m using in this tutorial:
- Oracle VirtualBox V6.0.4 from https://www.virtualbox.org/
- Ubuntu 18.0.4 LTS: https://www.ubuntu.com/download/desktop
- NXP FRDM-K64F Board: https://www.nxp.com/freedom
- NXP MCUXpresso SDK V2.5.0 for FRDM-K64F: https://mcuxpresso.nxp.com
- GNU Toolchain for ARM gcc-arm-none-eabi-8-2018-q4-major: https://developer.arm.com/tools-and-software/open-source-software/developer-tools/gnu-toolchain/gnu-rm/downloads
- cmake version 3.10.2:

Blinky on FRDM-K64F Board
Linux Host
I recommend using Ubuntu Linux. I’m using it in a VM (Virtual Machine) on Windows 10 with the Oracle VirtualBox. There are plenty of tutorials available on the internet about installing Ubuntu on VirtualBox if you are not familiar with it.
NXP MCUXpresso SDK
Select and configure the SDK on https://mcuxpresso.nxp.com. The important part is to select Linux as Host OS and GCC ARM Embedded as toolchain:

MCUXpresso SDK
Then click on ‘Download SDK’ and download the archive to the user home directory and extract it there in a subdirectory:
$ cd ~
$ mkdir MCUXpresso
$ cd MCUXpresso
$ mkdir SDK_2.5.0_FRDM-K64F
$ cd SDK_2.5.0_FRDM-K64F
Place the SDK .tar.gz file into that created folder. Unzip the downloaded SDK file:
$ gunzip SDK_2.5.0_FRDM-K64F.tar.gz
Then untar the archive:
tar -xvf SDK_2.5.0_FRDM-K64F.tar

Extraced SDK Files
Installing CMake
By default the SDK is using CMake and not directly normal make files. As CMake is not installed by default in my Ubuntu distribution, I have to add it:
$ sudo apt install cmake
CMake is a cross-platform make file *generator*. As with the make file syntax, it takes some time to learn using. To learn more about CMake: there are plenty of resources available online, a good starting point is https://cmake.org/.
💡 I’m using cmake 3.10.2. The SDK documentation recommends using an older version 3.0.x. Using the 3.10 version will show warnings like ‘The CMAKE_FORCE_C_COMPILER macro is deprecated. Instead just set CMAKE_C_COMPILER and allow CMake to identify the compiler.’ because the SDK cmake files are not compatible with newer cmake versions. The warnings are annoying, but do not affect the functionality so they can be ignored.
Installing GNU ARM Toolchain for Embedded
To develop with the SDK, I have to install a cross toolchain, available from https://developer.arm.com/tools-and-software/open-source-software/developer-tools/gnu-toolchain/gnu-rm/downloads
I don’t want to have the toolchain installed for everyone on my Linux, so I install it locally into a ‘opt’ folder inside my user home directory:
💡 The reason for this is to separate different GNU ARM Embedded Toolchains for different projects. If I would add it to the global path/system, separation would be very difficult.
$ mkdir ~/opt
$ cd ~/opt
The current release is gcc-arm-none-eabi-8-2018-q4-major-linux.tar.bz which I download with
$ wget https://developer.arm.com/-/media/Files/downloads/gnu-rm/8-2018q4/gcc-arm-none-eabi-8-2018-q4-major-linux.tar.bz2
unzip the archive:
$ tar xjf gcc-arm-none-eabi-8-2018-q4-major-linux.tar.bz2
Finally change the permissions to read-only:
$ chmod -R -w "${HOME}"/opt/gcc-arm-none-eabi-8-2018-q4-major
Verify that the compiler is working:
$ ~/opt/gcc-arm-none-eabi-8-2018-q4-major/bin/arm-none-eabi-gcc --version
which returns the following:
arm-none-eabi-gcc (GNU Tools for Arm Embedded Processors 8-2018-q4-major) 8.2.1 20181213 (release) [gcc-8-branch revision 267074]
Copyright (C) 2018 Free Software Foundation, Inc.
This is free software; see the source for copying conditions.  There is NO
warranty; not even for MERCHANTABILITY or FITNESS FOR A PARTICULAR PURPOSE.
CMake Environment
CMake needs a variable set to find the compiler. This can be done with
$ export ARMGCC_DIR=~/opt/gcc-arm-none-eabi-8-2018-q4-major
To make it permanent for the user, it can be added to the ~/.bashrc file:
$ nano ~/.bashrc
And then add it to the file which gets executed every time I log in as this user.

Setting Environment
Use CTRL+X to exit nano and to save the file.
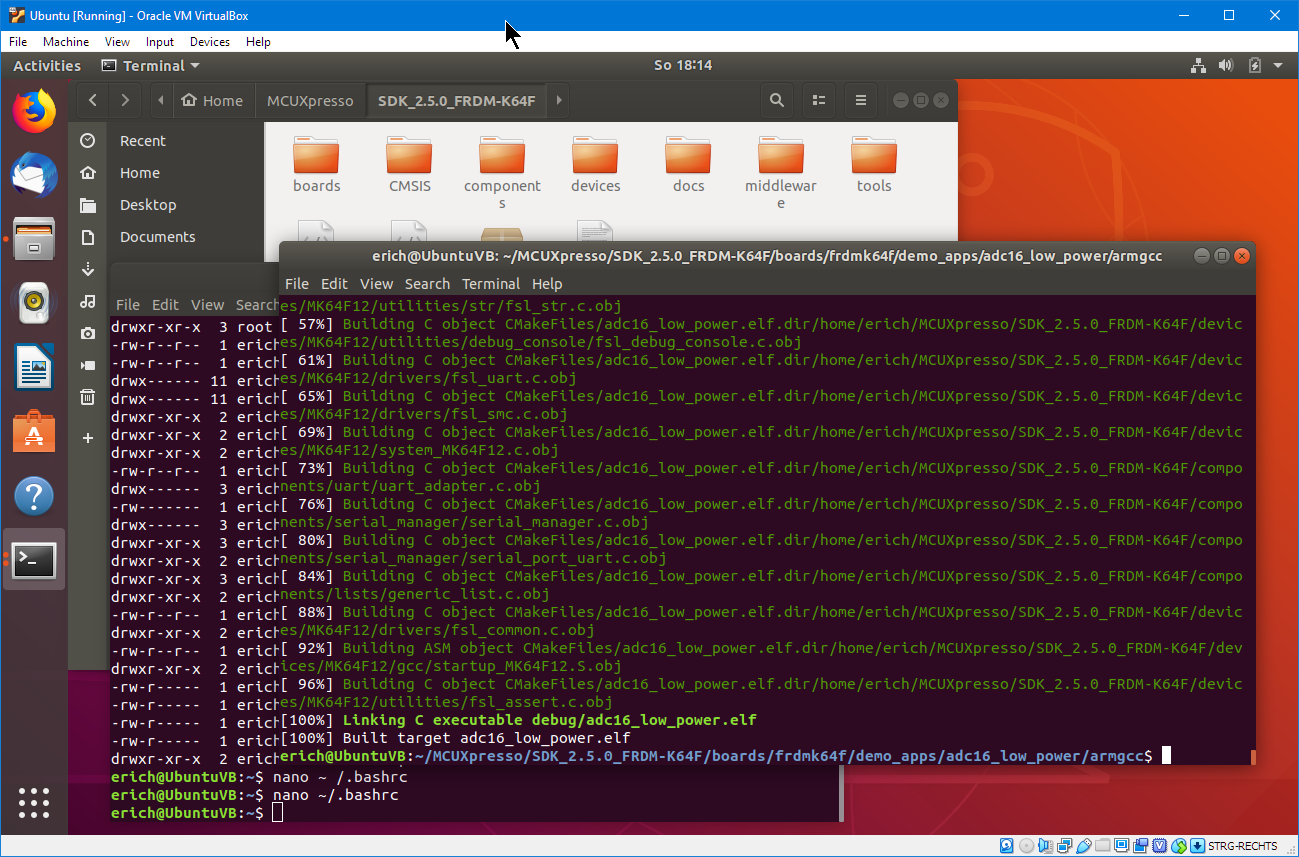
Building Example SDK Projects
In the next step I’m going to build one of the example projects: the LED Blinky one:
$ cd ~/MCUXpresso/SDK_2.5.0_FRDM-K64F/boards/frdmk64f/demo_apps/led_blinky/armgcc

LED Blinky Example Projects
This folder contains several *.bat files (left-over from the Windows world?). Relevant are the Shell script *.sh script files:
- clean.sh: used to clean the build files
- build_release.sh: generate make file for a release build
- build_debug.sh: generate make file for a debug build
- build_all.sh: build a make file for release and debug build
The shell script to generate the make file are using cmake (see above) with all the necessary information for cmake in the CMakeLists.txt file.
To build a make file for both debug version:
$ ./build_debug.sh

Running build_debug.sh
Beside of generating the make file, it generates the binary too in the ‘debug’ output folder:

Generated Files
With the ‘file’ command I can verify that indeed the correct binary has been produced:
$ file debug/led_blinky.elf

ELF 32-bit Executable
Because CMake has generated all the needed make files, I can now build the project with
$ make
To clean it I can use
$ make clean
that’s it 🙂
Summary
With this tutorial I showed the installation of the necessary tools (SDK, cmake, GNU ARM for Embedded toolchain) and how to build example projects.
In a next part I’ll touch on the debugging part with gdb. Until then, I hope you find this one useful.
Happy Linuxing 🙂
Links
- Oracle VirtualBox: https://www.virtualbox.org/
- Ubuntu Linux: https://www.ubuntu.com
- NXP MCUXpresso SDK web site: https://mcuxpresso.nxp.com
- NXP FRDM-K64F Board: https://www.nxp.com/support/developer-resources/evaluation-and-development-boards/freedom-development-boards/mcu-boards/freedom-development-platform-for-kinetis-k64-k63-and-k24-mcus:FRDM-K64F
- GNU Toolchain for ARM Embedded: https://developer.arm.com/tools-and-software/open-source-software/developer-tools/gnu-toolchain/gnu-rm/downloads
- CMake: https://cmake.org/
- MCUXpresso IDE: http://www.nxp.com/mcuxpresso/ide

An interresting alternate solution is the new Microsoft Windows Subsystem for Linux (WSL), which is basically a gimmick that implements most of the Linux kernel functionality on top of the existing Windows kernel and filesystem, without having to virtualize it. You can install multiple different Linux distributions on top of it (each system is practically a different folder in your home), and even run them at the same time.
I guess most of the tools you presented before run very well inside WSL.
If you install an X Server on Windows (like vcxsrv), you can also start graphical applications, like Eclipse or Visual Studio Code.
LikeLike
I had the same thought, so I just ran through the whole thing on WSL (Ubuntu) and it all worked except I had to unbzip2 by hand, vs. using tar xjf.
LikeLike
I should have written “bunzip2”.
LikeLike
is there anything wrong using tar instead of bunzip2? Maybe I need to change my habit using tar for .tar files?
LikeLike
No, nothing wrong with that. Just the tar included with the WSL Ubuntu doesn’t know about the bunzip option. (I had never heard of it before myself, either. 🙂
LikeLike
> the tar included with the WSL Ubuntu doesn’t know about the bunzip option
did you update to the latest version?
LikeLike
I did apt update, apt upgrade. But I have never changed it beyond that since the feature was first released to the Windows Insiders Fast Ring.
LikeLike
I think the latest WSL release includes Ubunutu 18 LTS, which later updates to a quite modern distribution.
LikeLike
I managed to upgrade the WSL release and now the tar understands the bzip stuff.
Curiously when the Linux part says it needs to reboot, it requires rebooting all of Windows, not just the Bash window. Which sorta surprises me.
LikeLike
Yes, that’s weird, but on the other hand there is no Linux kernel, the entire functionality is provided by the Windows kernel, re-cosmetised/extended with a new API that behaves like the Linux kernel, so major system changes cannot be handled by restarting the Bash terminal, which is exactly this, a shell running in the new Linux kernel environment.
LikeLike
Thanks for reminding me about WSL. I have tried that about 6 months ago, but I did not like it that much. Maybe it was too early or I did not invest enough time.
The Oracle VirtualBox has worked for me very, very well over years so I did not see a reason to change, but maybe I have to look into WSL again.
LikeLike
I recently updated my QEMU build scripts to run on WSL/Ubuntu, to create Windows executables intended for debug sessions (active QEMU development cycles on Windows).
When such a tight integration is needed, WSL is probably more convenient, since you can start Windows executables from a bash terminal, and/or dirrectly access the entire disk with posix paths (like /mnt/c). When isolation is needed, obviously VirtualBox is the answer.
The only possible problem I identified with WSL is that it stores the Linux filesystem directly in the Windows filesystem (it is true that the location is quite hard to find); the Linux specifics are stored as extensions, which are not updated if the files are accessed from Windows, so it is strongly recommended to not access the Linux files from Windows, since this can corrupt some files (I did not try, but I guess some attributes like set uid/set gid can be lost).
LikeLike
Here’s some info about accessing the Linux files from Windows.
LikeLike
Similarly I have used VMware for much of my Linux for many years. It works well and I see no reason to change, either. I just thought it would be interesting to see if the WSL could do it.
The Windows 10 I used for this was running in a VM. I’m one of those people who refuses to ever move to Windows 10. So it doesn’t boot natively anywhere for me. 🙂 I’m kinda hoping to reverse my VM situation during 2019. So I boot Linux natively and run Windows in the VMs.
LikeLike
Pingback: Tutorial: MCUXpresso SDK with Linux, Part 2: Commandline Debugging with GDB | MCU on Eclipse
Pingback: Tutorial: MCUXpresso SDK with Linux, Part 3: RAM and XiP Code on i.MX RT1064 | MCU on Eclipse
Great post Erych, there is one major exception in how I deal with this, which is that I use Vagrant, which means that all the commands above are scripted and can be run on demand and still run in Virtualbox. All hosted on my github : https://github.com/philmcm/arm-vagrant
One other difference is that I do all my programming and debugging using OpenOCD within the Vagrant/VirtualBox environment, and there is one major problem with that related to the LPC-Link2 and CMSIS-DAP … but I’ll write more about it in the comments under Part 2.
LikeLike
Hi Phil,
thanks for pointing to Vagrant (which I was not aware about). I currently have no need for this, but I’ll keep this in mind just for the future.
LikeLike