
In my previous article “Seeed Studio Arch Mix NXP i.MX RT1052 Board” I described how I can use and debug the Seeed Arch Mix Board. But so far I only had things running in RAM. Ultimately I want to use the QSPI FLASH memory on the device with my firmware and running code on it. This article shows how to get from RAM execution to SPI FLASH in-place execution (XiP).

Seeed Arch Mix NXP i.MX RT1052 Board
💡 Executing from FLASH is typically slower than running from RAM. But running from FLASH does not need any special loading at runtime.
With still no schematics of the board available (I have asked Seeed for that) I had to do some reverse engineering to find out more about the Arch Mix board.
💡 UPDATE: Seeed has uploaded the schematics of the board to http://wiki.seeedstudio.com/Arch_Mix/
I have found the ‘ShareBoard’ (see links at the end of this article) which seems to be like the predecessor of the Seeed Arch Mix board. That way I have found out some of the address mapping and peripherals.
I have setup the board for SWD debugging (see “Seeed Studio Arch Mix NXP i.MX RT1052 Board“). I’m using the Eclipse based MCUXpresso IDE V11.0.0 with the NXP LPC-Link2 debug probe with a 3D printed enclosure.

Debugging the Seeed Arch Mix i.MX RT1052 Board with LPC-Link2 and MCUXpresso IDE
💡 Do *not* install the jumper JP2 (provide power to the target), as with this debugging most likely will fail.
So here is how to go from ‘RAM’ to ‘SPI FLASH’ with the NXP i.MX RT1052 on the Seeed Arch Mix board….
Because there is not much documentation available, I looked at the i.MX RT1020 board projects (see “First Steps with the NXP i.MX RT1020 EVK Board“) as this board is using the same SPI FLASH device.

i.MX RT1052 with the i.MX RT1020-EVK
First, create an ’empty’ project with the Wizard in the MCUXpresso IDE using ‘New Project…’. Select the MIMXRT1052xxxxB with the MCUXpresso SDK:
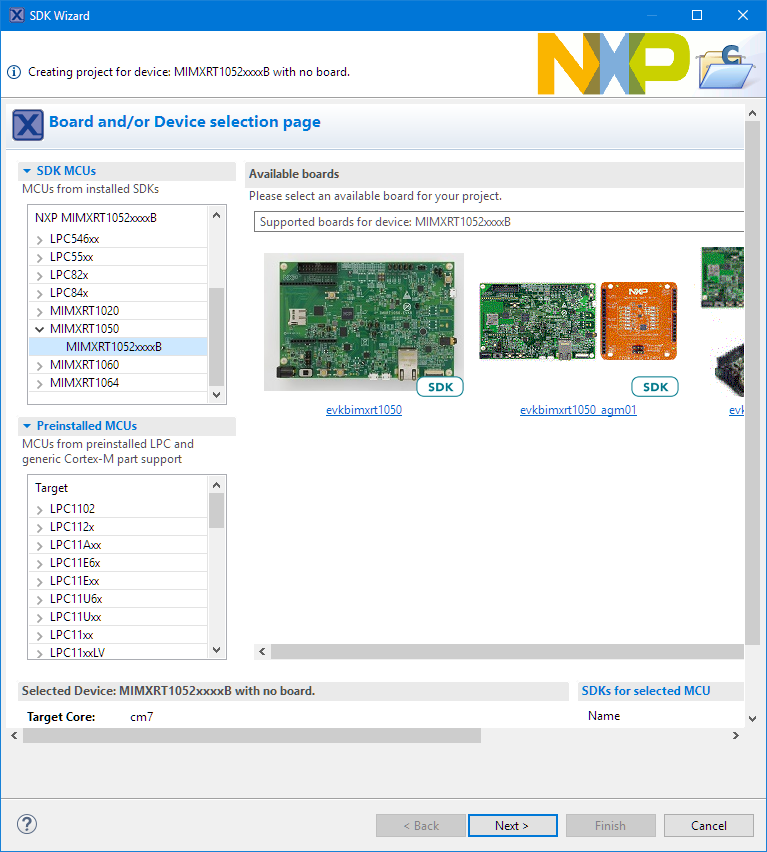
SDK Wizard
The RT1052 on the board uses the CVL5B package:

MIMXRT1052CVL5B
So I select that package to be used:

Selecting CVL5B Package
The rest leave with the defaults and have the project created. That project is setup for RAM only:

RAM project
So debugging that project will run it in RAM (actually the DTC RAM), as seen in the disassembly window of the IDE:
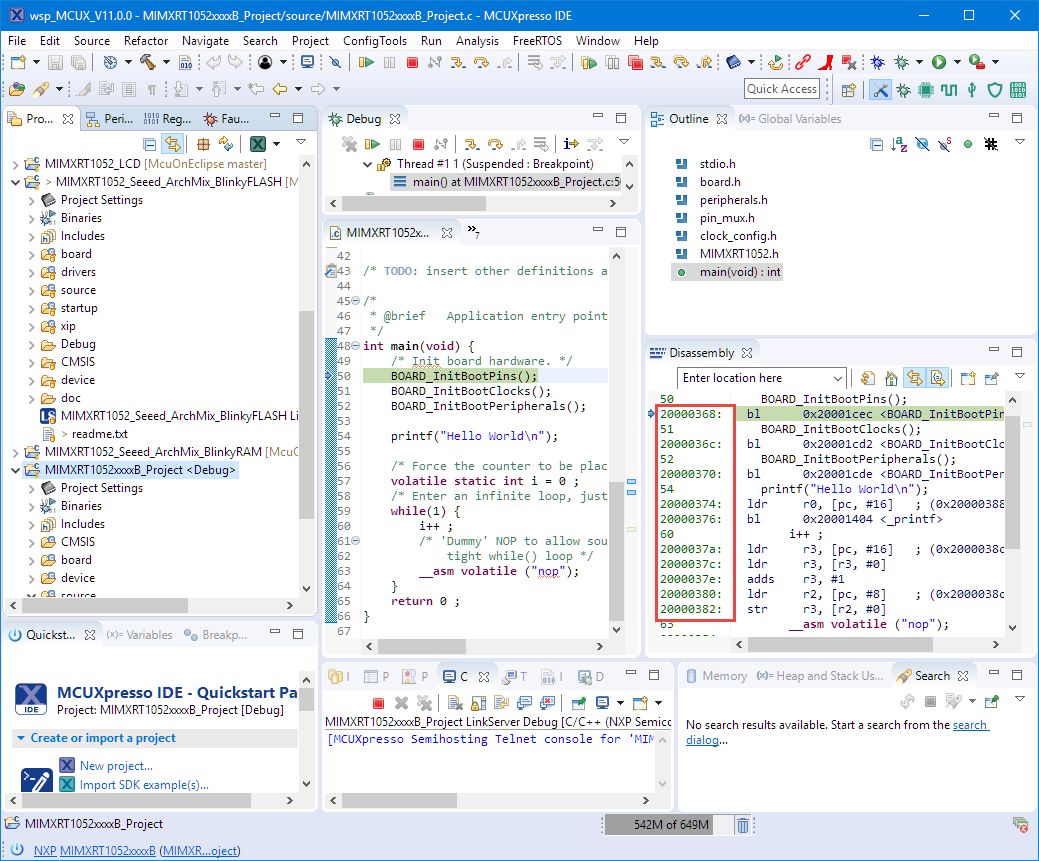
Running in RAM
So how to add the ability to download and debug in the external SPI FLASH?
The FLASH chip on the board is the IS25LP064A-BLE (64 MBit (8 MByte), the same as on the i.MX RT1020-EVK.

S25LP064A
First, copy the XiP folder from the i.MX RT1020 project as it contains all the needed data to configure and identify the external FLASH device. The files can be renamed t match the 1050/52:
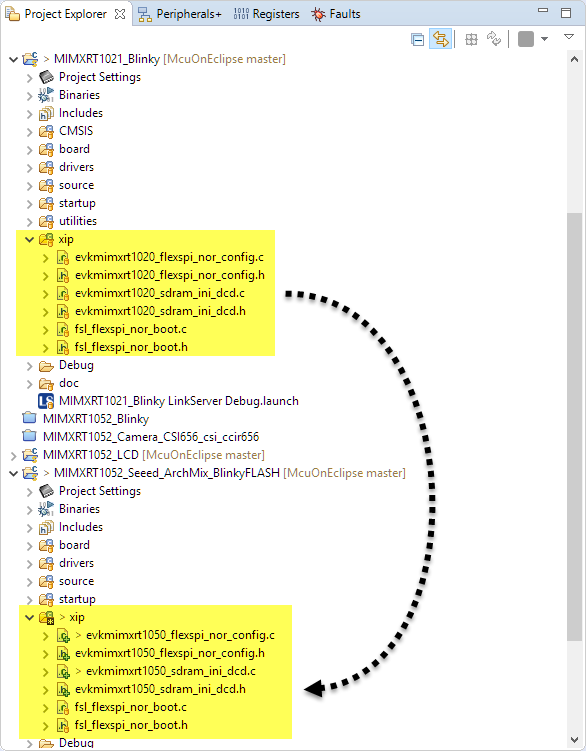
copy of XiP
Don’t forget to include that new folder for the build (see “Include Source Files for a Build in Eclipse“).
The files need the fsl_common, so make sure it is added to the project. Manage the SDK components:

Manage SDK components
Make sure the common driver is added:
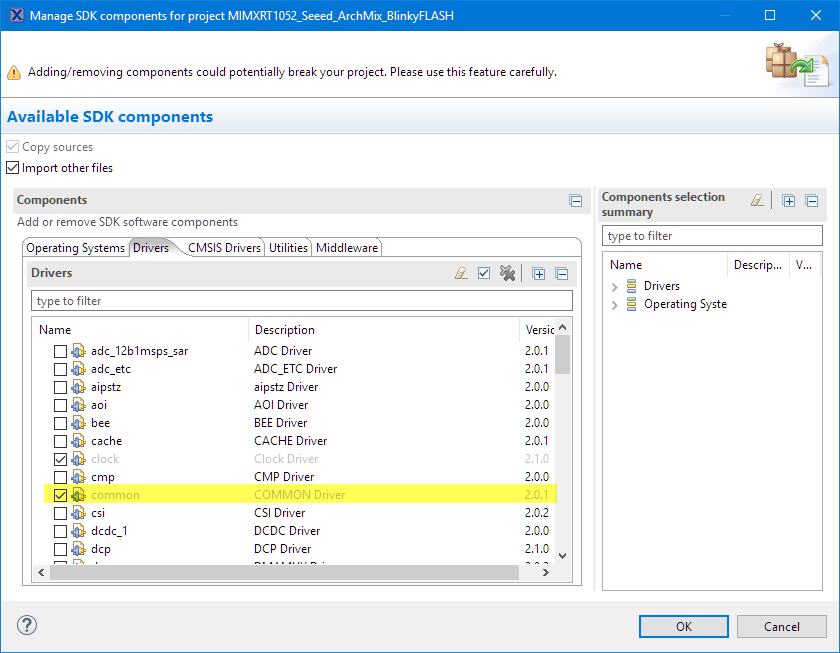
common SDK component
To make the FLASH device size known, add the following define to board.h:
#define BOARD_FLASH_SIZE (0x800000U)
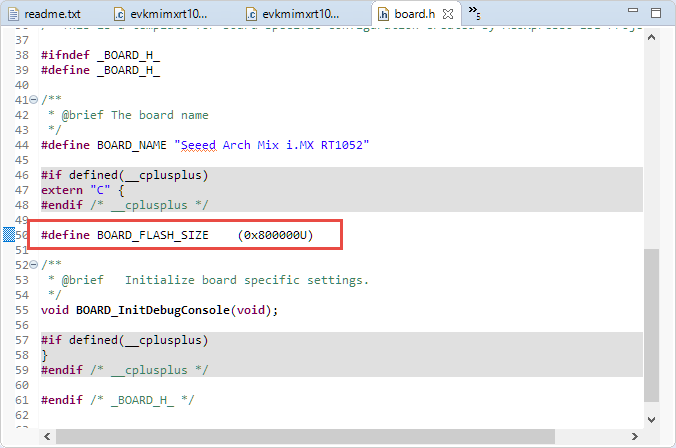
board.h with BOARD_FLASH_SIZE
These files need 3 defines in the project settings, so have them added:
XIP_EXTERNAL_FLASH=1
XIP_BOOT_HEADER_ENABLE=1
XIP_BOOT_HEADER_DCD_ENABLE=1

XIP Defines in Compiler Settings
Finally, add the Flash at the beginning of the Memory list in the project settings:

Added Flash Memory
- Type: Flash
- Location: 0x60000000
- Size: 0x80000
- Driver: MIMXRT1050-EVK_IS25WP064A.cfx
That’s it. Build the project and debug it:

Running and debugging in FLASH memory the Seeed Arch Mix i.MX RT1052
Victory! We have programmed the Flash and are debugging it :-).
The project is available as example on my GitHub site too.
Happy Flashing 🙂
Links
- Project on GitHub: https://github.com/ErichStyger/mcuoneclipse/tree/master/Examples/MCUXpresso/i.MX%20RT1052%20Seeed%20Arch%20Mix/MIMXRT1052_Seeed_ArchMix_BlinkyFLASH
- Getting Started with the Seeed Arch Mix: Seeed Studio Arch Mix NXP i.MX RT1052 Board
- Seed Arch Mix Board: https://www.seeedstudio.com/Arch-Mix-p-2901.html
- ShareBoard i.MX RT1050: https://github.com/Share-Board/ShareBoard-iMXRT1050
- ShareBoard schematics: https://github.com/Share-Board/ShareBoard-iMXRT1050/blob/master/PCB/V0.40/ShareBoard-i.MXRT1050_REV4.pdf
- i.MX RT Drivers in RT-Thread: https://github.com/RT-Thread/rt-thread/tree/8ed3470d2a485c49ec4f5d4a5ec53e94edf7a2c8/bsp/imxrt1052-evk/drivers
- RT1050 QSPI Boot Image discussion: https://community.nxp.com/thread/473345

Pingback: Restoring Default Firmware on Seeed Arch Mix NXP i.MX RT1052 Board | MCU on Eclipse
Hi Erich
I have a problem if I use the i.mx RT1020 xip files with the RT1050:
Booting from flash works fine but the external SDRAM dosnt work. Maybe the RT1020 EVK board uses a different type of SDRAM chip than the 1050 EVK board?
I replaced the files with the ones found on this webside (Attachment QSPI_xip.zip):
https://community.nxp.com/community/mcuxpresso/mcuxpresso-ide/blog/2017/12/07/overview-of-using-the-mimxrt1050-evk-with-mcuxpresso-ide
With those files the both the external flash and SDRAM work fine…
Regards
Dave
LikeLike
Hi Dave,
thank you! I’m going to update the projects on GitHub and will try it out.
Erich
LikeLike
Pingback: Using SEGGER J-Link with QSPI FLASH on NXP i.MX Boards | MCU on Eclipse
Hi Erich
Thanks for an excellent tutorial; being completely ignorant on using ARM controllers, I was able to get going withing few hours following the tutorial. Will definitely use this board in my projects, and I am getting ready to dive into RTOS using your examples on GitHub (need to learn the GitHub stuff now…)
LikeLike
Great, you made great progress! About ARM: if you have not noticed, RISC-V is getting high traction these days too, so it is always good not to bet everything on ARM. Acutually I believe the usage of ARM cores will greatly decline over the next years.
LikeLike
Thank you very much. Thanks to your article I was able to design my own Arch Mix interface board and program the flash with your blinky program. I tried first a LPCLINKII programmed as a JLINK but that failed(I think it was unable to STOP the processor). When I tried the straight up LPCLINKII it programmed just fine using the SWD interface.
It appears that the processor on the EVK is the commercial temp grade version(0C to 95C) of the one on the SEEED Arch Mix which is industrial(-40C to 105C). It is also limited to 500MHz from 600MHz, but I would put that down to the increased temperature range.
LikeLiked by 1 person
Hi Mark,
glad to read that it was useful for you. I think if industrial or not should really not make any difference to the debug probe. I did not notice that the one on the Arch board would be an industrial one. How did you find out?
LikeLike
The Arch Mix part is ..CVL5B while the EVK part is ..DVL6B. From the data sheet ‘C’ means industrial temperature and ‘D’ means commercial. The ‘5’ means 500MHz and obviously the ‘6’ means 600MHz, ‘VL’ refers to the package type which is the same for both and 10x10mm, 196 BGA. So the pinouts are identical as you mentioned.
Do you have any advice as to how to configure the external SDRAM? I would appreciate your advice.
LikeLiked by 1 person
Yes, indeed, I have a CVL5B on my boards too. SDRAM should be the same as on the EVK, so you could use that SDK code.
LikeLike
It looks like the SDRAM on the EVK1050 and the SEEED Arch Mix are the same, so the DCD code from the EVK SDK should work for the Arch Mix. Good news.
LikeLiked by 1 person
Yes, exactly.
LikeLike
Hi Erich
Thanks for an highly detailed tutorial; I’m having a issue with a custom board and a 8M QSPI Flash. Sadly, I need to use SD_B1_04 and 05 for I2C and avoid the use of the DQS pin, which I do not use in the QSPI Flash anyway.
How to achieve this behaviour ? How can we tell the ROM bootloader that when it boots our program, the NOR flash ‘does not’ requires a DQS pin ?
Please see some further explanations and images:
https://community.nxp.com/t5/i-MX-RT/Need-to-use-DQS-pin-in-RT1052-for-I2C-after-boot/m-p/1629767#M24488
Any help is appreciated!
LikeLike
Have you tried de-muxing and muxing the pin again?
LikeLike
Interesting…let me check and I’ll report my results…
Kind regards,
Sergio.
LikeLike
I did some experiments, on MUX and DE-MUX the pins. Sadly, it does NOT work.
I did lower the frequency to 50MHz in both:
flexspi_nor_flash_ops.c
xip/evkbimxrt1050_flexspi_nor_config.c
the last one controls the boot process and the and there is NO way that the DQS pins stop outputting data.
I was wondering Erich, the
MIMXRT1050-EVK_IS25WP064A LinkServer/CMSIS-DAP Flash Driver
is the source of the cfx file:
iMXRT1050_QSPI\builds\MIMXRT1050-EVK_IS25WP064A.cfx
shouldn’t’ we recompile it as we need this specific options?
LikeLike
I don’t think NXP provided the source files of the flash driver?
LikeLike
Yes, Erich, is indeed in the MCUXpresso directory we download with every update. Once you install MCUXpresso, the source of the project of the cfx is in the folder:
MCUXpressoIDE_11.XXX\ide\Examples\Flashdrivers\NXP\iMXRT\iMXRT1050_QSPI.zip
the cfx is actually an ELF that’s gets downloaded every time you debug a device.
LikeLike
I was not aware that they provided the source code with the projects. So indeed, you would be able to update/modify that flash applet in that case.
LikeLike