
In CI/CD for Embedded with VS Code, Docker and GitHub Actions, I used GitHub to build a pipeline. This setup supports continuous integration within a CI/CD environment.
This time, let’s do a similar thing. But instead of GitHub, I use GitLab with VS Code. And I use it for a project where three different MCUs are used: the Raspberry Pi Pico-W, an Espressif ESP32 plus the NXP K22FX512 on the Sumo robot:

Outline
Using a version control system like git is a common practice these days:
“Code doesn’t exist unless it’s checked into a version control system.” — unknown
But systems like GitHub or GitLab offer much more beyond offering storage for a repository. They offer server functionality to build, test and deploy your project, or CI/CD.
💡 If you are new to CI/CD: Read the article on CI/CD for Embedded with VS Code, Docker and GitHub Actions.
With CI/CD, I can do a lot of different things. One of the basic things is to make sure that the project(s) in the repository can build. You need more than ‘It works on my machine.’ This is essential if you want to collaborate and share projects with a version control system.
In this article, I’ll show how to use GitLab with CI/CD to build different projects. The projects use different toolchains and vendor SDKs. I’m going to build a CI/CD pipeline with Docker. The pipeline can be easily extended extra jobs or stages.
You can find the repository used in this article on GitLab: https://gitlab.com/ErichStyger/robotnetwork.
Docker Images
To build the application, I’m going to use Docker images dedicated for each project. The docker images all are hosted on https://hub.docker.com/. See the details and instructions in the repository inside the projects/docker folder.
ESP32
For the ESP32 project I’m using the IDF 5.3, and Espressif provides an image: https://hub.docker.com/r/espressif/idf, tagged with v5.3.
Note that when running the container, I have to run a shell script to configure the environment (see the GitLab job details):
source /opt/esp/idf/export.sh
The Docker Hub image file is "espressif/idf:release-v5.3"
NXP K22FX512
For the NXP device, I have created a docker image with the necessary tools:
# Fetch ubuntu image
FROM ubuntu:24.0.4

# Install prerequisites
RUN \
    apt update && \
    apt install -y cmake gcc-arm-none-eabi libnewlib-arm-none-eabi build-essential ninja-build

# Command that will be invoked when the container starts
ENTRYPOINT ["/bin/bash"]
For the NXP project, the SDK is already included. I don’t need to pull any SDK.
I have posted the image on Docker Hub: "erichstyger/cicd_nxp-image:latest"
RaSPBERRY Pi Pico-W
For the Raspberry Pi Pico-W, in a similar way the tool chain is included, plus the Pico SDK 2.0.0:
# Fetch ubuntu image
FROM ubuntu:24.04

# Install prerequisites
RUN \
    apt update \
    && apt install -y git python3 \
    && apt install -y cmake gcc-arm-none-eabi gdb-arm-none-eabi libnewlib-arm-none-eabi build-essential ninja-build

# Install Pico SDK
RUN \
    mkdir -p /project/src/ \
    && cd /project \
    && git clone https://github.com/raspberrypi/pico-sdk.git --branch master \
    && cd pico-sdk/ \
    && git checkout tags/2.0.0 \
    && git submodule update --init

# Set the Pico SDK environment variable
ENV PICO_SDK_PATH=/project/pico-sdk/

# Command that will be invoked when the container starts
ENTRYPOINT ["/bin/bash"]
The resulting image file is on Docker Hub: "erichstyger/cicd_raspberry_pico_sdk_2.0.0-image:latest"
In the Docker Image I clone the 2.0.0 version of the SDK.
This finishes the part for the needed docker images.
GitLab CI/CD
In order to use CI/CD with your GitLab repository, check that CI/CD is enabled under Settings > General > Repository:

GitLab .gitlab-ci.yml Pipeline File
The CI/CD pipeline of the repository is controlled by a special file in the root of the repository: .gitlab-ci.yml

That file is like a normal file in your repository, and is treated as such. So I can create it locally and then commit/push to the repository.
Pipeline Editor
Another way is to use the pipeline editor under Build > Pipeline editor.

This editor comes with syntax validation. Plus it has a graphical view of the jobs in the pipeline:

Next, we are going to look into some of the details of the .gitlab-ci.yml file.
Stages
The ‘stages’ list the different stages of the pipeline. Here I have listed a build, test and deploy stage:
stages:
  - build
  - test
  - deploy
Each of the pipeline jobs belong to a stage, using the ‘stage’ attribute. Below the job ‘build-esp-remote’ belongs to the build stage. More about jobs later.

Variables
Under ‘variables’ I can list variables which I can use in my jobs. For examples below I have variables for different docker images:
variables:
  IMAGE_NAME_NXP: "erichstyger/cicd_nxp-image:latest"
  IMAGE_NAME_ESP: "espressif/idf:release-v5.3"
  IMAGE_NAME_PICO: "erichstyger/cicd_raspberry_pico_sdk_2.0.0-image:latest"
  GIT_SUBMODULE_STRATEGY: recursive
This repository uses git submodules. That’s why the ‘GIT_SUBMODULE_STRATEGY’ variable is set to ‘recursive’. This enables a recursive checkout of the repository with all the submodules during CI/CD operation.
Build Job
Below is the job to build the NXP K22FX512 robot project:
build-robot:
  stage: build
  when: on_success
  image:
    name: $IMAGE_NAME_NXP
    entrypoint: [""]
  script:
    - cd projects/vscode/robot/
    - cmake --preset Debug
    - cmake --build --preset app-debug
    - cmake --preset Release
    - cmake --build --preset app-release
  artifacts:
    when: on_success
    paths:
    - projects/vscode/robot/build/Release/robot.elf
    - projects/vscode/robot/build/Release/robot.s19
    - projects/vscode/robot/build/Release/robot.hex
It has the settings:
- ‘build-robot’ is the name of the job.
- ‘stage‘ defines what stage the job will run in.
- ‘when‘: defines the condition when to run this job. Default is ‘on_success’ which means that the job only runs when no jobs in earlier stages fail.
- ‘image‘ is used to specify the docker image name and entry point.
- The ‘script‘ commands are executed as one would execute commands in the docker container. GitLab automatically clones the repository into the docker container root folder. That’s why I ‘cd’ into the
projects/vscode/robotsub-folder, as this is the directory structure of my repository. Next I execute the command line CMake commands to configure and build the project with CMake presets. See Building with CMake Presets for more about CMake presets. - With ‘artifacts‘ I can specify what results or artifacts of the job shall be stored. Here I specify with ‘paths‘ different output files of the build, but with ‘when‘ only if the build was successful.
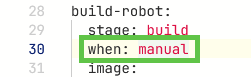
Manual Jobs
Note that with GitLab the pipeline will run by default after a push. To avoid this, set the job ‘when’ setting to ‘manual’:
Under Build > Pipelines I can run a stage or individual jobs manually:

Setting jobs to ‘manual’ avoids running stages or jobs to run for every push. Additionally this is useful for testing and running individual jobs.
Skipping running Jobs
If jobs and stages are set to ‘on_success’ (running by default), I can use a special entry in my commits. If I add [ci skip] or [skip ci] to my commit message, then the pipeline is not executed.

Alternatively, I can use
git push -o ci.skip
then the execution of the pipeline is skipped.
Pipeline Status
Under Build > Pipelines I can see the status of the pipelines:

Job Status
In a similar way, I can click on a job and inspect the status.

This is especially useful if a job has failed.
Artifacts
If the jobs produced artifacts, then I can download them using the drop-down of the pipeline:

Summary
With this, I have created a CI/CD pipeline using GitLab. It uses a pipeline with jobs to build different applications using Docker. I can configure the jobs, run jobs and stages automatically or manually. The build jobs store the binary files as artifacts which then are available for download. And the pipeline presented can be easily extended with extra stages, for example generating documentation with doxygen.
Running an automated building pipeline with GitLab is very useful. This is especially true in a collaborative environment where multiple developers contribute to the code base. Additionally running automated builds in a Docker and Linux environment catches errors in my code. For example Windows file names are not case sensitive, while they are case sensitive on Linux.
Happy integrating 🙂
Links
- GitHub: https://gitlab.com/
- CI/CD with GitHub Actions: CI/CD for Embedded with VS Code, Docker and GitHub Actions
- GitLab repository used in this article: https://gitlab.com/ErichStyger/robotnetwork

Hi Erich,
the power of automated build systems has not been widely promoted in the embedded development arena , so your article is timely.
Generaly speaking, large companies that have been developing for embedded devices for a long time have their own established build systems linked with support desk and issue tracking tools. So its great that you have shown that anyone can do this now with GitLab. Jetbrains Teamcity is another tool that could be used and its possible to setup on a local machine for those that prefer to keep their code and tools in house at all times.
Its raises the questions: how could you manage library dependancies? how can version numbering be automated? What if you wanted to build a library that could run on many different platforms such as x86 arm etc?
LikeLike
Hi Chad,
yes, good software engineering practice such as CI/CD gets adopted by the embedded community more and more. The challenge compared to ‘software only’ development is that with embedded there gets hardware into the mix, making things more complex. But on-target automated testing is a reality (see https://mcuoneclipse.com/2023/12/18/modern-on-target-embedded-system-testing-with-cmake-and-ctest/).
About managing library dependencies: for the embedded (C/C++) world I see there has been multiple attempts to solve it. Things like xpm (https://xpack.github.io/xpm/). To me, the world will be fragmented on the C/C++ side, but I see that new and modern environments like with Rust could be the solution for the future. The ‘cargo’ package manager with Rust works exceptionally well for me.
About building multi-architecture libraries: I have no experience or need for that.
LikeLike
Hi Erich,
a bit offtopic:
I missed the Data Watch Trace debug functions from the STM32CubeIDE for plotting a graph or debugging a buffer overflow. All without halting the system or using the ITM channels (timing changes).
But now i found orbuculum von orbcode.
Orbzmq can directly connect to the JLinkGDBServerCL and provides a ZeroMQ Server. A small python programm connects to the ZeroMQ and displays the data. (HWevents, ITM Channels, …)
I didn’t know that the four dwt cmp registers can also be configured for a small range.
Now i am really happy, that this works without STM32CubeIDE. I think the Data Watch Trace Compare is a underrated debug feature.
LikeLike
Hi Alex,
thank you for that reminder about orbuculum: It was on my radar a while back, but I really need to check it out again for SWO data I have.
LikeLike