
For the Eclipse and Processor Expert lovers of this world: there is another Eclipse based IDE you can use: ThunderBench made by Emprog:

ThunderBench for ARM Eclipse Startup Screen
They support a range of ARM based devices, including the Freescale ones I’m using. So I downloaded the v3.24 30 day trial from their download page last week. Finally I have found some time to try it out. Could this be an alternative to use my Freescale FRDM boards with Processor Expert?
Download and Installation
Downloading the evaluation version requires registration. After that, I receive an email with the download link. Compared to other tool chains (IAR, Keil, Freescale, …) the download size is very small: only 260 MBytes 🙂
During the installation it asks to install the debug drivers:
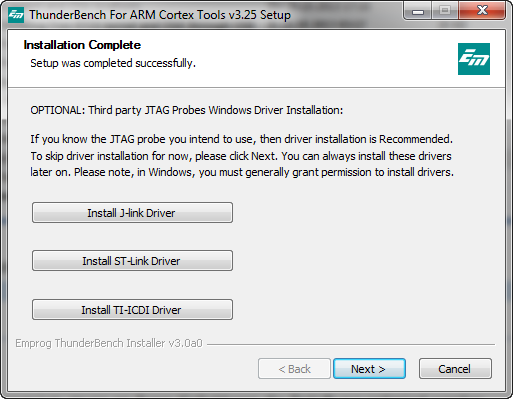
Driver installation
Hmm, no P&E, OpenSDA or OSBDM/OSJTAG? But looks I can use the Segger J-Link with their OpenSDA firmware. Or of course use a Segger J-Link.
Eclipse and GNU
The tool chain includes GDB with ARM GNU tool chain 4.7.4. The Eclipse platform is 4.3.0. The Eclipse IDE comes nice and clean, and has a ‘Control Center’ which gives access to tutorials and project examples.
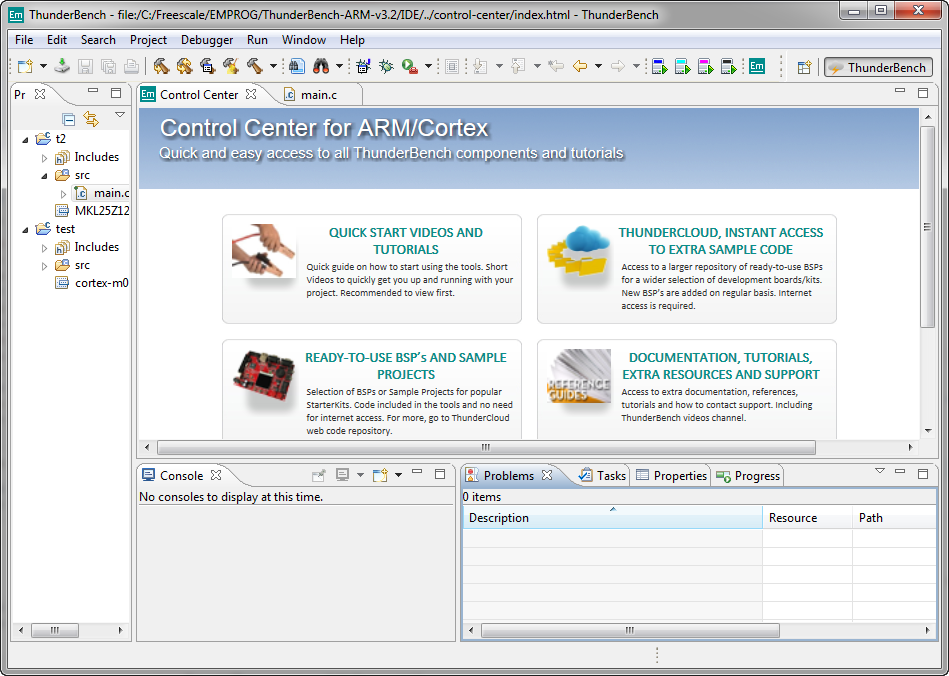
Thunderbench Eclipse IDE
I noticed that the IDE comes with the Wittenstein FreeRTOS plugins installed. I’m wondering as I saw that other Eclipse versions had to remove that plugin in their distribution? Anyway, so one thing less to download with this distribution. 🙂
Cloud Center
An interesting thing is that examples are hosted in the ‘Cloud Center for ARM/Cortex’: that way I can download the latest and greatest examples:
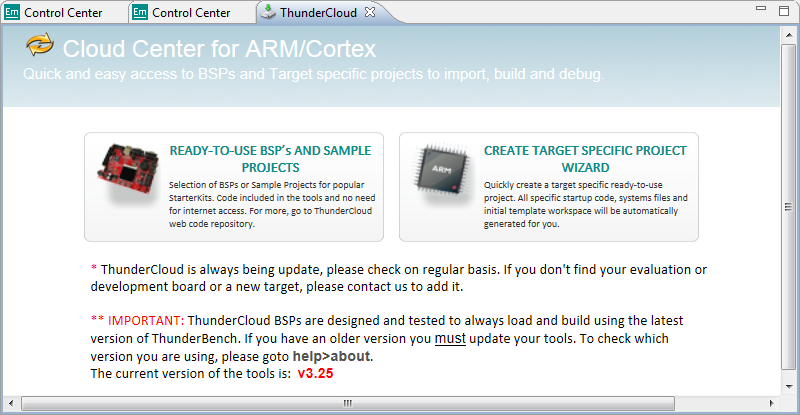
Cloud Center
The version I had downloaded showed v3.24, and the above cloud information said that I need v3.25. The question is only: how to update?
The menu Help > Check for updates gives:
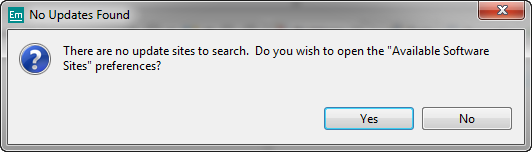
No updates found
So I decided to enable automatic updates:
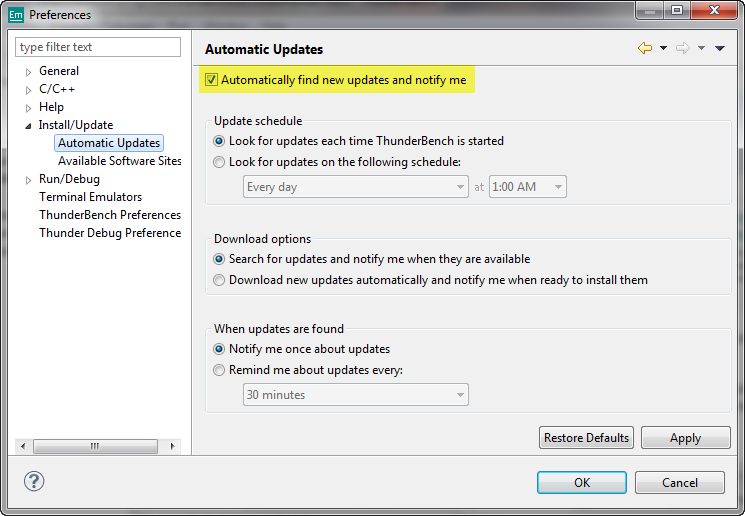
Automatic Updates
But: somehow this did not help neither. So I ended up to register again and to download the version 3.25. Because of the small download, that was ok for me.
ThunderBench allows me to select from a set of evaluation boards. I’m happy to see that there is the FRDM-KL25Z 🙂 :

Evaluation Board Selection
It even comes with an example with FreeRTOS 🙂 :
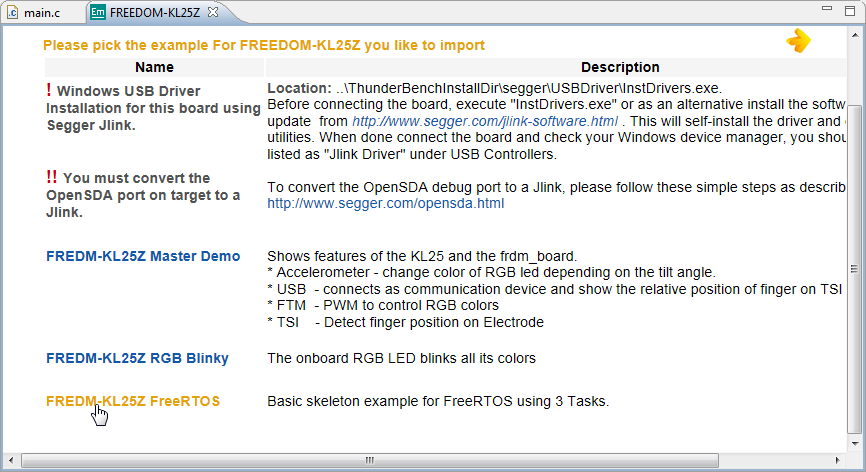
FreeRTOS example
The FreeRTOS version used is 7.1.1, so bit behind the actual version 7.5.x.
Selecting that project, an it ask me to select my connection (very, very nice!):
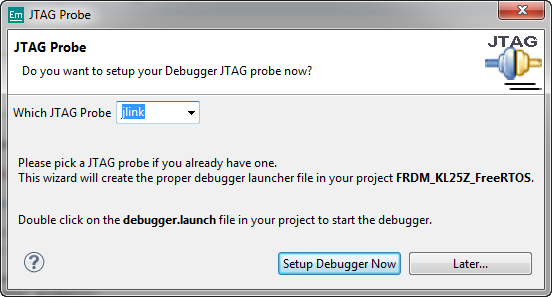
Asking for connection
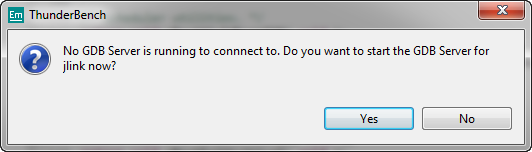
And at launching the debug session it asks me to automatically start the GDB server. Cool!
Launching GDB Server
The toolbar has icons to start/restart the different GDB servers:

Start and Restart GDB Server
❓ Start/Restart the GDBServer has always lost the Target Device Selection in the Segger GDB Server for me.
But somehow this does not work the first time:
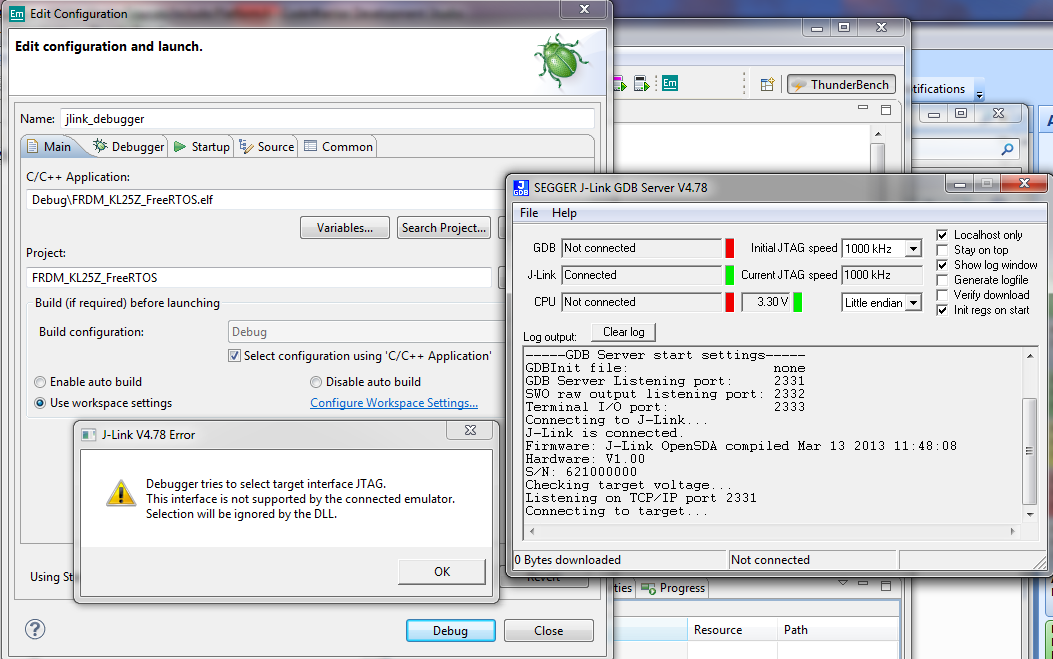
J-Link Error
After some poking around, finally I identified the issue: no Target Device set up in the Segger J-Link Setup:
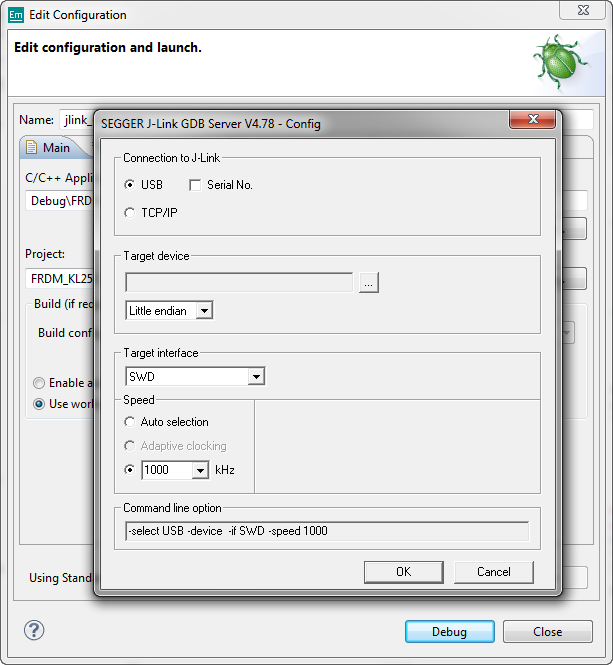
Segger J-LINK server has no CPU set
Setting it correctly to MKL25Z128xxx4 definitely helped :-).
Not sure, but the root cause could have been that the project itself has no CPU set in the Project properties:
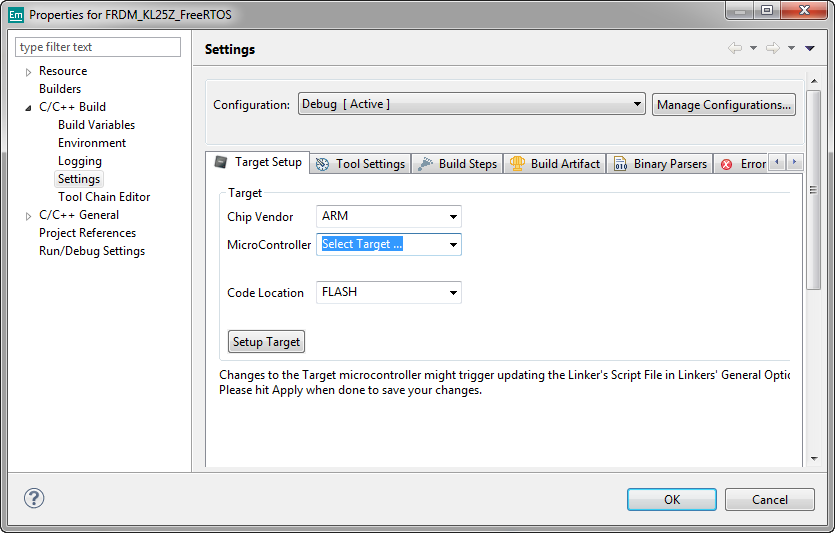
No Microcontroller setup in the project
So I have ‘fixed’ this too and set it up for ‘cortex-m0+’. However, with that setting change the Segger J-Link again had lost its CPU setting :-(. After fixing that again, I’m debugging :-):
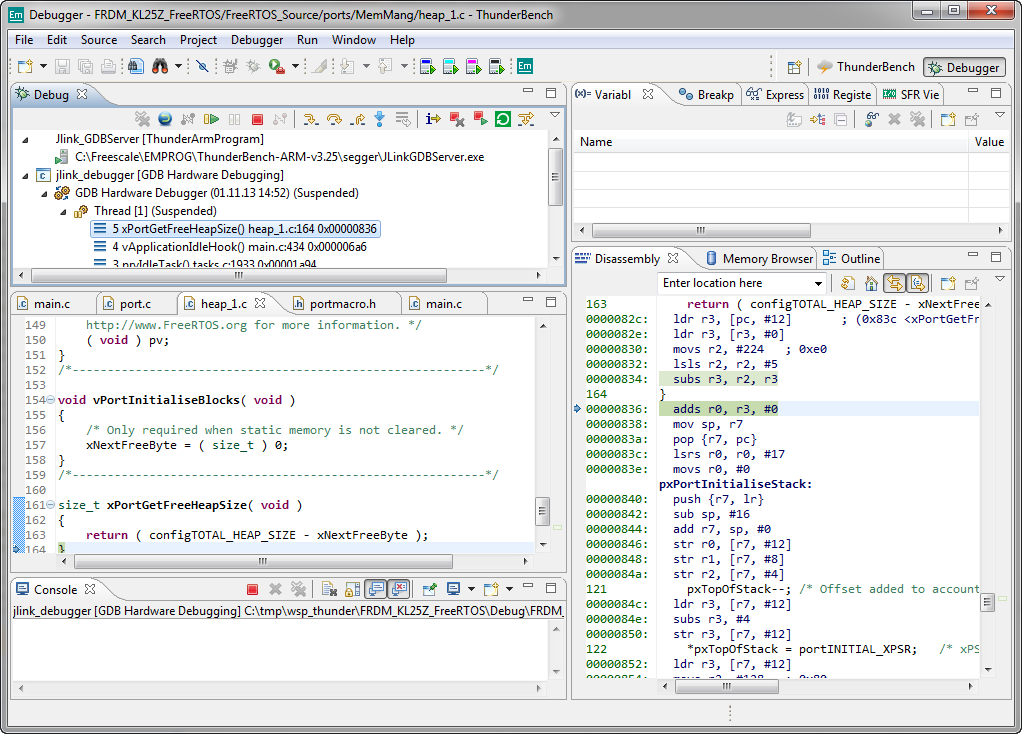
Debugging the Application
Debugging works pretty much as with any Eclipse based debugger or GDB. But there are a few nice options:
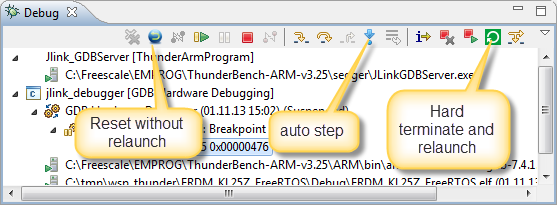
Debug Icons
- Reset without relaunch: GDB has a horrible reset handling (it is hard to impossible to perform a reset to the target). This button will let the debugger jump to a reset handler function where I can re-load PC and SP to do a reset. I wish that would be as in CodeWarrior (the CodeWarrior debugger does this automatically from the vector table entries). In ThunderBench I need to provide my function for this. Better than plain GDB, but not as nice as CodeWarrior.
- Auto Step: cool feature: this lets the debugger perform stepping until I stop it.
- Hard Terminate and relaunch: this stops the target and debug session, performs a build and then starts the debugger again. Useful after code changes.
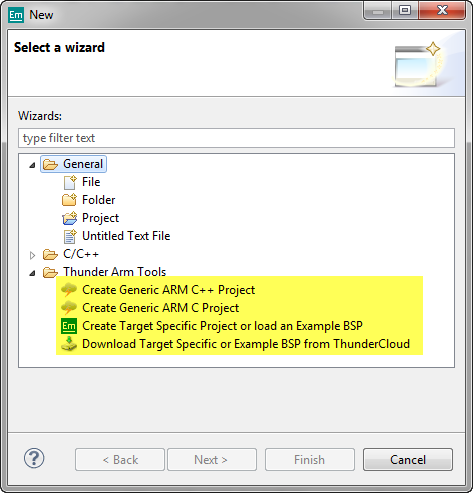
Creating Projects
New projects can be created with File > New:
Creating Thunder Arm Projects
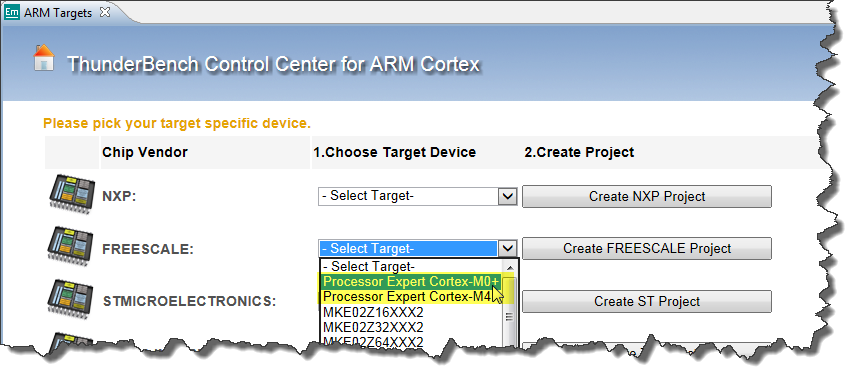
But the ‘Generic’ projects are what the name says: really generic. And they will not run on a target with the proper linker file and source changes. So this way is really only for the very experienced users. The target specific project settings will simply open the above ‘Control Center’ where I can download or select a project from provided set of boards or from the cloud. So it looks there is no other way to create a simple project say for the KL25Z as in CodeWarrior?
Well, until I realized that exactly this thing is hidden below the scroll bar of the Control Center: to see that choice I would have to scroll down the window first to make it visible ;-):

Create Target Specific Project Wizard
This gave me what I was looking for: To create a simple project for the FRDM-KL25Z:
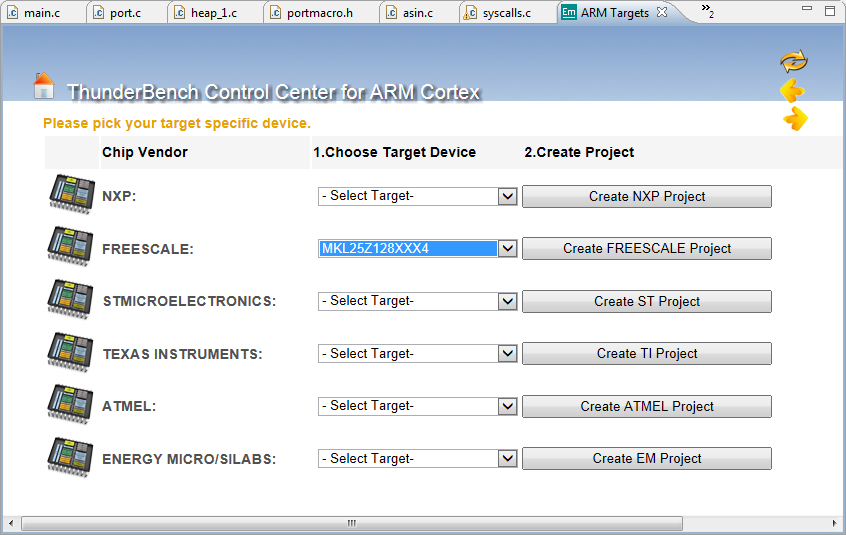
Creating KL25Z project
The created what I was looking for: a simple program for the KL25Z128 :-).
Build and Compiler settings
ThunderBench provides similar panels as for example CodeWarrior: they look very similar, but have different icons. As a highlight it features the optimized Nano runtime library:
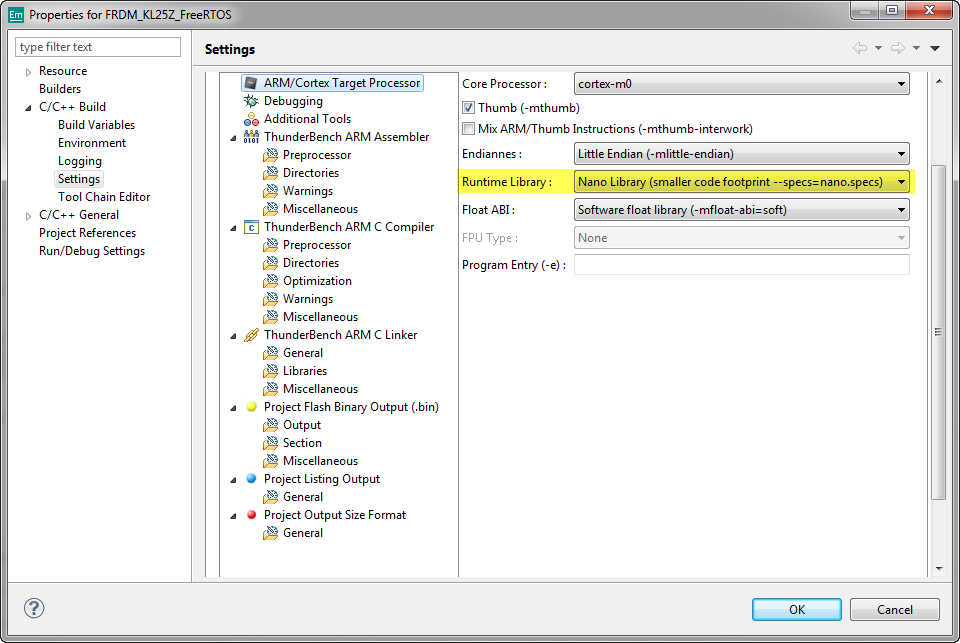
Build Panels with Nano Library Settings
Processor Expert
Now what I wanted to check out the most: how does it work with Processor Expert?
I used the same steps which I used for Eclipse Kepler in this tutorial.
I could create Processor Expert projects as I do in Kepler using the menu File > New > Processor Expert Project. But ThunderBench offers a better way:
Processor Expert Selection
This creates a small template project with a readme file with the instructions:

Processor Expert Template Project in ThunderBench
- Select this project in the project Explorer
- Select File > New > Other > Processor Expert > Enable Processor Expert for Existing C Project
- Select the correct device and use GNU gcc as toolchain.
This enables Processor Expert for that project. Now I can add components, change the settings and generate code as usual. That was really easy :mrgeen:!
There is a video which shows how this looks like on Youtube.
Summary
ThunderBench is a nice Eclipse based product, and best for me it works nicely with Processor Expert. I have not found any pricing information on their website. I wish there would be a free of charge (code size limited?) version.
For me the only choice is to use the J-Link with the Freescale boards which is somewhat limited. Yes, the J-Links are great, but not everyone has one.. Would be good if the range of supported run control devices could be extended.
The debugger has some cool extensions, but was somewhat bumpy with loosing (or not storing?) the device type.It helped me for sure that I had a lot of CodeWarrior and Eclipse with Kepler+GDB and Segger experience. Otherwise I think new users might need more guidance (if they are like me and typically not reading any manuals ;-).
Things are looking good, and as always I wish for more:
- Smoother end-to-end debugging (maybe my fault?). It comes with great automatic debugger choice or run control change feature, but somehow the GDB server connection is not working out of the box. But this is maybe something I’m doing wrong?
- A free version (e.g. code size limited) so I could use it in my classroom, similar what is provided by IAR, Keil and Freescale.
- More debug options other than J-Link: P&E, USBDM, OSJTAG, CMSIS-DAP, …
ThunderBench comes nicely integrated, and shows in many good ideas how an Eclipse based product can make things easy for users. As it is today, it is a good alternative and other choice to other tool vendors in the ARM market. Compared to others, the size of the package/download is very small. And I definitely I love the nice way how Thunderbench integrates with Processor Expert projects :-).
Happy Thundering 🙂

Pingback: Tutorial: Using a Terminal Input and Output; *without* printf() and scanf() | MCU on Eclipse
Is this a windows only IDE?
LikeLike
Yes, as far as I see it is Windows only (as many other development tools) 😦
LikeLike
Pingback: Merging NXP LPCXpresso IDE with the Freescale Kinetis Design Studio, Processor Expert and Kinetis SDK | MCU on Eclipse