
3D printing is like cooking or like BBQ: It is more about barometric pressure, humidity and temperature than you might think of. To me, printing (and cooking) is a combination of art and science. And as with cooking, sometimes the result is not usable.
I’m very happy with the Ultimaker 2 printing PLA material. For a LED matrix project I have to use ABS as this material is suitable for higher temperature: PLA simply will not stand the heat produced by the LEDs I’m going to use. And here the joy ended: printing using ABS was definitely no fun. While the first small test print came out OK, I produced afterwards a pile of unusable parts because of warping :-(.
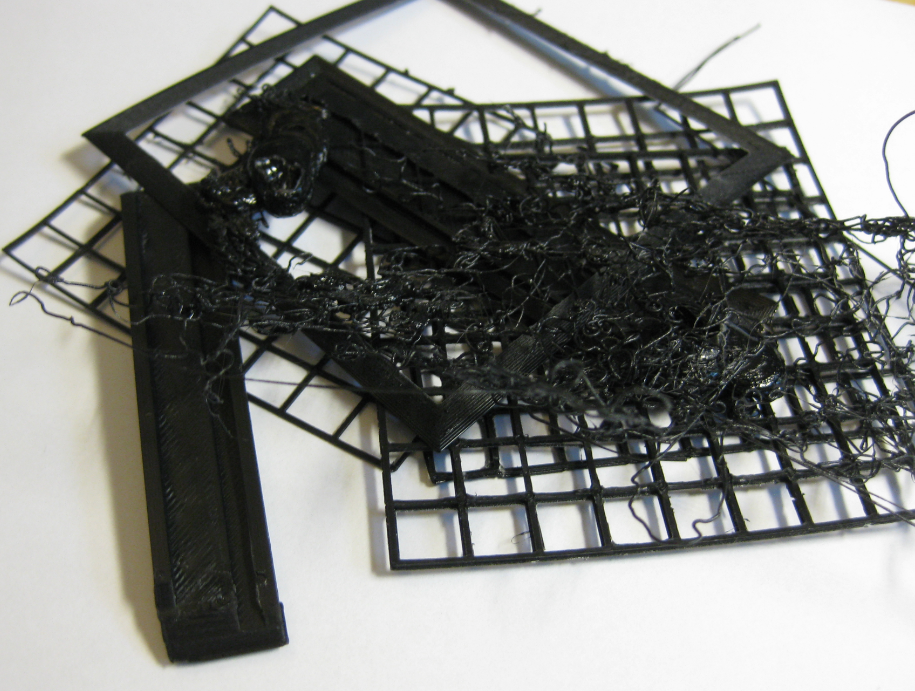
Pile of bad ABS Parts
PLA vs. ABS
PLA (Polylactic Acid) melts around 180-220°C, while ABS (Acrylonitrile Butadiene Styrene) melts . The thing is that PLA gets soft around 50°C, while ABS can stand up to about 85°C. As my LEDs can produce some heat, PLA gets soft and unstable. I already noticed that problem with my LED Cube where I used a PLA structure on the back side of the LED PCBs (see “Kinetis Lava LED Light Cube“).
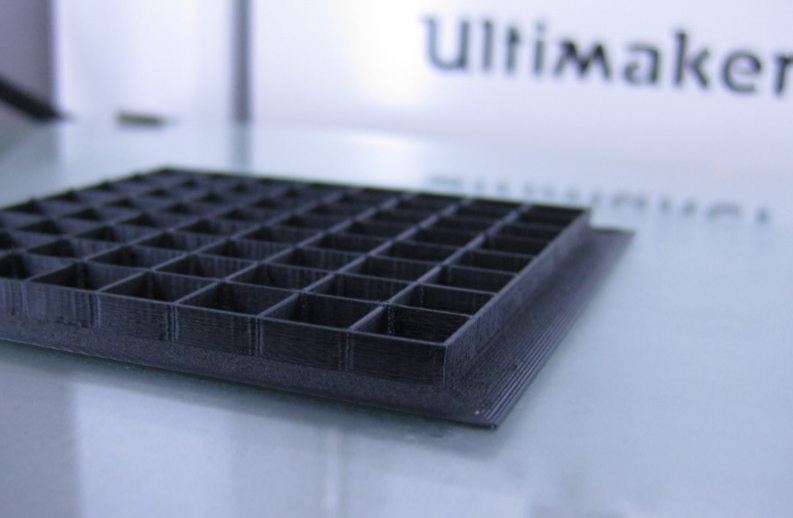
This time I need a LED matrix diffuser right around the LEDs, so that will not work with PLA: I need it printed in ABS:

3D Printed LED Matrix Diffuser Grid
Warping
However, a big problem in 3D ABS printing is ‘warping’: It exits for PLA too, but it is much less likely. Because ABS is shrinking when it cools down, the corners can lift up:
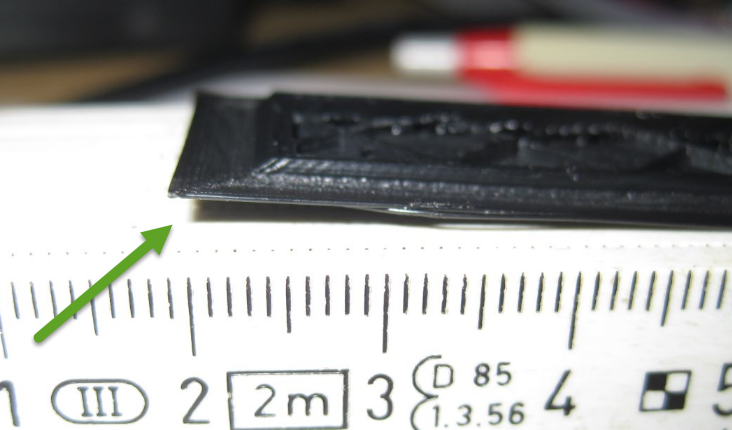
ABS Corner Liftup because of Warping
That shrinking is a good thing for an injection molt process: the part will pop out the form when it cools down. But it is definitely not a good thing to ‘pop out’ while 3D printing a part 😦
The second problem with ABS is that it does not stick very well to glass.
Solution
Doing some research, I have found the following solutions to deal with the ABS shrinkage and stickiness to glass:
- Have a heated bed, and heat it up. Luckily my Ultimaker has a heated glass bed, but I have found that the default 90°C for ABS seems not be enough.
- To keep the temperature stable, cover the printer to reduce the airflow, or build a heated printer enclosure.
- To reduce cooling near the glass plate, do not use the print head fan for cooling.
- To stick the part better to the heated bed, use rim or rafts.
- Apply some sticking material to the glass plate. One solution is to use a paper glue pen or to dissolve some ABS scrap pieces in Acetone and apply this ‘Acetone Paint’ to the plate.
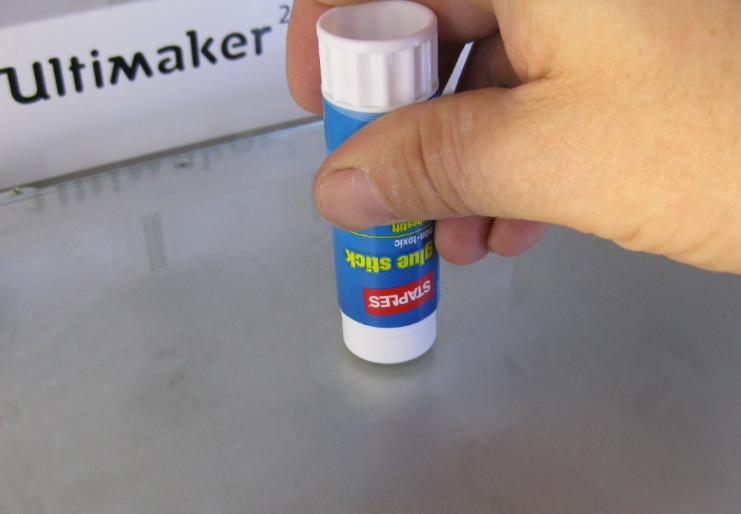
Paper Glue Stick on Glass
Below Acetone from the hardware store. I put a few drops on the cold (!!!) glass bed and then use a scrap ABS piece to dissolve a bit of ABS which then coats the glass. While Nail Polish Remover usually contain Acetone too, it does not work (I assume because of additives).
💡 I like the glue stick method more as with Acetone it needs a very well vented area because of possible skin/eye irritations.
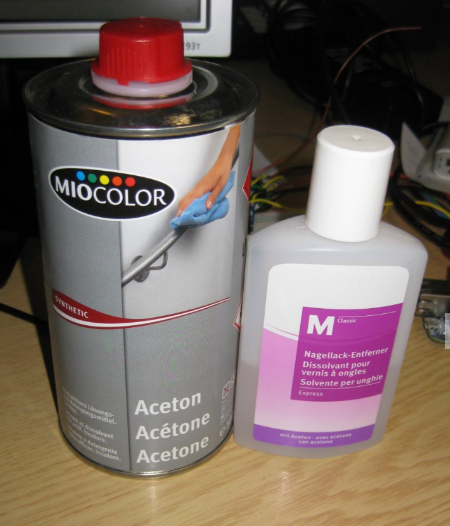
Acetone and Nail Polish Remover
What works for me
So here is what finally produced good results so far:
- Cleaned the glass plate while it is cold with alcohol to remove any fat
- Applied paper glue stick to the glass surface (alternatively use ‘Acetone-ABS paint’)
- Using a brim with 10 lines to stick it to the plate (rafts did not help much for my parts)
- Instead of using the default heat bed temperature of 90°C as default for ABS, I increased the heating bed temperature to 105°C.
- Instead of the default fan speed of 40%, I turned the fan OFF or running it only at 10% depending on the part height
- Nozle/material temperature at 260°C (default)
- Material flow 107% (default)
- Closed the Ultimaker front to keep the heat inside the printing area (I think this is one of the most important thing!) and placed a card box on top of the printer to keep the inside of the printer warm.
For the fan speed, there is a setting in Cura to disable the cooling fan:
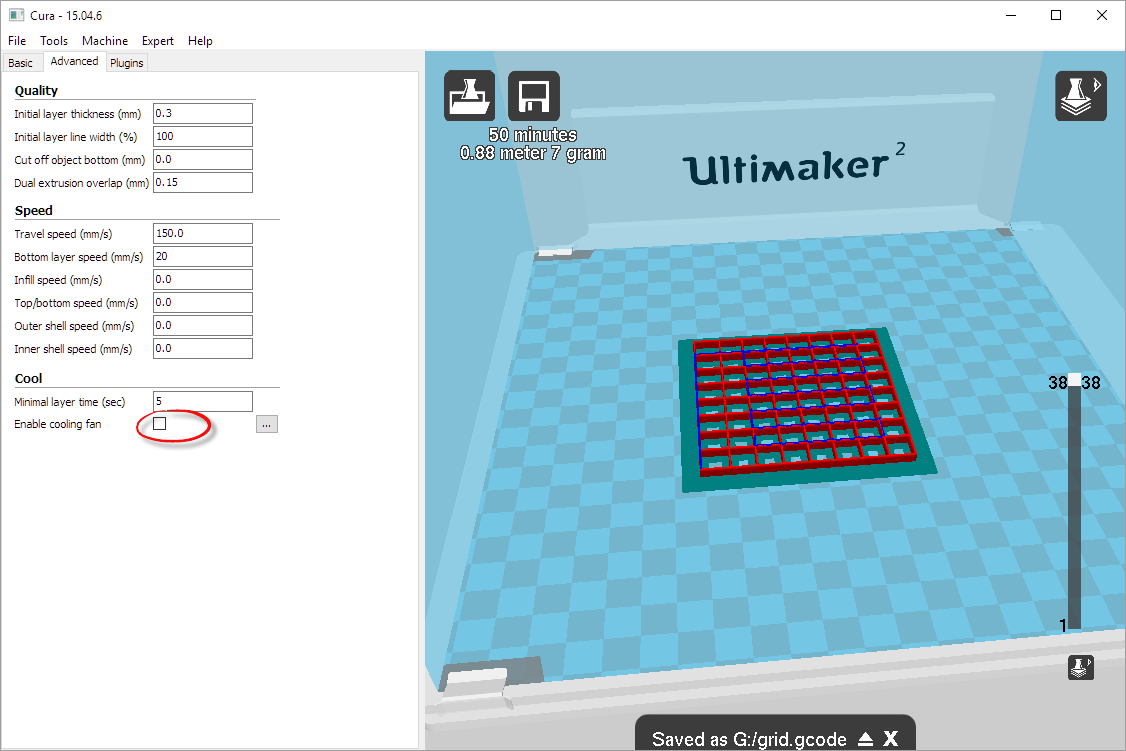
Cooling Fan Disabled in Cura
Much more settings can be triggered at a certain layer: that way I configure the cooling fan and the bed temperature:
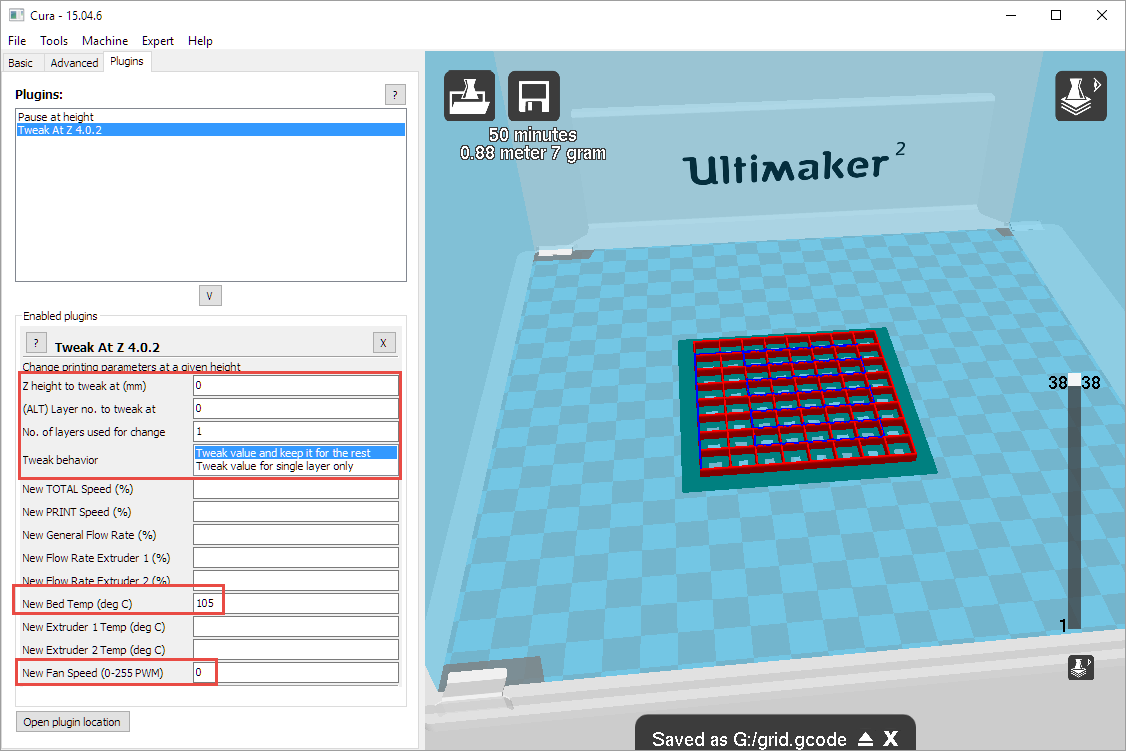
Tweak at Z in Cura
Below my first version of printer coverage which produced usable parts:
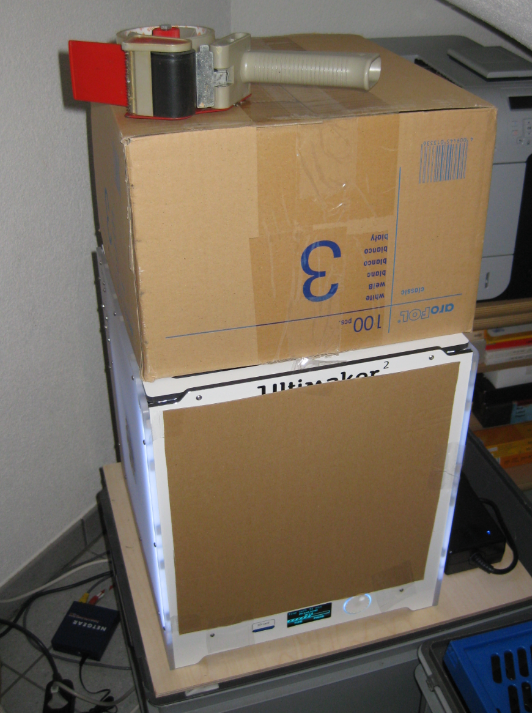
First Trials with Covered Ultimaker printer
Because that way it is not easy to see how it is printing, my next version uses a (half-transparent, because this is what I had at hand) cover:
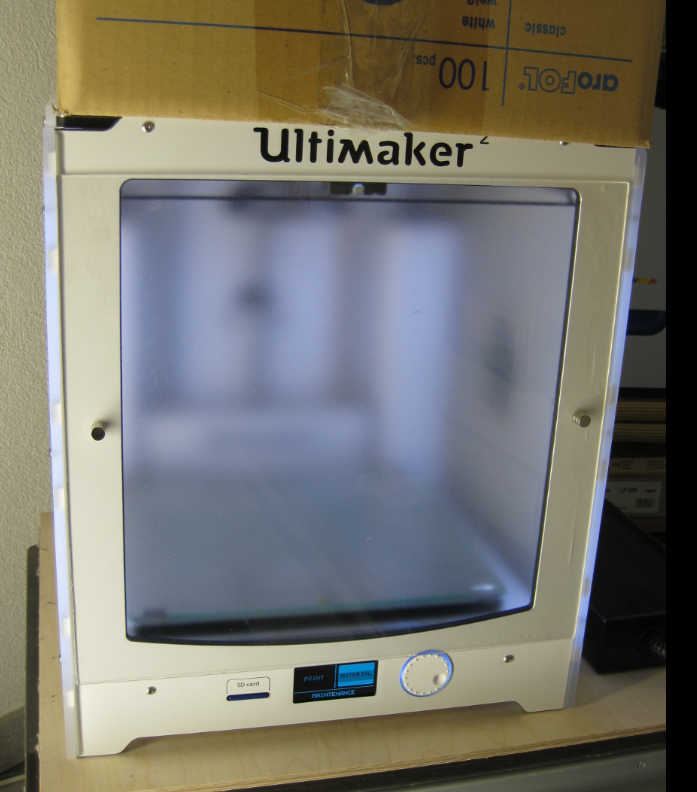
Version with half-transparant front and magnets
With the cover and the glue on the glass, the parts now do come out without warping 🙂
Good ABS Part
LED diffuser matrix with brim:
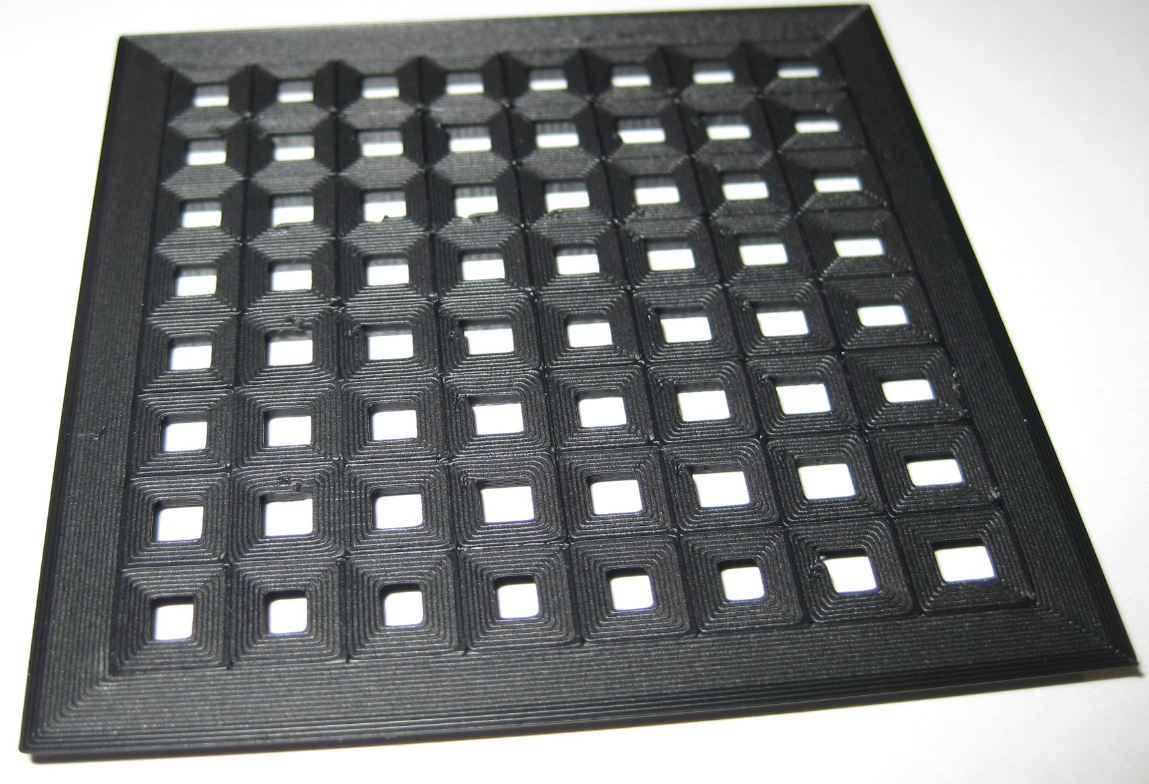
LED Diffuser with Brim
LED Frame with brim, printed in ABS:
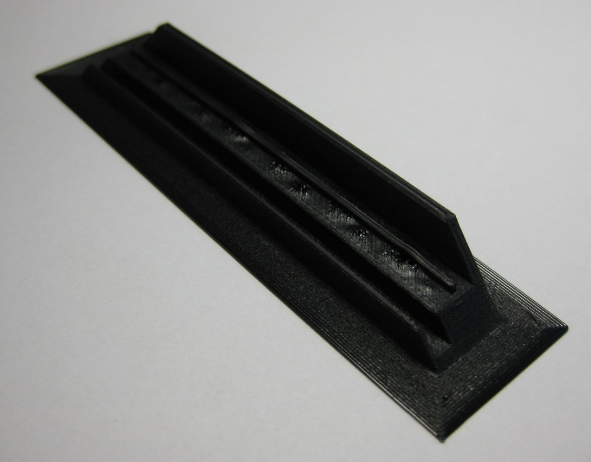
LED Frame printed in ABS
And with this I have the first prototype of my LED enclosure printed in ABS working:
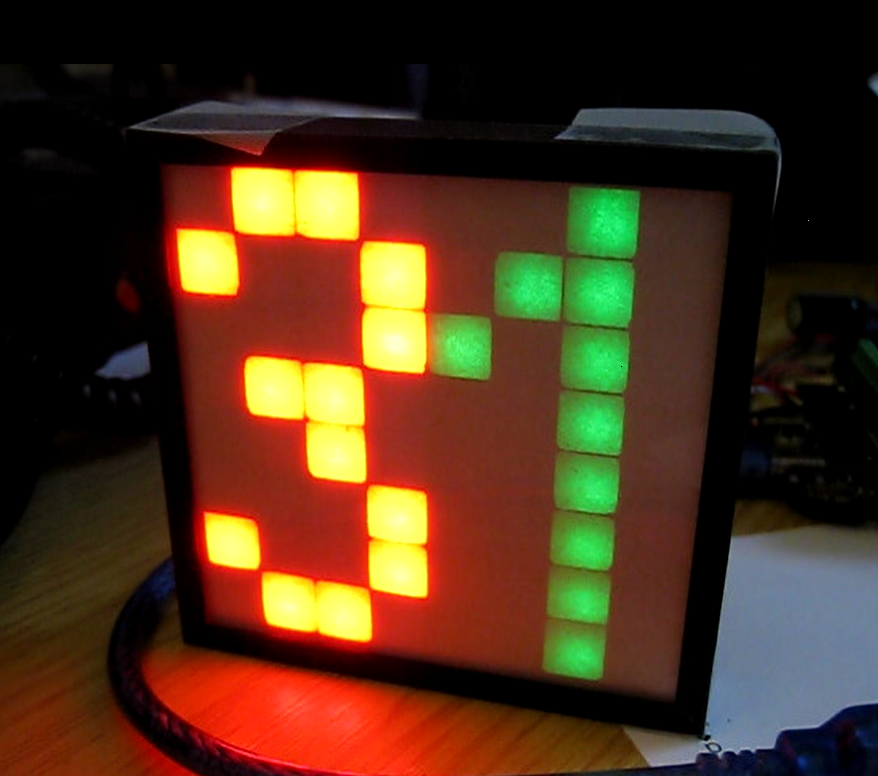
LED Matrix Display
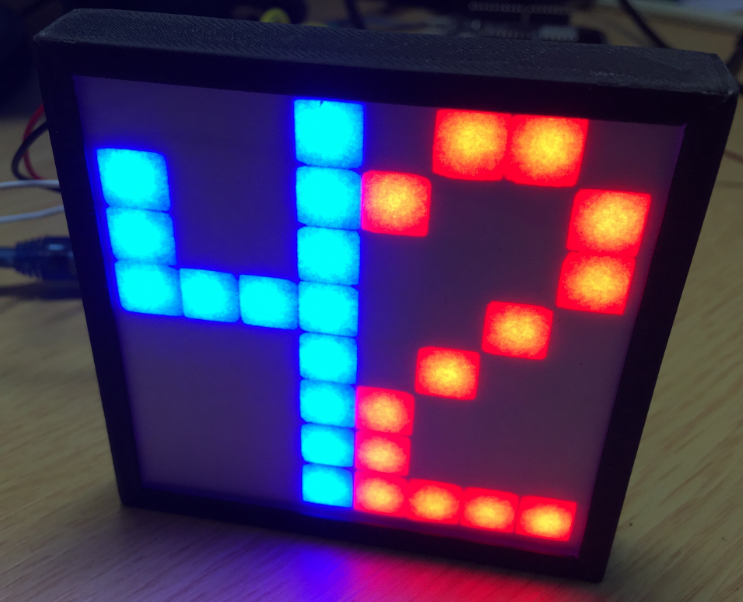
LED Matrix Display 42
Summary
Because of the shrinkage of ABS, it is important that it sticks well to the heated bed. For this either a simple paper glue stick can be used or a thin layer of ABS with ‘Acetone-ABS paint’. Either way works well. But even more important is to avoid too cool down the printed part too early. For this it worked best for me to increase the temperature of the heat bed plus to reduce the airflow in the printing area.
Happy Unwarping 🙂
Links
- Tips to fight warping: http://www.makerbot.com/blog/2011/06/23/12-ways-to-fight-warping-and-curling

One word: PETG.
🙂
LikeLike
Yes, I read good reports about PETG. Still have two rolls of ABS, but definitely will try out PETG next.
LikeLike
Actually a better acronym is PEI
What you want to do to quit messing with gluesticks, hairspray, acetone&ABS (ABS Juice)… is to just get a .030 sheet of PEI from amazon or where-ever, and stick it to your build plate.
You will never mess with sticky mess again. typically you scuff it up with some 1000 grit before the first use, after that it just works.
LikeLike
Hi Brynn,
thanks for the tips, I definitely have to try this out. I see how I can get my inventory of ABS down a bit (only two spools).
LikeLike
Pingback: 3D Printed Adafruit NeoPixel LED Frames | MCU on Eclipse
Proto-pasta.com has high temperature PLA.
LikeLike
Pingback: DIY Wireless Magnetic Levitating Moon Lamp | MCU on Eclipse
Pingback: Copyright Law for Makers and Educators | MCU on Eclipse
Pingback: Building a DIY High Density Philips Hue LED Stripe | MCU on Eclipse