
While new Freescale boards come with the OpenSDA debug firmware, I still students using boards with the OSBDM/OSJTAG. And with new CodeWarrior tools, it might be that there is a new OSBDM/OSJTAG firmware, and when I download to a board with an older firmware, the tool will prompt me to update the firmware. To me, after doing this several times, not a big deal. But for someone who sees this the first time, it might not be that easy. So to avoid any further questions, here we go with a step-by-step tutorial how to update the OSBDM/OSJTAG firmware.
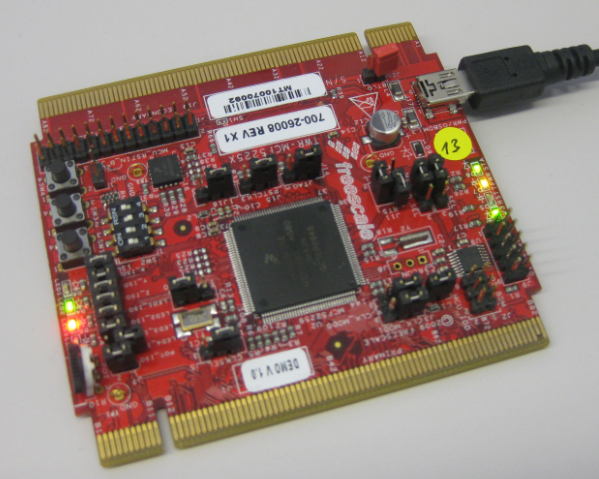
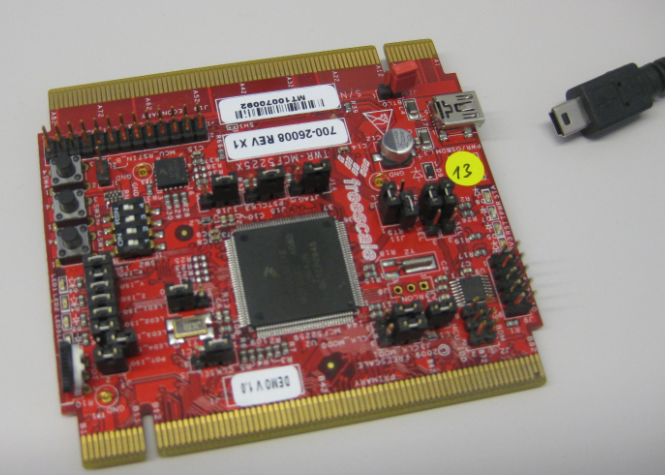
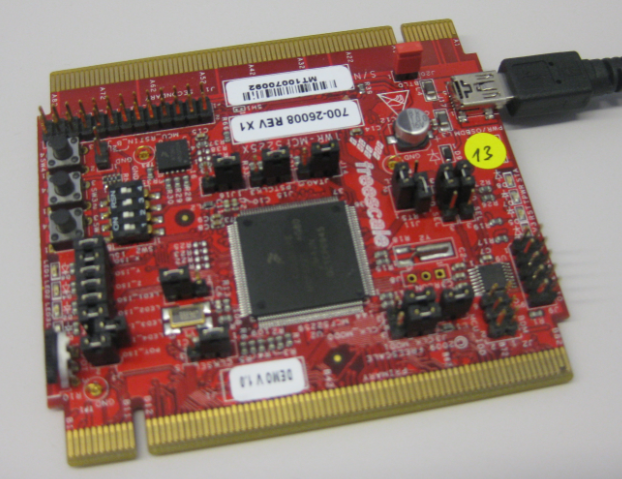
MCF52259 Tower Board with OSBDM Firmware
Updating a New Firmware
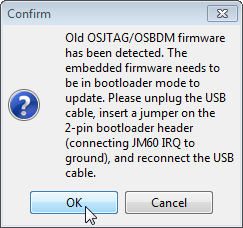
If trying to download to a board with an old firmware, the following dialog shows up:
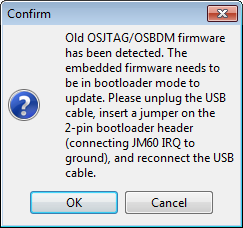
Message to update the OSJTAG OSBDM Firmware
- Keep that dialog open (do not click OK or Cancel (yet)). Power off the board with unplugging the USB cable. If your board is inside a Tower, then best if you remove the board from the Tower system.

Removed Power from Board
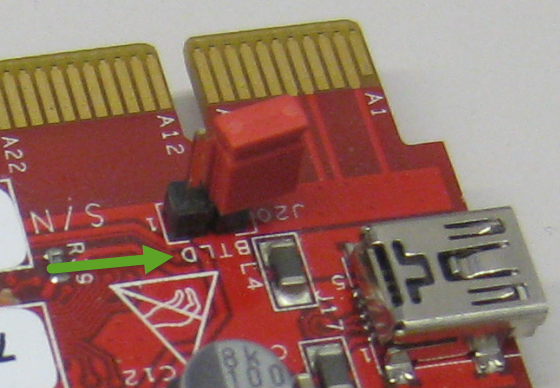
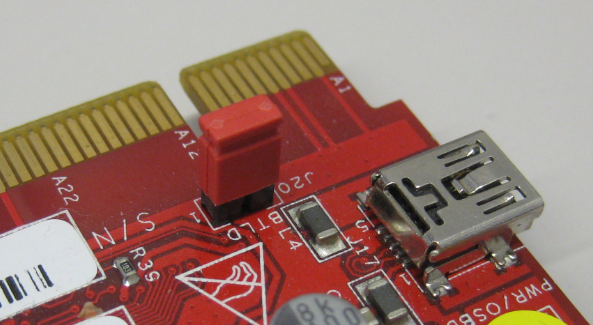
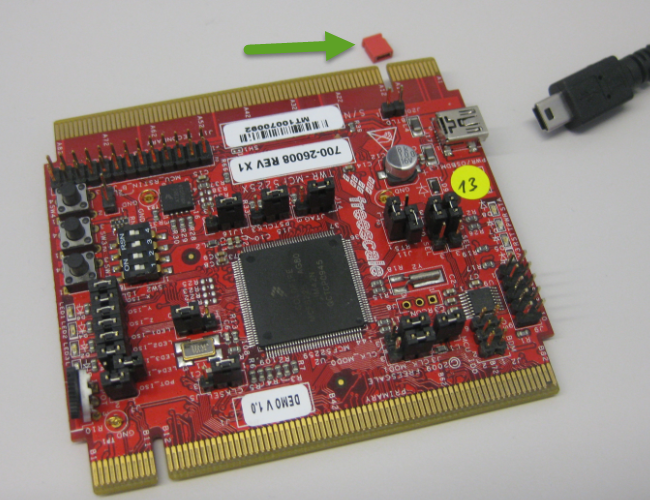
- LocatetheOSBDMBootloader jumper on the board. This jumper is *not* set by default. Check your hardware user manual/schematicsforthelocation of the jumper. On most boardsthejumperislabeledBTLDorBootloader or something like that.

Bootloader Jumper
- Put a jumper on that header.

Jumper on Bootloader Header
- Power the board again. Note that the board LED do *not* light up (it looks like the board is dead).

Board Powered in Bootloader Mode, no LEDs are on
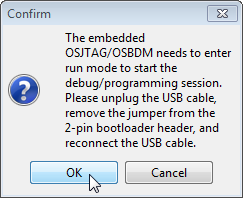
- With the board powered on, press the ‘OK’ button in the debugger dialog:
Pressing Ok to update the firmware
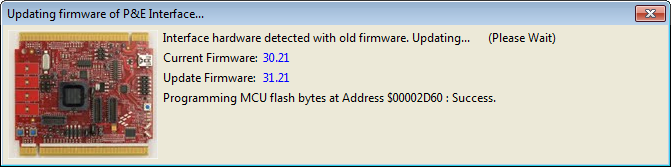
- The firmware gets updated with showing a progress dialog. This might take a minute or so. First it programs the flash, then it does a verify step.

Updating firmware
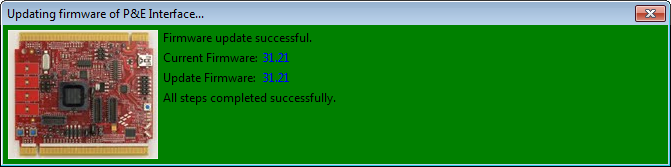
- At the end, it should show a green ‘ok’ dialog:

updating firmware successful
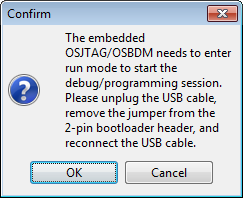
- A new dialog shows up, asking to remove the jumper:
Dialog asking to remove the jumper again
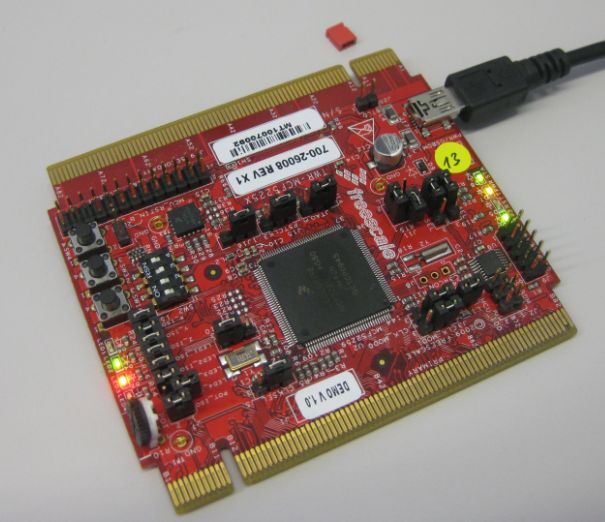
- Unplug/unpower the board and remove the jumper:

Removed Bootloader Jumper
- Plug in the USB cable again to power the board. Notice that now the LEDs are on as normal.

Board with LEDs on as normal
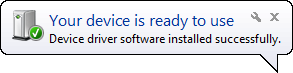
- Usually with the new firmware, new drivers get installed (might take several seconds). Wait untilthedriversare installed:
Driver successfully installed
- Afterthedriversare installed, you can press the OK button in the dialog to go ahead:
OK after firmware upgrade and drivers installed
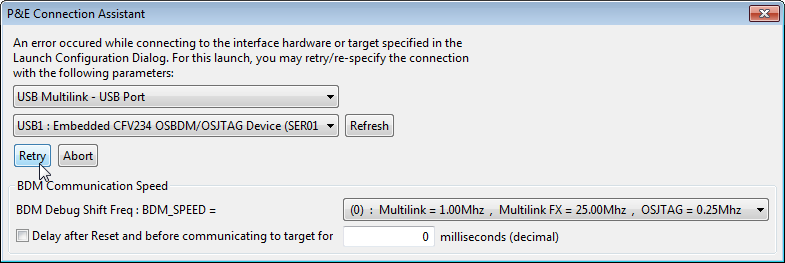
- In most cases, debugging/downloading should now work. If new drivers were installed, this usually means that the P&E Connection Assistant dialog shows up.
- Press the Retry button in the P&E Connection Assistant dialog:

Retry Downloading after Firmware Update
- With this, everything should be working fine with the new firmware.
Expert Tips 🙂
- If connection is not possible, and the P&E Connection Assistant dialog keeps showing up: Abort that dialog and start a new debug session/download. Another reason might be that the new drivers are not installed yet, or failed installation.
- If you do not have a jumper at hand, a metal paper clip or metal coin can be used to shortcut the jumper. The point is that OSBDM/OSJTAG checks the jumper right after power-on, so it is not necessary to keep the shortcut on all the time. A paperclip can be used too if the jumper header is not populated on the board.
- If your board does not show any LED’s (looks like a dead board), check if the bootloader jumper is set (remove it).
Summary
Updating the firmware is not that difficult: it means reading carefully the dialogs and jumper/power the board. The most difficult part is locating the bootloader jumper location: to simplify this, I usually populate it with a jumper in a different color.
With this post I hope this reduces the number of “I don’t know how to upgrade the debug firmware on my board” questions in the following weeks ;-).
Happy Updating

Hello, this is great! but have you ever tried it running a virtual machine. The thing is that my after starting up the board with the bootloader enabled, the computer does not recognize the board so the update is unsuccessful.
Thanks
LikeLike
No, I have not used a virtual machine for this, so I cannot comment.
LikeLike
Pingback: Recovering OpenSDA Boards with Windows 10 | MCU on Eclipse