
Thanks to the GNU ARM Eclipse plugins from Liviu it is easy to build and debug projects for all the different ARM cores. But I need to specify the device name in the debug configuration:
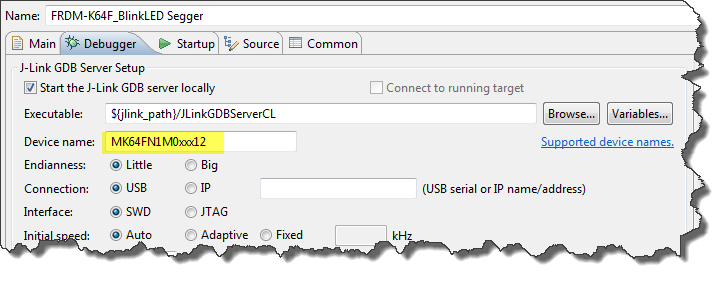
Device Name for Segger GDB Configuration
There must be an easier way for this? Yes, indeed, there is 🙂
The plugin actually is pretty clever: it remembers the last used settings and uses that for new debug configurations. So once I made the settings (and I do not switch the microcontroller), everything is set up correctly.
But for a new workspace or for a new device I need to find out that device name.

No Device Name
If in the plugin I keep the field empty, then I get an error:

Error in Services Launch Sequence
💡 I proposed a feature to have the dialog populated by default with ‘Unspecified’ instead of an empty text, more about this later in this article.
For this the plugin provides a link to the Segger web site which lists all the device names supported:
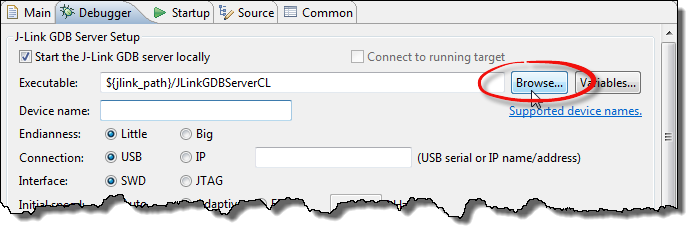
Browse for Device Name
But what if I’m travelling and do not have internet connection, and do not remember the device name used by Segger?
Using a wrong name
The first trick is to use a device name not recognized by Segger:
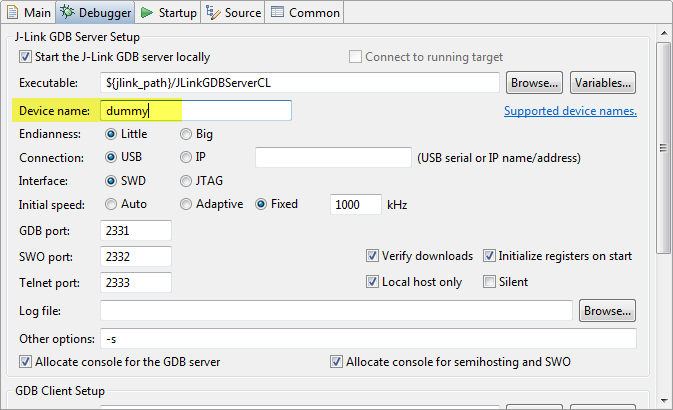
Dummy Name
Then the Segger library will prompt a dialog that it does not know that device:
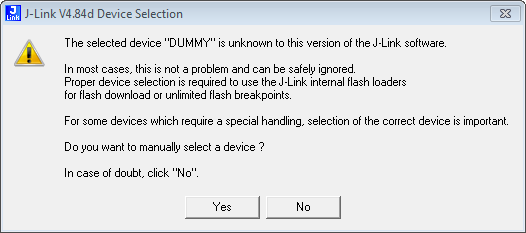
J-Link Device Selection
Pressing ‘Yes’, I can select the device from a list:
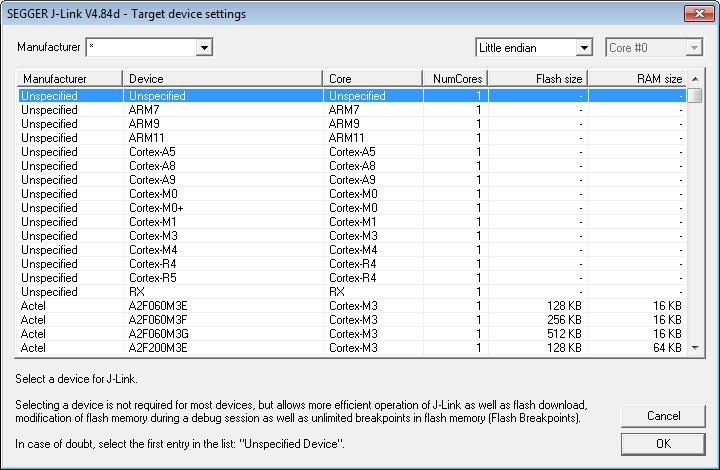
Select Segger J-Link Device
❗ Unfortunately, this dialog is open only for a about 10 seconds, not sure why?
As a tip, another way to get that dialog is to launch the JLinkGDBServer and then browse for the device name:
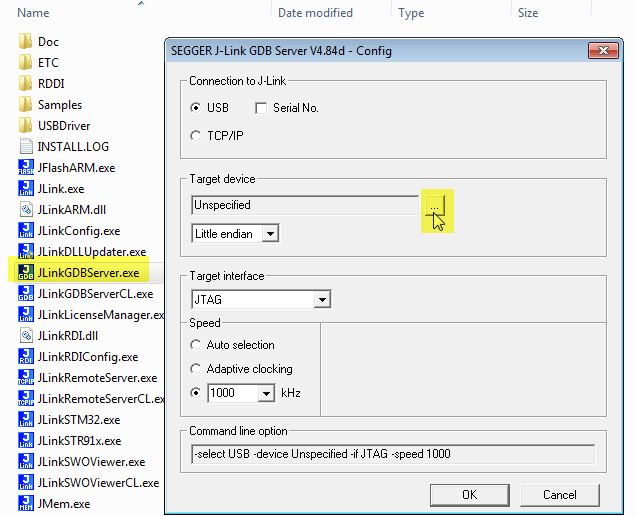
Getting the Device List
Only using the Core Name
The solution is just to use the name of the supported CPU core which is pretty easy to remember: The list of supported cores is listed at http://www.segger.com/jlink_supported_devices.html#SupportedCPUCores.
“Note that a device has not to be known by name to be supported. This means that J-Link can be used with any device, using a standard core listed in Supported CPU Cores even if it is known by name.” (Source: Segger Web Site)
So instead of
MK64FN1M0xxx12
I can simply use
Cortex-M4
The Segger site lists disadvantages of that approach, but so far that worked fine for me. For STMicroelectronics devices even just ‘ST’ works fine too (see this link) :-).
💡 Be aware that just specifying the core (Cortex) means that the debugger has no knowledge about the peripherals and specifics of the device (flash security, etc). It might work, but that really depends on the device used! Better specify the exact device name used.
The other thing I have found is to use ‘Unspecified’:
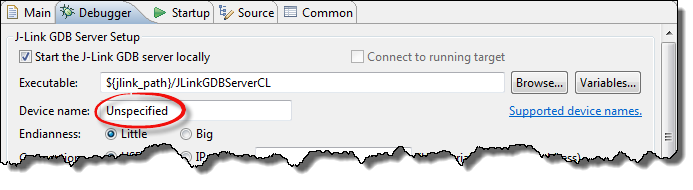
Unspecified Device Name
It seems that the Segger interface is pretty smart and finds out what core it is talking too? I can see this if I launch the JLink.exe:
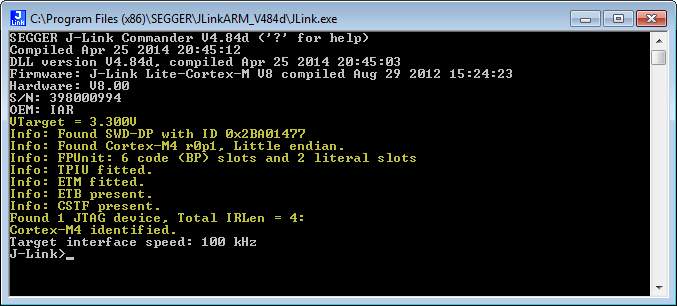
Segger auto-detecting the core
Summary
It is best to specify the exact microcontroller device name to the Segger J-Link. But for when I don’t know it or I’m lazy, ‘Unspecified’ or ‘Cortex-M4’ or ‘Cortex-M0+’ likely will do it. No guarantee, but better than nothing 🙂
Happy Seggering 🙂

Do not use Cortex-M4!
I’m using STM32F407ZE and I use Cortex-M4 as device name.
The downloading fails it cost me a whole night to find the problem.
LikeLike
Do not use Cortex-M4 as device name!
I’m using STM32F407ZE and I used Cortex-M4 as device name.
The downloading failed like following:
Downloading 392 bytes @ address 0x08000000 – Verified OK
Downloading 10536 bytes @ address 0x08000188 – Verified Failed
Downloading 504 bytes @ address 0x08002AB0 – Verified Failed
Downloading 8 bytes @ address 0x08002CA8 – Verified Failed
Downloading 4 bytes @ address 0x08002CB0 – Verified Failed
Downloading 4 bytes @ address 0x08002CB4 – Verified Failed
Downloading 124 bytes @ address 0x08002CB8 – Verified Failed
(Yes, the first 392 bytes is OK).
What’s worse, no obvious message is given when downloading fails, and the debug session goes as if everything is OK, only the program in the chip is the old one.
It cost me a whole damm night to find the reason.
LikeLike
Thanks for all that information. I have added an extra warning note about only using the core (Cortex). The thing is that with that the J-Link has no knowledge about the device specifics (flash memory, flash protection, etc). It might work, but this seems depending on the device used. Conclusion: better specify the exact device name.
LikeLike