
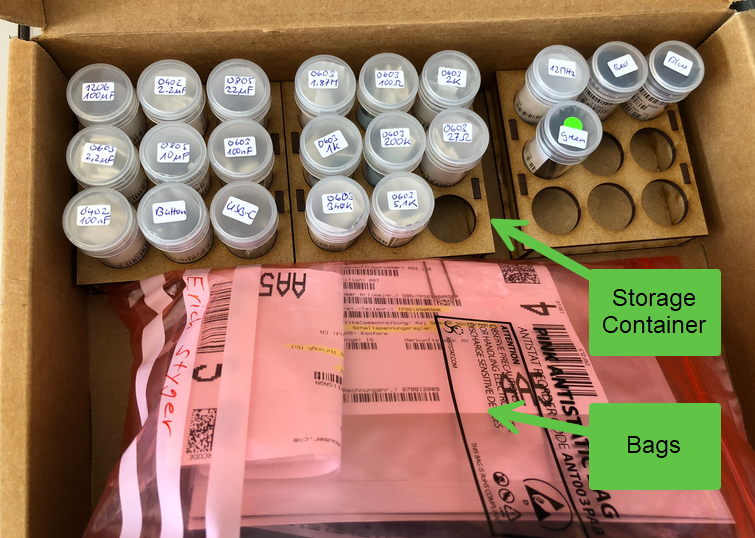
For many of my PCB projects I’m using cut-tape SMD components. So far I have used to keep the components in the little bags as shipped by Mouser and others.
But keeping all the components in bags for multiple projects is not ideal: it takes a lot of time to go through the inventory. What I wanted is an easy and simple storage system at least for the ‘common’ parts used in multiple projects.
Outline
Instead keeping ‘bags of bags’ with components, I was looking for a solution I can store the parts in small container. That way I can reduce the storage space needed, and have a quick overview of parts, and I can pick and arrange the parts based on the BOM (Bill of Material) of the PCB.
I looked at different ways of storing components (3D printed, or even commercially available systems). 3D printing containers or tape holders takes a lot of time, and commercially available containers are expensive or too small to keep the part label stored with the box.
So I came up with my own solution for the problem. One idea came from the following design kit. I really like the idea of such containers.
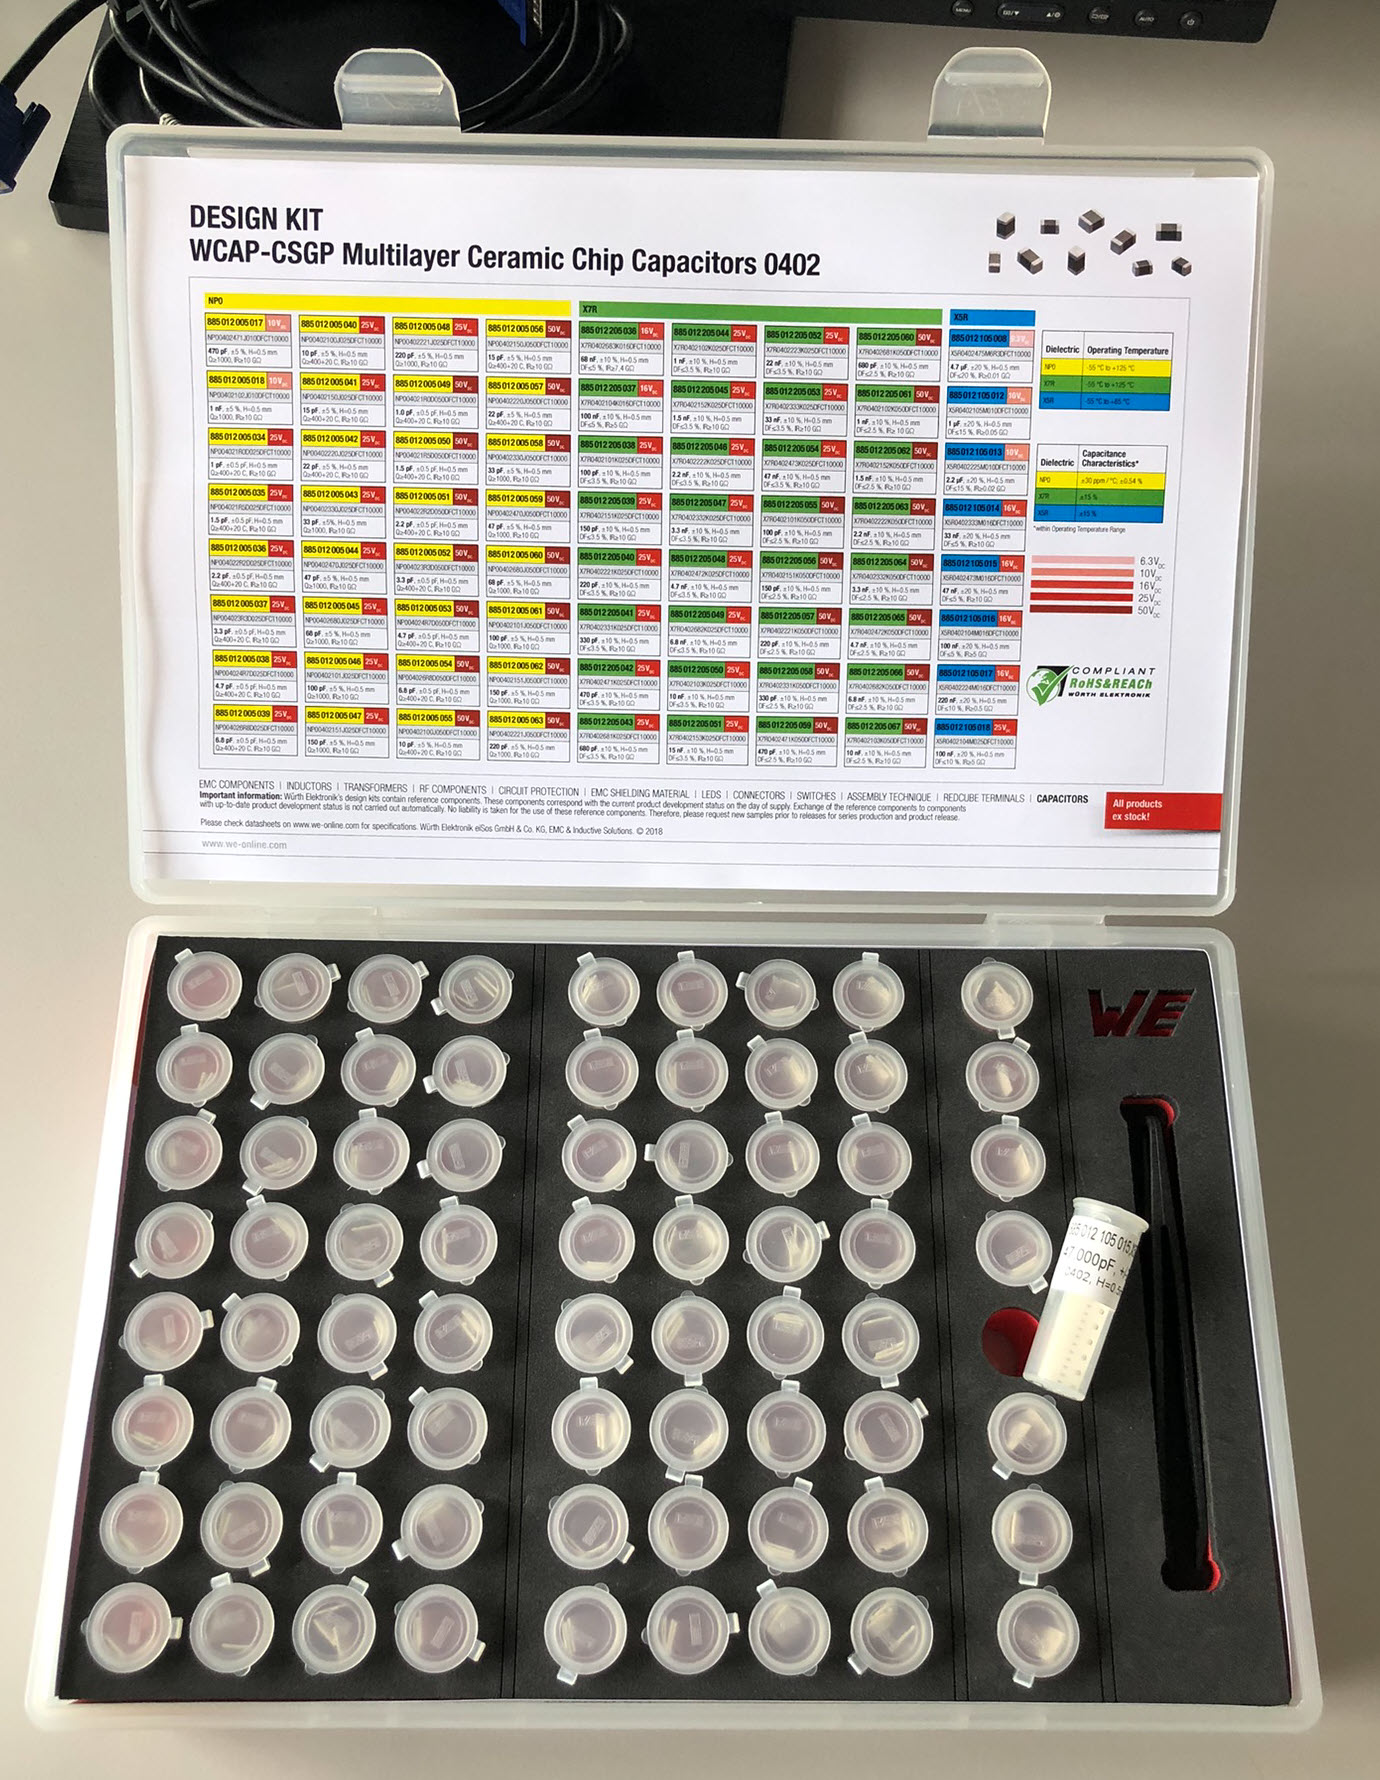
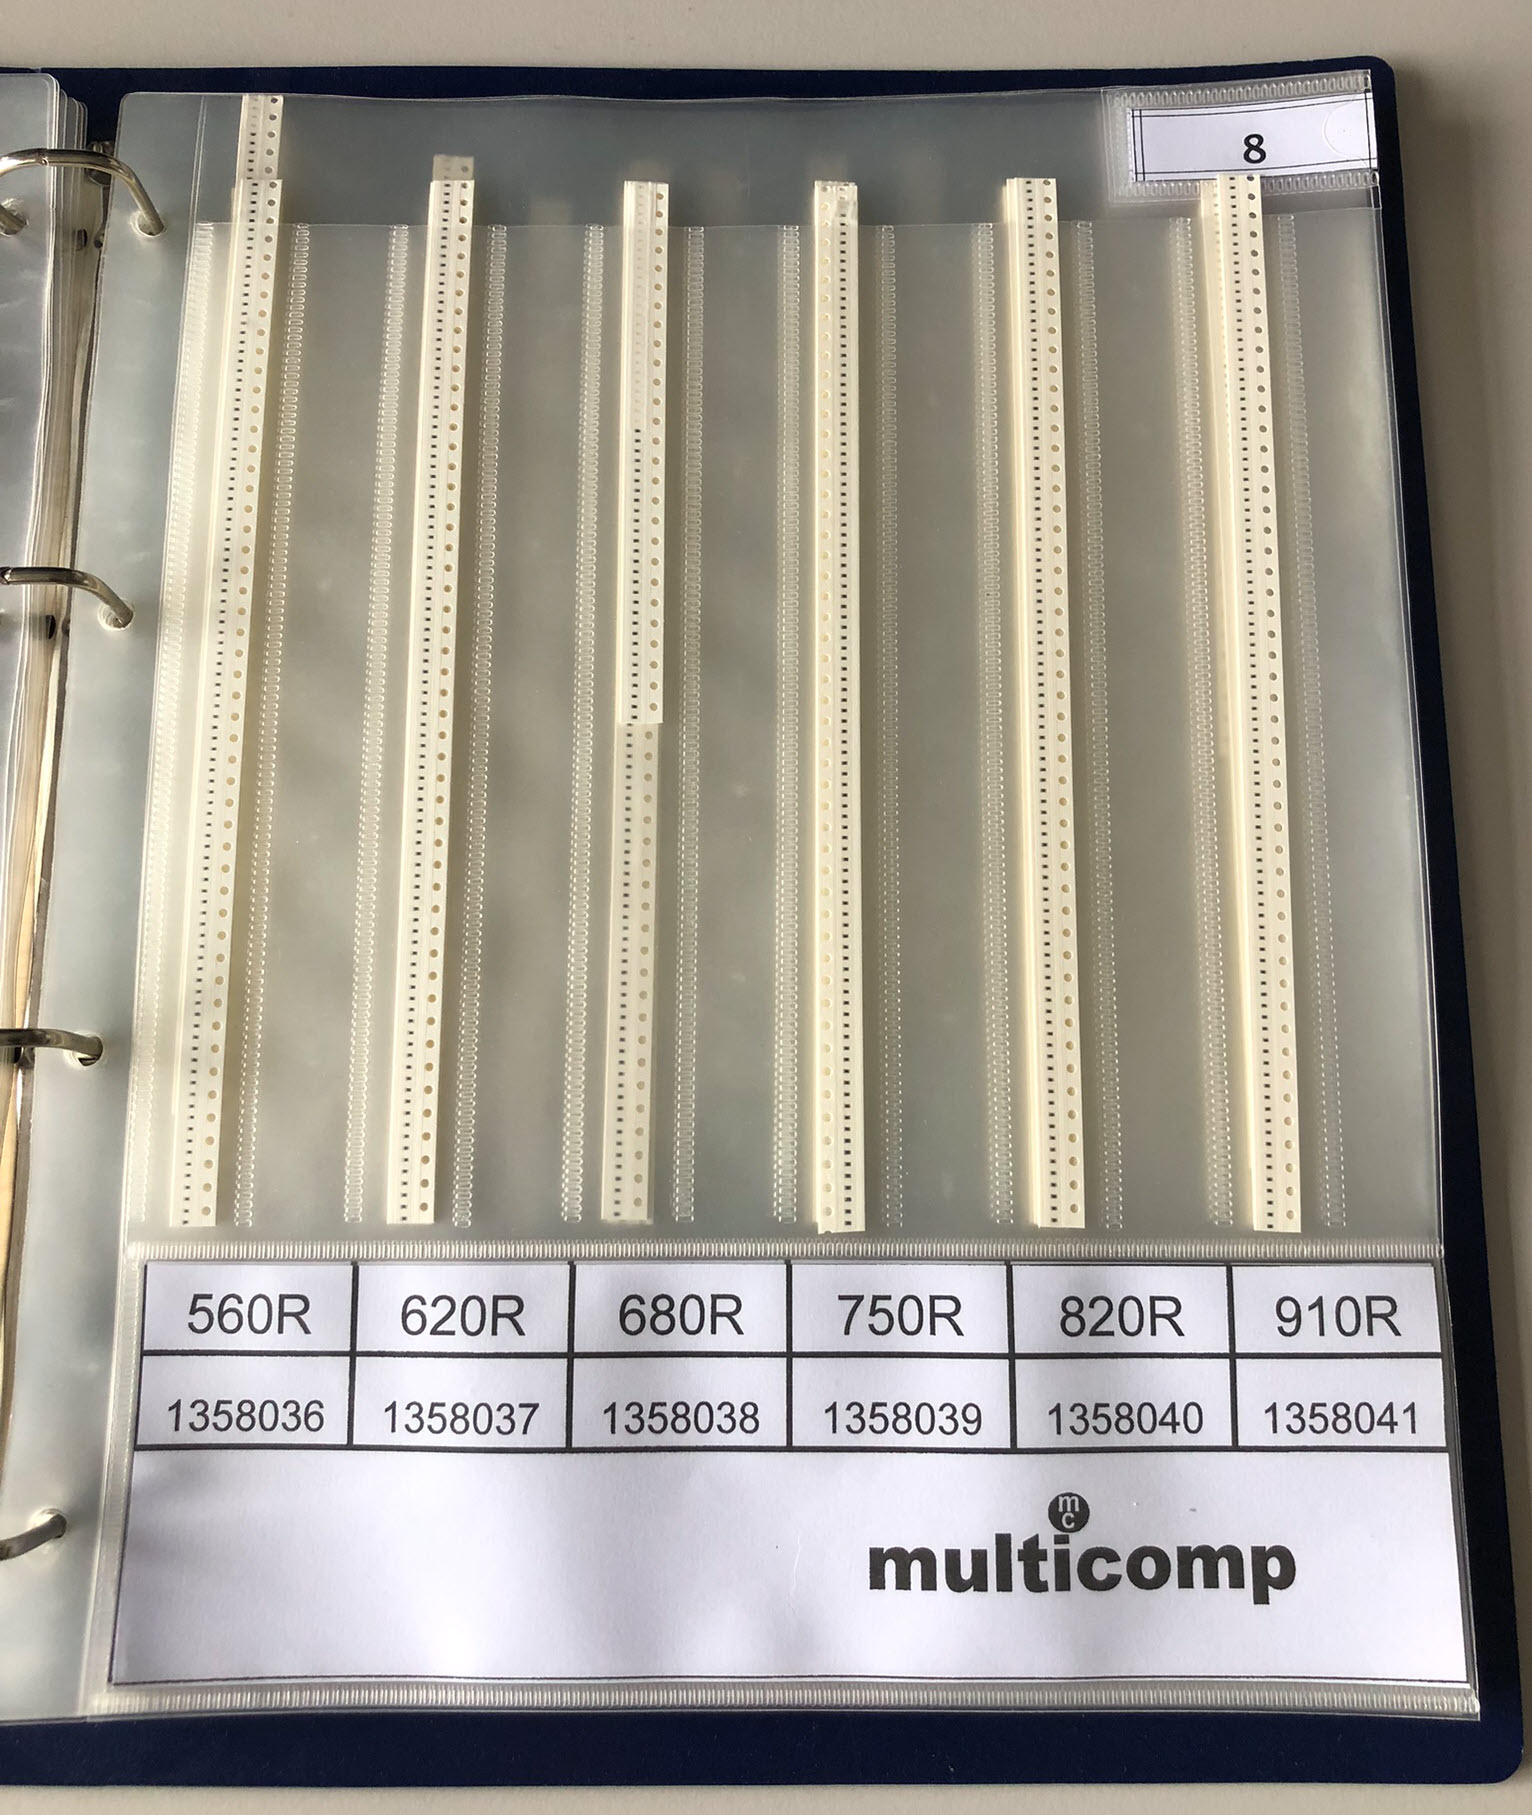
The other thing we use is binders with the tapes: The challenge is that the inserts might be hard to get, and won’t work for parts like switches, etc.
Container
I’m using inexpensive transparent containers (2.4×4.8 cm) which costs less than $10 for 60 pieces:

I ordered my containers from the MoonCresin Store. The containers are designed for ‘Diamond Painting’ parts, but can be used for other small things too.
Container Tray
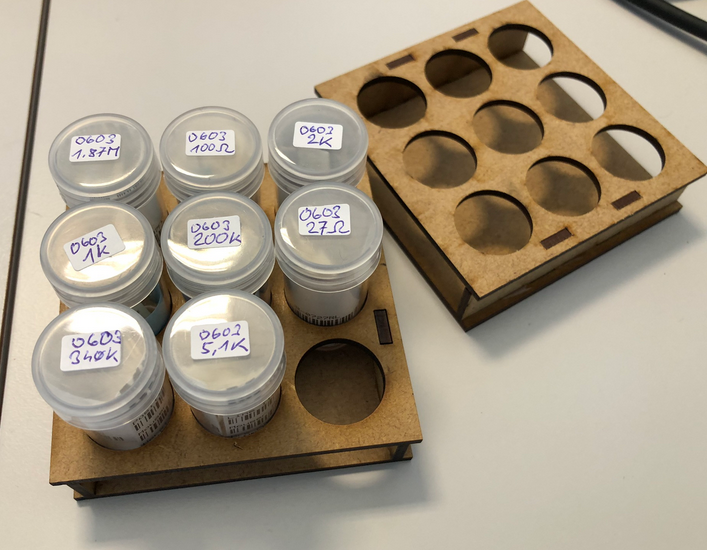
To organize the containers, a simple 3×3 tray for containrs has been created:
Using 3 mm MDF and the laser cutter, this gives a a stack-able collection of parts:
Part Labels
The label from the original part bag is cut to size to have all the information present:
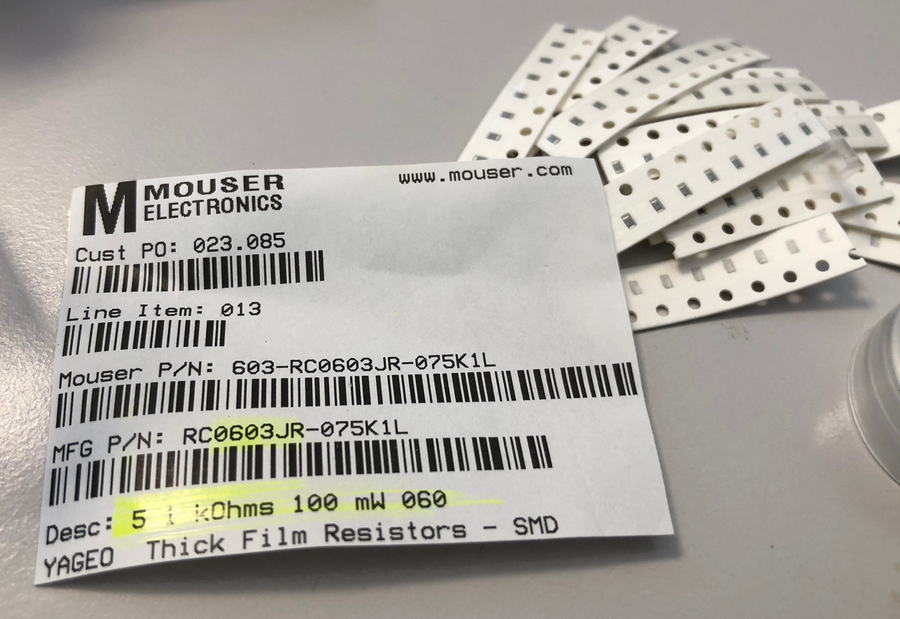
With the container height of 5 cm, the usual labels fit perfectly in to the container:
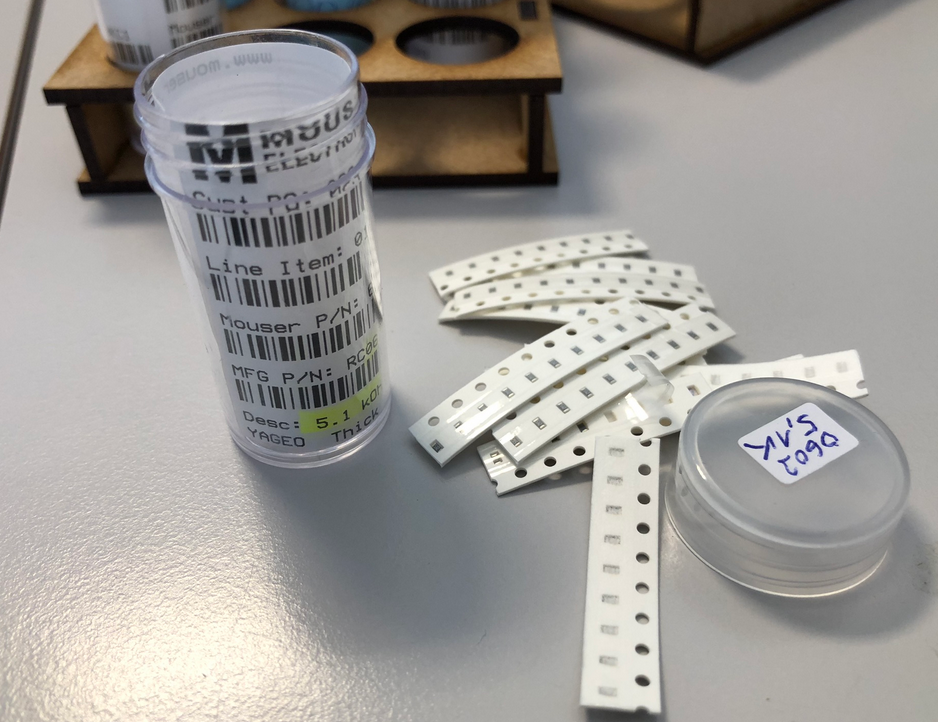
That way I always have the bar code and order numbers available for re-ordering the parts, or getting details about the parts.
Lid Labels
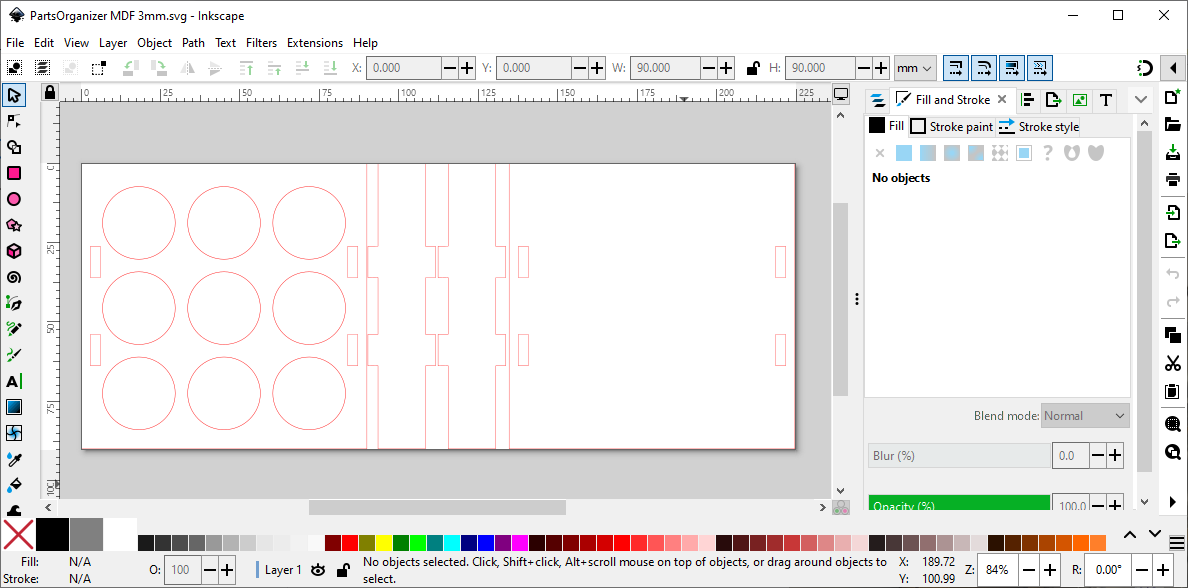
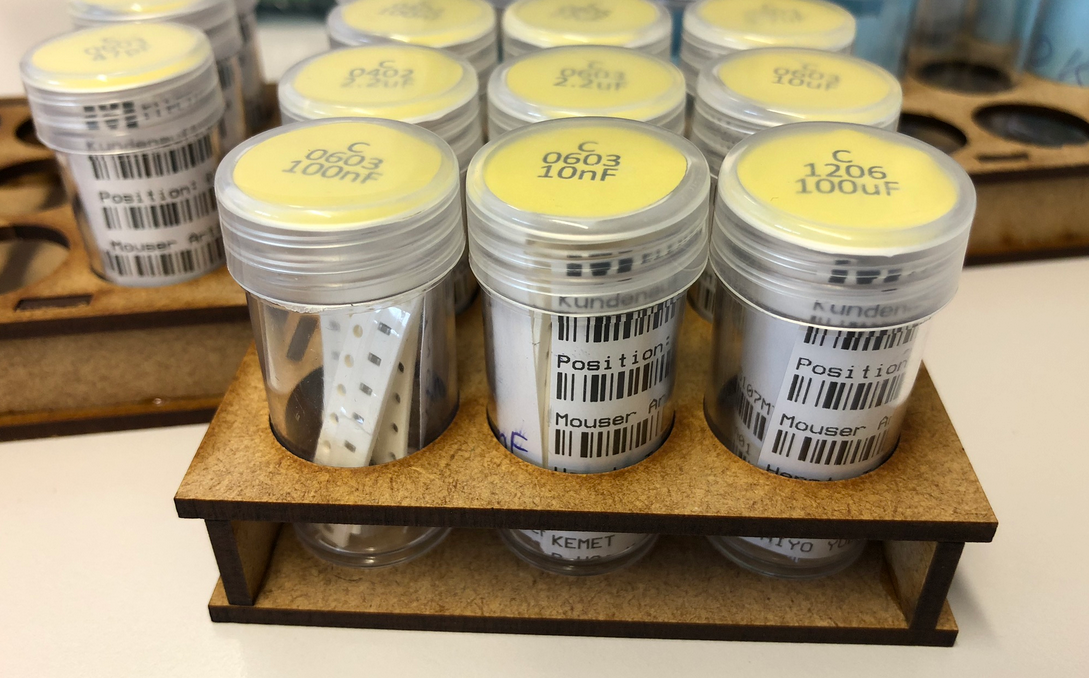
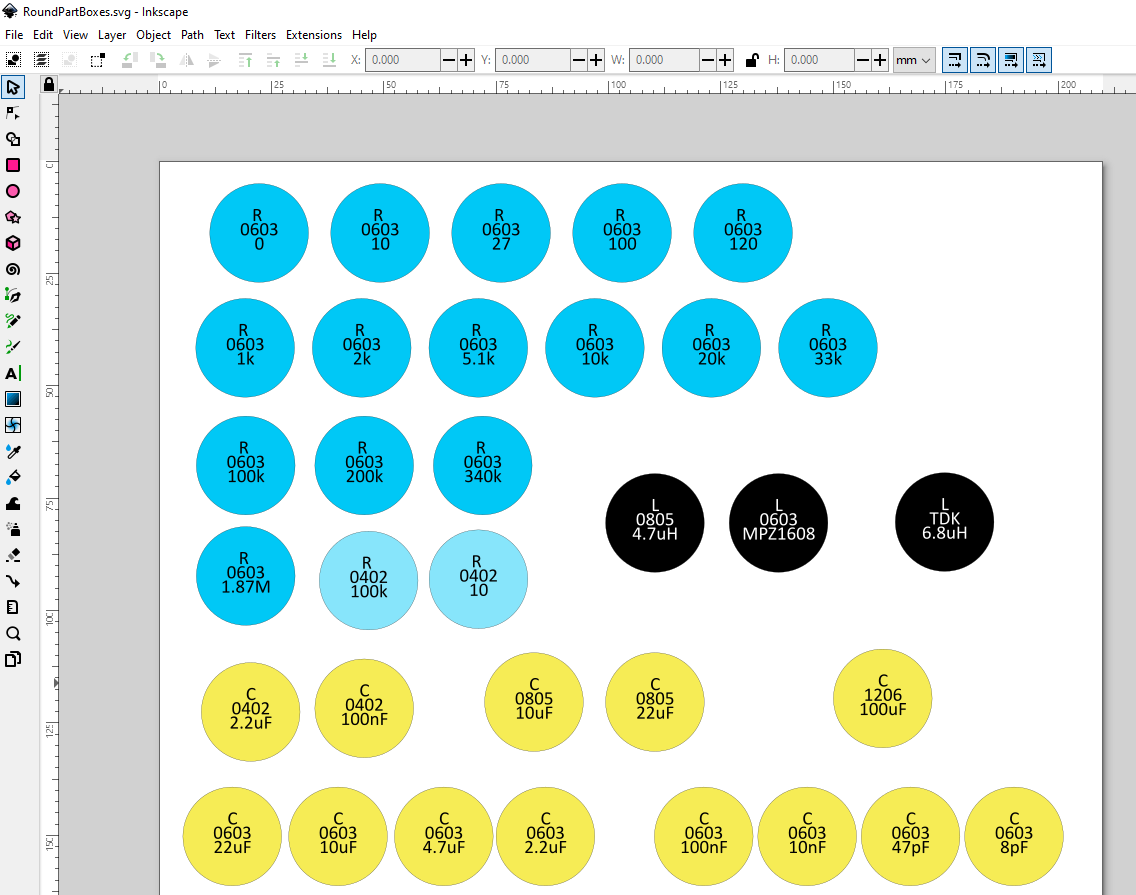
Initially I used small stickers, but that was not ideal: I wanted to use different colors for resistors, capacitors, etc. I used Inkscape to create round labels with the part details. The labels for the container are printed on paper, cut out and then placed into the cap of the container.
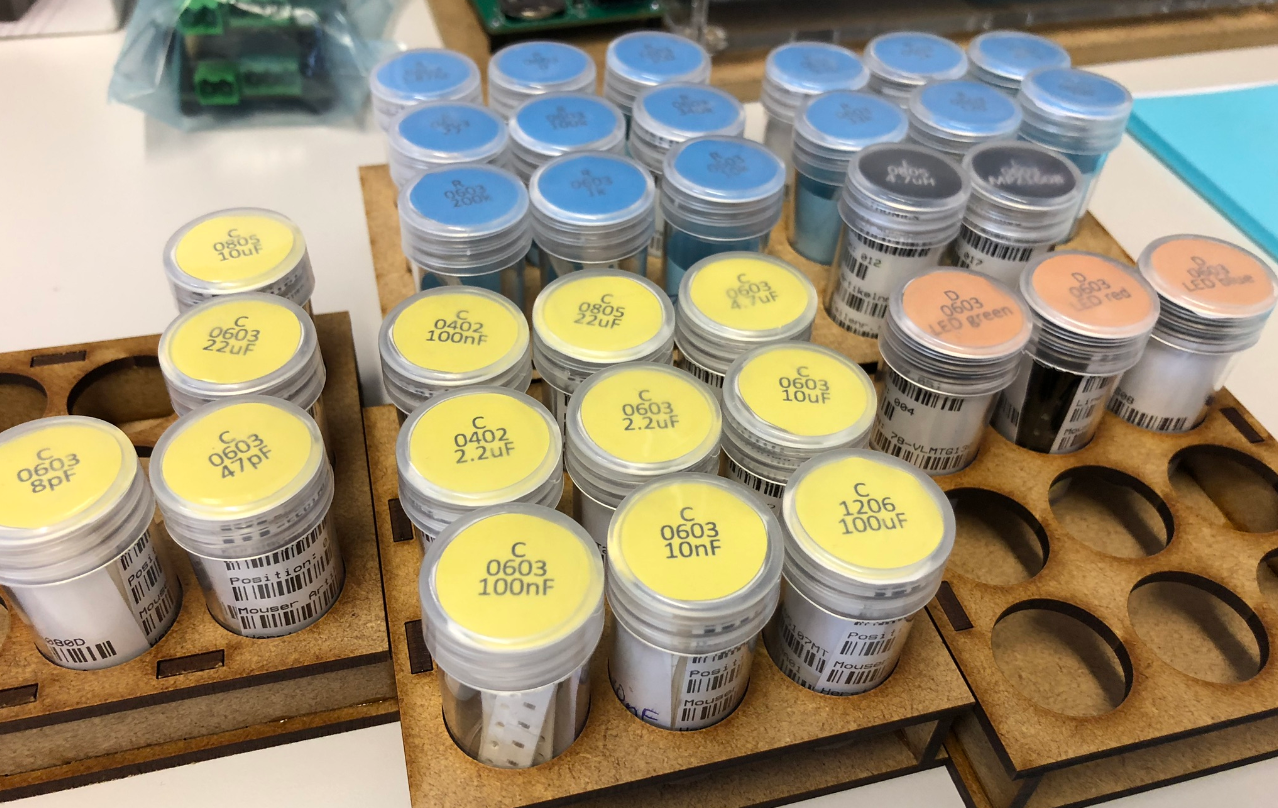
Result
With this, I have a flexible way to store the parts for my projects. I get a quick and easy overview.
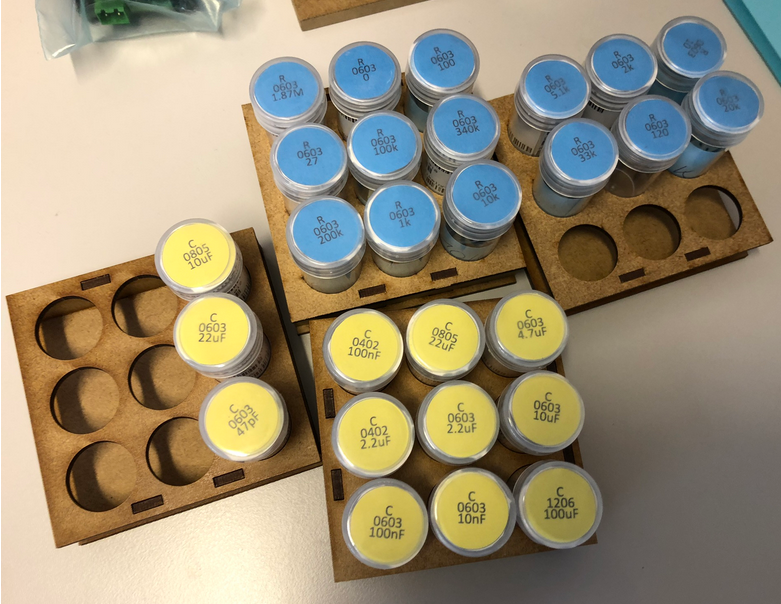
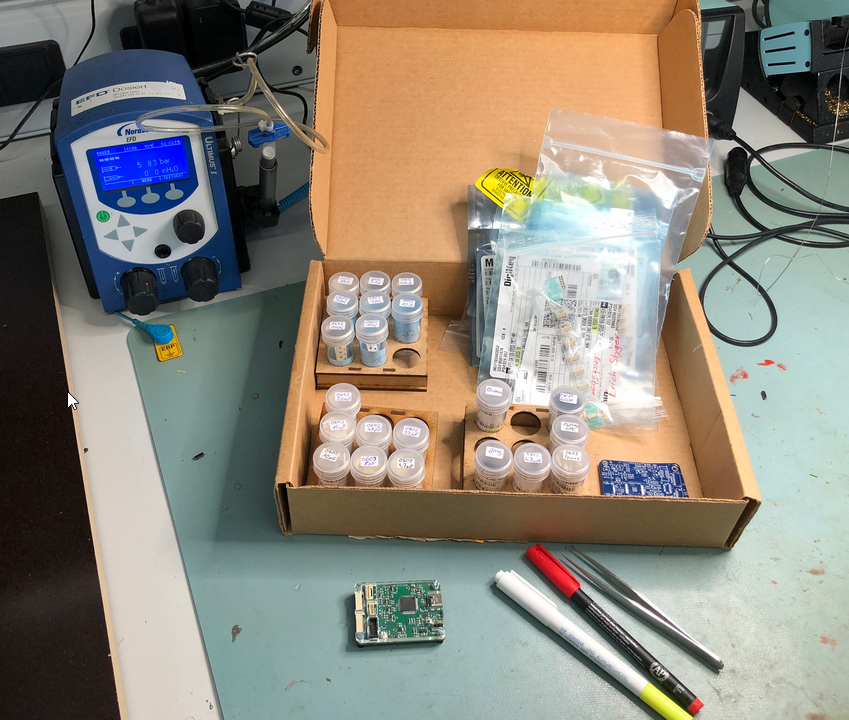
For a PCB part assembly, can pick and collect the parts I need and put them on the trays:
Over time, I have now migrated my ‘common’ parts to the new system, and it has worked very well.
As a tip: if having multiple tapes in a container, I’m marking with a pen the tape I have started using: that way I easily can find and use that one for the next assembly job.
You can find the files on Thingiverse.
Are you using a different or better way for storing SMD cut-tape parts? Let us know and post a comment!
Happy organizing 🙂
Links
- Files on Thingiverse: https://www.thingiverse.com/thing:6702948

A very neat idea. I have my current setup where the bags the parts are delivered in are filed in folders using postcard collector pockets (Getting some order in the house). This way all the part and order information stays with the part without any additional work. I sometimes tag the part with a label of the project they are for so I have a bit more context.
However there are some exceptions and I am looking for something to compliment what I have. This looks ideal.
I particularly like the idea to collect together the various parts for a project. This would also give a quick overview of what is missing.
LikeLiked by 1 person
Your idea to collect the bags in a folder with the postcard pockets is a very neat one: simple without much extra work, I like it!
And yes: for me it was important to go through the BOM and collect the parts into that try/container holder(s): It nicely complements with the KiCad ‘interactive BOM’ with going through the parts and put them into the tray, so I know what I have or what is missing.
LikeLiked by 1 person