
I have to admit: I’m not a vegetarian. I love BBQ, and no offense to vegetarians! Today is perfect day for another BBQ session, and this time I plan to enhance it with electronics. No, not eating electronics, but doing BBQ with a little DIY electronic helper. There are different ways to cook meat on an open fire pit, and each region of the world has its own way to do it. Traditionally, in my area we are ‘grilling’ the meat: high temperature, for a few minutes, done! I like that ‘fast food way’ too, but there is an even better version: Slow food smoking!
I’m gifted that I had the opportunity to experience the Texas BBQ culture: slowly cooking the meat, at low temperature, and ‘smoking’ it: Cooking the meat around 80°C prevents that it gets dry (because the water does not vaporize, see this article on Wikipedia). There are different ways how to do this, but I love the way how it is done at the Salt Lick in Austin/TX with an open fire pit:

BBQ Pit in Austin Texas
Such a bit BBQ pit is definitely on my construction wish list :-). But not easily doable in my area. For several years I have now a ‘workaround’: A ‘smoker’ which allows me to cook the meat indirectly. It looks like a locomotion, produces smoke, and my neighbours made jokes about it. But only until they tasted that BBQ meat coming out of that machine ;-).
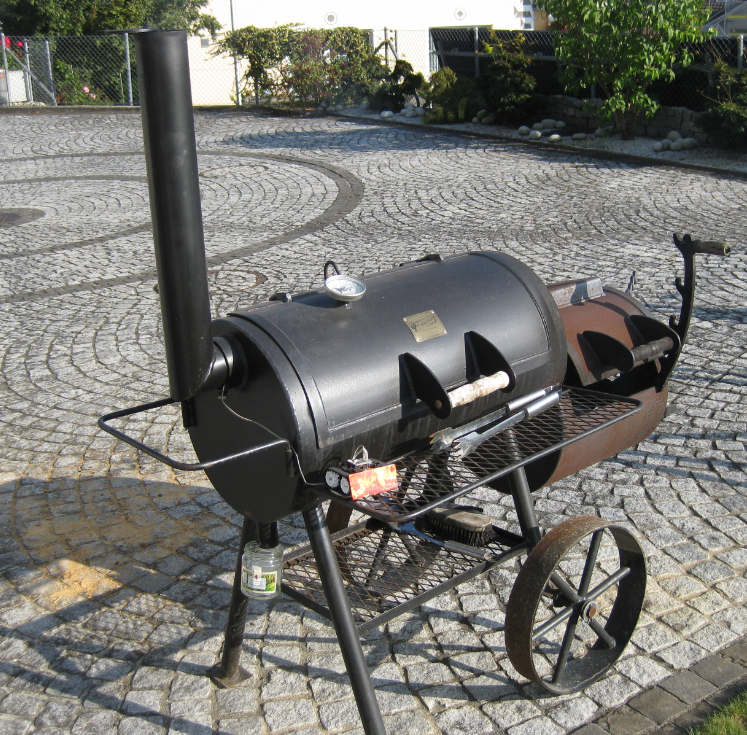
Smoker
To move the smoker around, it has squeaky wheels, so my neighbours get notified when I take it out for another BBQ session ;-). On one end there is the fire-box:

Fire Box
The heat of the fire-box is passed to the higher box where the meat is placed. The fire box has openings to control the air coming in, effectively affecting the temperature in the meat box.
Compared to ‘traditional’ grilling a rather small amount of wood is needed (slow, small fire). I usually burn cherry wood or beech wood.
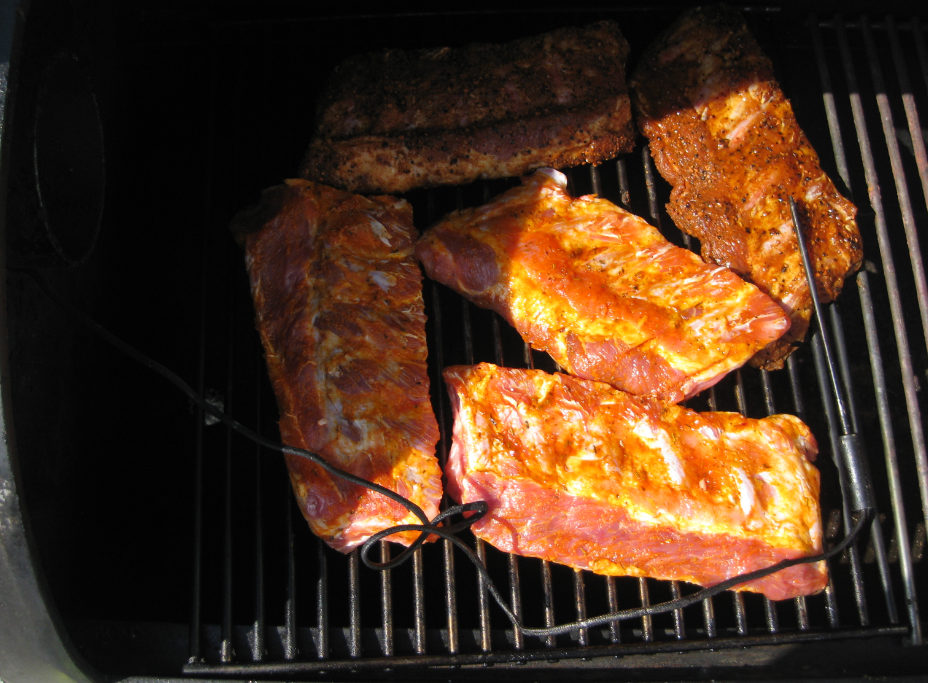
On the left side there is larger box where the meat is placed, and my favorite meat are (baby back) pork ribs: I’m smoking my ribs usually for 6 hours: about 3 hours smoking, then for 2 hours in aluminum foil, then smoking them again for one hour. Key to this is to keep the temperature around 80°C. So for this I had to check the temperature every 10 to 15 minutes and either increase or decrease the amount of air, and adding wood for the fire as necessary. So I thought: Why not build a robot to help me monitoring the smoker temperature?
BBQ Temperature Monitor Robot
I already have a robot which allows me to communicate either with Bluetooth or nRF24L01+ (WiFi support is work in progress) with a wireless communication shield. So connecting the robot with the temperature sensor, and I have my BBQ smoker temperature monitoring robot:
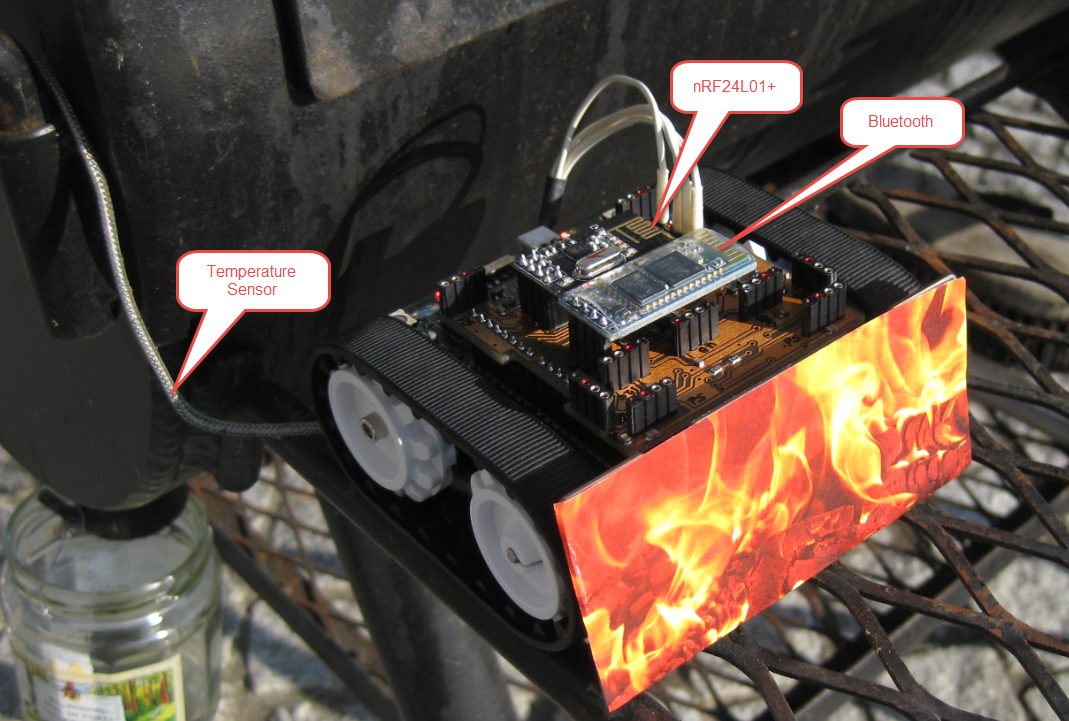
Temperature Monitoring Robot
The day before, the ribs get a dry rub. In the smoker, the ribs get a gentle marinade treating about every 30 minutes with my ‘secret’ sauce (apple juice, apple vinaigrette, cane sugar, ketchup and spices from Rudy’s 🙂).
The temperature sensor is placed near the meat in the meat (smoking) box:
Fresh Ribs placed in smoking box, ready to get started
With the Bluetooth transceiver on the robot I can send data to my host PC or to my Android tablet, but the range is limited to about 10 to 15 meters. So I’m not really using it for this project, as I want to monitor the temperature from inside my house. To keep things simple, another nRF24L01+ transceiver is used with a Freescale FRDM-Kl25Z board, attached to my laptop:
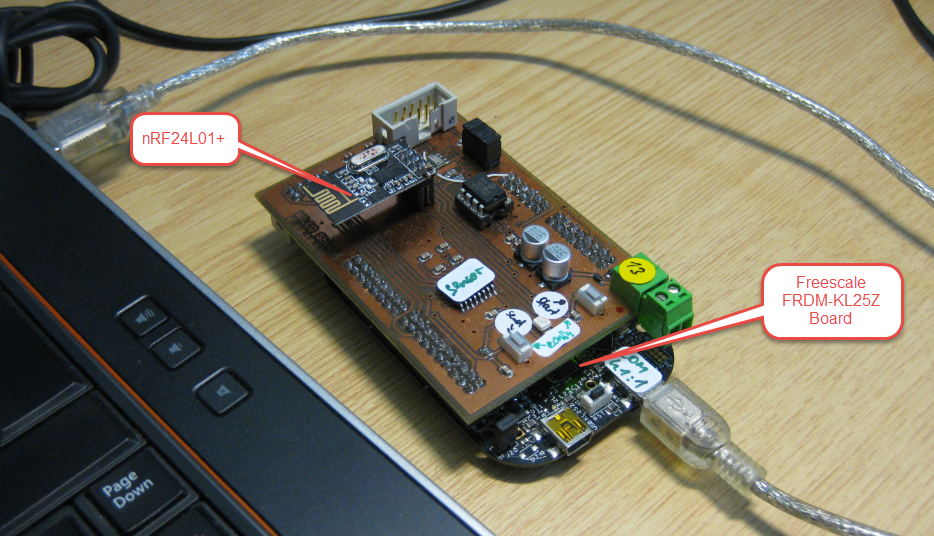
FRDM-KL25Z with nRF24L01+ Transceiver
I’m using the RNET wireless communication stack to connect the two boards. In the terminal window I the information I need.
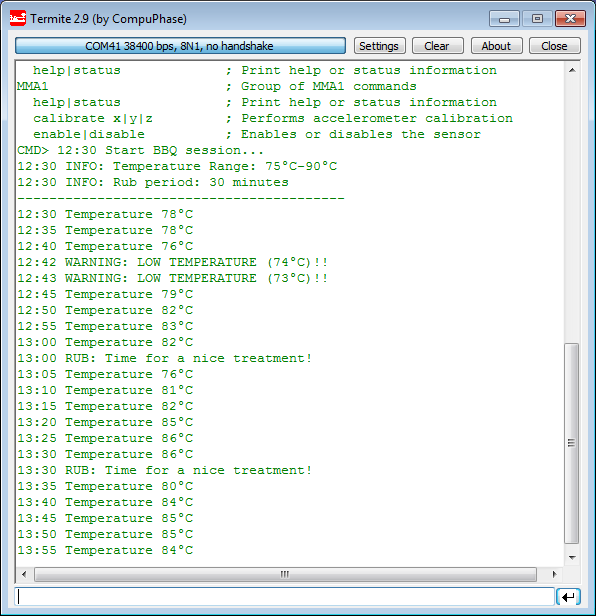
BBQ Status Reports
For now temperature messages are sent every 5 minutes, except it is outside the range. I get notifications when it is time again for a gentle rub :-).
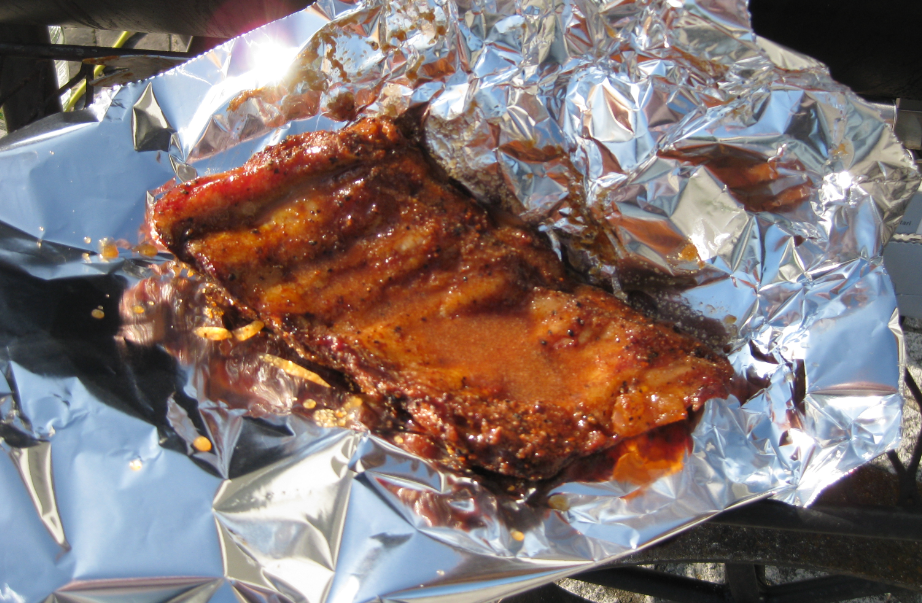
After slowly smoking them for about three hours, they get wrapped into aluminium foil, with another treating of the marinade:
💡 The method to put the meat into aluminium foil in a last phase of the treatment is called ‘Texas Crutch’ (“Texas Krücke”). Some do not like it, but it really makes the meat soft and very tender! And the result is what counts ;-).
wrapping ribs in aluminium foil
Then get placed back into the smoking box for an extra 2 hours:
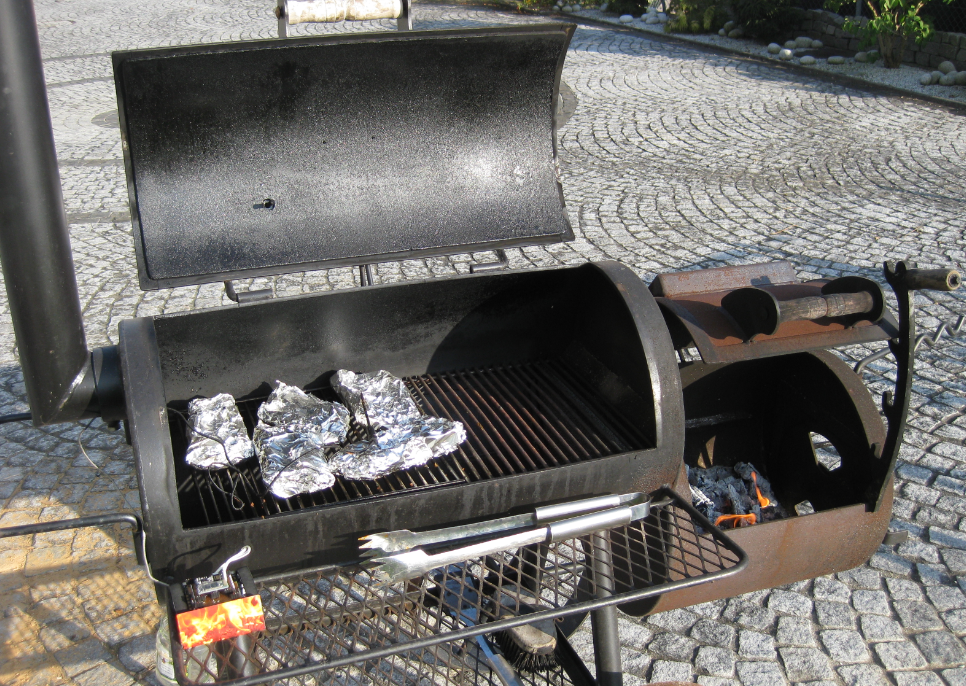
Wrapped Ribs in Smoking Box
After two hours wrapped in foil, I take them out to finish them for another hour:
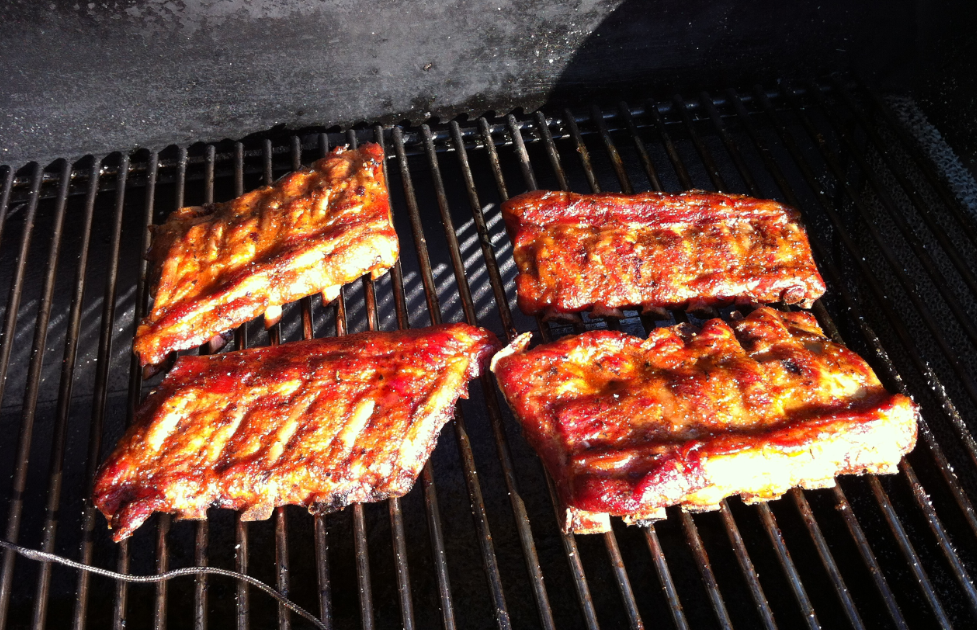
Pork Ribs in Smoker ready for finishing
Outlook
The BBQ Smoking assistant robot works fine. It monitors only the temperature for noew and sends me the status information so I can take care about my ribs. I’m thinking about a graphical view of the temperature data. Sending an alarm SMS messages to my phone? Hooking it up to my WLAN? Taking pictures and sending them? Monitoring more (temperature fire pit, outside temperature, smoke temperature, smoke detector)? Creating a closed loop version: monitoring the temperature and controlling the fire and heat. That would be cool!
But WAIT! First I have to eat THIS:
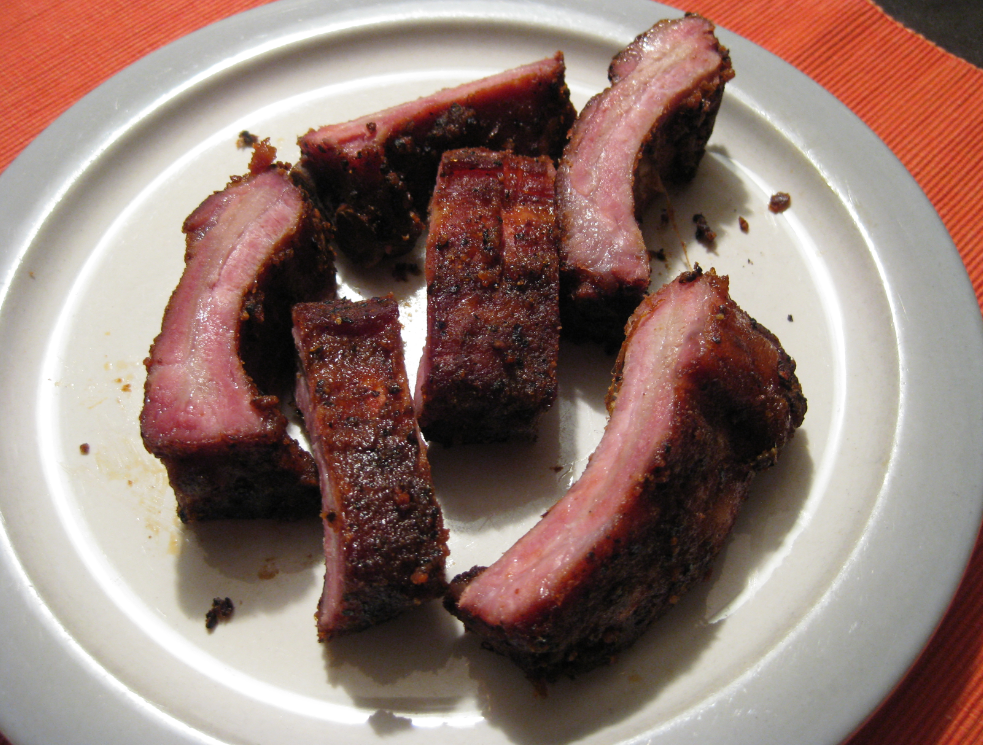
Smoked Baby Back Ribs
🙂
Happy Smoking 🙂
PS: For me *the* site about BBQ and ‘Grillen’ is http://www.grillsportverein.de (sorry, in German, but the pictures will give you the idea 🙂 )
PS2: BTW, I’m a part-time vegetarian too.

I have to say, I’m a bit surprised to find a bit of Texas in you!
(except in Texas the smoker would be welded up out of old oil drums. 🙂
LikeLike
Well, my climate zone needs something heavier than old oil drums: mine is having 4 mm steel: heavy and durable, so I can use it during winter time too 🙂
LikeLike
4mm thick steel! Yikes!
Well, from what I’ve seen so far, nothing is ever done half-assed in Switzerland!
LikeLike
you only should buy or build a smoker once in a life time. The 4mm makes it durable, and has some heat inertia mass to keep things warm inside 🙂
LikeLike
Pingback: My First DIY Smoked Beef Brisket: Day 1 | MCU on Eclipse
Pingback: My First DIY Smoked Beef Brisket: Day 2 – the Way and the Result | MCU on Eclipse