
Decisions, decisions! Such long weekends like Pentecost are a real challenge for a family with engineers:
- Should we join that record long traffic jam to Italy and be stuck for more than 4 hours and analyze it?
- Or: should we stay home, turn the BBQ smoker engine on fire, load it with baby back pork rib racks for a slow-and-low smoke treatment, while doing some on-the-side IDE and technology exploration?
Well, my family vote was kind of clear: they have chosen that second option. Not to mention that hidden technology piece in it, but that was part of the deal ;-).
And I’m sorry: this article is not about BBQ (for this see “Smoking BBQ Baby Back Ribs – Swiss Style“), it is about technology: I’m using the NXP MCUXpresso IDE and tools for many of my projects (see “Eclipse MCUXpresso IDE 10.1 with integrated MCUXpresso Configuration Tools“). Right before the this extended weekend, NXP has released the new v10.2.0 version, so here is where that technology exploration piece comes into play. Checking the release notes, this version number change includes so many cool stuff I decided to have a look and to check it out. Of course always having an electronic eye on the baby back ribs!
MCUXpresso IDE v10.2.0
Outline
The MCUXpresso IDE targets the NXP LPC, Kinetis and i.MX RT Cortex-M microcontroller and microprocessors and runs on Windows, Mac and Linux hosts. It includes the GNU ARM Embedded toolchain, debugger and graphical configuration tools (MCUXpresso Config Tools) for pin muxing, clocks and peripheral driver configuration. Support for specific devices and families are provided through downloadable software packages (MCUXpresso SDK). It includes wizards to create and manage projects, managed linker scripts and many debugging features (instruction trace, SWO trace and profiling, live and global variable view, FreeRTOS Kernel awareness, flash programming tools, …). It has replaced all the previous IDE’s Freescale/NXP has provided in the past (CodeWarrior, Kinetis Design Studio) and is the NXP flagship and choice of IDE and toolchain.
At a very high level, the new version 10.2 comes with an updated Eclipse (Oxygen 3) and new CDT (9.4.3), updated toolchain/libraries and extended debugging features. It is free-of-charge, and as 10.1 there are no code size limits. But now even the ‘Pro’ features of 10.1 are now included free-of-charge, so everything is free and unlimited :-).
💡 MCUXpresso IDE v10.2 can be installed without removing any previous version (this is pretty standard for any Eclipse). Of course make sure you are installing into a new directory. Actually I have many different version of Eclipse/toolchains installed that way on my machine. But make sure you are NOT sharing/mixing workspaces (see note below).
In the next sections I go through some of the new features and functions I have explored. Given the long list of changes and improvements, I picked the ones which seem to be the most relevant for my work. Other than that, check out this community post with overview of main enhancements.
💡 This new Eclipse IDE comes with an updated Eclipse (Oxygen). As a general rule for Eclipse, never use an older IDE workspace with a newer IDE/Eclipse. What I do is to keep the IDE workspaces separate, e.g. having a folder named wsp_MXUXpresso_v10.1 and wsp_MCUXpresso_v10.2. As for the projects, I never open/use older/existing projects with a newer IDE, and always use a version control system (e.g. git) so I can go back. Only after everything is working fine, I’m moving over projects to the new IDE version. Keep in mind that moving from an older version to a newer version is usually working fine, going back is usually *not* easy (unless you have a version control system in place for this).
Download
For later reference: this is the version I’m using the following version in this article:

MCUXpresso IDE V10.2.0 Build
The installer is available from https://www.nxp.com/mcuxpresso/ide download section:

Product Downloads
Better Quickstart Panel
Starting the new IDE, one thing to see right away is the updated quick start panel:

Quickstart Panel
Items are now grouped/foldable which makes it easier to pick a task in the development process, and it shows the selected project on the top.
The feature to force a probe rediscovery is now visible in the tooltip. That’s useful if changing the connection in an existing project.

Force Probe Re-Discovery
This will search for new probes attached to the host:

Automatic Probe Discovery
What is new is the ability to trigger directly actions from the drop down for each probe (LinkServer, P&E and SEGGER):

Debug Action
The button will remember what action I have configured, that way I only need to press that button the next time. And best of all it offers debugging, programming, attaching and erasing in single mouse click. I think that’s the easiest and simplest way I ever have seen.
Importing Projects with Drag&Drop
Something I have really missed from the ‘CodeWarrior time’ which is now available in the MCUXpresso IDE: A convenient way is to drag&drop projects into the Project explorer view:

drag_and_drop
It will ask me if I want to link to that project or copy that project:

Project Import Dialog
I can drag&drop one or multiple projects and import them that way. It works the same way with zip files too.Or I can drag&drop projects from one IDE/workspace to another one which is a cool way to move/copy projects between workspaces.
As an extra cool feature, I can drag projects from the Eclipse Project Explorer view to my desktop or to a folder on my disk: it will copy that project so I can use it as an ‘export’ feature.
New Projects and Importing Example Projects
As in the previous version, there are wizards to create new projects or import SDK example projects from the set of available SDKs:

SDK Import Wizard
For new projects I choose from the set of available drivers and middleware:

Configure the Project
What I really like is that I can add/remove components for an existing project:

Manage SDK Components
Project Explorer View with Project Settings
Another thing I noticed in the Project Explorer View: there is a new ‘Project Settings’ node available. This is a very convenient way to get a quick overview about the project details:

Project Settings Node
Even better, I can use the context menu to change settings that way too:

Context Menu on Project Settinigs
Faster Build Time
The v10.2 includes a new GNU ARM Embedded toolchain (GCC7, 2017q4-major). For the projects I have tried, the code size with that new version is a bit smaller (few bytes for 10-50 kB projects). Positive, so not really noticeable. But one thing I noticed when I was building one of my larger projects: the new build time seemed to be somewhat faster with the new IDE. So I compared the time needed to build the same project:
MCUXpresso IDE 10.1:
text data bss dec hex filename
515516 324 63656 579496 8d7a8 FRDM-K64F_Demo.axf
16:09:33 Build Finished (took 24s.151ms)
MCUXpresso IDE 10.2:
text data bss dec hex filename
515440 324 63656 579420 8d75c FRDM-K64F_Demo.axf
15:51:12 Build Finished (took 18s.431ms)
Instead of 24 seconds it is now 18 seconds which is ~24% faster. Of course that depends on the files. It seems to me that the Eclipse CDT 9.4.3 has contributed to that too. In any case, a positive thing too :-).
Managed Linker Scripts with Extra Linker Script Input Sections
An interesting new feature is the ability to assign special input sections in the linker settings. Previously I had to do this by hand or add extension points to the linker scripts (see “FreeRTOS Heap with Segmented Kinetis K SRAM“). Now I can do this directly in the linker panel: I can specify the section name or simply the variable and then place it into one of the available sections:

Placing variables into memory sections
New Terminal View
Another benefit of using the new Eclipse is that finally (again) the Terminal View is working with serial ports. That way I don’t need to use an external terminal program to connect to a target serial port.

Terminal View
GUI Flash Tool extended for P&E and SEGGER
The GUI Flash Tool previously was only for the LinkServer (or LPC-Link2) connections.

GUI Flash Tool
Now it supports all debug probe connections, including P&E and SEGGER, and I can program, erase or even resurrect a ‘bricked’ Kinetis device:

LinkServer GUI Flash Tool

PEMicro GUI Flash Tool

Segger GUI Flash Tool
Using the toolbar icon is probably the most convenient way to use the GUI Flash Programmer, it is possible to run it from the debugger launch configuration too:

Running GUI Flash Programmer from Launch Configuration
The operation executed is logged in the Console View:

GUI Flash Tool Console Output
MCUXpresso SDKs
As in the previous version, I can manage my SDKs inside the IDE and jump to the SDK Web page to download packages:

MCUXpresso SDK Builder
Jump to SDK Documentation
What is new is that I can directly access the documentation provided in the SDK:

SDK Documentation
In the SDK Details there is a ‘filter’ button so I can filter for all the documentation (pdf, txt, html) content. From that area, I can open the file:

SDK Documentation
‘Portable’ SDK Projects
Previously, when I wanted to pass a SDK project to someone else (e.g. passing to students), I had to make sure they have that SDK used installed as well. For example the debugger needed that part/device information. Now this is much easier as I can add the needed SDK support files to an existing project so it can be built and debugged without the full SDK installed:

Add SDK Part Support
Of course this does not replace the need for having the SDK and all the source files installed if I want to add new drivers/etc. But at least allows someone else to use the project ‘as is’ without the need to have the SDK for it installed.
The added information shows up in the Project Explorer view:

SDK Part Support Added
MCUXpresso Configuration Tools
As in 10.1, the IDE comes with the MCUXpresso Configuration tools integrated. They have now an ‘overview’ menu item:

Config Tools Overview
This shows a dashboard of the current configuration tool status (Pins, Clocks and Peripherals):

Config Tools Overview Dashboard
It gives me an overview and informs me about any dependency problems. I can click on the items and directly open the corresponding tools.
Below the Pins perspective to manage the pins and muxing:

Pins View
With the Clocks Perspective I can manage all the system clocks and clock settings:

And in the Peripherals View I can manage the peripheral drivers:

Peripherals View
Instruction Trace
Now this is *really* cool: instruction trace was previously only available for the LinkServer/LPCLink2 connection, now all connections including P&E and Segger are supported with instruction trace! 🙂
This probably deserves a more detailed article, but here are the quick steps to get instruction trace: From the Instruction Trace view open the configuration view:

Instruction Trace View
Enable trace and press apply:

enabling instruction trace
In the Instruction Trace view, turn on ‘Record continuously’:

Record Continously
Run the target, stop it, and then load the instruction trace data:

Get Instruction Trace Data
Instruction trace markers are shown in the source view:

Instruction Trace Markers in Source View
For more information, see the IDE Instruction Trace Guide (btw, the documentation has been updated too and is worth a read too):

Instruction Trace Guide
SWO Features
Now the the SWO interrupt trace graph which previously was a ‘pro’ feature is available to everyone (but only for now available for LinkServer, but not for P&E and Segger yet):
💡 note that to have SWO trace data, the SWO pin needs to be available on the debug connector. This is usually not the case for Freescale FRDM boards, but the TWR boards have it usually available on the larger 20pin debug header. The NXP LPCXpresso boards have the SWO pin available on the debug connector. See “Tutorial: Using Single Wire Output SWO with ARM Cortex-M and Eclipse” for more details.

Same for the SWO Interrupt statistics:

SWO Interrupt Status
The same for the SWO Profiler which is only available for the LPCLink2/LinkServer connection:

SWO Profile
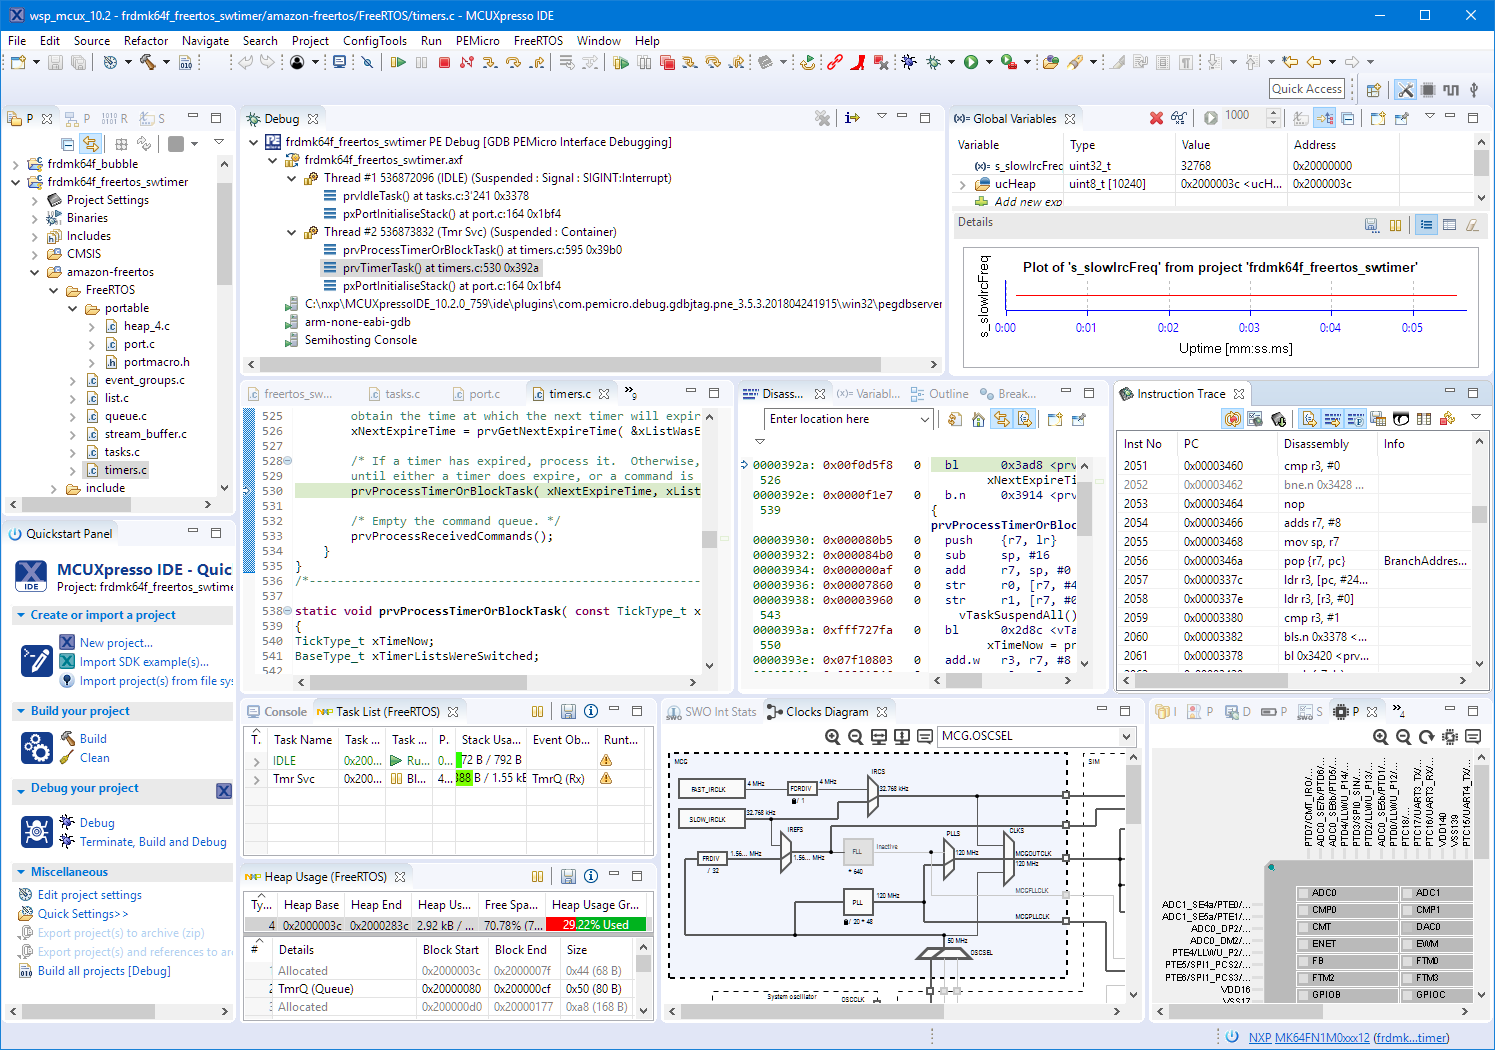
Global Variables Graph with LinkServer Connection
The earlier IDE version already supported ‘live variables’ (variable values updated in a view while the target is running) for P&E and LinkServer/LPC-Link2 connections. With LinkServer/LPC-Link2, there is a new feature to capture the values in a graph. This is very useful to watch one or multiple variables over time:

Plot Variables over Time
Faster Redlib with Semihosting
From the release notes I read that there is a new optimized Redlib library with semihosting using message buffers:

Redlib Semihosting libraries
The Redlib semihosting should be faster now, plus the ‘mb’ variants are used to transfer data without stopping the target with a breakpoint instruction.
I did not had a chance to try this out, but as I’m using semihosting with file I/O using the GNU coverage (gcov), any performance improve will be more than welcome. So once I have this working, I have to see how much this will speed up writing files on the host PC for dumping coverage files.
Migrating to the new IDE
As a rule of thumb, I don’t change IDE/toolchains for ‘work in progress’. I recommend to use a dedicated workspace for each IDE/Eclipse version and a version control system to keep track of any changes. Over the weekend, I have tested the v10.2 with several 10.0 and 10.1 projects, and they worked all fine. The only thing I did was deleting the existing launch configurations to create new ones. I plan to migrate all my MCUXpresso IDE projects on GitHub to the new version over the next few days.
Summary
I have been very happy with the v10.1, but this new MCUXpresso IDE v10.2 tops it by many aspects. I like the new views and features. I have missed that drag&drop project import for a long time, the Quickstart panel and Project Settings node in the project view makes things very accessible and easy to use. I have now extended flash programming and instruction trace features with the P&E and SEGGER connections which were before only available with the LinkServer/LPC-Link2 one. Doing debug/attach/erase/program has never been easier. I have a simple way to place variables or sections in the linker (which is a pain with normal GNU linker scripts). The configuration tools help me to configure the pins, clocks and peripheral drivers. The IDE is using Oxygen, and I can carry forward my legacy projects with the 10.2 version (I have it working with Processor Expert too :-)), which is incredibly useful as some of my projects are maintained and evolving for more than 10 years. And for my NXP Cortex-M projects, the v10.2 version of the MCUXpresso IDE is my choice going forward.
Happy Xpressing 🙂
Links
- MCUXpresso IDE web: https://www.nxp.com/mcuxpresso/ide
- MCUXpresso IDE v10.2.0 changes: https://community.nxp.com/community/mcuxpresso/mcuxpresso-ide/blog/2018/05/18/mcuxpresso-ide-v1020-now-available?et=watches.email.blog
PS: Oh, look what I have found under ‘additional resources’ 🙂

Additional Resources
PS2: if you are still interested in BBQ ribs, post a comment and I see what I can show 🙂

This is is the first post that tempts me to try out your toolchain—I might have time to do that this summer, after I’ve finished all my grading.
LikeLike
because of the BBQ ribs? 😉 I in the process of preparing for the next semester, but too busy to really make much. First need to write the exam, do the grading, then I really can focus on the next semester.
LikeLike
I have abandoned KDS because I started to work with ST devices and since that my FRDM boards are covered of dust. The new NXP’s IDE looks great and give me the envy to bring back the Kinetis on the table.
I am glad that you effort is even recognized by NXP in the IDE. Thank you for this great article.
LikeLike
Yeah, I know that feeling: I still have some S12 and S08 parts which I would love to use, but as everything has moved to ARM they are waiting in a shelf for a better time. With all the buzz about RISC-V it very well could be that ARM gets some serious competition.
LikeLike
Thanks for the update alert, Erich … but this demonstrates exactly why I hate to accept tool updates! I loaded the 10.2, and pointed it to my in-development workspace which compiled fine with 10.1 on Friday. And what do I get but a heap of errors (warnings, but I always code with warnings promoted to maximize bug free code)
LikeLike
Stupid webbrowser! ENTER doesn’t mean I finished … so anyway, the new errors are because my existing ” /*lint -FALLTHROUGH*/ comments are no longer being accepted and I have to change uppercase to lowercase; no sensible reason I can think of, totally stupid to force such a bug.
How many other silly things like this get delivered with every update?
LikeLike
Hmm, I always have used lint comments in lower case, so I might not have seen that (must try this out). But I don’t see a reason why this would make a difference?
LikeLike
I quickly added /*lint -FALLTHROUGH*/ to my code, and this had no negative side effects (but I have not added lint to that project yet). So I think it must be something different?
LikeLike
I always have dedicated workspaces for each Eclipse version (workspaces should never shared between Eclipse versions, especially as this one is a different Eclipse (Oxygen)). Importing projects into that workspace (with links) might be ok, but I’m careful about this too.
LikeLike
Pingback: Understanding FreeRTOS Task Stack Usage and Kernel Awarness Information | MCU on Eclipse
Thanks for this presentation Erich.
I installed the new release and all is fine except that time_t is now (GCC v7) a 64bit variable type…
LikeLike
Good point about the time_t, but that should not be a problem for me.
LikeLike
Pingback: Tutorial: Understanding and Using FreeRTOS Software Timers | MCU on Eclipse
TNX for this article, Erich!
I have noted two “new entry” on list of available peripherals; LPTMR0 and PIT components… by now, reading the respective code on include files as fsl_lptmr.h and fsl_pit.h, is easy to work out an initialization routine similar to component generate by peripherals tool, of course, so far distant from regretted PE… 😦
LikeLike
Hi Antonio,
yes, the number of supported devices and peripherals get more and more. Still not the full level, but getting better.
Erich
LikeLike
Pingback: GNU Link Time Optimization finds non-matching Declarations | MCU on Eclipse
Pingback: Installing Darkest Theme with MCUXpresso IDE 10.2 | MCU on Eclipse
Hello.
I downloaded and installed the RT1020 SDK for MCUXpresso. I open a source example project and I see that Peripheral Tools is not available, also when I access the configuration Clock is only available in text mode (Clocks Table) not in graphic mode.
Does anyone know how to solve these problems?, I am mainly interested in being able to access Peripheral Tools, to configure DMA and Interrupts.
LikeLiked by 1 person
For me https://mcuxpresso.nxp.com is not accessible (server down?), so I cannot check the RT1020 files/SDK or comment in details what is possible or not.
I have currently only a board with the RT1052 (https://mcuoneclipse.com/2017/12/16/mcuxpresso-ide-v10-1-0-with-i-mx-rt1052-crossover-processor/).
But I know that currently in the Peripherals tool not all peripherals are supported yet, and support for more peripherals get added over time.
I hope the website will be back soon, so I could check more.
LikeLiked by 2 people
Thanks for your reply, Erich.
I also have the RT1050 evaluation board, I have checked it now and exactly the same problem, I can not open Peripheral Tools and the Clock is only shown in Table mode, not graphic.
It may be that for the RT1050 I need to download the updated SDK again. I downloaded it some time ago, just after receiving the evaluation board, I suppose that over time they will update it and add new options.
LikeLiked by 1 person
I have updated the SDK for the RT1050, but I still do not have access to Peripheral Tools, and the Clock is only available in text mode (Clocks Table).
Very strange, that there is no access to Peripheral Tools, for me it is a very essential tool to configure the microcontroller, mainly the interrupts and the DMA. I can understand that it is not yet ready for RT1020, recently released, but RT1050 is already available some time ago.
LikeLiked by 1 person
The web site is back again, and I have downloaded the SDK for the 1020. And I do have clocks with graphical view available. Plus there is the Pins tool available. But no Peripherals Tool for the 1020.
LikeLiked by 1 person
For Clocks, I only see “Clocks Table” in text mode. Without Peripheral Tools, and the same for the RT1050 SDK. Its hard develop without the Peripheral Tools, I need mainly for DMA and interrupts.
Today I received the RT1020 evaluation board, similar to RT1050 but without hyperflash, chip in LQFP144.
At this time, no Datasheet or Reference Manual. In the printed Packing List they put a web link to download the user manual of the evaluation board, but it does not work ( nxp.com/MIMXRT1020EVKQSG ).
The good thing I see in both SDKs for RTs is a lot of examples of source code and documentation. I wait for data sheet and reference manual for day 26, as announced in the forums of NXP, I also want to buy several chips to develop my own test board, to migrate all my developments with Kinetis and STM32 to RT1020.
LikeLiked by 1 person
Hi Erich
I noticed that in the latest MCUXpresso 10.2 there are already ISSI QSPI Flash drivers for RT1050/RT1020. I tried it and it worked without problems while you know some customer will use chose QSPI flash from different vendor, Like Winbond. Do we have any plan to add other QSPI Flash driver in the future or just fixed flash from ISSI and ExoXip? THanks.
LikeLike
MCUXpresso supports different flash devices/vendors. To some extend this depends on the run control (Segger, P&E, LinkServer) connection.
LikeLike
I suppose different flash needs corresponding flash algorithm like MIMXRT1050-EVK_IS25WP064A.cfx in C:\nxp\MCUXpressoIDE_10.2.0_759\ide\bin\Flash path. While i didn’t find other Qspi Flash vendor’s flash algorithm except for ISSI.
LikeLike
Extra flash drivers can be packed with the SDK packages. See as well chapter 14 of the MCUXpresso IDE User guide.
LikeLike
If the flash drivers come with SDK package, it will only support EVK on board QSPI flash part, no way to add extra optional Qspi flash vendor support. And as the flash driver code is not open source(IAR and Keil open it), i believe it is very difficult to use other Qspi flash for those customers using MCUXpresso IDE. Why not open the source code project for customizing flash driver by customer themselves?
LikeLike
I have not implemented myself a new flash driver, but a quick search gave me this:
https://community.nxp.com/thread/389143
Reading this, it seems to me that the flash driver is indeed open and you can add whatever you need?
LikeLike
Good work Erich!
I have one hesitation: if i build a project, under Xpresso 10.2, as debug option, with many “printf()” inside the code (to debug.. optimize the code..), when i go to build as “release” option (to program final version of code into chip) WITHOUT delete the severals printf() statements, is correct to do? Because i don’t understand the difference between two options…
LikeLike
Hi Antonio,
in general, I do *not* recommend to use an printf() for things like this as this is very intrusive. If you want to use it, you could have a #define for a DEBUG_PRINTF: mapping that define to a printf() call or to ‘nothing’ will enable you to either use it or not.
LikeLike
TNX Erich,
but it is an environment variable that is defined building in “debug” option that is not defined in “release” option? So i will write:
int main() {
int a = 10;
#ifdef BUILD_DEBUG_OPTION
printf(“Ok, i are builded in debug-option, and variable a= %i rn”, a);
#endif
}
so, in “release” option this semihosting feature is not build. Is correct?
But, what is this variable?
LikeLike
Who search.. found.
May be, Erich, this variable is simply DEBUG?
(Properties/C/C++ Build/Settings between the defined symbols, in debug configuration is DEBUG, in release configuration is NDEBUG)
LikeLike
Hi Antonio,
yes, such defines are used to turn on/off things in the build.
LikeLike
Pingback: Porting Processor Expert Projects to MCUXpresso IDE | MCU on Eclipse
Pingback: New NXP MCUXpresseo IDE V10.3.0 Release | MCU on Eclipse
Pingback: GDB All-Stop and Non-Stop Mode with LinkServer | MCU on Eclipse
Sorry, I’m sure this is the wrong place to report …
the program / erase tool is broken when the directory path has spaces; so for example the command line includes “-configfile=C:/Dropbox (PGT)/Software/KE14F/.metadata …” and the response is “PE-ERROR: ERROR: Invalid config file parameter “C:/Dropbox””
The tool needs to wrap qutoes around the path, I think?
LikeLike
Yes, indeed. I did not run into this issue and I can confirm that it happens for me with the P&E probe on 10.3.0 too. I’m going to report this to my IDE contact to have this fixed, thank you!
LikeLike
Pingback: Visualizing Global Variables while Target is Running with Eclipse and MCUXpresso IDE | MCU on Eclipse
Hi Erich,
Regarding MCUXpresso “extra linker script”, I posted question on NXP forum. When you get a chance, please help me get rid of build warning “setting incorrect section…” at:
https://community.nxp.com/thread/510817
Thanks for the help.
MI
LikeLike
Hi MI,
I see on https://community.nxp.com/thread/510817 that Con Verse provided really good answers on your case, which is point on.
You cannot have writable data in FLASH memory on these devices.
LikeLike
Pingback: Import Projects from git into Eclipse | MCU on Eclipse