After the “WiFi OLED Mini Weather Station with ESP8266“, here is another one: this time with Touch LCD :-):
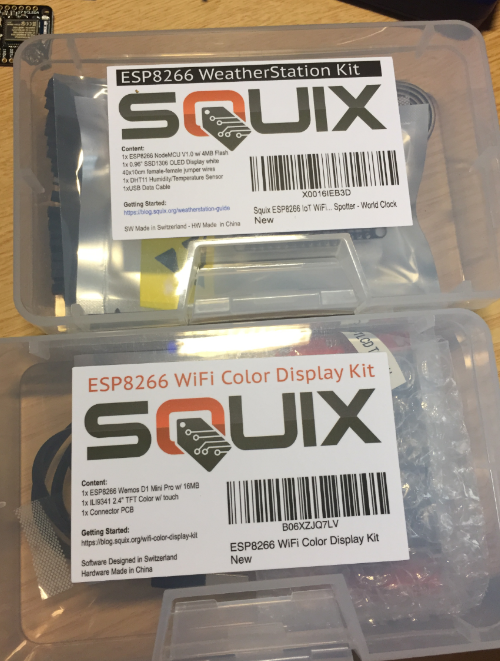
In the previous article (“WiFi OLED Mini Weather Station with ESP8266“) I have used the OLED kit from https://blog.squix.org. And as promised, this time it is about the “ESP8266 WiFi Color Display Kit”:
I had ordered both because I thought that the Color Display kit is needs the other kit as a base. Well, it turned out that both kits work independently. My bad. Actually this is good, as I have now two independent ESP8266 weather stations :-). An addition to that, they can exchange data (e.g. temperature/humidity) with a server, so that makes them a perfect dual weather station.
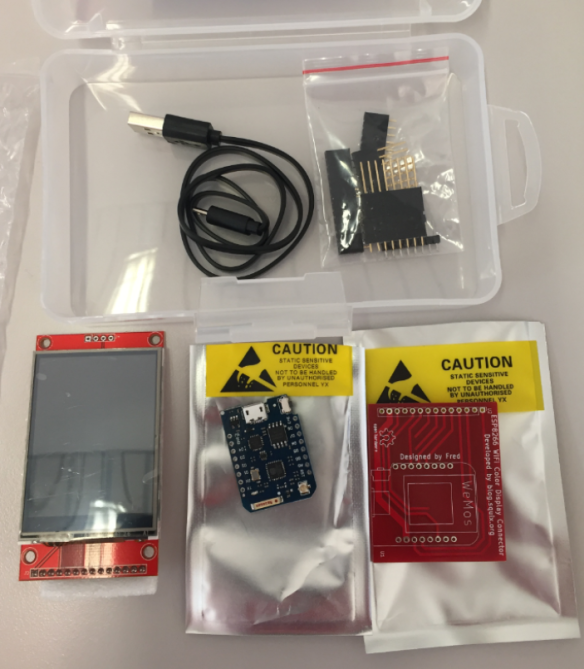
As the OLED kit, everything comes in a nice box, professionally packed in ESD bags:
- ESP8266 Wemos D1 Mini pro 160 MHz with 16 MByte FLASH
- 2.4″ Color TFT Display (ILI9341) with touch
- Connector PCB
- Micro USB cable
- Stacking headers
This time assembling the kit needs basic soldering skills. With the excellent tutorial by Daniel Eichhorn (https://blog.squix.org/wifi-color-display-kit) this should be a piece of cake. The only consideration is what kind of headers to use. I opted for the ‘larger but flexible’ approach. That way I can separate the boards if needed.
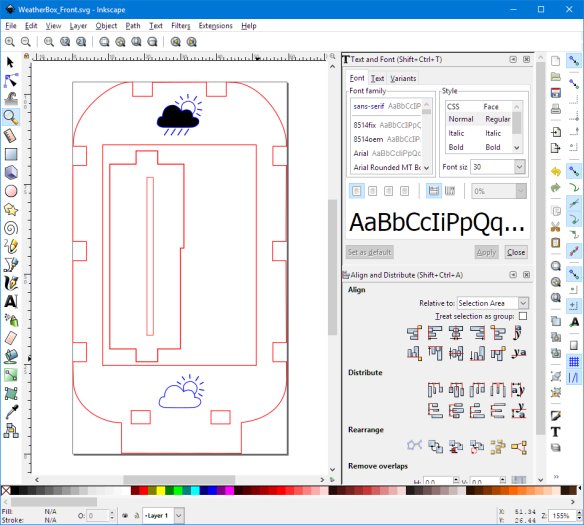
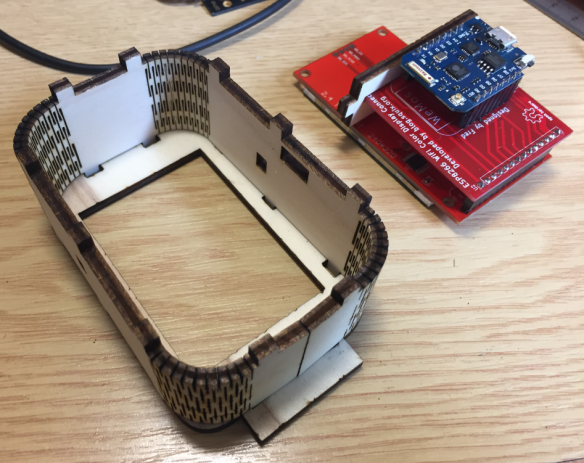
Again I designed quickly a custom enclosure in Inkscape using 4 mm plywood:
It has enough space so I can add sensors, LiPo battery plus a wireless charing option:
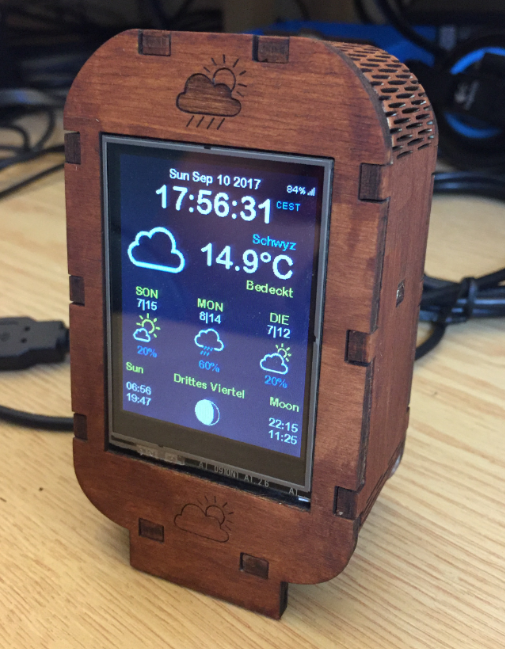
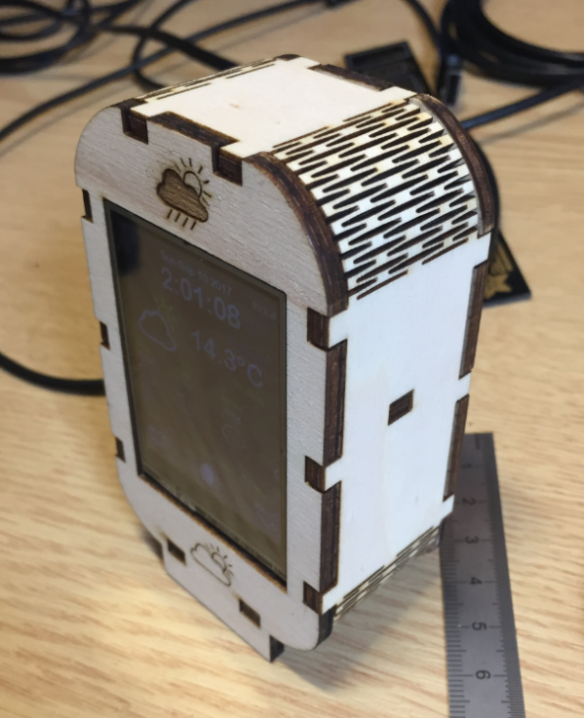
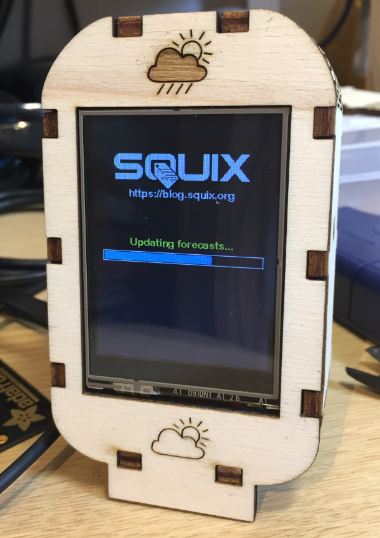
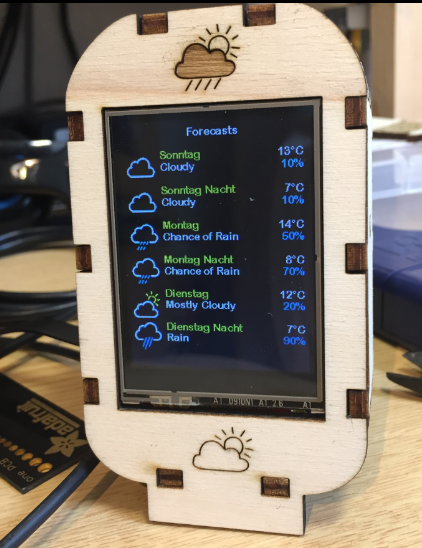
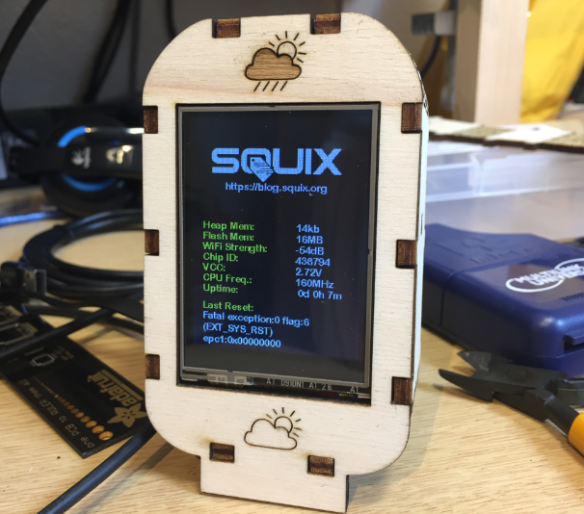
Example code is available on GitHub (https://github.com/squix78/esp8266-weather-station-color). The code is very well documented I had no issues to make all the needed configuration (WiFi SSID and connection settings). After a few hours I had the ESP8266 weather station up and running in the first prototype of the enclosure:
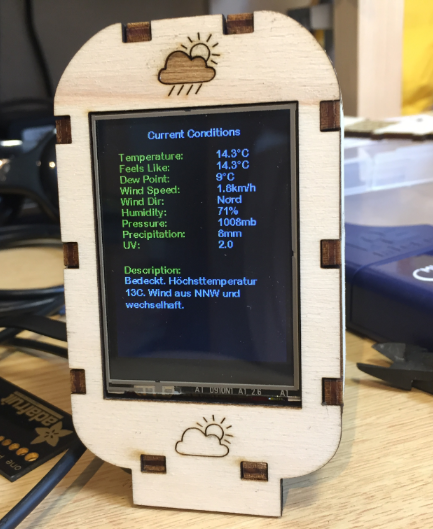
The example code pretty much works the same way as for the smaller OLED station, but it uses the touch display to show the data.
Touching the LCD cycles through more screens:
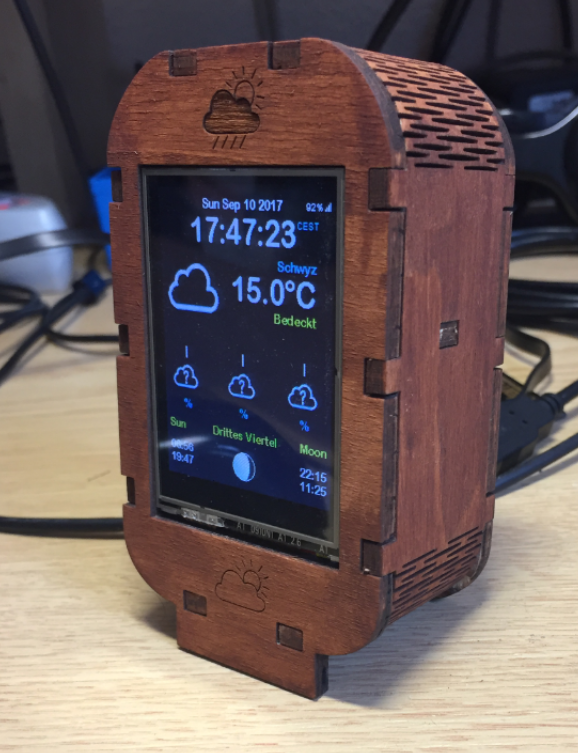
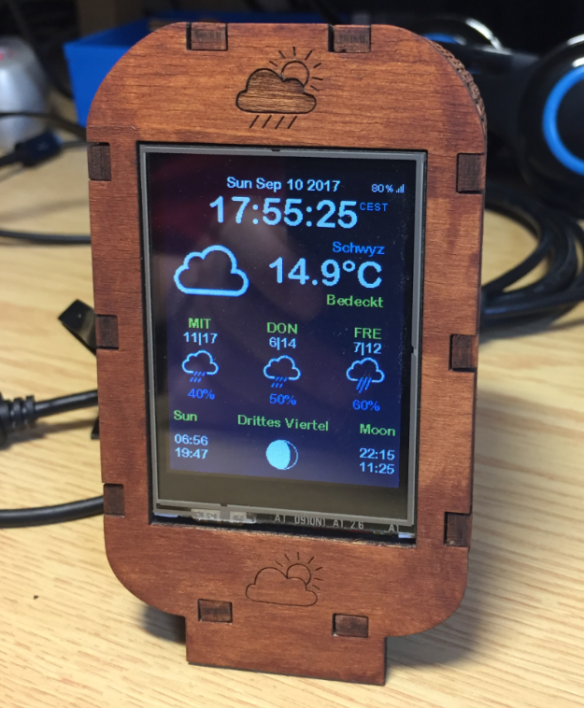
I have been experimenting painting the laser cut plywood with acrylic colors. So here is one variant using a brown color:
After a few hours, I have now my second ESP8266 WiFi weather station with touch LCD. It is not looking good and I very much enjoy it. The design is available on Thingiverse (https://www.thingiverse.com/thing:2527282).
Thanks go to Daniel Eichhorn for making that kit available and documenting it so well!
Happy Squixing 🙂
Links
- Starter Kits: https://blog.squix.org
- Weather Station Kit: https://blog.squix.org
- Weather Station Color Add-on Kit: https://blog.squix.org
- Getting Started Guide for Weather Station: https://blog.squix.org/wp-content/uploads/2017/06/esp8266weatherstationgettingstartedguide-20170608.pdf
- Blog post: https://blog.squix.org/2016/10/esp8266-weather-station-color-code-published.html
- Github: https://github.com/squix78/esp8266-weather-station-color
- Enclosure design on Thingiverse: https://www.thingiverse.com/thing:2527282





I’m loving the side panels for your enclosure, using the vents slots so they can curve — nice touch!
How do you make those curves conform to the curves of the front and rear panels? Hot melt glue and luck?
LikeLike
The enclosure does not need any glue or screws: it is kept in place with the special side constructure. The curves is a technique called ‘kerf bending’ (see http://www.gedankensuppe.de/kerf-bending-patterns).
LikeLike
Would there be another type of material that could be used to make the enclosure other than plywood? Perhaps something with UL 94-V0 flammability rating ?
LikeLike
PMMA is another material I use (https://en.wikipedia.org/wiki/Poly(methyl_methacrylate)), but I think that would not stand a UL94-V0 test?
I’m sure there might be other materials, but with a laser cutter one has to be careful about not using materials which could create a health issue (e.g. PVC would be such a problematic thing).
That’s why usually only plywood, PMMA or (real) leather or paper/cardboxes are used in a low power laser cutters. Of course with high power laser cutter you could cut metal sheets.
LikeLike
A very cool box telling you the things you want to know before leaving the house. Because you are commuting with puplic transport: Why not add a screen whoose telling you the next train/bus departures. ÖV-live offers you an already implented live view.
LikeLike
Excellent idea! 🙂
LikeLike
Sumptuously!!!
LikeLike
Pingback: SQUIX ESP8266 based E-Paper WiFi Weather Station | MCU on Eclipse
Hello Erich ,
Very nice Case. Thats is what i Search.
Can i order this everywhere?
Regards Markus
LikeLike
Hi Markus,
you can order any 3D printed parts through 3DHubs, see the link at link at the end of https://mcuoneclipse.com/2016/01/16/3d-printed-classic-mac-apple-watch-charging-station/
I hope this helps,
Erich
LikeLike
Hi Again,
but I think it’s make with a Laser.
And not an 3d print
regards Markus
LikeLike
Yes, this one is made with a laser cutter. The one in https://mcuoneclipse.com/2017/10/22/squix-esp8266-based-e-paper-weather-station/ is created with a 3D printer.
LikeLike
Hello Erich,
Yes, I think that was the first question of mine.
I love this case and want to have it.
Where can I get it?
or can I make it with the files I downloaded at a company the do this?
Are the files for a laser cutter available?
regards Markus
LikeLike
Hi Markus,
3DHubs are specialied for 3D printing, not laser cutting. Not sure if a similar service exists, but maybe you find a maker space nearby? The laser cutter files are listed on thingverse (see link at the end of this article.
Erich
LikeLike
Excellent! Is it possible to use LCD screen without touch?
LikeLike
Yes. Well, then you don’t have the touch functionality. Touch is used to cycle between different views, so you could cycle through the displays without the touch functionality, e.g. at a fixed rate or using a push button.
LikeLike
Erich, Thanks for making this available!
I have assembled my SQUIX kit as well, but it is much thinner than yours, about 0.3″ from the back of the faceplate to the back of the top PCB. I’m able to reuse your front and back, but I’ll have to change the kerf-wrap.
A few questions, if you don’t mind: How did you design the outline? In inkscape, I can move the kerf cuts, but the outline is fixed, which means I cannot make it narrower. Is there some easy way to turn it back into lines?
Also, how did you calculate the length for all of the segments?
thanks,
todd
LikeLike
Hi todd,
I have used headers for my PCB assembly, so this might add to the thickness change you see.
You can move the outline in Inkscape: make sure you have it ungrouped first (select, Object > Ungroup).
I did not calculate the length of the segments, it was simply trial-and-error (took me 3 iterations, so not that bad).
LikeLike
2.4 Inch TFT LCD Shield ILI9341
ESP32
Is there a tft screen connection diagram with esp32? esp32 and 2.4 Inch TFT LCD Shield Would you help with the weather?
LikeLike
You can run it with the normal SPI signals.
LikeLike
Hallo,
Ich wollte dieses Tutorial nachbauen und stoße leider auf Probleme. Ich verwende als Hardware:
– WeMos D1 mini pro
– TFT ILI9341
Das Kompilieren und Hochladen der Software von Daniel Eichhorn funktioniert fehlerfrei und der Wemos verbindet sich auch mit meinem WLan, dessen Daten ich in der setting.h zusammen mit meinen lokalen Daten und der OpenWeatherMaps-ID eingetragen habe. In der IDE habe ich das WeMos Di mini pro als Board ausgewählt.
Dann kommt das Problem nach dem Start des Sketches: Fehlermeldung “ISR not in IRAM!”
Da ich Anfänger bin, sagt mir dieses nichts. Was kann ich machen?
Gruß Ulli
LikeLike
Hi Ulli,
are the settings in the Arduino IDE matching the Wemos speed and memory size? Other than that: if you had ordered the kit from Daniel Eichhorn, you might post that question on his page (https://blog.squix.org/2016/10/esp8266-weather-station-color-code-published.html) too.
Or, maybe this is the solution:
https://github.com/esp8266/Arduino/issues/6127
?
I hope this helps,
Erich
LikeLike
Ich habe gerade gesehen, dass ich im Boardmanager die core 2.5.2 für esp8266 installiert habe.
Nun habe ich die Version 2.4.2 installiert und im seriell monitor erscheint:
Connecting to WiFi UE/73918465865812313454
…………………Connected…Initializing touch screen…
Mounting file system…
SPIFFS opened: OK
Current time: 1560039543
DST Rules Updated:
DST Start: Sun Mar 31 02:00:00 2019
DST End: Sun Oct 27 02:00:00 2019
Time difference for DST: 7200
Getting url: http://api.openweathermap.org/data/2.5/weather?id=2950159&appid=ba292706b743a353f4c62eef4fea76b8&units=metric&lang=DE
[HTTP] GET…
[HTTP] GET… code: 200
start document
Getting url: http://api.openweathermap.org/data/2.5/forecast?id=2950159&appid=ba292706b743a353f4c62eef4fea76b8&units=metric&lang=DE
[HTTP] GET…
[HTTP] GET… code: 200
start document
Free mem: 19808
Leider sehe ich auf dem ILI9341 TFT nicht die Wetterdaten. Woran könnte dieses liegen?
LikeLike
The connection to the openweathermap works. You have to debug and go through the code to find out why it is not working.
LikeLike
Hi, strange think happened to me, yesterday the touch was working, today I installed again and I have no touch. What Had happened, did I installed the wrong code?
LikeLike
Is everything else working? It could be that the touch hardware (it is a piece on top of the display) itself is not connected to the board anymore.
LikeLike
Thanks for the answer, all the rest is working, but as you said, I’ll double check the connections
LikeLike
Hi Erich, I double checked and the connections are ok, I did as well on the breadboard with no result. It is possible for you to send me the link and the right library of your code?
Hoping I’m not bothering you
LikeLike
I’m using the code from https://github.com/ThingPulse/esp8266-weather-station-color
LikeLike
Hi, I have to say tat the touch is working because everytime I touch the display there is a light on the wemos, but there is no other images on the display that suppose to change. Sorry my english
LikeLike
Not sure what it is: do you have a workign internet connection with the ESP32?
Other than that: I assume you have ordered the kit from https://blog.squix.org, so you could ask there too?
LikeLike
Now, is working, but I had to install esp8266 ver, 2.41 and the flash size of the Wemos to:
4M (1M SPIFFS)
LikeLike
Excellent!
LikeLike
How did you change the code to get a daily forecast instead of the hourly default of every 12 hours? I see line 308 in the .ino has the following line that can be modified to change which hours are included in the hourly forecasts, but would prefer daily with high/low temperatures like it looks like you achieved.
uint8_t allowedHours[] = {12, 0};
LikeLiked by 1 person
I did not change anything except setting the location as in the tutorial written by Daniel.
LikeLike
Hallo, kann ich das auch mit ein st7735s tft display betreiben. ohne touch sondern mit taster?
mfg
LikeLike
Hi Andre,
yes, if it has the touch overlay. And if you do not need any input, of course you simply can use the display only.
Erich
LikeLike