
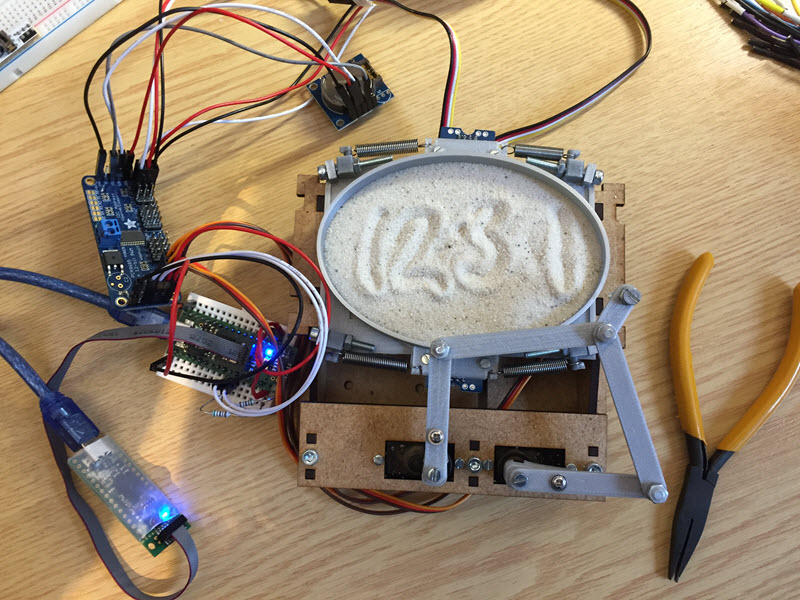
The year is coming to an end, the Holiday season is approaching. In case you are looking for a nice present: I have completed my version of a sand clock: a clock writing the time into sand:
Sandclock
If you are interested to build your own version, I have documented the different steps with tips and tricks…
Plotclock
The idea is based on the famous ‘Plotclock’ by the Fab Lab Nürnberg (https://wiki.fablab-nuernberg.de/w/Ding:Plotclock). That Plotclock is using a whiteboard marker to write the time and erases it with a wiper ever minute: very cool idea!
Fablab Nürnberg Plotclock, source: https://wiki.fablab-nuernberg.de/w/Ding:Plotclock
Material
There is a lot of flexibility. I have used the following material:
- Microcontroller board, I have used the tinyK20 using the NXP Kinetis K20DX128 microcontroller (ARM Cortex-M4 running at 50 MHz)
- 3 Micro servos e.g. from Dx.com.
- RTC (Realtime Clock) to keep the time with battery backup. I used the DS1307 from DX.com which have used in another clock project.
- For battery operation: battery and DC-DC converter. I’m using the Adafruit power boost 500 charger.
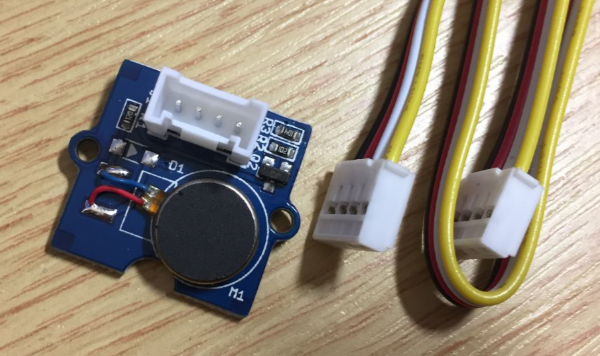
- Vibration motors to erase the writing, e.g. the one from SeedStudio (DX.com).
- Adafruit 16-Channel PWM/Servo Driver: https://www.adafruit.com/product/815
- 3D Printer or laser cutter: something to construct the chassis.
- Decoration: sand, sea shells or whatever you like, plus a box or something similar to put everything into place
- Cables, nuts and bolts
From Plotclock to Sandclock
The original concept is using a wiper to erase the writing, but after a while things are not cleaned much any more. So instead using a wiper, I wanted to use a stylo to write the time into sand. The c’t computer magazine published that idea as PlotClock 2.0 (see https://github.com/heise/SandUhrZweiNull) using a laser cutter. Based on that design I have created my first prototype based on laser-cut wood (many thanks to Claudio for helping me with that!):
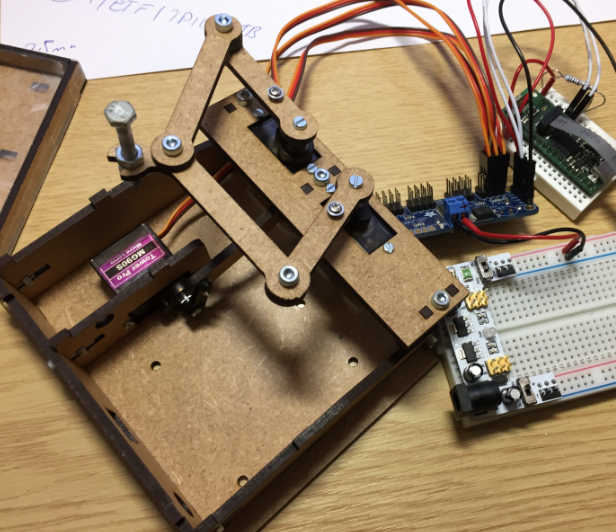
Sand Clock Prototype
The bottom servo is responsible to lift the pen and the drawing servos:
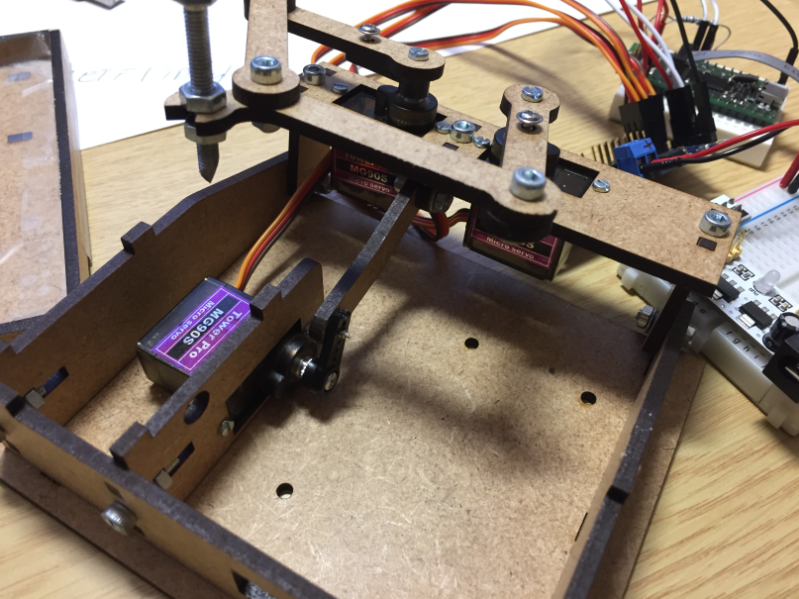
Lifting Servo
3D Printed Parts
I have printed the needed extra parts with a Ultimaker on PLA. Below are all the parts used:
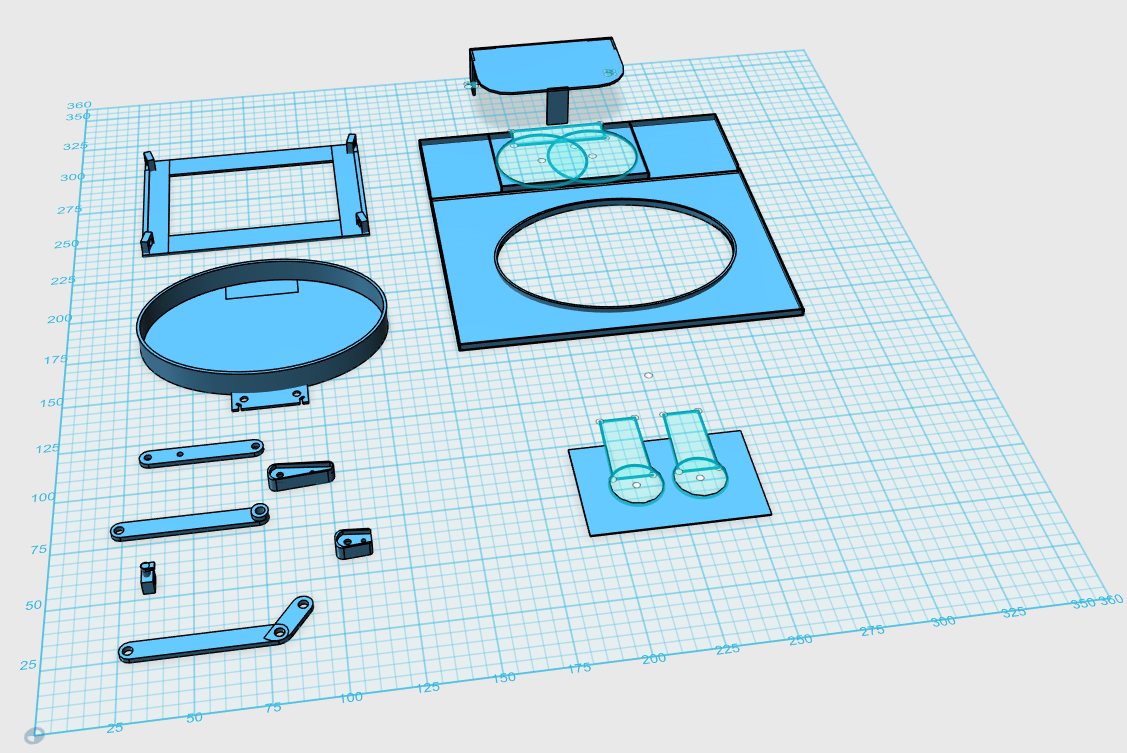
3D-Printed Parts
For some parts, several iterations were needed:
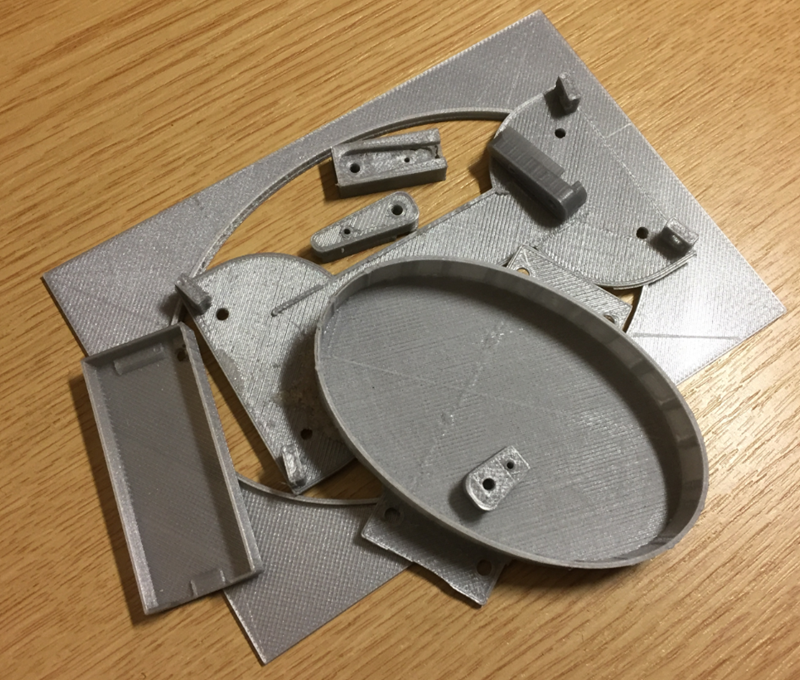
a bunch of 3D printed left overs
tinyK20 Board
As microcontroller I used the tinyK20 board (NXP Kinetis K20), an ARM Cortex-M4 running at 50 MHz:
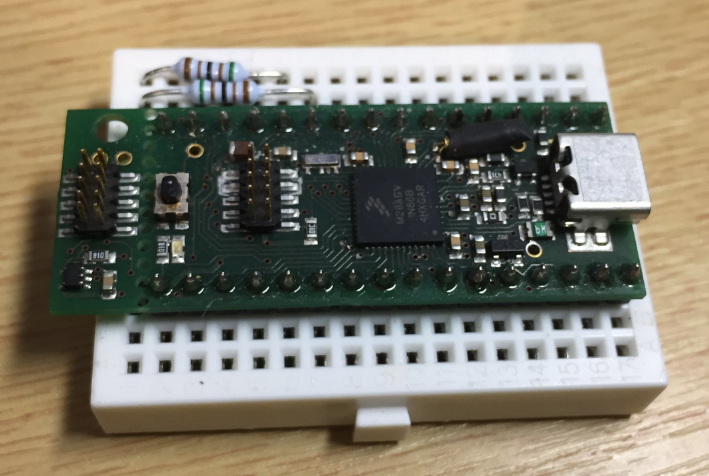
tinyK20 on a breadboard
Adafruit 16-Channel 12-bit PWM/Servo Driver
To drive the servos (and more!) I used the NXP PCA9685 which is a real cool device (https://www.adafruit.com/product/815): I can use it to drive up to 16 PWM or servos with a single I²C connection:

Adafruit 12-Channel PWM Servo Driver
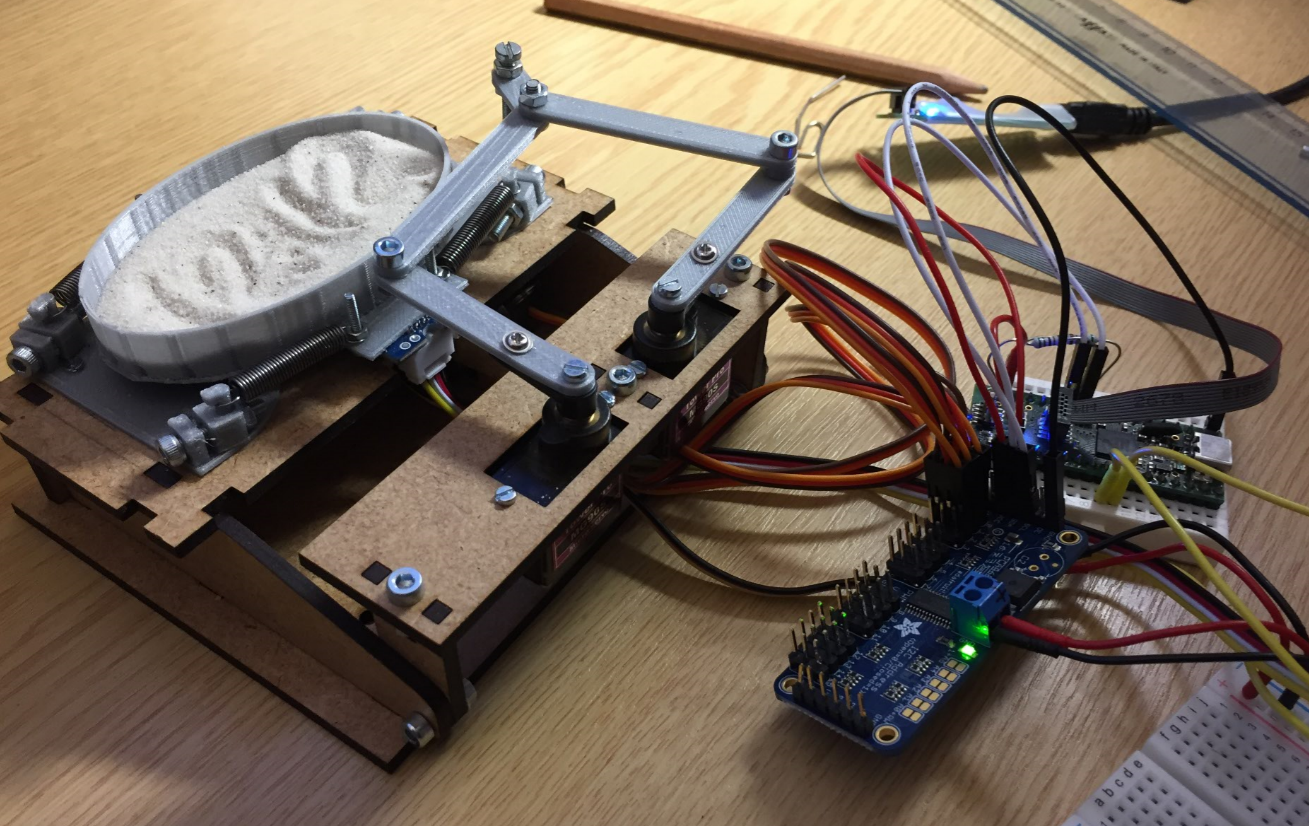
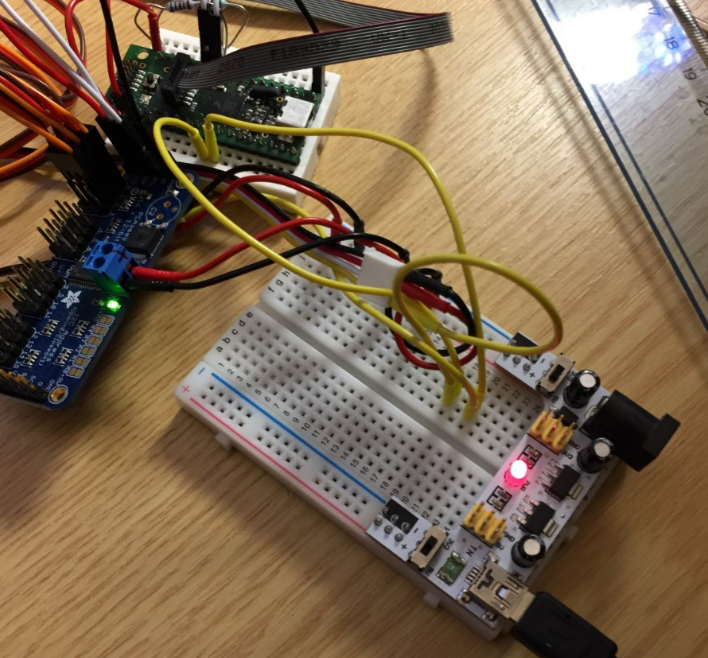
Breadboarding
In the first phase I have experimented with various components and used bread boards to connect the parts.
Because the original laser-cut arms did not work well, I designed them for 3D-printing: that way I can change the size and cut the weight:
3D Printed Arms
Vibration Motors
I used small vibration motors from Seedstudio: they are small and can be attached with small screws to the sand box. I have used motors.
Small Vibration Motor
Initially I used normal GPIO pins to drive the motors:
Vibration Motors with GPIO Pins
Because this was not flexible enough for leveling the sand, I switched using the PCA9685 for the motors too.
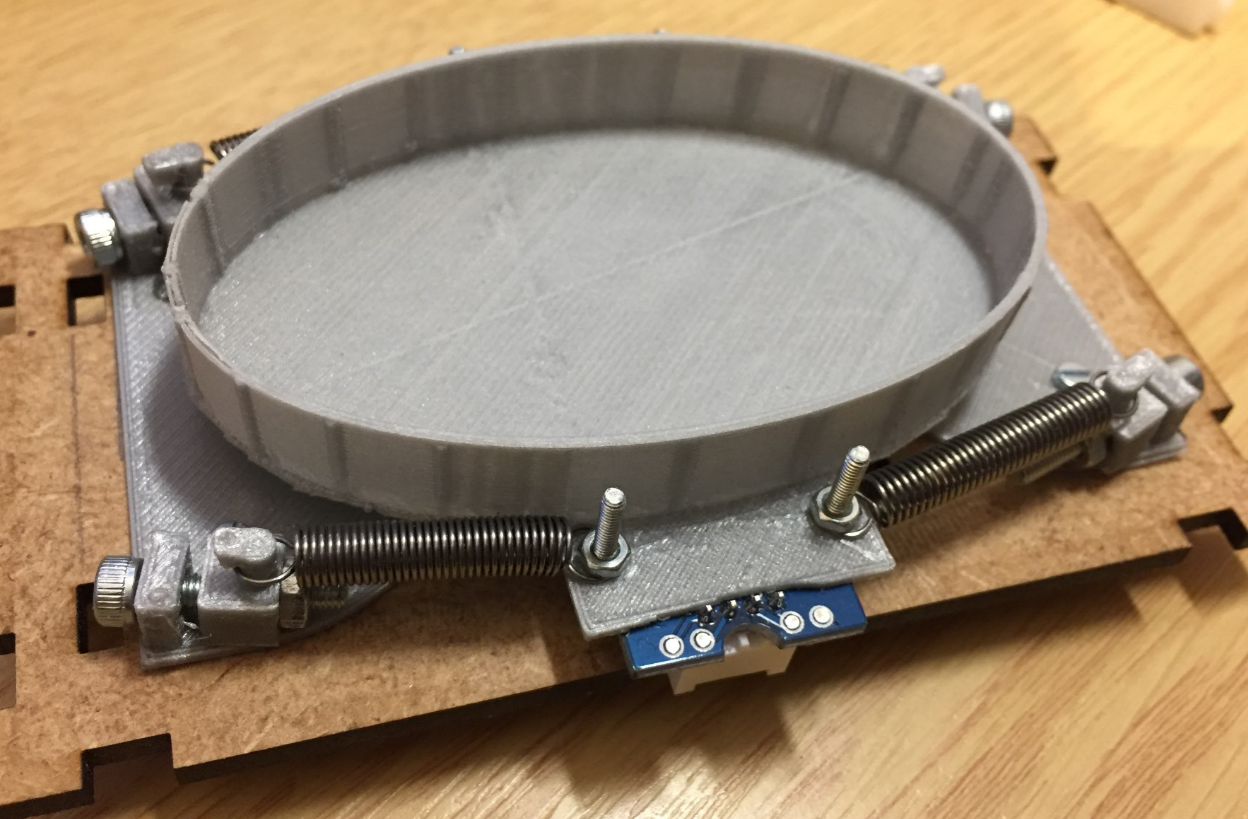
Sand Box
With a rectangular sand box I had issues that the send is building hills and valleys. So I printed a round shaped sand box:
First 3D Printed Sandbox with vibration motors
The sand box is hold in place by four springs for better vibration and decoupling from the rest of the chassis:
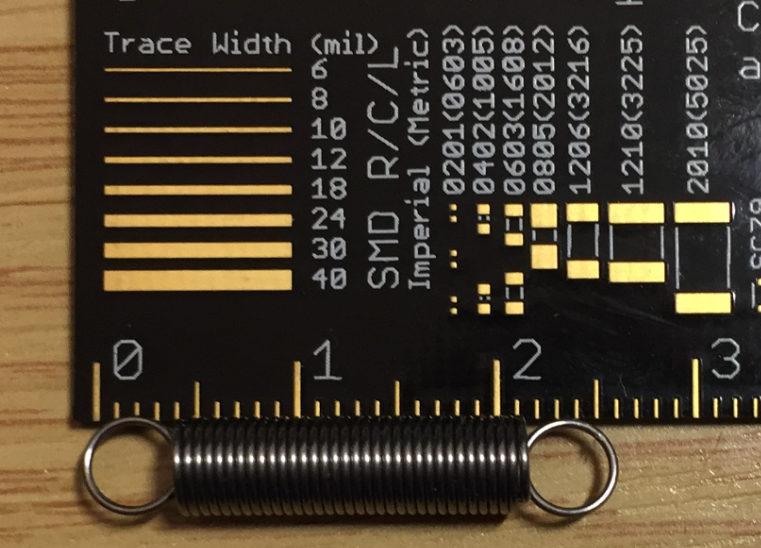
Spring
That worked pretty well as shown it the following video:
Larger Sand Box
Well, that first sandbox was a too small: the digits are very close together. So the next iteration was printing a larger box:

larger-sand-box
That one worked better:
Realtime Clock
To keep the time and date, I added a I²C based realtime clock: the DS1307 from DX.com which have used in another clock project.
Sandclock with RTC
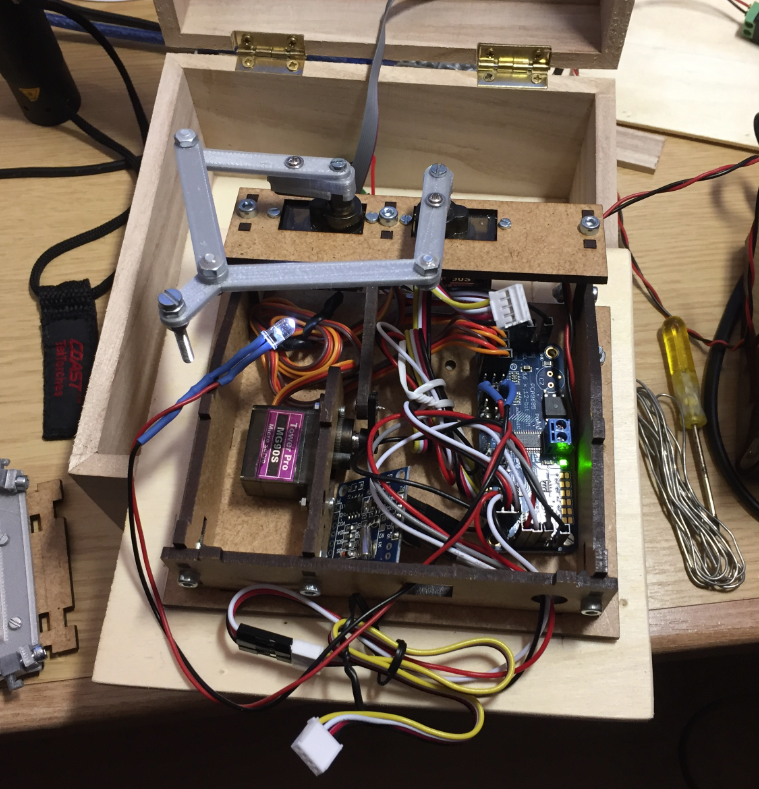
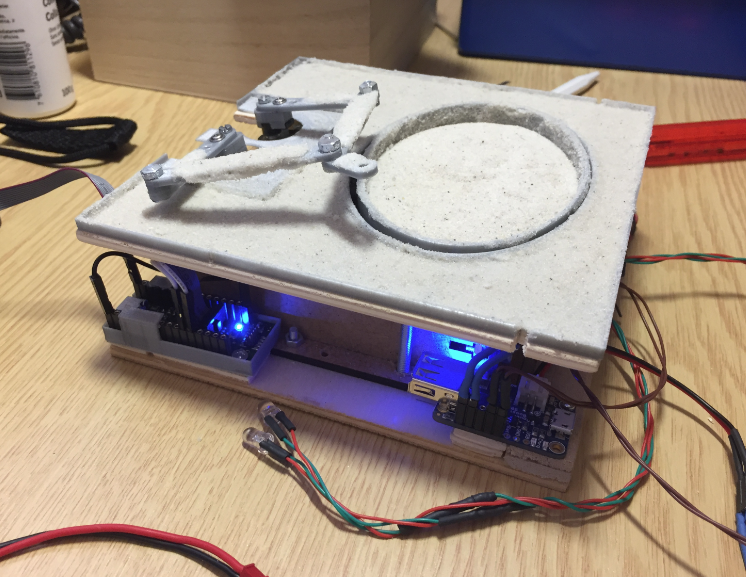
Chassis
To have things look nice, everything gets placed into a wooden box with a glass cover. Space is tight, so the servos, RTC and the NXP PCA9685 module all get placed inside the base chassis:
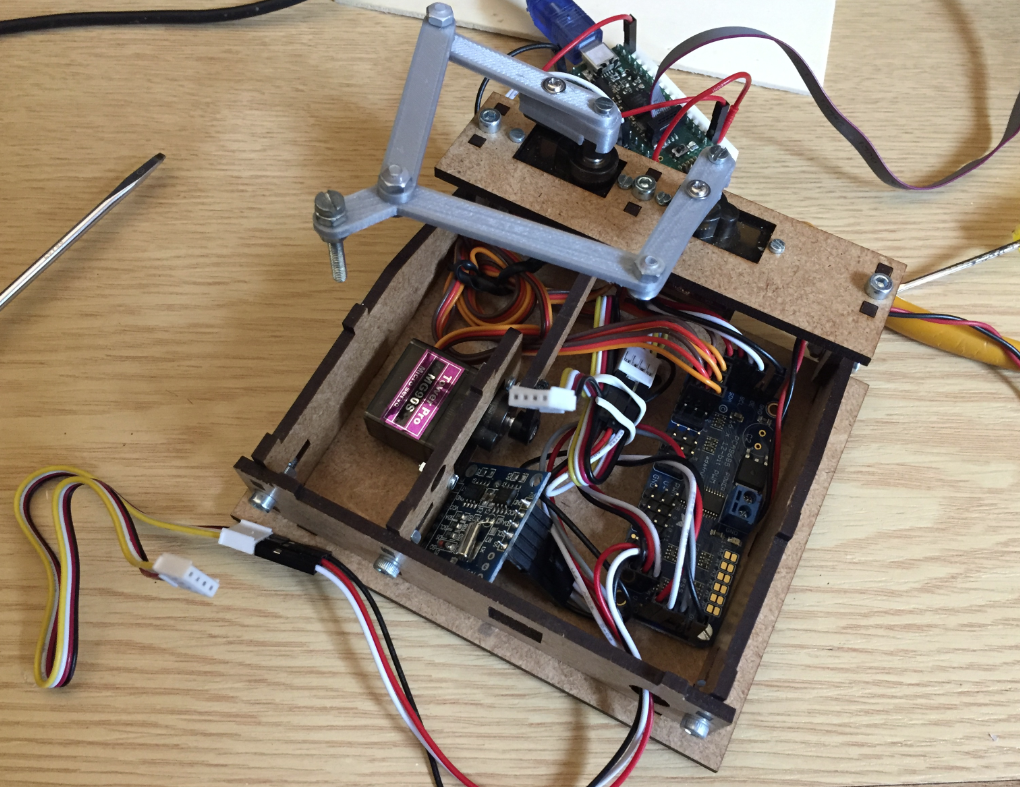
That one gets screwed on a base plate which then gets inserted into the wooden box. the 4 white LEDs get connected to the PCA9685 module as well so I can control and dim them over I²C:
Clock mounted on base plate with one LED attached.
Then it gets placed into the box below a top cover but out of wood:
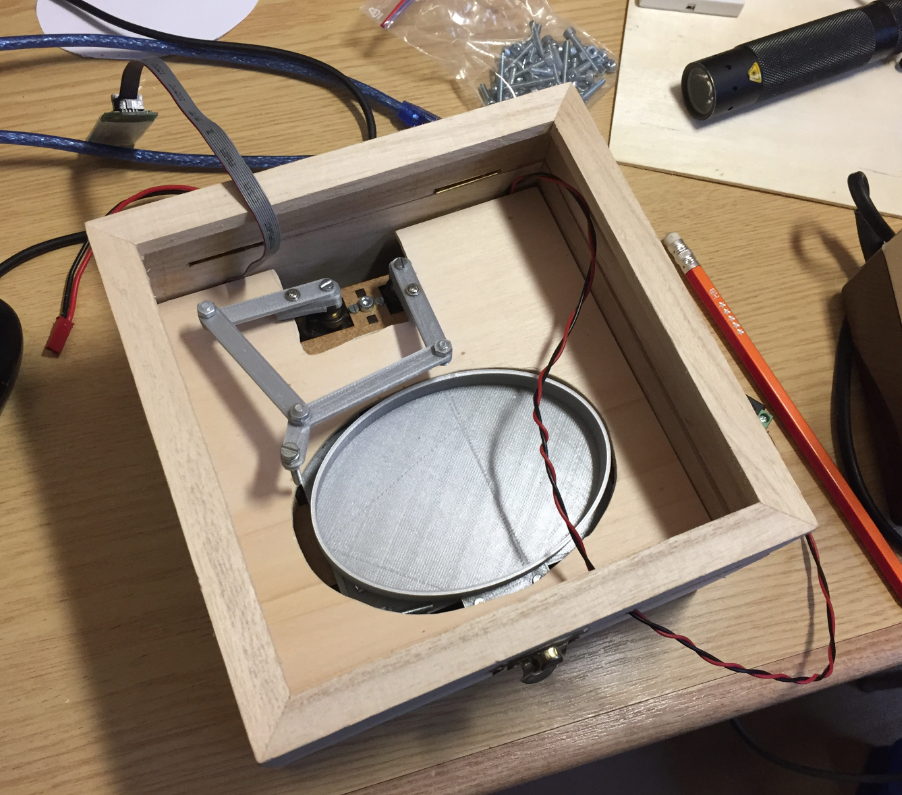
Clock placed in box with cover
Sand Look
To cover the 3D printed plastic parts, I experimented with glue and sand:
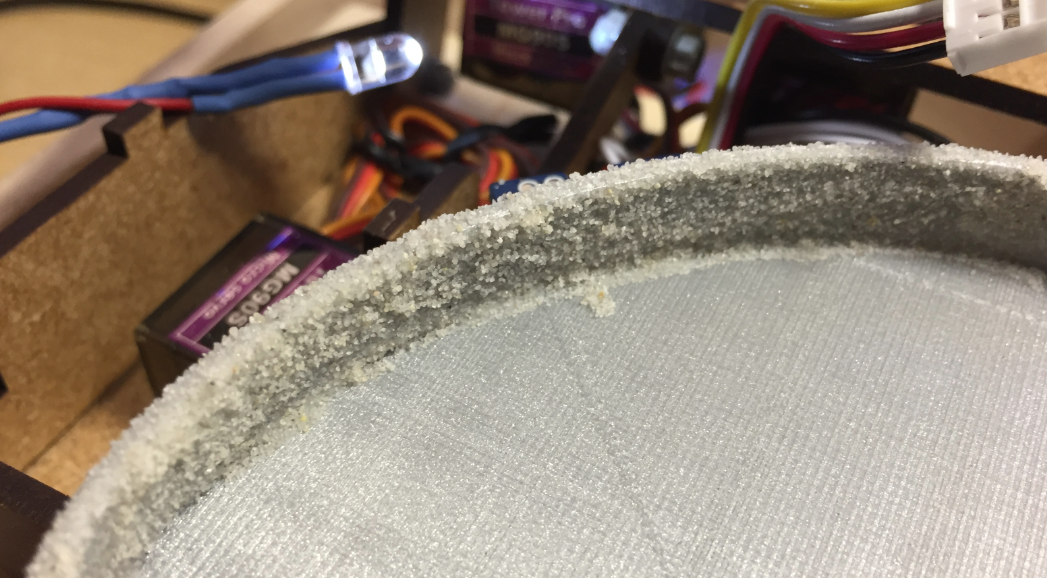
Sand Box Border with glued Sand
Parts get glue and then covered with sand. From here on sand started to spill around everywhere. To lower the mess I tried to keep the sand in a plastic box:
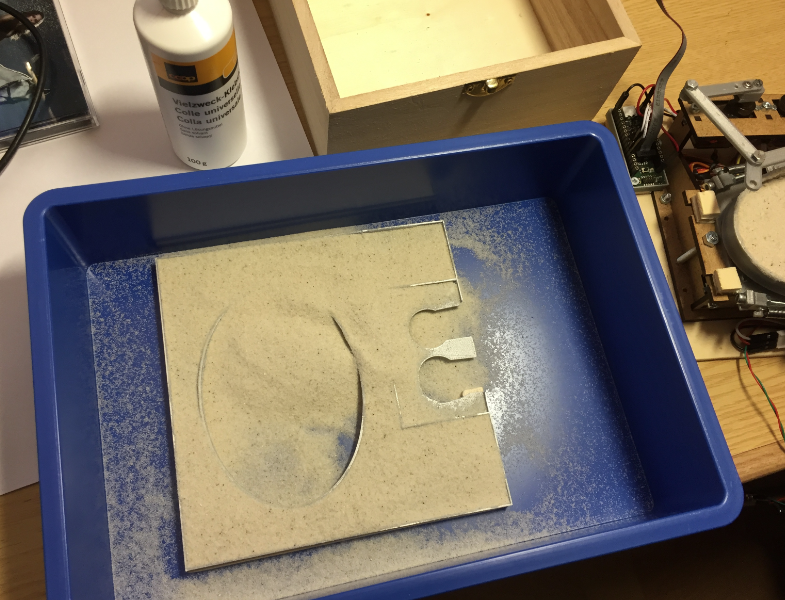
Sanding Box
With the sand I’m able to cover most of the plastic parts:

Cover in Sand
Battery
The motors and electronics can be powered with the tinyK20 USB port. I have added a LiPo battery (1000 mAh to last for several days) combined with a battery charger. Here again I used an Adafruit 500 mA Power Boost (https://www.adafruit.com/product/1944) which can charge and give power the same time.
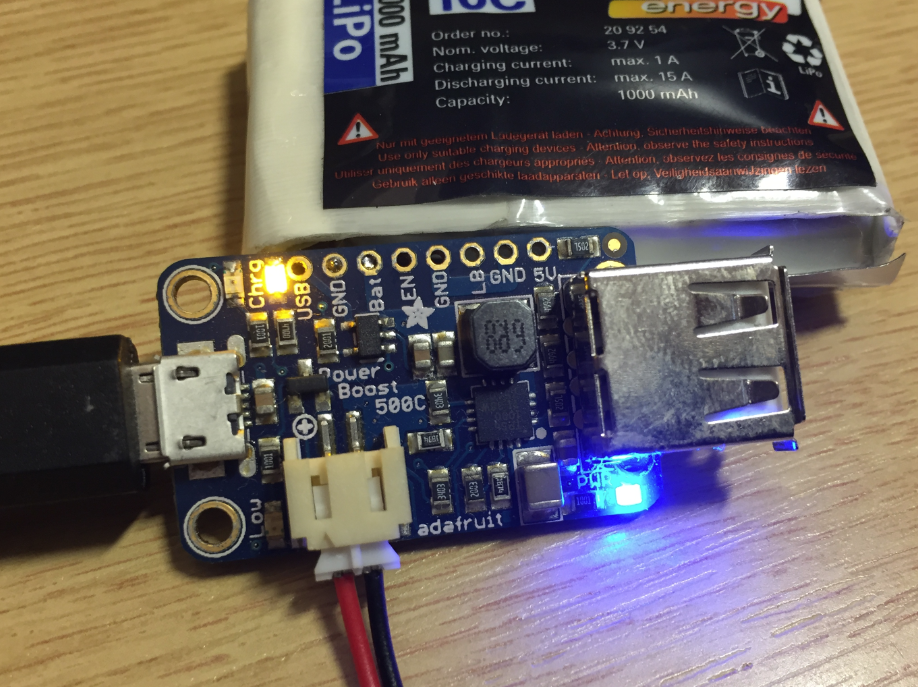
Adafruit Power Boost 500
I added headers to the module. With that module I have added an ON/OFF switch to completely turn off the clock.
LEDs
The clock digits are better visible if there is a good light with shadow. For this I added four white LEDs, two on each side:

Sand Clock with LEDs wired
The microcontroller board gets a 3D printed enclosure.
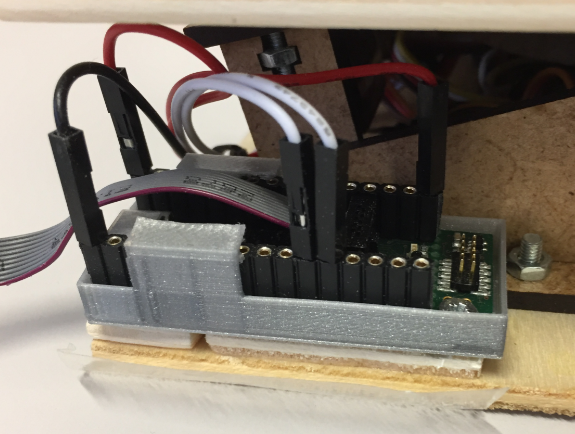
tinyk20 mounted inside clock
Both the microcontroller board and the battery charging unit get placed under the side:
tinyK20 and Battery Module
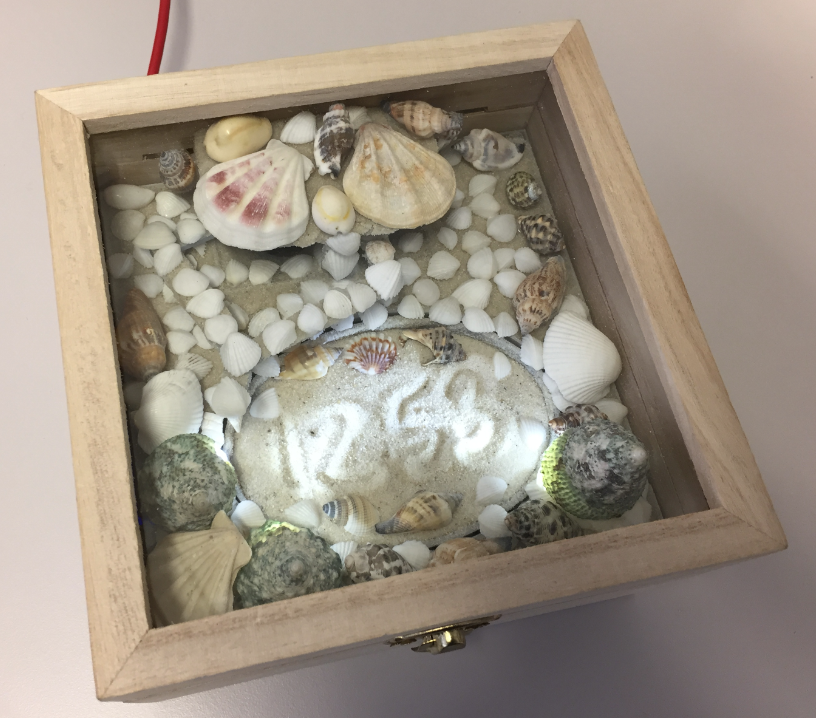
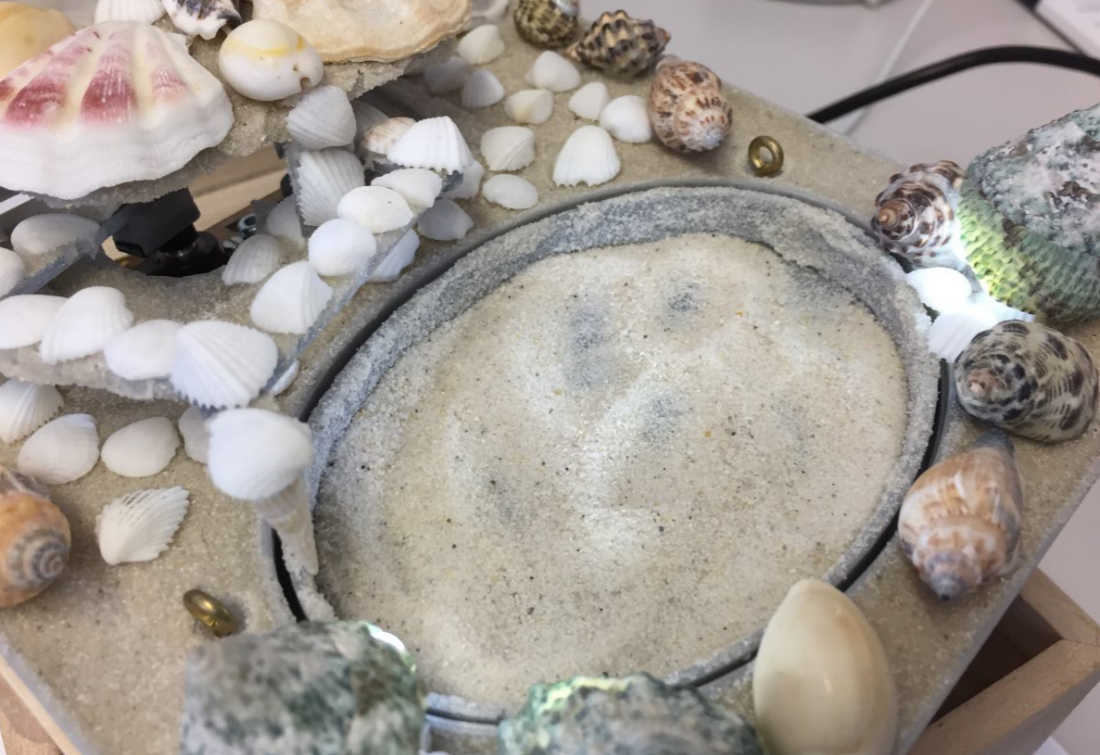
Sea Shells
I have found various sea shells in the local stores. The LEDs get placed into sea shells and illuminate the sand drawing area. Shells are used to cover the power switch and the two hooks on each side which are needed to get the clock out of the wood box:
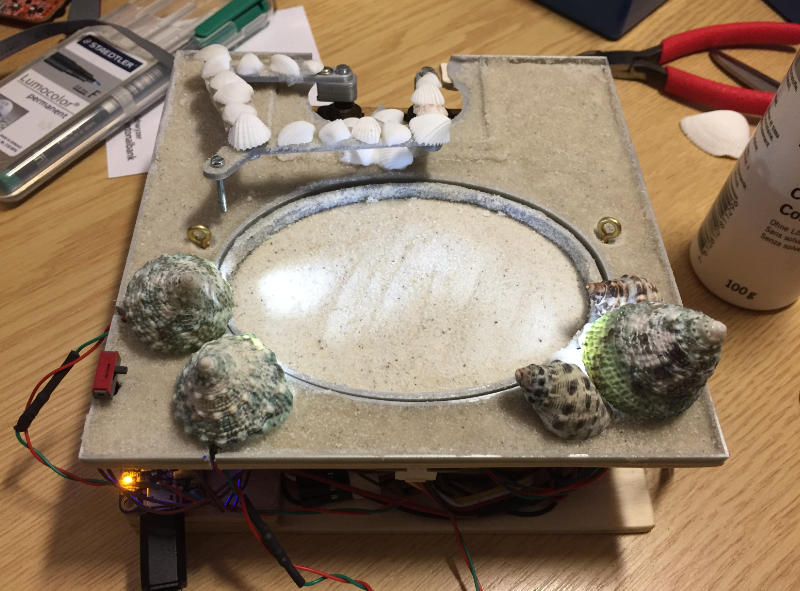
LEDs inside Shells
To cover the other areas, more shells are added and glued to the ground. A small cover is covering the part where the servo arms are coming out:
Clock Box Open with Shells
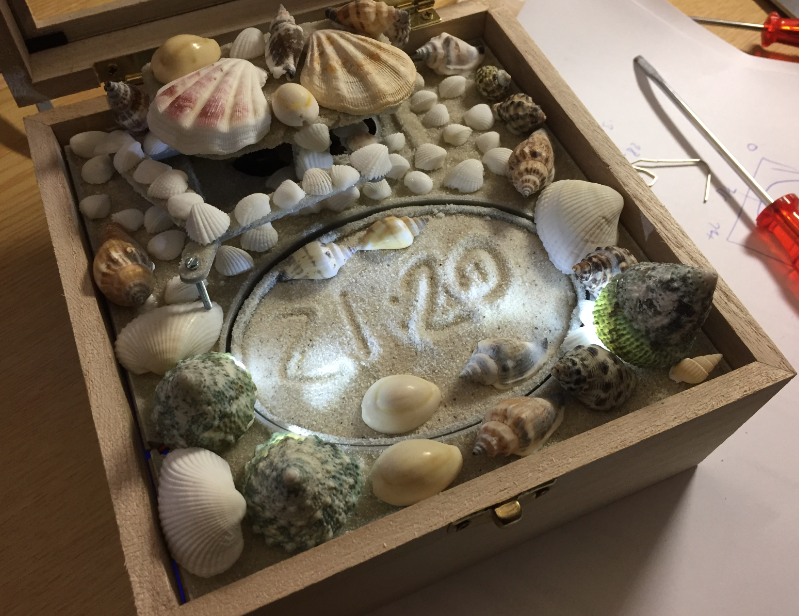
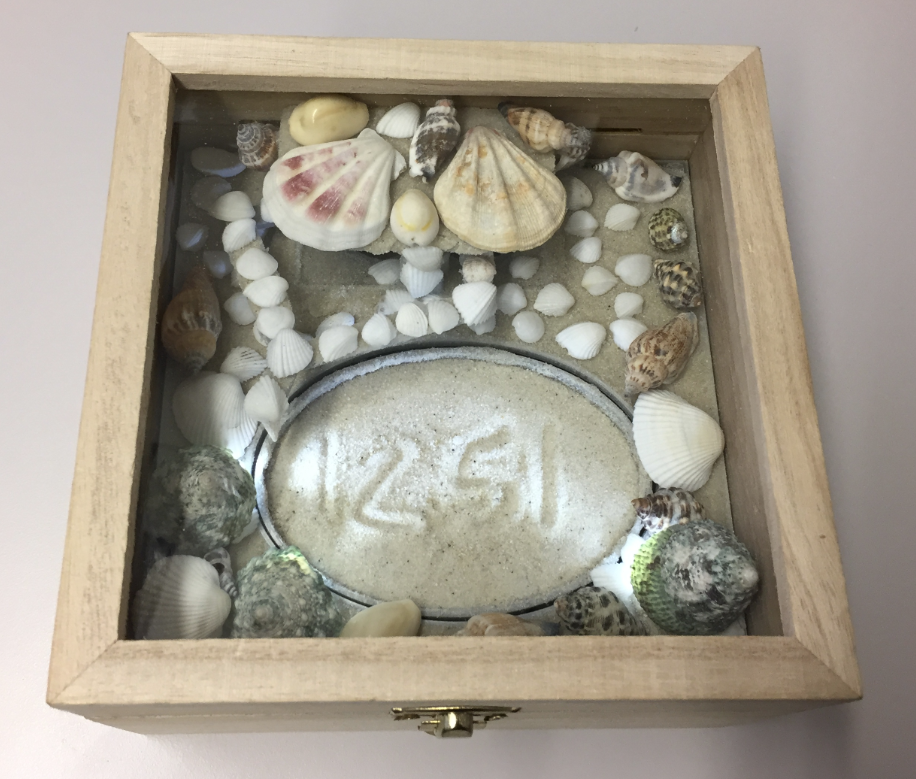
The top of the wooden box has a glass window:
DIY Sand Clock in a Box
Here another picture with more shells added:
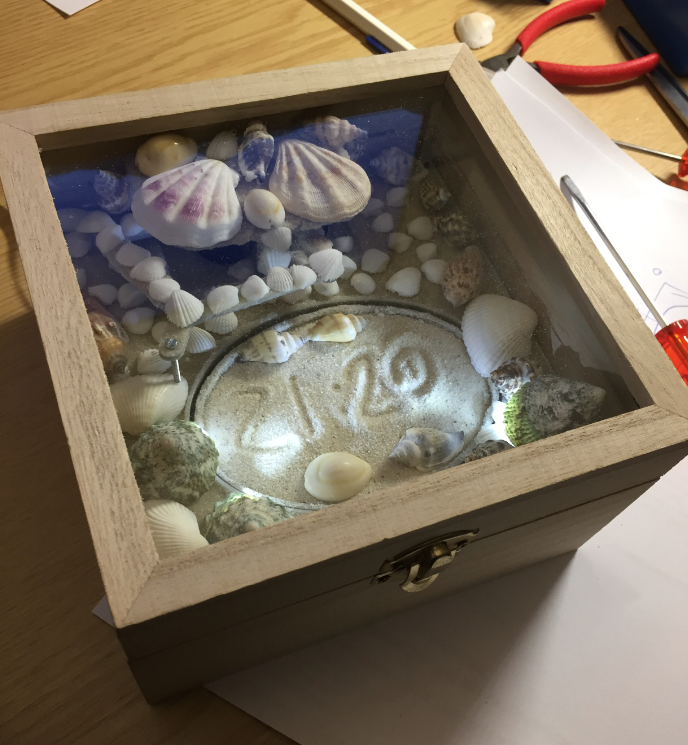
Wooden box with glass window
Video of the clock in the box, the vibration motor sequence still needs some tuning:
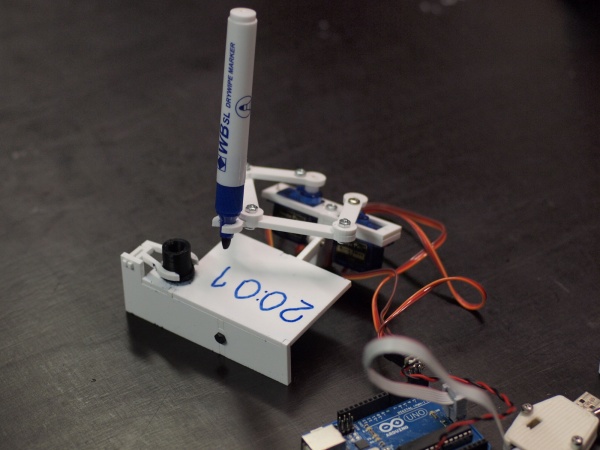
The writing pen finally is using a pointy shell:
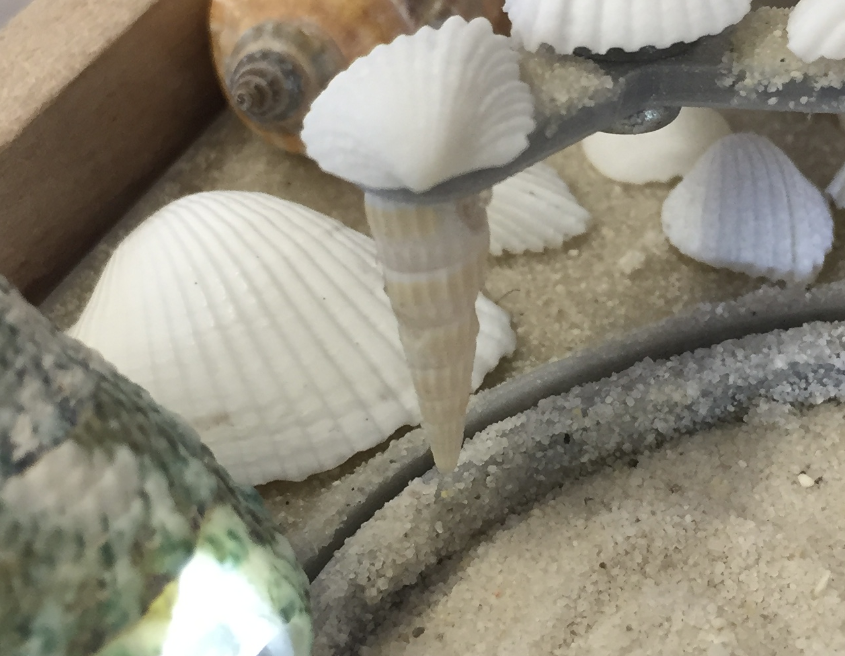
Sea Shell Pen Detail
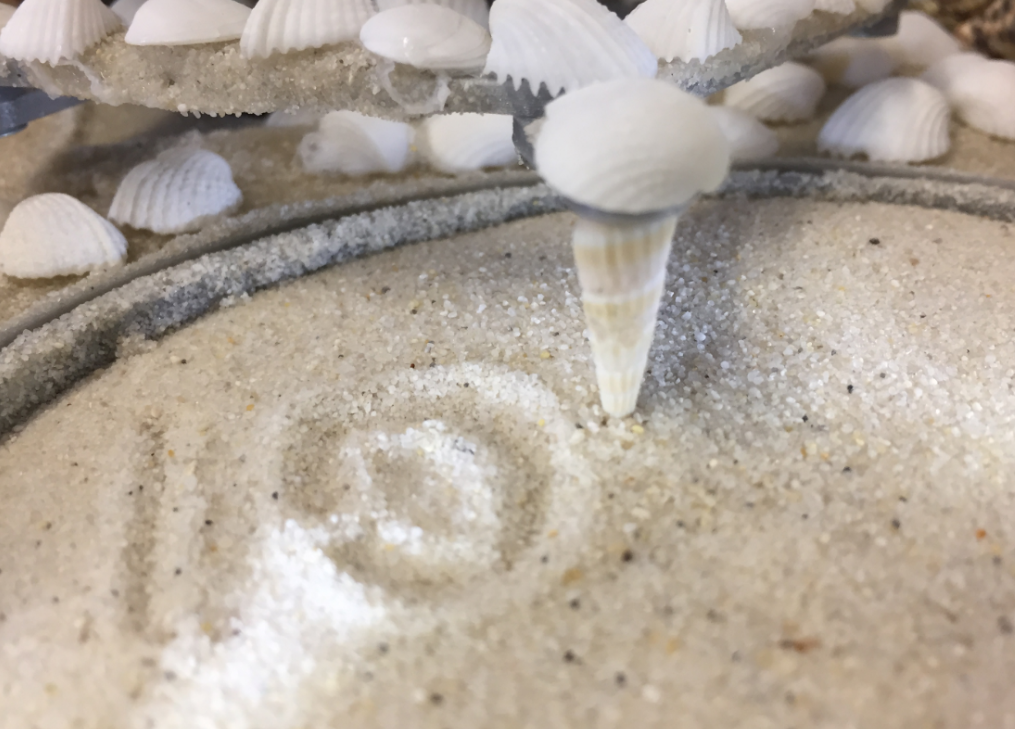
Sea Shell Clock Pen
Good Vibrations
One of the most challenging problems was to get the sand vibrations right: depending on motor place, the frequency and duration of vibration, the sand was building mountains and valleys, up to the point to swap the sand outside the sand box. Oh, I tink I will have sound all over the place for the next weeks and months :-(.
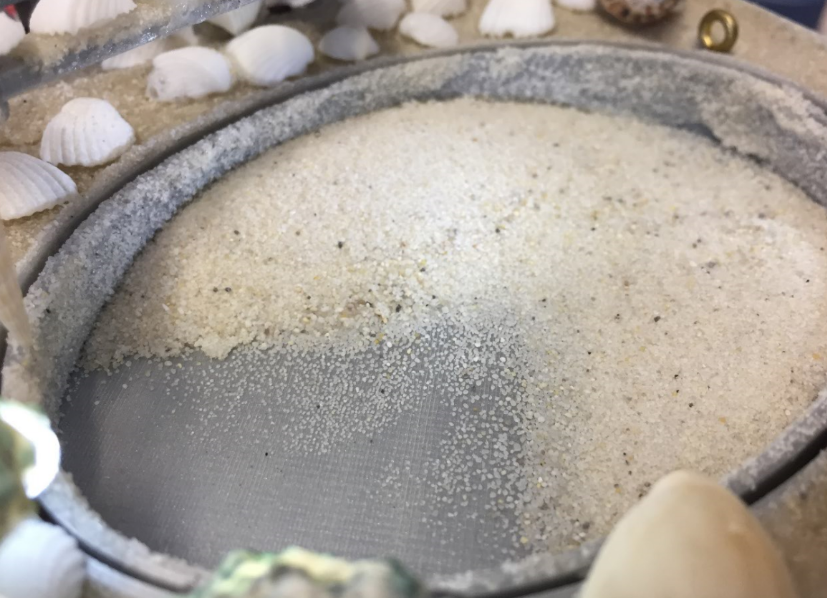
The sand has to be like a powder: small and round grains. I tried several kinds, including ‘cleaning sand’ for small animals ;-). The best one I have found is a package of decoration sand found in a nearby store:

Sand Samples for Testing
I tried to find good patterns with small amount of sand, and then filled up the sand box and adjusted the settings. The following pictures and videos show some of the patterns I have observed:
Other Sand Vibration Patterns
With some motor/frequency combination the sand was moving to one or the other end:
Sand Vibration Patterns
A video of the sand moving around:
Research indicated that this is a complex problem to solve and influenced by many factors. With the help of my colleagues I have built a ‘sweeping’ table stimulating the sand with a sequence of frequency/duration patterns. With this the sand was leveling properly without spilling out of the designated area.
Software
The project and sources are available on GitHub. I have used the original ‘Plotclock’ code from the FabLab Nürnberg and ported it to ARM Cortex/NXP Kinetis, using the free Eclipse based Kinetis Design Studio and GNU build tools:

Sandclock Eclipse Project
The original code is in ‘Plotclock.c’ and has been greatly extended and is using FreeRTOS for scalability:
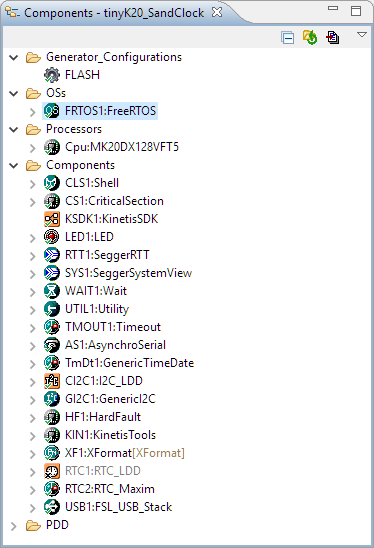
Sandclock Project Components
It includes a USB CDC stack and command line interface: I have many commands and configuration options:
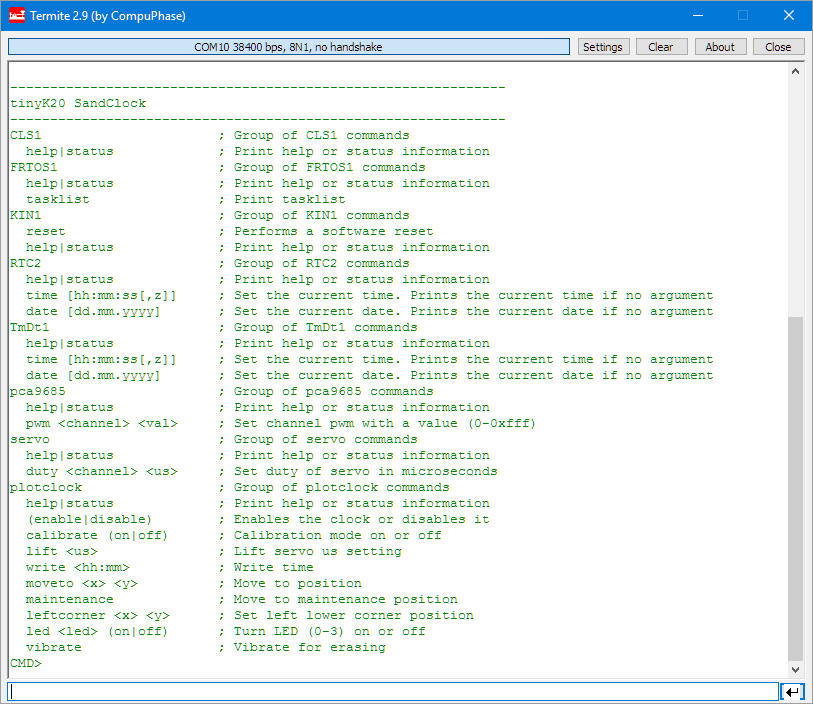
Sand Clock Command Line Shell
That way I can drive all servos, lights and functions of the clock with a command line interface and can check the status.

Sand Clock Status Output
Summary
I’m happy with the result, and the clock is working well:
It took me a while to get it done, but now I have a nice gift. Most challenging was to get the sand vibrated in a way that it levels out properly. This clock has a “beach” theme, but other ideas for “Halloween” theme (small pumpkins, and a bleeding finger writing the time into black seeds?) or dedicated Christmas theme (glitter balls, a Christmas tree writing the time into a bed of wax, erased with a Peltier element?). Post a comment if you have more ideas :-).
Happy Clocking 🙂
PS: I deeply apologize for all the sand flying around in the office and at home. Beach feeling in the Swiss Mountains I would use as an excuse 😉
Links
- Project on GitHub: https://github.com/ErichStyger/mcuoneclipse/tree/master/Examples/KDS/tinyK20/tinyK20_SandClock
- Adafruit PowerBoost 500 Charger: https://www.adafruit.com/product/1944
- tinyK20 board: https://mcuoneclipse.com/2015/11/17/production-tinyk20-boards-arrived/
- DS1307 RTC clock: dx.com (careful, this one is using pull-ups to 5V which needs to be removed!)
- Micro Servos from DX.com
- SeedStudio vibration motors: dx.com
- Adafruit 16-Channel PWM/Servo Driver: https://www.adafruit.com/product/815
- NXP PCA9685: http://www.nxp.com/products/power-management/lighting-driver-and-controller-ics/i2c-led-display-control/16-channel-12-bit-pwm-fm-plus-ic-bus-led-controller:PCA9685

Pingback: ‘SandClock’ Writes Time in Sand, in a Frame of Seashells #plotclock #drawbot #timebot « Adafruit Industries – Makers, hackers, artists, designers and engineers!
Pingback: These Sands Of Time Literally Keep Time | Hackaday
Hello Erich! My name is Laura and I’m a video producer for INSIDER, part of Business Insider in New York City. We’re interested in featuring your sandclock video from YouTube in a story for INSIDER. Please contact me if interested for more information at lbilash@businessinsider.com Thank you!
LikeLike
Tell me you replied Erich! that’d be cool to see in insider. maybe they didn’t accept it. It is just a clock but still. idk. whatever Im just a dude from reddit. o/
LikeLike
Yes, I replied. But the terms and conditions they wanted me to sign were not acceptable: to me the concept of insider sounds strange to me: no real content but only to do advertising? To bad 😦
LikeLike
insider is more vague than vox. it very odd indeed. I hate a lot of the terms and conditions these people want they basically say we will do this little thing that’ll earn us money and you not but we have tot are your soul first.
LikeLike
I end up there a lot though as I search for tech a lot and today I searched for alex guiness(old obi wan kenobi) from star wars and they have an article for that and like everything else. they are very generic but tales they aren’t completely dumb.
LikeLike
Amazing! Thank you so much for sharing that. Another idea would be have a crab write the time.
LikeLike
Yes, I had a crab in mind too, but did not find in time good ways to make it happen.
LikeLike
Pingback: What is “Realtime Debugging”? | MCU on Eclipse
Pingback: WiFi OLED Mini Weather Station with ESP8266 | MCU on Eclipse