
In my earlier post I showed how I have installed the open source openHAB home automation system (see “Installing openHAB Home Automation on Raspberry Pi“). In this post I show how to control a local LED on the Raspberry Pi with openHAB home automation system: how to control any GPIO pin on the Raspberry Pi from remote:

Controlling the LED with openHAB
Of course the LED is just a good demonstration for doing other things with GPIO: not only to write GPIO values (solenoid, LED), but as well to read in values (e.g. from a push button).
Items, Sitemaps, Rules, Persistence, Transform
In the previous post “Installing openHAB Home Automation on Raspberry Pi” I have used a demo openHAB environment to verify things are working properly. But the real fun with openHAB is to build up my own home automation system. For this I need to know a bit about the entities in openHAB:
- Items are things I can use and interact in my system: a device, sensor or an information event. It does not have to be a physical device, e.g. it could be a web source, a weather forecast or a stock price item. Items are stored in an inventory file inside the /opt/openhab/configurations/items
- Sitemaps are used to arrange items so the can be displayed e.g. in web browser or smartphone/tablet app. It defines the layout the items to be shown. Sitemaps allow me to group and organize items too.
- Rules are the heart of any automation system. It defines schedules or tells what has to happen e.g. if a sensor reaches a certain value. Rules can define time triggered events as well, e.g. to turn off lights after midnight automatically if no person is present in a room.
- Persistence is an advanced topic: with persistence data values can be stored and shown e.g. over time. Things like outdoor temperature. I can define what is stored, in which format and how frequently.
- Transform contains mappings for data to labels. For example I can define ‘comfort’ if the room temperaturure is between 20°C and 22°C with a humitity between 70% and 80%.
The Sitemap and Items are essential for openHAB and are covered in this article. The other items are something for future posts.
In this article I’m going to use a sitemap with an item to control an LED, attached to a GPIO pin on the Raspberry Pi.
Items File
Create a new empty home.items file in /opt/openhab/configurations/items:
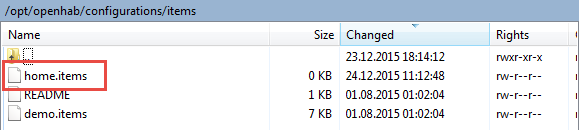
New empty home.items file
Sitemap File
Create a new sitemap file home.sitemap in /opt/openhab/configurations/sitemaps:

new home sitemap
with the following skeleton:
sitemap home label="Home"
{

}
openHAB will automatically detect that new sitemap and I can inspect it in my browser (replace 192.168.0.108 with your IP address):
http://192.168.0.108:8080/openhab.app?sitemap=home

New Sitemap in browser
But as the sitemap is empty, it does not show any items.
Adding LED Switch
So let’s add a simple LED I want to be able to turn on/off on the Raspberry. For this, I add this to the home.items file:
//------------------------------------------------------------------------
// Raspberry Pi
// GPIO
//------------------------------------------------------------------------
Switch RaspiLED{ gpio="pin:4" }
This tells that I’m using a ‘switch’ (on/off) item named ‘RaspiLED’ which is using the GPIO binding on pin 4. I give it the name ‘RaspiLED’ which I will use later in the sitemap.
💡 Be aware that everything is case-sensitive!
There are many different openHAB items beside switches, see https://github.com/openhab/openhab/wiki/Explanation-of-items
Site Map with LED
And the site map (home.sitemap) gets extended with the LED information:
sitemap home label="Home"
{
 //------------------------------------------------------------------------
 // Raspberry Pi
 // GPIO
 //------------------------------------------------------------------------
 Frame label="Rasperry Pi GPIO"
 {
   Switch item=RaspiLED
 }
}
Inside the sitemap file, I add my previously defined item RaspiLED. I put it inside a frame and label it. If check the site map with my browser, I have (ho-ho!) the RaspiLED showing up:

RaspiLED in Browser
The LED is connected to GPIO 4. The following picture helps to locate the GPIO 4 pin on the Raspberry Pi 2:

Raspberry Pi Pinout (adpoted from https://ms-iot.github.io/content/en-US/win10/samples/PinMappingsRPi2.htm)
I have attached a LED with the cathode to GND (pin 9) and with the anode to GPIO 4 (pin 7). Between cathode and GND I used a 150 Ohm current limiting resistor (any other value somewhat between 100 – 600 Ohm should do it as well):

LED Wiring
One thing is still missing: the openHAB bindings. Bindings are kind of device drivers used by openHAB to send and receive messages. To have the LED with GPIO working, I need to add the following two to the /opt/openhab/addons folder:
- org.openhab.io.gpio*
- org.openhab.binding.gpio*

Binding Files for GPIO
Now I can control the LED on the Raspberry Pi from the Raspberry itself, or any web browser connected to it, e.g. from a smart phone or tablet:
Controlling the LED with openHAB
Summary
openHAB uses a ‘sitemap‘ to represent the controls to the user. The controls are stored as ‘items‘. One very simple item is the gpio item which can be used as a switch to turn on/off things. The ‘bindings’ act as device drivers and are used the make the connection between the items and the hardware. That way it is very easy to build up an open source and versatile home automation system. With this I have a way to control GPIO pins of the Raspberry Pi. Of course it does not stop here: I could use pins as inputs (e.g. with push buttons) and attach external devices on a bus, define rules and other advanced automation tasks. But these will be subject of further posts.
Happy Automating 🙂
Links
- openHAB: http://www.openhab.org/
- Installation of openHAB on Raspberry Pi: Installing openHAB Home Automation on Raspberry Pi
- Automatically start openHAB at boot time: Autostarting openHAB on Raspberry Pi

Name not a rope in his house that was hanged. ;))))
Raspberry Pi VS FRDMxx.
LikeLike
I don’t think it is not about Raspy vs FRDM: more about combining them 🙂
LikeLike
Pingback: Controlling NXP Freedom Board RGB LED with openHAB and Raspberry Pi | MCU on Eclipse
I have a problem to switch the port. When i start the openHAB the port switch to high.
When i press the switch button nothing happen on the pi (port level is still high).
What should I do know?
LikeLike
Hi Philipp,
are you sure you are using the correct pin/port?
LikeLike
When I implemented this it did not work. I found two issues:
1. gpio pin 4 never changed
2. once I fixed issue 1, issuing “service openhab stop” followed by “service openhab start” resulted in an error in the openhab file about the RaspiLED being busy, and the LED stopped responding.
Fix #1 – It appears that you either have to run openhab as root in order to access the gpio pins, or you are supposed to be able to add openhab to the gpio group and have that work. I could only get this to work properly by editing /etc/default/openhab and setting the user and group to root. Once I did this, the LED worked, and if I rebooted, then the system came back up properly. However, if I stopped and restarted the openhab service, then the LED no longer worked.
Fix #2 – See the openhab gpio binding page at https://github.com/openhab/openhab/wiki/GPIO-Binding for this fix. Edit the init script for openhab and unexport the gpio pins when stopping the service. Edit /etc/init.d/openhab. Below “if start-stop-deamon –stop… add the line, echo 4> /sys/class/gpio/unexport
LikeLike
Hi Brad,
were you using the same openHAB version than I did? I have not decided to upgrade to the latest version, maybe I should try this on my side too.
LikeLike
Hi Erich, I am using the latest stable release. I believe it is 1.8.3.
After posting the note above, I found that you can include the “force:yes” command in the binding configuration allows stoping and starting openhab without having resource contention issues with the gpio pins.
LikeLike
Can you do a tutorial on blinking a light on a Raspberry Pi over network.
LikeLike
OpenHAB *is* over the network 🙂
LikeLike
Blink LED on Raspberry Pi over network not running Openhab. From Openhab.
LikeLike
I have no such tutorial at hand. Have a look at the HTTP binding in OpenHAB, you can use this to make a connection to a remote web server (that Raspberry Pi with the LED on it).
LikeLike
Would you be able to make instructions for openhab 2?
LikeLike
I have not switched to openHAB 2, there was no reason for me (yet)?
LikeLike
Please could you help me with (which I assume to be) a very simple problem?
I cannot find a way to open an editor, e.g. to complete basic file activities like creating a new empty home.items file.
Apologies for an obviously silly question, but for a newbie like me, I’m completely stumped!
Thanks
Dan
LikeLike
Daniel,
There are many, many different ways. I’m mostly using the nano editor which should be pre-installed on your system. See https://en.wikipedia.org/wiki/GNU_nano
I hope this helps,
Erich
LikeLike
Thanks Erich. I will investigate, however I would prefer a window explorer type UI, as I cannot easily see/edit the file directory structure.
LikeLike
Hi again Erich, as predicted I’m struggling with to use GNU nano in any effective way to understand the directory structure, navigate around and create files, such as sitemap and item home files.
I was actually using linux dos prompt in the pi environment, but in doing so I noticed there was no /configurations directory. Is this normal? Should I have to create this?
LikeLike
You certainly could use the graphical editor most likely installed with your Raspy Distribution (depending on the distribution you are using). Otherwise consider using WindSCP (search the net for that one): that way you can use e.g. your Windows host editor directly and transfer the files.
LikeLike
nano (as vi) are very basic text based editors, useful if you only have a shell connection. As for the openHAB configuration directory: that depends on which openHAB version you are using.
LikeLike
Dear Erich, Thank you for your help. After some perseverance i worked out what was going on with finding the files. I realised that with OpenHAB2, which I’m using, the location of the sitemaps and items directories were different to the OpenHAB version you used in this post.
I also worked out how to open and use GNU nano. So thanks for your guidance there.
I have also progressed to getting controlling the LED through GPIO No.4, but it isn’t flashing. I done it slightly differently to you in that I used the GPIO bindings from the PaperUI. As said, it lights without flashing. Do you think that would have something to do with the bingings or the would the items and sitemap code need updating for OpenHAB2?
Regards,
Dan
LikeLike
Hi Dan,
can you try the same approach I have used?
And I would try it first with the pre-OpenHAB2 version, and once everything is working, switch to the OpenHAB2 if needed.
LikeLike