
My Raspberry Pi Zero arrived last week (see “A Raspberry Pi for $5! What are your decision factors?“), and finally I have found an hour to try it out. Because the ‘bare board’ $5 version was sold out at that time, I ordered a package with 8GB SD card, micro USB cable and mini HDMI adapter. That way I had all the needed cables, including the mini HDMI adapter cable:

Raspberry Pi Zero
NOOBS (New-Out-Of-the-Box-Software) is very easy way to get a Raspy up and running, and I have used it successfully in all my Raspy projects.
I need
- Raspberry Pi Zero
- 5V Micro USB Power Supply rated at least 1A
- 8 GB Micro SD card (with card adapter to use it on a host)
- Micro-USB to USB cable (USB OTG cable)
- Mini HDMI to HDMI adapter
- A mouse, a keyboard and a HDMI monitor
Adafruit has a package with most of the parts available: https://www.adafruit.com/product/2817. A HDMI-to-VGA adapter is something I use too for montors without HDMI input.
Setup
Using the Zero is not much different from the normal Raspberry Pi:
- Use SD Formatter to format the micro SD card.
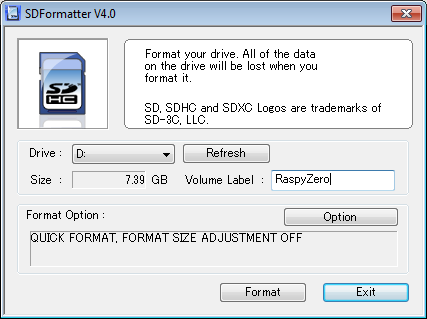
SD Card Formatter
- Download a Linux image from the Raspi Downloads. I have used the NOOBS V1.5.0 distribution. (note: V1.4.0 does not support the Pi Zero!)
- Extract the content of the image/zip to the micro SD card.
- Insert the card into the Raspy
- Power and boot the Raspy
- This then will go through the setup
- It takes about 15-20 minutes until all the files are installed
- The system boots and the system is up-and-running 🙂

I’m using a wireless mini keyboard with touchpad with the Zero:

PiZero with Keyboard
With that setup, my Raspberry Pi Zero is running fine 🙂

Raspberry Pi Zero Running
In order to use a WiFi dongle in addition to the mouse/keyboard, I had to add a USB hub:

Setup with Hub
Summary
Setting up the Pi Zero is not much different from the ‘normal’ one. Having only one USB port requires a joint keyboard/mouse or using a hub. Would have been kind of cool if the Zero still would have the camera interface: that would make it a smart camera with a small form factor. For using the WiFi USB dongle I would need that anyway, or I have to disconnect the Keyboard/Mouse. That USB converter cable is kind of ugly because it kinds of destroys the coolness of this board. But I’m sure there will be soon some mini-adapter cables/dongles.
Happy Zeroing 🙂
Links
- A Raspberry Pi for $5! What are your decision factors?
- SD Card Formatter: https://www.sdcard.org/downloads/formatter_4/
- Setup Raspberry Pi Zero in Headless Mode: http://davidmaitland.me/2015/12/raspberry-pi-zero-headless-setup/
- Adafruit Raspy Zero Tour: https://learn.adafruit.com/introducing-the-raspberry-pi-zero/a-tour-of-the-pi-zero
- Adafruit Mini USB Keyboard with Touchpad: https://www.adafruit.com/products/922
- Raspberry Pi Zero Pack: https://www.adafruit.com/products/2817

For USB to micro conversion, I use these inserts:
http://www.ebay.co.uk/itm/DM-OTG-Adapter-Micro-USB-Male-to-USB-Female-For-Samsung-Android-Phone-Tablet-PC-/391313051444?hash=item5b1c134f34:g:ax4AAOSwT6pV6lM3
The only problem, due to their size, is that they are easy to lose.
LikeLike
Wow, that’s a cool tip! I even did not know that something like this exists, very cool!
LikeLike
Pingback: Installing openHAB Home Automation on Raspberry Pi | MCU on Eclipse
Hi Erich,
Raspberry Pi, DMA read and write functions similar to ARM?
read (SPI, SCI, GPIO) and write (SPI, SCI, GPIO).
has pin ( trigger_request ).
I looked info in the manual but it was not clear to me.
thanks
Carlos.
LikeLike
Hi Carlos,
I’m sure it has that, but I have not used anything like this on that low level as on other ARM. With using a Linux a lot of the hardware is hidden behind the device drivers.
Erich
LikeLike
You can use two usb port ??
power use 5v pulled on usb equipment
LikeLike
You can use it as a USB Gadget, see https://learn.adafruit.com/turning-your-raspberry-pi-zero-into-a-usb-gadget/overview
LikeLike