
Getting the hands on an embedded project has always been exciting for me. So, here I am again with my blog trying to provide you with an easy to use guide for the Kinetis Design Studio 3.0.0 (KDS_3.0.0). Well, as you all know I am an intern at Freescale working for the first time on KDS, I will tell you what all we can do to start working on it with a perspective of a novice. But personally I feel KDS is one of the most encouraging IDE you can work on. So how do I start with my code for our NeoMatrix board? I am currently working with one of the demo codes for the NeoMatrix:
https://mcuoneclipse.com/2015/07/10/lets-play-with-freescale-frdm-k64f/
So, my first task is to write the code in KDS for the NeoMatrix_Demo. How do I do that? After opening the KDS 3.0.0, I need to go to File and select New and then Kinetis Project. You can see that the New Kinetis Project wizard appears once you click the File>New> Kinetis Project. Type a name and click next.

The Devices page appears the next. All I need to do is to select the board on which I need to work on, which is FRDM-K64F. I can click Finish at any step in the project wizard to save the project with the default settings. However, I recommend clicking Next to ensure that the project settings match your needs.

The Rapid Application Development page appears. This page can help me to configure Processor Expert for configuration and KSDK. Processor Expert is included with Kinetis Design Studio software, but KSDK must be installed separately. When the Kinetis SDK is installed, the default selection uses the Kinetis SDK. By default, Processor Expert is not selected. I already had the Kinetis SDK installed and thus I need not worry about the processor expert. I just had to click next.

The Target compiler page appears. I selected the GNU C compiler since I want the Kinetis Design Studio to build the code. After that I just clicked on finish.

After finishing this process the new project is ready for my use. I can now customize it by adding my own source code files, changing debugger settings, or adding libraries.
I was able to see the ‘test’ in my project explorer window. You can just click on that, select sources and select main.c
On selecting main.c, I was able to get a program with some initial commands written for my ease. I can easily write any kind of code within it and then continue to build the program.

Importing an existing project
Now apart from this there is another process which I would like to share with you all. If you already have a code which you might have downloaded from another compiler or somewhere else, you have the option to import it to KDS. To import the code to the Kinetis Design Studio just click on file and select import option from the dropdown: File > Import, after selecting import the import dialog appears.

Select existing Projects into Workspace from this dialog box and click on Next. The next option provided me with the dialog box that asked me to select a directory to search for an existing Eclipse project. I need to select root directory option next.
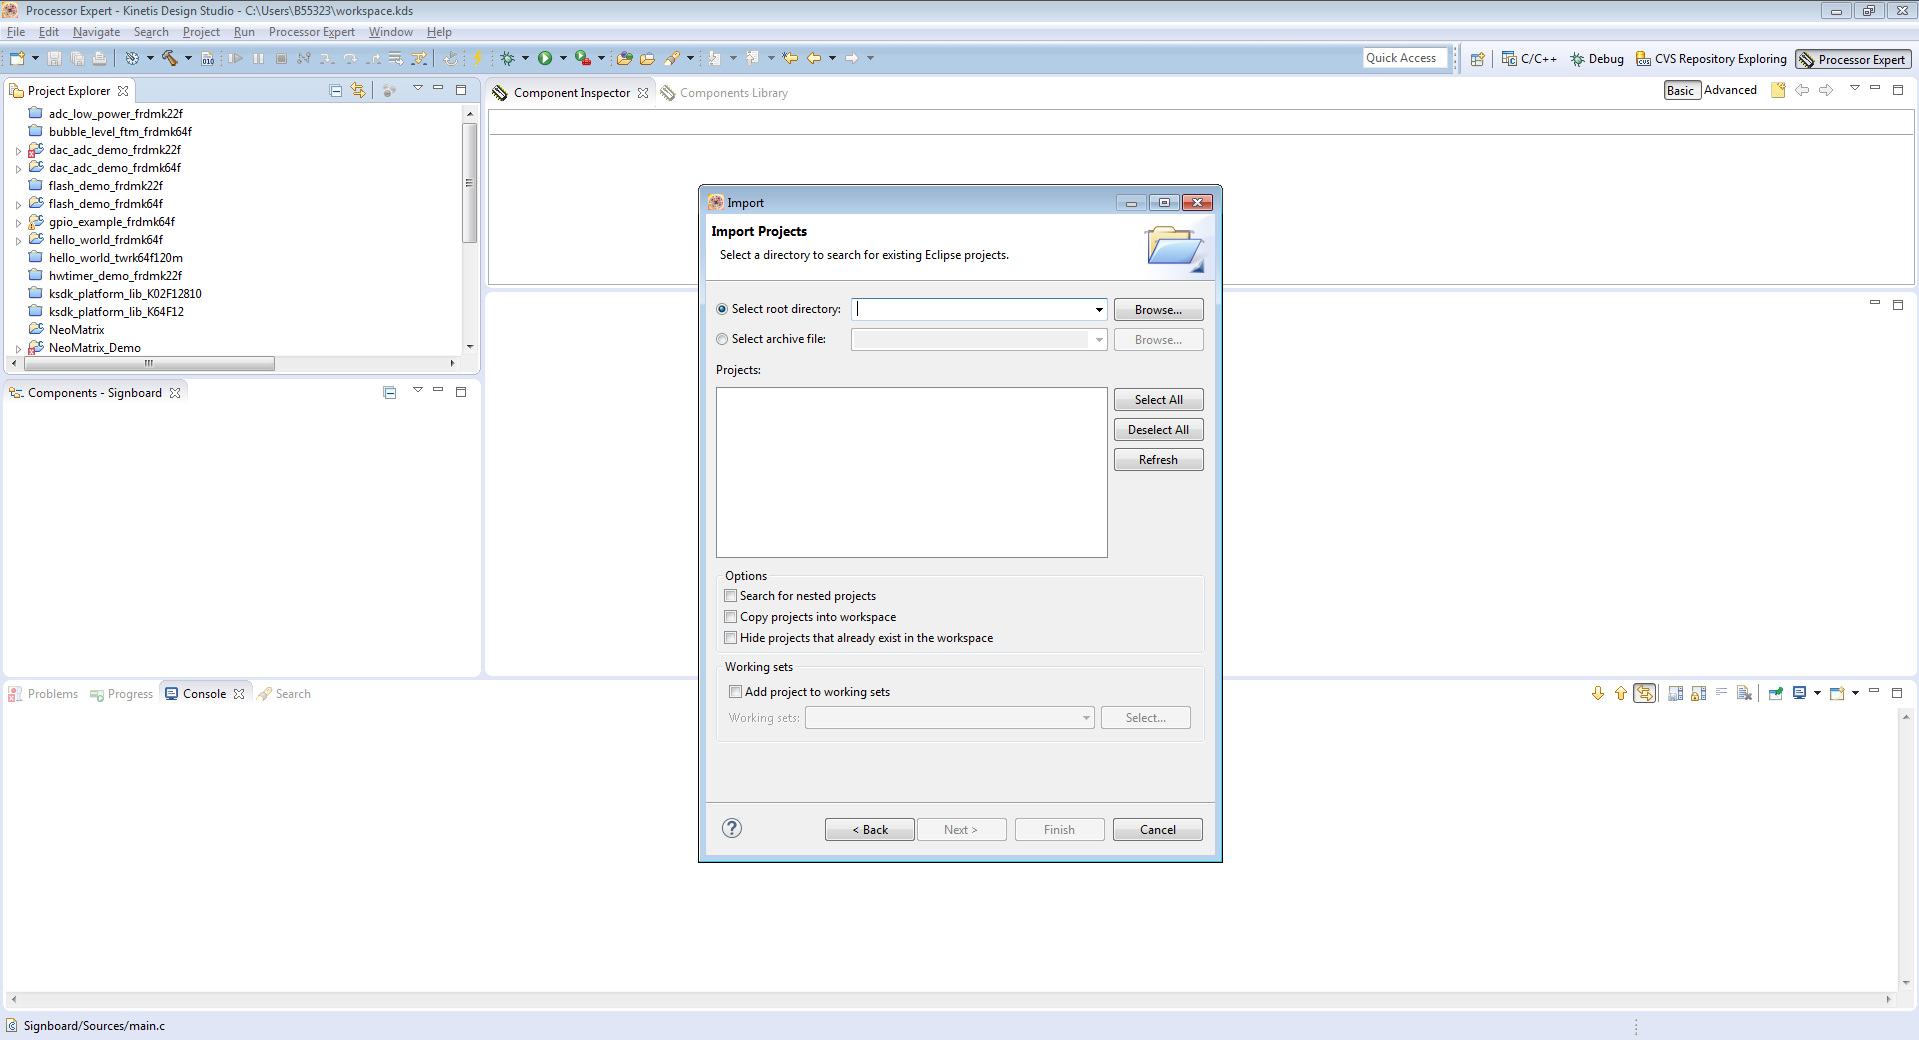
Now I needed to browse for the root directory that I need to open. This root directory can be located anywhere but to be on the safer side I saved my Neomatrix demo example with the other FRDM-K64F examples.

So now when I was asked to select the root directory I browsed as shown below:

After selecting the NeoMatrix_Demo, click OK and you will be able to select your project. This process is nearly done and you just need to click on Finish.

After this you can spot the NeoMatrix demo in the Project Explorer.
Now I realized that it is a good practice to close any of the other open projects you have in your project explorer before you build the NeoMatrix demo. The little arrow sign before the name of any projects shows that it is open. You can see that easily in the previous image. I just selected all the open projects and then do a right click on them and selected close projects.
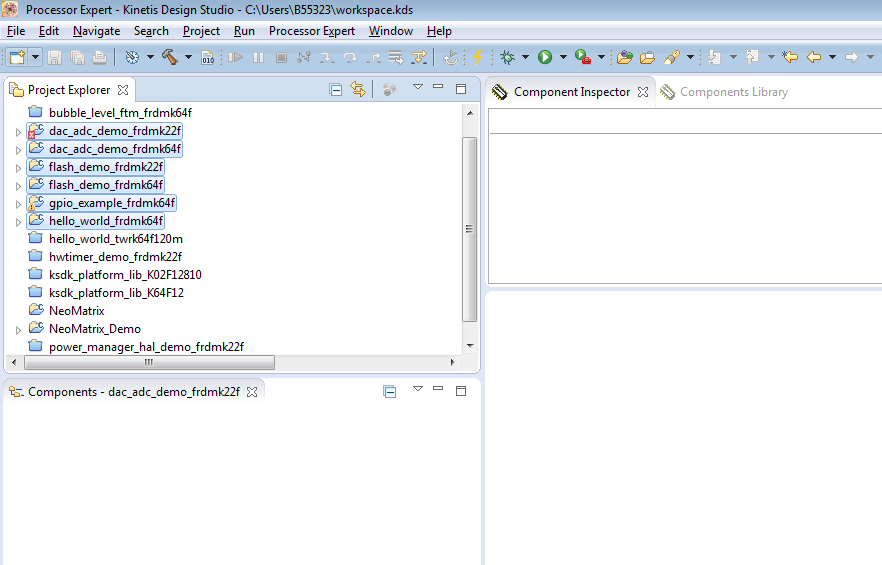
Now you can see that we do not have any open projects in the project explorer.

After this I just selected my NeoMatrix_Demo and clicked on the little hammer shown in the toolbar. That hammer will build your project if it is correct and if there is some problem you can see that in the console window at the bottom.
![]()
So, when I tried to build my NeoMatrix_Demo project, I got something like this:

Oops!! Yes there they are and I am stuck now. I do need to debug these errors that we see and then only I will be able to run my demo. So, I will try to debug this and will be back with my next blog sharing all that I will be learning along the way.I will suggest that do browse to the new getting started process link for the FRDM-K64F for using KDS: http://www.freescale.com/webapp/sps/site/prod_summary.jsp?code=FRDM-K64F&tab=In-Depth_Tab
I also referred to the doc folder inside the KDS after installing the Kinetis Design studio.
I hope this blog will help you all in figuring out the starting process for KDS 🙂
#KinetisConnects

Nice step by step tutorial, I can relate. I had done something similar for DIY eclipse IDE for Linux before KDS was created, someone had to do this for KDS. Now I don’t have to do it 🙂 , I will just link here from my blog. Thanks for sharing.
I have just started using KDS full time as opposed to vanilla eclipse CDT with the extra tool-chain plugins added one by one, its a very easy and exciting process.
I do have the FRDM-K64F board and some NeoPixel LED strips I purchased quite a while ago but never used, I will be following this series of blog posts, just to use the board so it doesn’t feel like its going to waste.
One thing am not sure is, should I connect a voltage level converter b2in my NeoPixel strip and the board, I don’t have the pendant thingy, or can I use the 5v output from the board? I have tow of these http://www.adafruit.com/products/1426. A schematic fro the connection from the controller to the LEDs would be great.
LikeLiked by 1 person
Hey Karibe!
Thank you so much for your comment. I will try my best so that your NeoPixel LED strips does not go waste and you can build a nice working project from it. Right now I am working on the code and hardware details for my project. I am sorry but I think I can better answer your question in my next blog. 🙂 Till then may be you can refer to more of these blogs:
https://learn.adafruit.com/adafruit-neopixel-uberguide
LikeLike
You *could* use the on-board 5V to drive a few LED’s, but only a few. Because each LED in full brightness will consume about 60 mA current.
Better to have a separate 5V power supply with a good capacitor to ease the current rush, as explained in https://learn.adafruit.com/adafruit-neopixel-uberguide. That guide gives as well the basic connection.
If you are interested in boards, I have made one here:
Unfortunately, that board has been created at the university with Altium (not Eagle), and I don’t have the design files with me.
LikeLike
So basically I can drive the data port directly with 3.3v but power the LED with 5V? I thought the LED chip ports were 5v like TTL and hence the level shifter. I will buy a Level shifter and make a custom board with some new controllers am getting, but for now am going to just use the FRDM-K64F on-board 5v to drive just one strip with a few LEDs.
LikeLike
No, you need 5V logic levels for the LED’s, and that’s why there is a fast level shifter from 3.3V to 5V levels needed.
The LED’s have a 5V power input, and here you could use (only for a few LED’s!!!!!!) the 5V of the FRDM board.
I hope that makes sense.
I recommend to read https://learn.adafruit.com/downloads/pdf/adafruit-neopixel-uberguide.pdf which covers the electrical specs.
LikeLike
Karibe,
so you know: I was trying to get my FRDM-K64F board working the same way as the FRDM-KL25Z to drive Adafruits NeoPixel as in this article: https://mcuoneclipse.com/2014/11/10/neoshield-ws2812-rgb-led-shield-with-dma-and-nrf24l01/
I have to say ‘try’ because I had to spend a lot of time yesterday with the Kinetis SDK to get the timer working, and to add DMA. Right now I have the timer, plus some baby steps with DMA. It is not functional yet, but at least I have ‘something’ working on. You might follow my project on GitHub here: https://github.com/ErichStyger/mcuoneclipse/tree/master/Examples/KDS/FRDM-K64F120M/FRDM-K64F_NeoPixel_SDK_PEx
LikeLiked by 1 person
I like the fact that the link leads to github 🙂 but the mcuoneclipse repo has many things… cloning… our university internet is the crappiest I have seen. thanks. Am trying to gauge the stretch from baremetal, to SDK to PE. I want to kinda provide 3 levels of embedded dev depending on project urgency. So i am eager to learn how to use SDK.I tried so hard and couldnt blink an LED and send printf to uart a the same time a few weeks ago and gave up on SDK, hehe. Was getting very strange errors with startup scripts and TYPES.h and stuff like that.
LikeLike
Welcome, Manya! Does KDS run on Mac OS 10.6.8? I’ve been using MBED for my development work, and am a little irritated with the rather bloated code that comes with their development system. I’ve done a little with bare-metal-arm, but that is too far in the other direction, with too little assistance.
The biggest project I currently have on the Freedom boards is PteroDAQ for the KL25Z, a data-acquisition system that my son built, and that I’ve taken over much of the development for this summer: https://bitbucket.org/abe_k/pterodaq/wiki/Home
I’ve been blogging about the KL25Z board a fair amount this summer ( https://gasstationwithoutpumps.wordpress.com/tag/kl25z/ )
(Also, my son’s first product used the KL02 chip: https://futuristiclights.com/ )
LikeLike
Kinetis Design Studio v3.0.0 released end of April supports now Mac OS X. As I do not have a Mac, I cannot share my own experience, but I have seen reports in the forums that this is working fine for them. The only thing is that that it supports Segger J-Link only, not P&E Multilinks or OpenOCD.
LikeLike
According to http://www.freescale.com/webapp/sps/site/prod_summary.jsp?code=KDS_IDE&nodeId=0152109D3F1E8C1EB4
you need Mac OS 10.10, but I only have 10.6.8 on my laptop and one of the 10.7 versions on my desktop. Some day I might upgrade to 10.10, but that will probably break more things that I rely on than it will fix.
In the meantime, I’ll continue using the mbed tools,
LikeLike
I’m really not familiar with the differences of all these Mac OS X versions. The versions mentioned on the FSL website usually refer to what they have tested it with. So if 10.6 or 10.7 is similar to 10.10, then it might work on earlier versions too?
LikeLike
Thank you for this step by step tutorial. this goes for all your material. I’ve ported on older CWS 10.2 project (using add not import) and cannot find the reason why my main function is not called. Any recommended readings I’m missing
Thank you
LikeLike
I guess it hangs somewhere between the startup code and main(). In the debugger (launch configuration) setting under the ‘startup’ tab there is a ‘continue’ setting: if enabled, it tries to run to main(). I recommend that you turn that off so you can step through the startup code and see what is going wrong?
LikeLike
Hi Manya and Erich
I am an electronics undergrad and a beginner to KDS. I am using a j link segger to dump the code into the board. My Project mentor told me to find a way to dump the code through segger disconnect the segger and then see whether your code works. What should I do ?
Thanks & Regards
Ganesh R
(An ardent follower of MCUONECLIPSE.com)
LikeLike
Hello ! I want to know how I can run the FRDM 64k board without using the Kinetis Proccessor expert, what files are needed to implement a project without the Kinetis Proccessor . Thank you for your help
LikeLike
Yes, you can use the board without Processor Expert (but it is much, much simpler and more powerful if you use Processor Expert).
Anyway, here is how you start without it: use the menu File > New > Processor Expert, and where you are asked to select the Kinetis SDK and/or Processor Expert, simply say ‘none’/no, and you have a project without it.
I hope this helps,
Erich
LikeLike