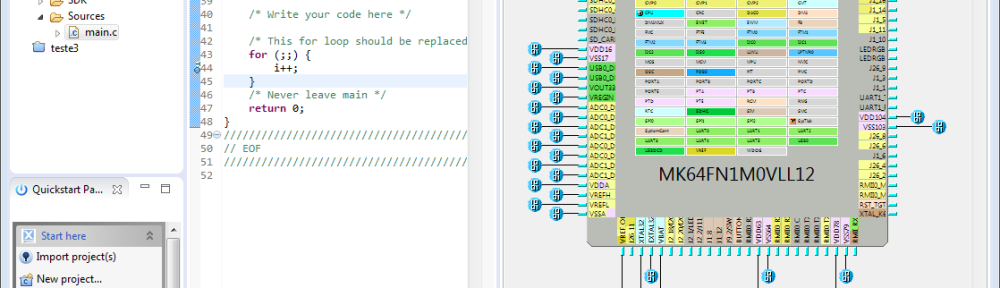
So NXP announced here a $40 Billion Merger with Freescale. Frequent readers of my blog will know that I’m using in my own and university projects many Freescale devices with Eclipse based tools (Eclipse Kepler/Luna, Emprog ThunderBench, Atollic TrueSTUDIO, Freescale CodeWarrior and of Freescale Kinetis Design Studio) in combination with Processor Expert. In a few projects I have used NXP devices with the CodeRed Eclipse base tools too. So I was curious how that merger of the two silicon companies could look like, if you merge the Freescale and NXP Eclipse based tools, and mix it with Processor Expert and the Freescale Kinetis SDK? The result looks like this:

LPCXpresso v7.7.2 with Processor Expert and Kinetis SDK
A while back I wrote about using the CodeRed Red Suite (see “Red Suite 5: Eclipse Juno, Processor Expert and unlimited FRDM-KL25Z“), and only shortly afterwards NXP had acquired CodeRed. Now with NXP is in the process to acquire Freescale, time to look how the Freescale Kinetis SDK and Processor Expert can be combined with the LPCXpresso?
💡 LPCXpresso is a special version from CodeRed created for NXP.
NXP LPCXpresso IDE
💡 I already have Kinetis Design Studio V3.0.0 installed on my machine. I have not tried the steps below on a clean machine. The steps below work for me using the FRDM-K64F board and the Segger J-Link Software. LPCXpresso is able to debug my board using Segger, but I’m not sure if it using the KDS drivers or drivers from LPCXpresso.
Download LPCXpresso from NXP.com and install it. I’m using in this post the v7.7.2:
LPCXpresso v7.7.2
GNU ARM Eclipse Plugins
LPCXpresso comes with its own build tools integration. But because the Freescale parts are using the open source GNU ARM Eclipse plugins. I use with the menu Help > Install New Software:
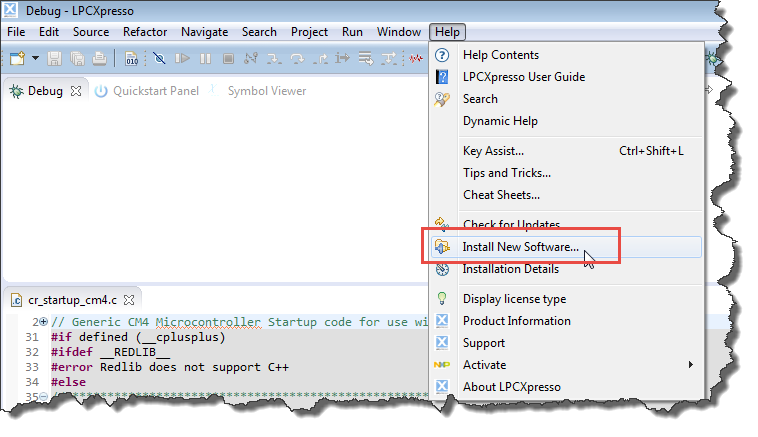
Install New Software
I’m using the following update site:
http://gnuarmeclipse.sourceforge.net/updates
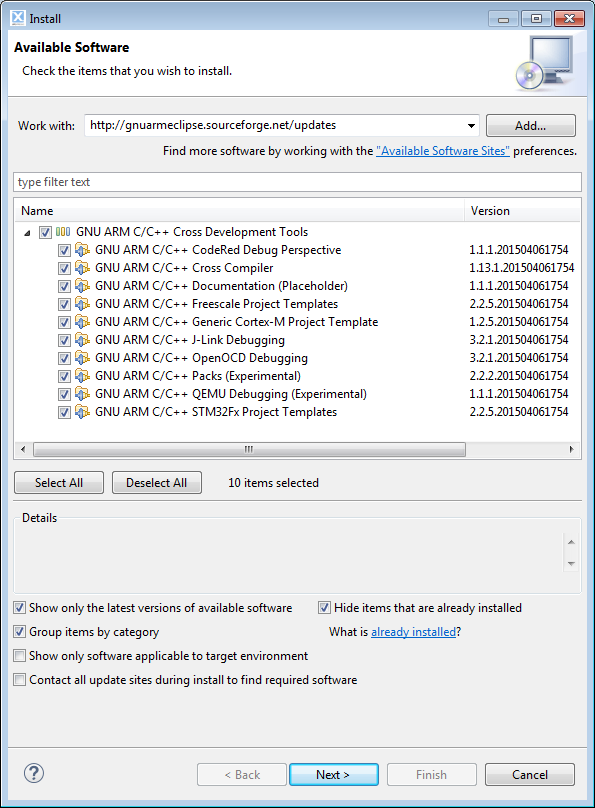
GNU ARM Eclipse Plugins Installation
Press ‘Next’ and go through the installation process.
Freescale Kinetis SDK
Next, download Kinetis SDK from http://www.freescale.com/ksdk and install it. The Kinetis SDK is a software library and drivers package for Kinetis devices. The version I’m using at this time is V1.2.0.
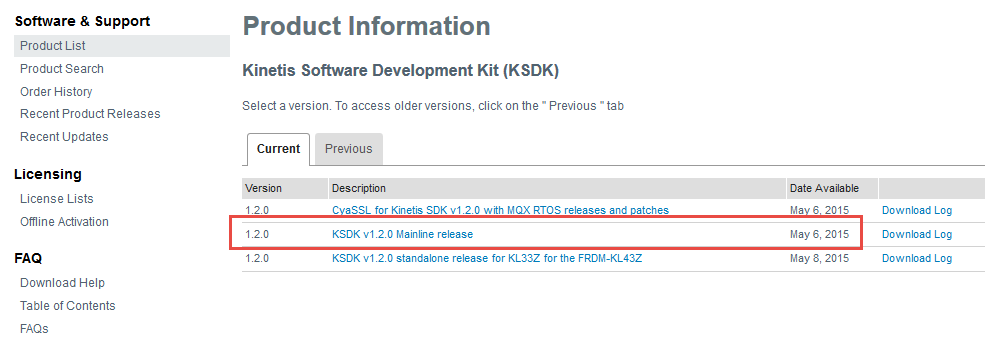
KSDK V1.2.0 Mainline Release
The Kinetis SDK comes with an update package for Eclipse. On Windows, it is
C:\Freescale\KSDK_1.2.0\tools\eclipse_update\KSDK_1.2.0_Eclipse_Update.zip
Install that package in LPCXpresso using the menu Help > Install New Software and then install that archive:
💡 Drag&Drop the file into the ‘Work with’ edit box.
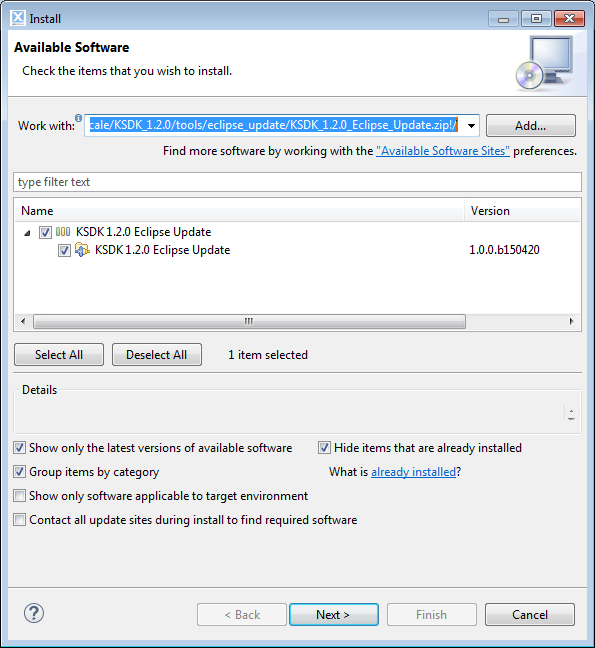
Installing SDK Update Package into LPCXpresso
Press ‘Next’ and go through the installation process.
Freescale Processor Expert
Next, I’m going to install Freescale Processor Expert. Processor Expert is a really cool tool which allows to graphically configure and initialize a device. Additionally it comes with a wizard to create projects for Freescale Kinetis devices. Download Processor Expert V3.0.0 from http://www.freescale.com/webapp/sps/site/prod_summary.jsp?code=PE_DRIVER_SUITE&tid=PEH. Because LPCXpresso V7.7.2 is Eclipse Luna (4.4) based, download the file for the Eclipse 4.4:

Processor Expert for Kinetis V3.0.0
This downloads you the PEx_for_Kinetis_3.0.0_Install_into_Eclipse_4.4_Unzip_me.zip file: as the name indicates: unpack that archive. Besides documentation, there are two software packages in it. First, use in LPCXpresso the menu Help > Install new Software and install the freescale_updater.zip:
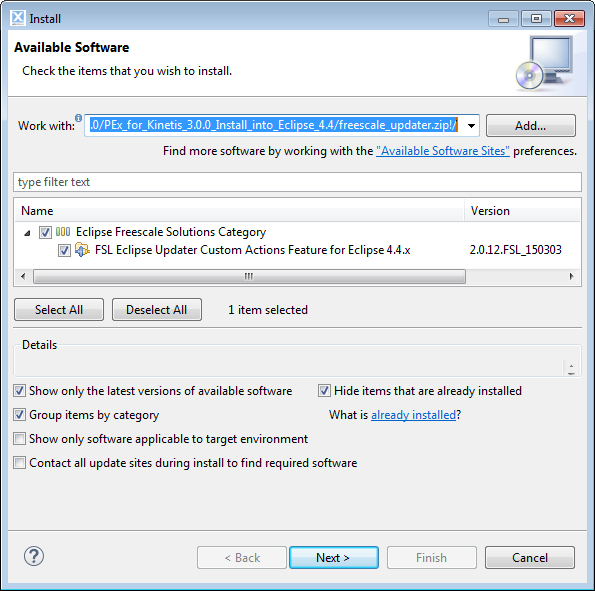
Freescale Updater
Go through the installation process. Then, do the same, but this time install the PEx_for_Kinetis_3.0.0.zip:
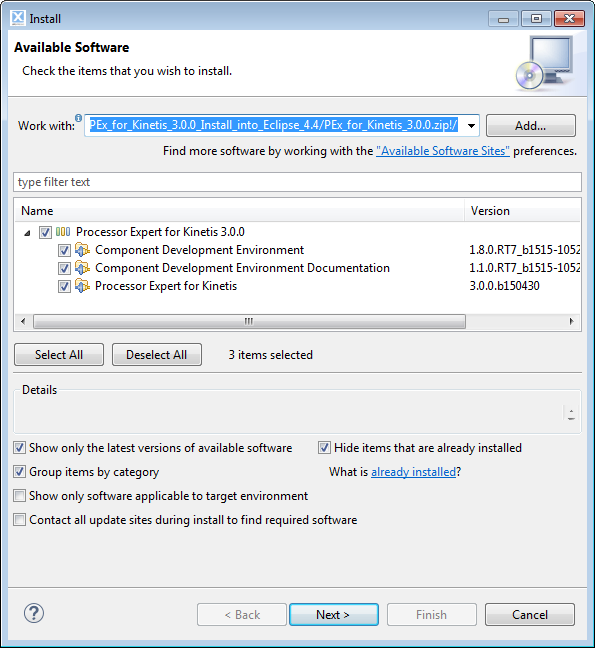
Installing Processor Expert for Kinetis
The first time the IDE is launched with the new installed Processor Expert, it will update the list of supported processors:
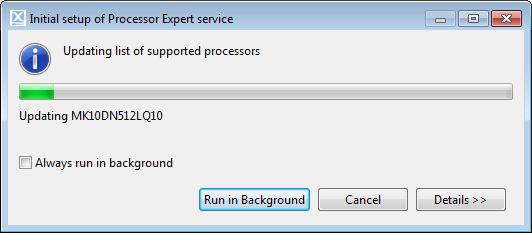
First Time Starting With Processor Expert
After that, ready to rock :-).
Creating Project
For this example, I’m creating a project for the Freescale FRDM-K64F board (see e.g. “FTF: FRDM-K64F, Kinetis Design Studio and Kinetis SDK“) using the Segger J-Link interface (see “Segger J-Link Firmware for OpenSDAv2“). To start the New Project Wizard, I use the Menu File > New > Kinetis Project:
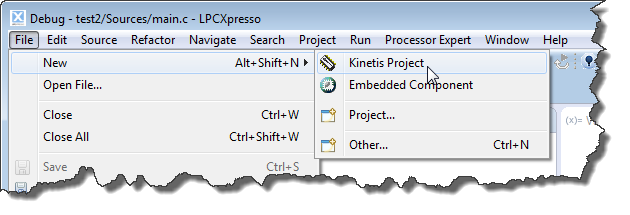
New Kinetis Project
Next, I specify the project name and select the board or processor:
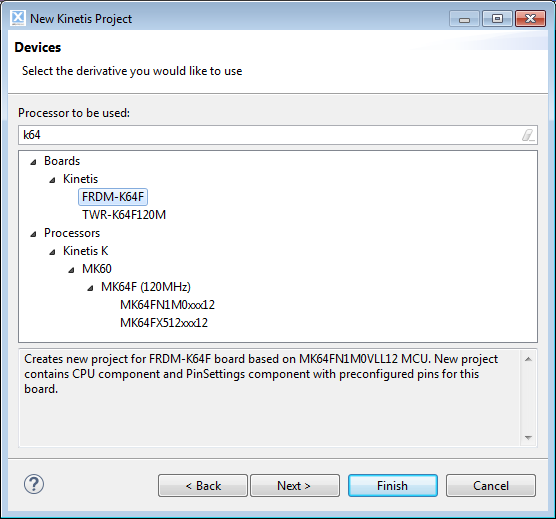
Board Processor Selection
As I have the Kinetis SDK installed, it recognizes that my board/device is supported with the SDK and Processor Expert:

SDK and Processor Expert Selection
The last dialog is about the compiler to be used (if I have selected Processor Expert, as it supports multiple compilers and IDE’s). LPCXpresso is using GNU, so I’m going with the default:
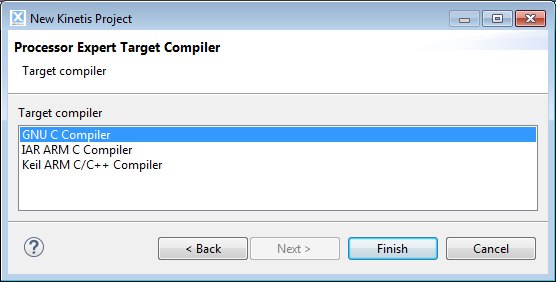
Compiler Selection
With this, the project will be created:

Project Created
Building and Toolchain Selection
LPCXpresso is using its own custom GNU toolchain and libraries, and not the de-facto standard one from ARM (GNU ARM Embedded from launchpad (https://launchpad.net/gcc-arm-embedded)). The GNU ARM Eclipse (Liviu) make it easy to use different tool chains. So I’m going to use the one installed by Kinetis Design Studio. I use the menu Window > Preferences > C/C++ > Build > Global Tools Path to configure it for all workspaces to use the KDS v3.0.0 GNU ARM Embedded tool chain:

Global Tools Path
💡 If not having the Kinetis Design Studio installed, get the GNU ARM Embedded tool chain from https://launchpad.net/gcc-arm-embedded and the Build Tools from Liviu.
The same settings are as well under the menu Window > Preferences > Run/Debug > String Substitution:
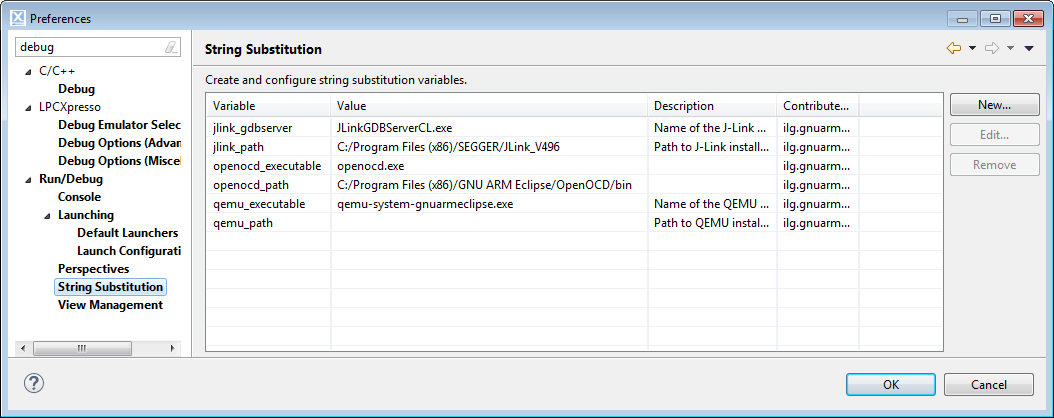
Debugger String Substitutions
With this, the project should compile fine:
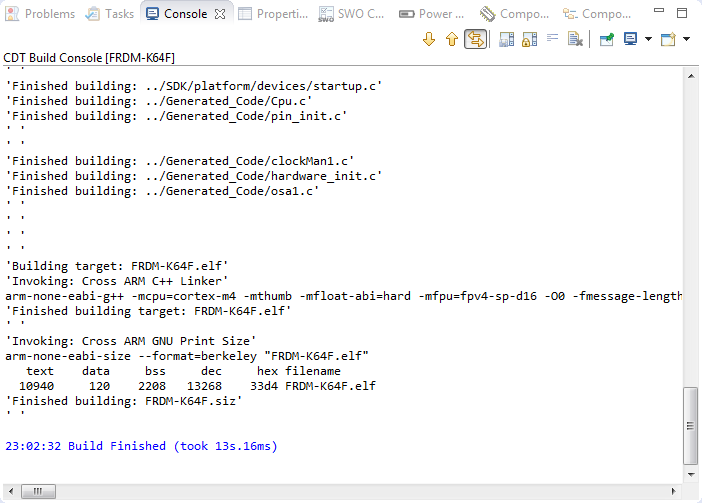
Building Project with GNU Tools
Debugging
The debug configurations (menu Run > Debug Configurations) have been preconfigured at project creation time by the wizard. For Segger J-Link, I had nothing to do:
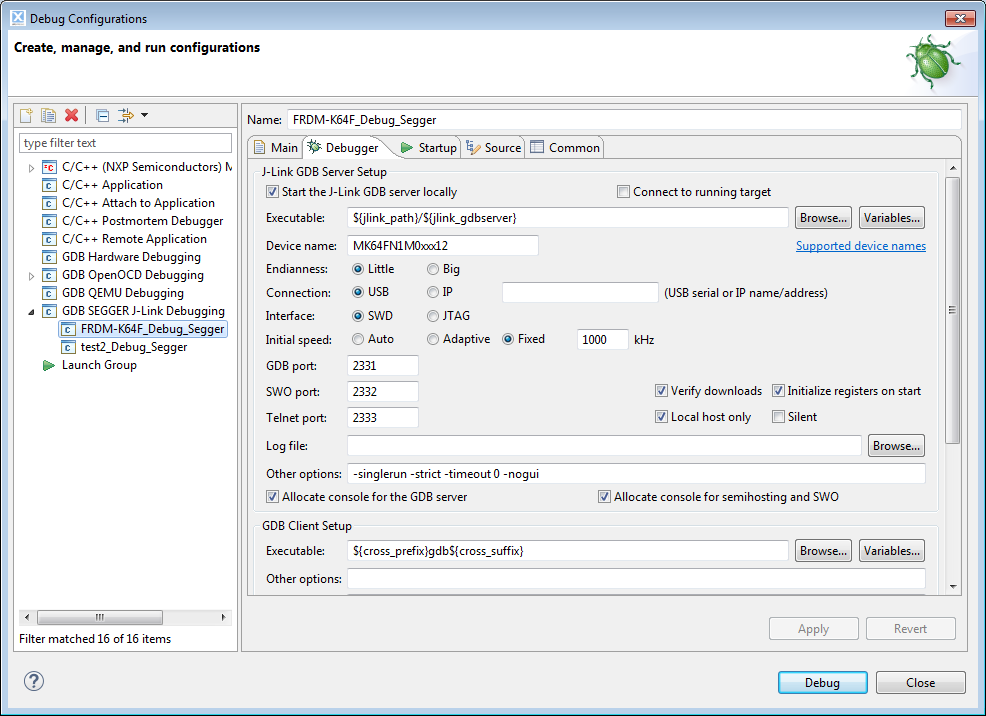
Segger J-Link Debug Configuration
This because I already had the Segger J-Link software downloaded and installed on my machine. If this is not the case for you, you might need to download it from www.segger.com. If you want to know which Segger software the launch configuration is using, press the ‘Variables…’ button:
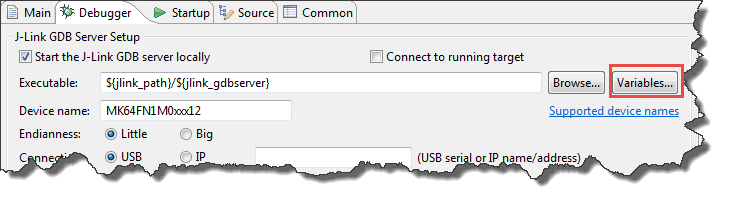
Variables
On the jlink variable, press the ‘Edit Variables…’ button:
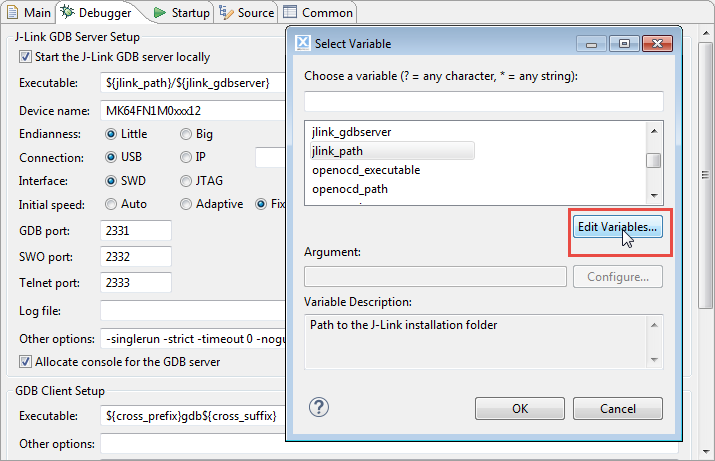
Edit Variables
And there I can see what it is using or I can change it to my needs:
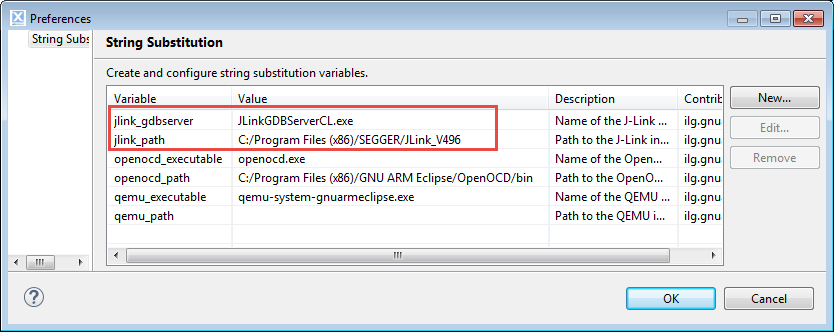
jlink_path and jlink_gdbserver
With this sorted out, I can press ‘Debug’ or use the ‘Debug’ toolbar drop-down:

Debug
💡 Do not use the ‘plain’ debug icon, as this launches a LPCXpresso specific ‘search my debug adapter/emulator’ wizard, which won’t recognize a non-LPCXpresso debug connection.
And voilà: I’m debugging the Freescale FRDM-K64F board with the NXP LPCXpresso :-):
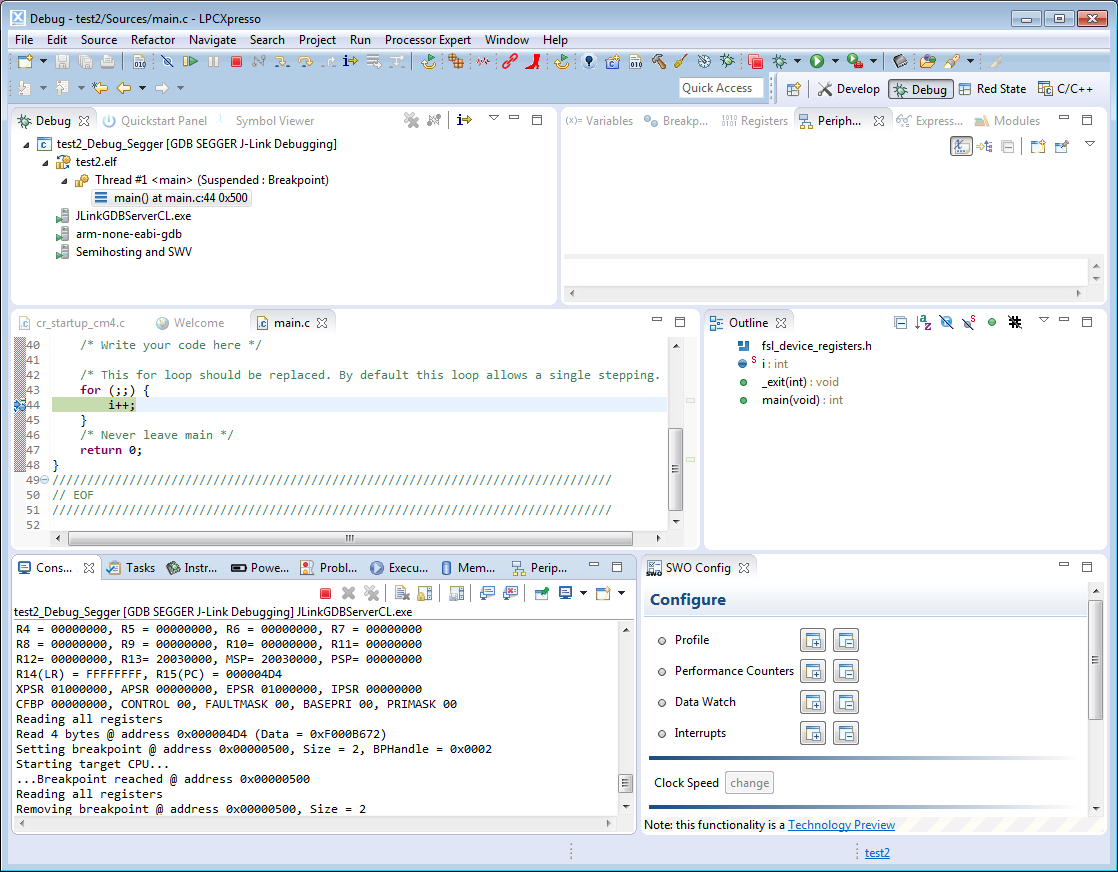
Debugging FRDM-K64F with LPCXpresso
Summary
LPCXpresso is a nice Eclipse distribution, with nice features built-in like trace. Their customized build tools integration and views making things easy to use. Advanced features like trace are not free of charge, and the free of charge edition comes with a code size limit. On the other side, the Freescale Kinetis Design Studio is unlimited and free of charge, but does not come with advanced features like trace. The cool thing is that the Freescale differentiator Processor Expert and as well the Kinetis SDK support with it can be easily installed into the LPCXpresso IDE, making it possible to be used for Freescale Kinetis Devices.
Happy Expressing 🙂

great! good going..
LikeLike
instead of manually editing variables in the String substitution window, there are now separate Preferences pages (for SEGGER J-Link, OpenOCD and QEMU) in the Run/Debug category.
they have the same effect, but are somehow easier to use.
LikeLike
Hi Liviu,
thanks for that hint. Indeed, that is easier to use (and find). I have updated the post with that information.
LikeLike
Thanks Eric. Interesting article. Couple of minor points on your comments on LPCXpresso IDE though. First of all, LPCXpresso does use the GNU ARM Embedded tools from launchpad – but it ships with the ‘Redlib’ C library as well.
Secondly, the Free Edition of LPCXpresso does provide both SWO trace and instruction trace support.
LikeLike
Hi Andy,
thanks for the information and the links. Yes, I was thinking it is using the GNU ARM Embedded tools from launchpad, but was not sure. I see if I can use it properly with the GNU ARM Eclipse plugins. And thanks for the information about the trace, I need to see if this works with the Freescale devices too. I hope it does, but I need to find out.
LikeLike
The question I have is how the KInetis devices will merge in with the LPC devices. It seems that they fit in well between the LPC cortex M3 17xx 13xx devices and the LPC4xxx high end devices. Any guesses at how they merge the MCU lines? Sure hoping that the kinetis sticks and the pricing continues to be superior in function/prices.
LikeLike
This is really hard to tell, so I guess we have to wait and see what comes out of the merger.
LikeLike
Pingback: Board Take-Over: Using Freescale to Debug NXP | MCU on Eclipse
Pingback: Board Take-Over: Using Segger J-Link to Debug NXP | MCU on Eclipse
Pingback: NXP MCUXpresso Software and Tools with Clocks Tool | MCU on Eclipse
Pingback: MCUXpresso IDE: Installing Processor Expert into Eclipse Neon | MCU on Eclipse