
❗ UPDATE: Code Red Technologies have been acquired May 1st 2013 by NXP, see this press release. According to this, they will not continue to support non-NXP architectures after May 2014. 😦
You probably know this already: I’m a fan of Eclipse, Processor Expert and the Freedom board. As for tool chains I use CodeWarrior for MCU10.x (Eclipse based, 64 KByte free limit) and IAR (32 KByte limit) with the Processor Expert Driver Suite.
And I have added a new Eclipse based solution: Red Suite 5 from Code Red Technologies. They released a new Red Suite 5 (v5.2.2 build 2108) which caught my attention when reading the release notes:
- Eclipse Juno SR2: New Eclipse Look & Feel 🙂
- Added integration for Processor Expert 🙂 🙂
- Non-expiring 128k (!!!) limit when used with the Freescale FRDM boards 🙂 🙂 🙂

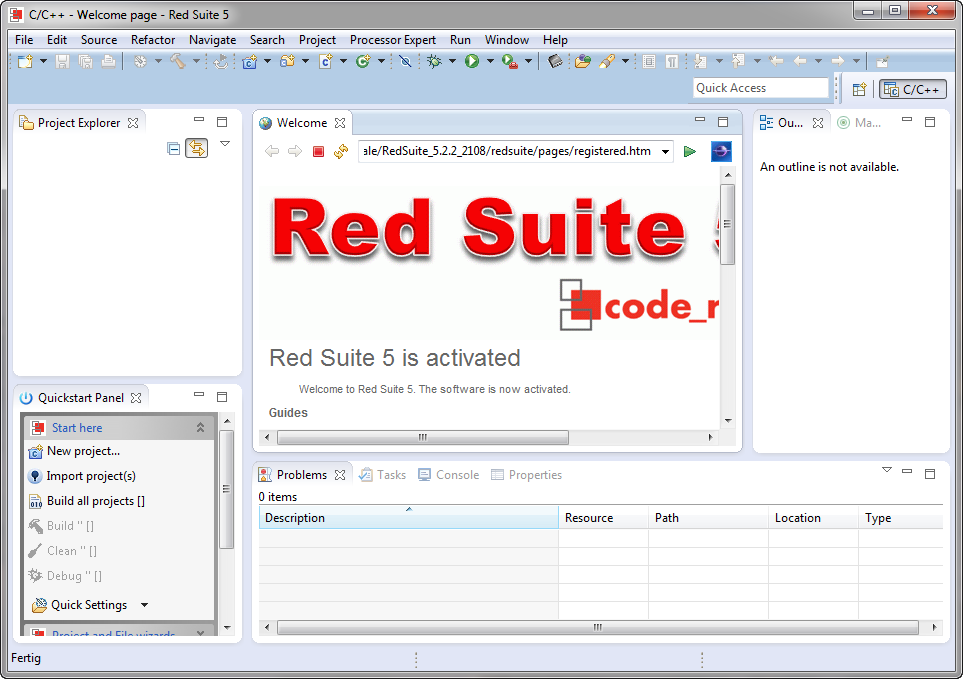
Red Suite 5 Eclipse Startup
With me doing more and more projects with ARM Cortex cores, it has the advantage that there is huge ecosystem around these cores, with many choices. One of it is Code Red Technologies with their Eclipse based Red Suite 5 product line. I knew that product as I used the free edition for NXP (LPCXpresso).
I’m showing here my steps to get up and running with Red Suite 5 for the FRDM-KL25Z board and Processor Expert.
Setup Red Suite 5
Red Suite 5 Full Edition is available from the Code Red web page. The download is less than 400 MByte. Then I run the setup:

Red Suite 5 Setup
For the drivers I only select the Code Red Debug drivers:

Code Red Debug Drivers
Installation is very fast: it only takes about 5 minutes to install. And the disk space needed is reasonable too: less than 800 MBytes.
💡 Uninstalling is done with the unins000.exe located in the installation folder. And it is super fast: it takes less than 30 seconds!
Product Activation
I need to register and activate the product first, which gives a 60 days evaluation period. To ask an evaluation license, use this menu:

Product Activation Menu
I received the activation code by email, which I had to enter into the ‘Activate license…’ menu from above.
Processor Expert Plugins
Next step is to download and install the Eclipse Processor Expert plugins. They are available from the Processor Expert Driver Suite page:
💡 “Processor Expert Driver Suite” is the ‘standalone’ version of Processor Expert. Same as I use in Eclipse based CodeWarrior. But the ‘Driver Suite’ can be either integrated into a non-CodeWarrior Eclipse version, or used as ‘standalone’ version e.g. with IAR.

Processor Expert Driver Suite Pag
Here I select the ‘Download’ tab: from here I need two files (I need to register with Freescale to download the files):

Indigo and Juno Processor Expert Packages
- Microcontroller Driver Suite v10.0 plug-in for existing Eclipse 3.7 (Indigo) installations
- PExDrv 10.0 Update 1.0.0 (Indigo and Juno)
❗ Don’t be confused that the first download says ‘Indigo’, while Red Suite 5 is using ‘Juno’. The first download is for Indigo, but can be installed in Juno too. But it needs the second download which then adds proper support for Juno. So I need to download and install both!
Microcontroller Driver Suite/Processor Expert (Indigo)
First, I download the “Microcontroller Driver Suite v10.0 plug-in for existing Eclipse 3.7 (Indigo) installations” file (around 140 MByte):

ProcessorExpertDriverSuite10_0Final.Eclipse3_7.zip
Then I unzip that archive to a folder on my hard disk.
💡 The archive has a PDF with detailed installation instructions I will follow below.
First, I need to install the Freescale Eclipse Updater. In Red Suite 5, I select the menu Help > Install New Software, then press ‘Add’, followed by ‘Archive’. I Archive I select the com.freescale.eclipse.3.7.updater.custom.updatesite.zip I just have unzipped:

FSL Updater Archive
Then I select the package and press Next to install it:

Selected Eclipse Updater
This should only take a few seconds, followed by a restart of Red Suite 5.
Next, to install the Processor Expert plugin itself. Same thing as above, but this time I browse for the com.freescale.eclipse3.7.pexdrv10_0.updatesite.zip archive:

PEx10 Driver 10
I select the package(s) and then press next:

Processor Expert Software Selected
This needs about 5 minutes to install, followed by a restart of Red Suite 5.
Processor Expert Upate to Juno
As Red Suite 5 is Juno, we need to install yet another update, the “PExDrv 10.0 Update 1.0.0“. Without this, Processor Expert won’t work in Juno.
Again, same procedure: Menu Help > Install New Software, selecting the archive, and this time “com.freescale.eclipse3.7.pexdrv10_0.update.v1_0_0.zip“:

Processor Expert Update for Juno
The installation takes a few minutes, followed by a Red Suite 5 restart.
Congratulations, you completed the installation part :-).
Eclipse Juno
If you know CodeWarrior Eclipse (3.7, Indigo), then Code Red Suite 5 (4.2, Juno) looks familiar. Well, familiar, but different UI look:
Eclipse Juno with Code Red
Apart of the new UI, there are many additional things new in Juno, described in this list.
Creating a Processor Expert Project
Code Red is using a ‘wrapper’ project around the Processor Expert project. That wrapper project has links to the Processor Expert project. That sounds odd, but is not a big deal. The advantage is that the Red Suite can do ‘its own thing’ and the integration with the Processor Expert project is more light. Technically this makes sense, but I wish it could be a tighter integration as in CodeWarrior. Again, not a big deal, but I need to be aware of it. This means as well: a project is created in two steps: first the Processor Expert project, followed by the wrapper project.
The Processor Expert project is created with the menu File > New > Processor Expert Project: Nothing special here, but as Red Suite is using gcc, the GNU C Compiler has to be selected during project creation:

GNU C Compiler
‘Finish’ creates the project:

Created Processor Expert Project
💡 I use the menu Processor Expert > Show Views to open other views for Processor Expert.
Creating the Wrapper Project
To create a new wrapper project, I use the ‘New project…’ button in the Quickstart Panel view:

New Project in Quickstart Panel
Inside the Freescale group, I select ‘Red Suite wrapper project for Processor Expert project’:

Red Suite wrapper project
I give it a name:

Name for Wrapper Project
Then I select the microcontroller:

Selecting Target MCU
❗ IMPORTANT: select the same CPU as you have selected in the Processor Expert project. Red Suite is using this information for the debug connection and other things. Not matching the CPU type will cause issues.
Going through the next dialog, it will create the wrapper project and immediately start another wizard page asking for the Processor Expert project:

Linking to the Processor Expert Project
Now we have wrapper project which links to the Processor Expert project:

Wrapper Project with Links
The wrapper project monitors the Processor Expert project. For example if I add new components and I build the code, the wrapper project gets updated:

Change detected
💡 I have not seen an option to ‘shut up’ that dialog. That would be useful.
Using MCUonEclipse Processor Expert Components
If you want to use the MCUonEclipse Processor Expert components: keep in mind that the Driver Suite uses components from a different place:
C:\ProgramData\Processor Expert\PEXDRV_PE5_3

User Working Directory for Driver Suite
Redlink Debug Firmware for Freedom Board
The FRDM-KL25Z needs the special Redlink debug firmware. Steps how to upgrade the firmware are explained in the Red Suite 5 Welcom Screen (see this post about OpenSDA in general):
- Power the FRDM-KL25Z with the OpenSDA debug cable and with the reset button pressed (green LED flashes)
- Copy the Redlink firmware to the Bootloader device. The firmware S19 file is inside the redsuite/bin directory:

Redlink Firmware File
- Repower the board: The device should now enumerate properly:

Redlink Debug Device in Windows


Debugging
To debug the project, I select the wrapper project and use the ‘Debug’ button in the Quickstart Panel view:

Debug from the Quickstart Panel
This builds the project and launches the debugger. If I have my Freedom board plugged in, it will sho up in the connection dialog:

Freedom Board shown as Redlink Debug Probe
Pressing OK, and ta-taaaaaaa: I’m debugging my FRDM-KL25Z board:

Debugging Freedom Board with Red Suite 5
Summary
I need to continue explore more things in Red Suite 5, but as it is Eclipse based, I felt home right away. Having another Eclipse distribution beside CodeWarrior is good news for every Eclipse-Lover, for sure. I’m only using Windows (yes, I know!), but for everyone using Linux or Mac: Red Suite 5 supports this too.
And it is excellent news for Freedom board maniacs too. Red Suite 5 offers a free 128 kByte limit for the Freedom Board. That’s why above what others offering today. As the KL25Z has 128 KByte of Flash, this means a free Eclipse based tool chain with Processor Expert for the Freedom boards with the Redlink OpenSDA debug firmware. If that’s is not cool news, what else?
Happy Reding 🙂

Hi Erich,
this is more good news for ARMed Projects ….
And this should also work for Freescale’s new Baby as Code Red states : FRDM Boards, or am I wrong ?????
Eclipse and Netbeans based IDEs are so much more flexible, fast and portable than most ‘Windows only’ IDEs (like Atmels AVRStudio; have you ever tried to work with the Version 5 or 6??? damned are they slow compared to Codewarrior or other Eclipse based IDEs). Together with the FRDM Board Line you have a powerfull Tool Set at hand.
I hope that more of my Customers will accept ARM based Solutions for their Projects …….
Regards
LikeLike
Yes, it works the same way with the new (red) FRDM-K20D50M. As for the black FRDM-KL25Z, I need to replace the debug firmware, and it worked like a charm. The ARMed projects clearly have reached beyond critical mass in the industry in my view. At least on my side I can say that all projects started in 2013 I mentor at the university are using ARM Cortex M4 and M0+. The projects are with external partners, so I think this is the trend in the industry. I have used the AVRStudio years back, and I was not happy with it. But as I have not used it much beyond some trials, I cannot say much. Eclipse based tool chains have been considered ‘slow’ in the past, and compared e.g. to IAR or Keil, they are not that ‘snappy’. But I think the fact of multicore PC’s, more RAM and faster host machines reduced the somewhat slower Eclipse. And the versatility, portability and power of Eclipse is shining even more.
LikeLike
Pingback: Review of CodeWarrior for MCU10.4 | MCU on Eclipse
Pingback: Low-Level Coding with PDD (Physical Device Driver) | MCU on Eclipse
It might be interesting to this page:
http://mbed.org/blog/entry/mbed-enabled-Freescale-FRDM-KL25Z-board/
It is an online IDE, a great community and find a lot of information and project ideas pretty good.
Here some examples:
http://mbed.org/handbook/mbed-FRDM-KL25Z-Examples
LikeLike
Hi Diego,
thanks for reading :-).
And yes, I’m know mbed (https://mcuoneclipse.com/2013/03/10/mbed-for-the-freedom-board/). The community and open source part is the best thing. But what I miss is the ability to debug my board with it: it still needs an external ‘off-line’ IDE. So it is great to explore a board, but when it comes to really work with it beyond ‘printf-debugging’, then for now I prefer ‘real’ tools.
LikeLike
Pingback: Freedom Board with Segger OpenSDA Debug Firmware | MCU on Eclipse
Pingback: Bricking and Recovering FRDM-KL25Z Boards: Reset, SWD Clock and Low Power | MCU on Eclipse
Pingback: Using Keil µVision (ARM-MDK) with Processor Expert Driver Suite | MCU on Eclipse
Will this work on linux?
LikeLike
Hi Georg,
I have not used on Linux, but yvesbalderacchi did. See his post at the end of this thread: freescale community thread/302984
I hope this helps.
LikeLike
Seems that Xubuntu 13.xx has something broken surrounding the usb lib/drivers.
I installed Xubuntu 12.04.2LTS 32 bit earlier today. Installed Code Red as per instructions above.
Just used the example code supplied to test, and it compiles and debugs!!!
Running on 12.04.2LTS. Will do some further testing during this week.
Hope this help some of the other users that want to use linux instead of windows.
LikeLike
Code Red has released Red_Suite_5_5.2.4_2122 today. Installed it on Linux 12.04.2LTS and installed all the plugins as above. Bare board projects, Processor Expert and MQX-Lite projects compile and debug using this configuration.
LikeLike
Hi Georg,
thanks, good to know, and thanks for posting!
LikeLike
Pingback: DIY Free Toolchain for Kinetis: Part 3 – Debugger (GDB Server with P&E and Segger) | MCU on Eclipse
Pingback: FreeRTOS V7.5.0 released | MCU on Eclipse
Pingback: DIY Free Toolchain for Kinetis: Part 4 – Processor Expert for Eclipse | MCU on Eclipse
Pingback: Getting Started with ARM Microcontrollers | Mobile Communication & Coding Laboratory
I walked through your instructions installing it on my Ubuntu system. Everything went fine until I had to select the MCU for the wrapper. Oops. No KL46Z. Any suggestions?
Thanks.
LikeLike
Hi Injun,
My suggestion: not using Red Suite any more, as they have been acquired by NXP May 1st this year, and they announced stopping supporting non-NXP devices :-(. As for the wrapper: you probably could use a KL25Z one, but I have not tried it that way.
LikeLike
Pingback: 2014: A Look into the Magic Crystal Ball | MCU on Eclipse
Very nice blog post. I absolutely love this website.
Thanks!
LikeLike
Pingback: CodeRed Debug Perspective in Kinetis Design Studio | MCU on Eclipse
Pingback: Merging NXP LPCXpresso IDE with the Freescale Kinetis Design Studio, Processor Expert and Kinetis SDK | MCU on Eclipse
Pingback: Embedded World Nürnberg 2017 Impressions: MCUXpresso, Hexiwear, NTAG, LPC800-DIP and Alan Hawse | MCU on Eclipse